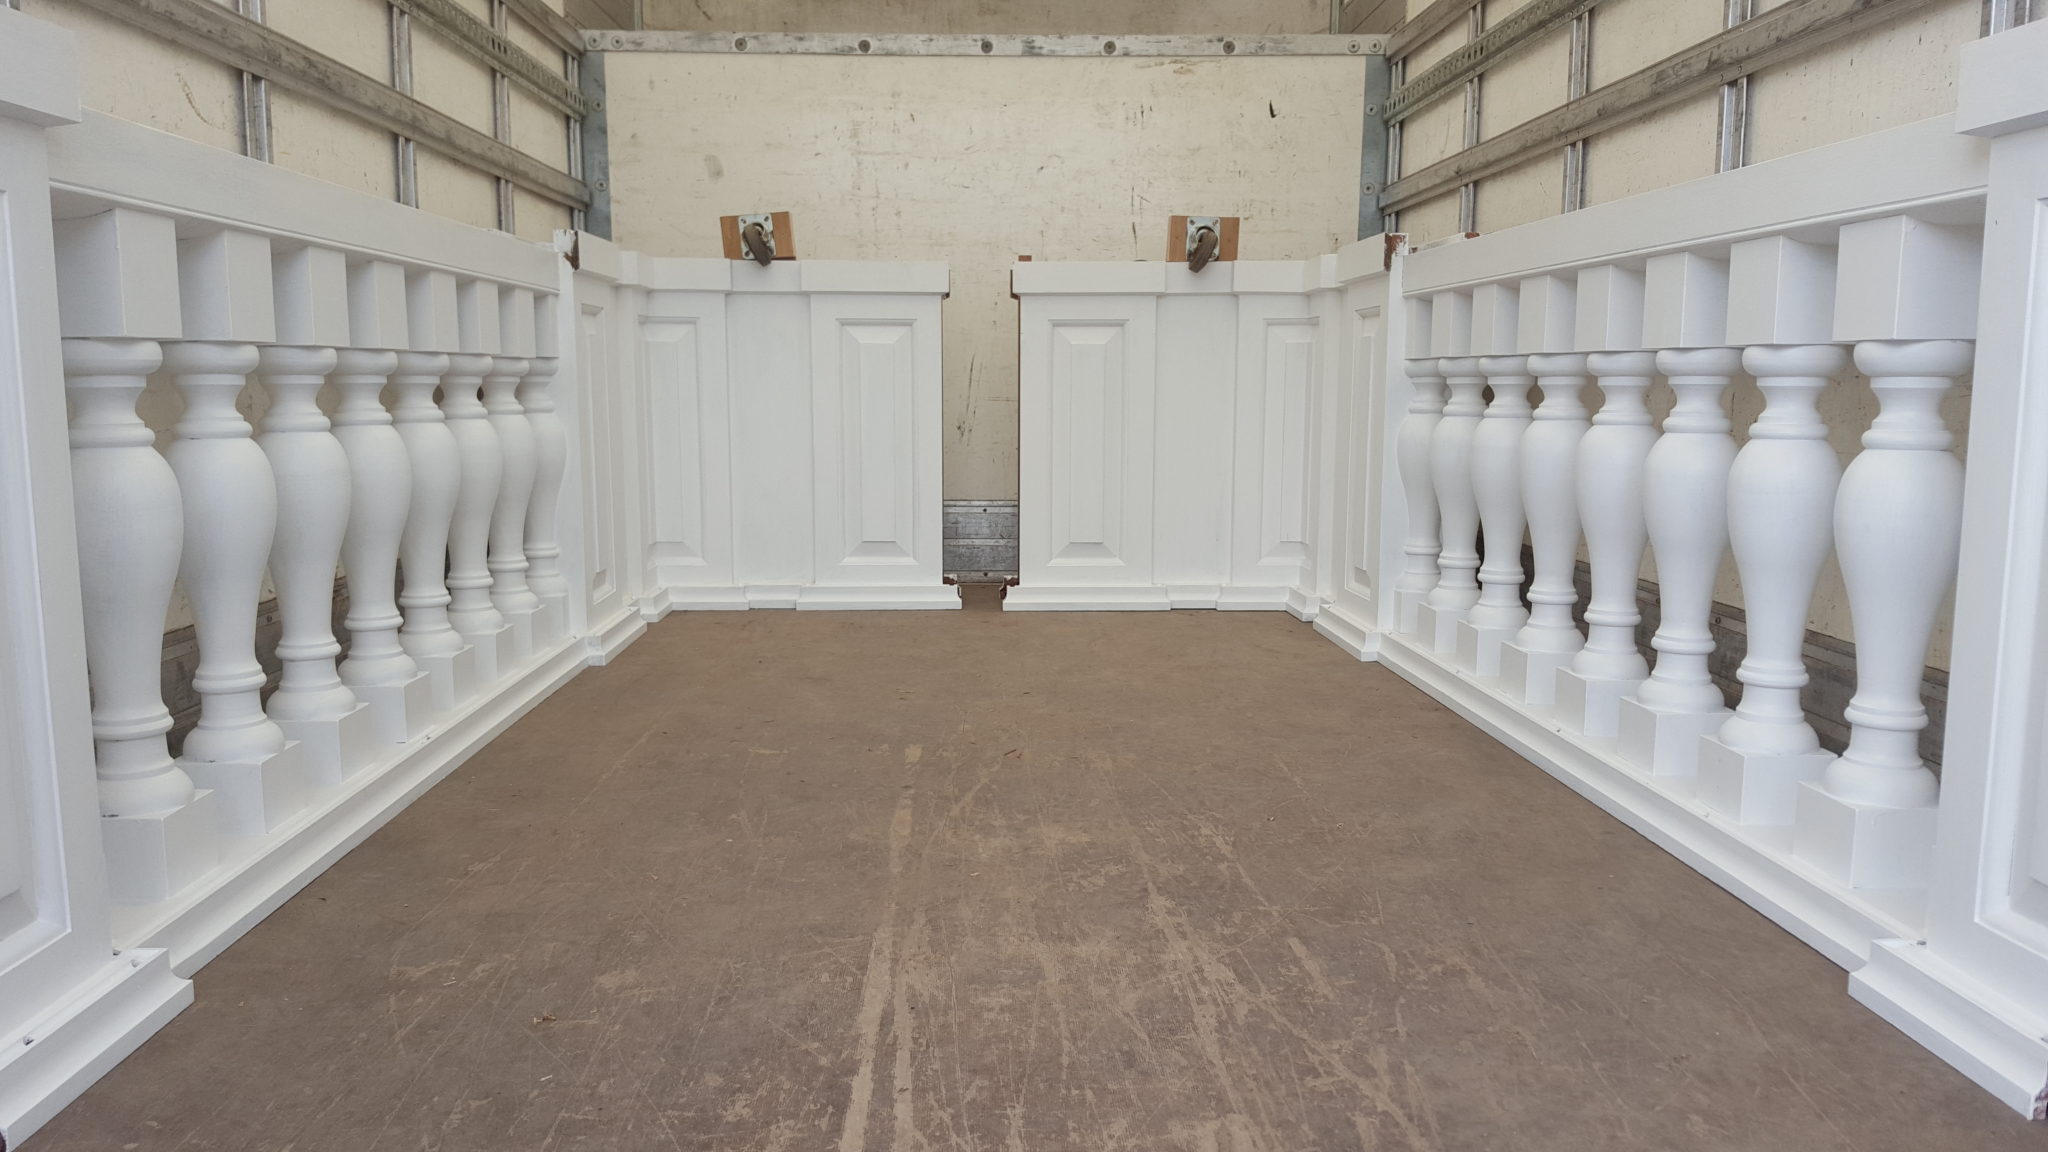
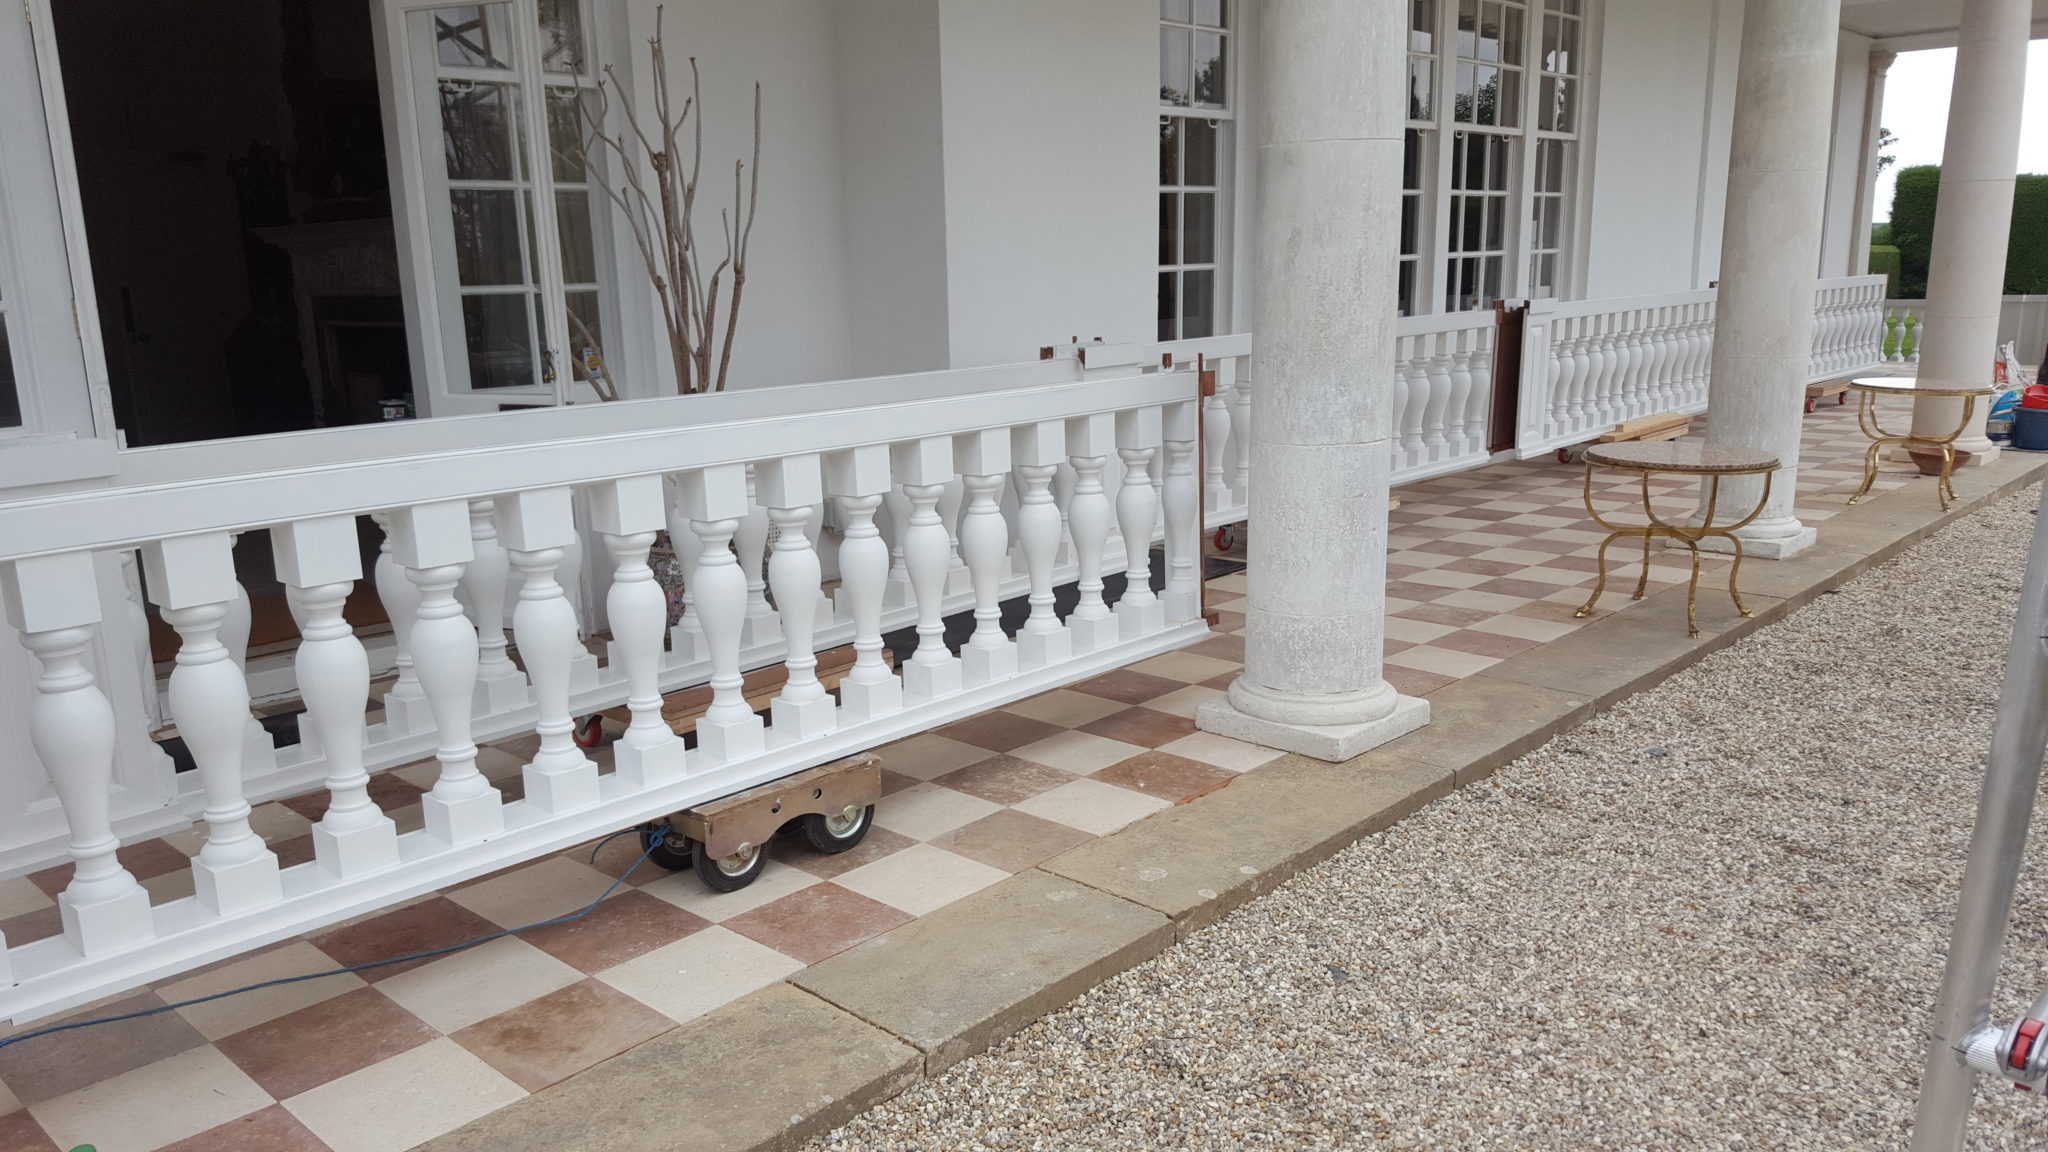
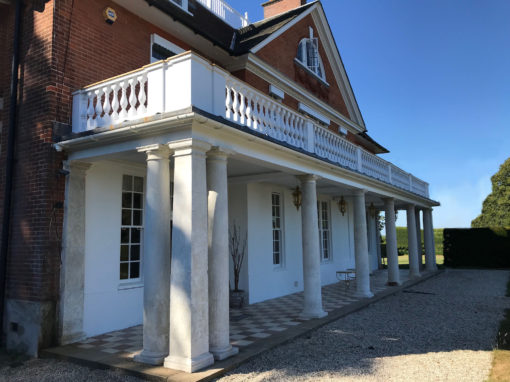
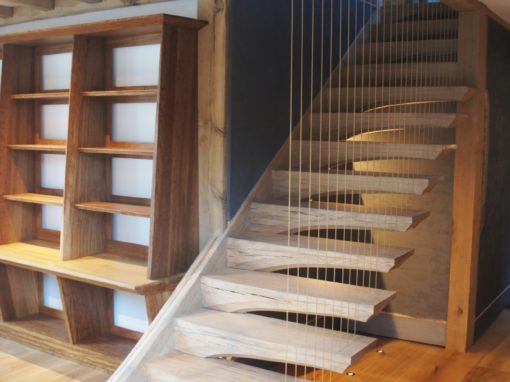
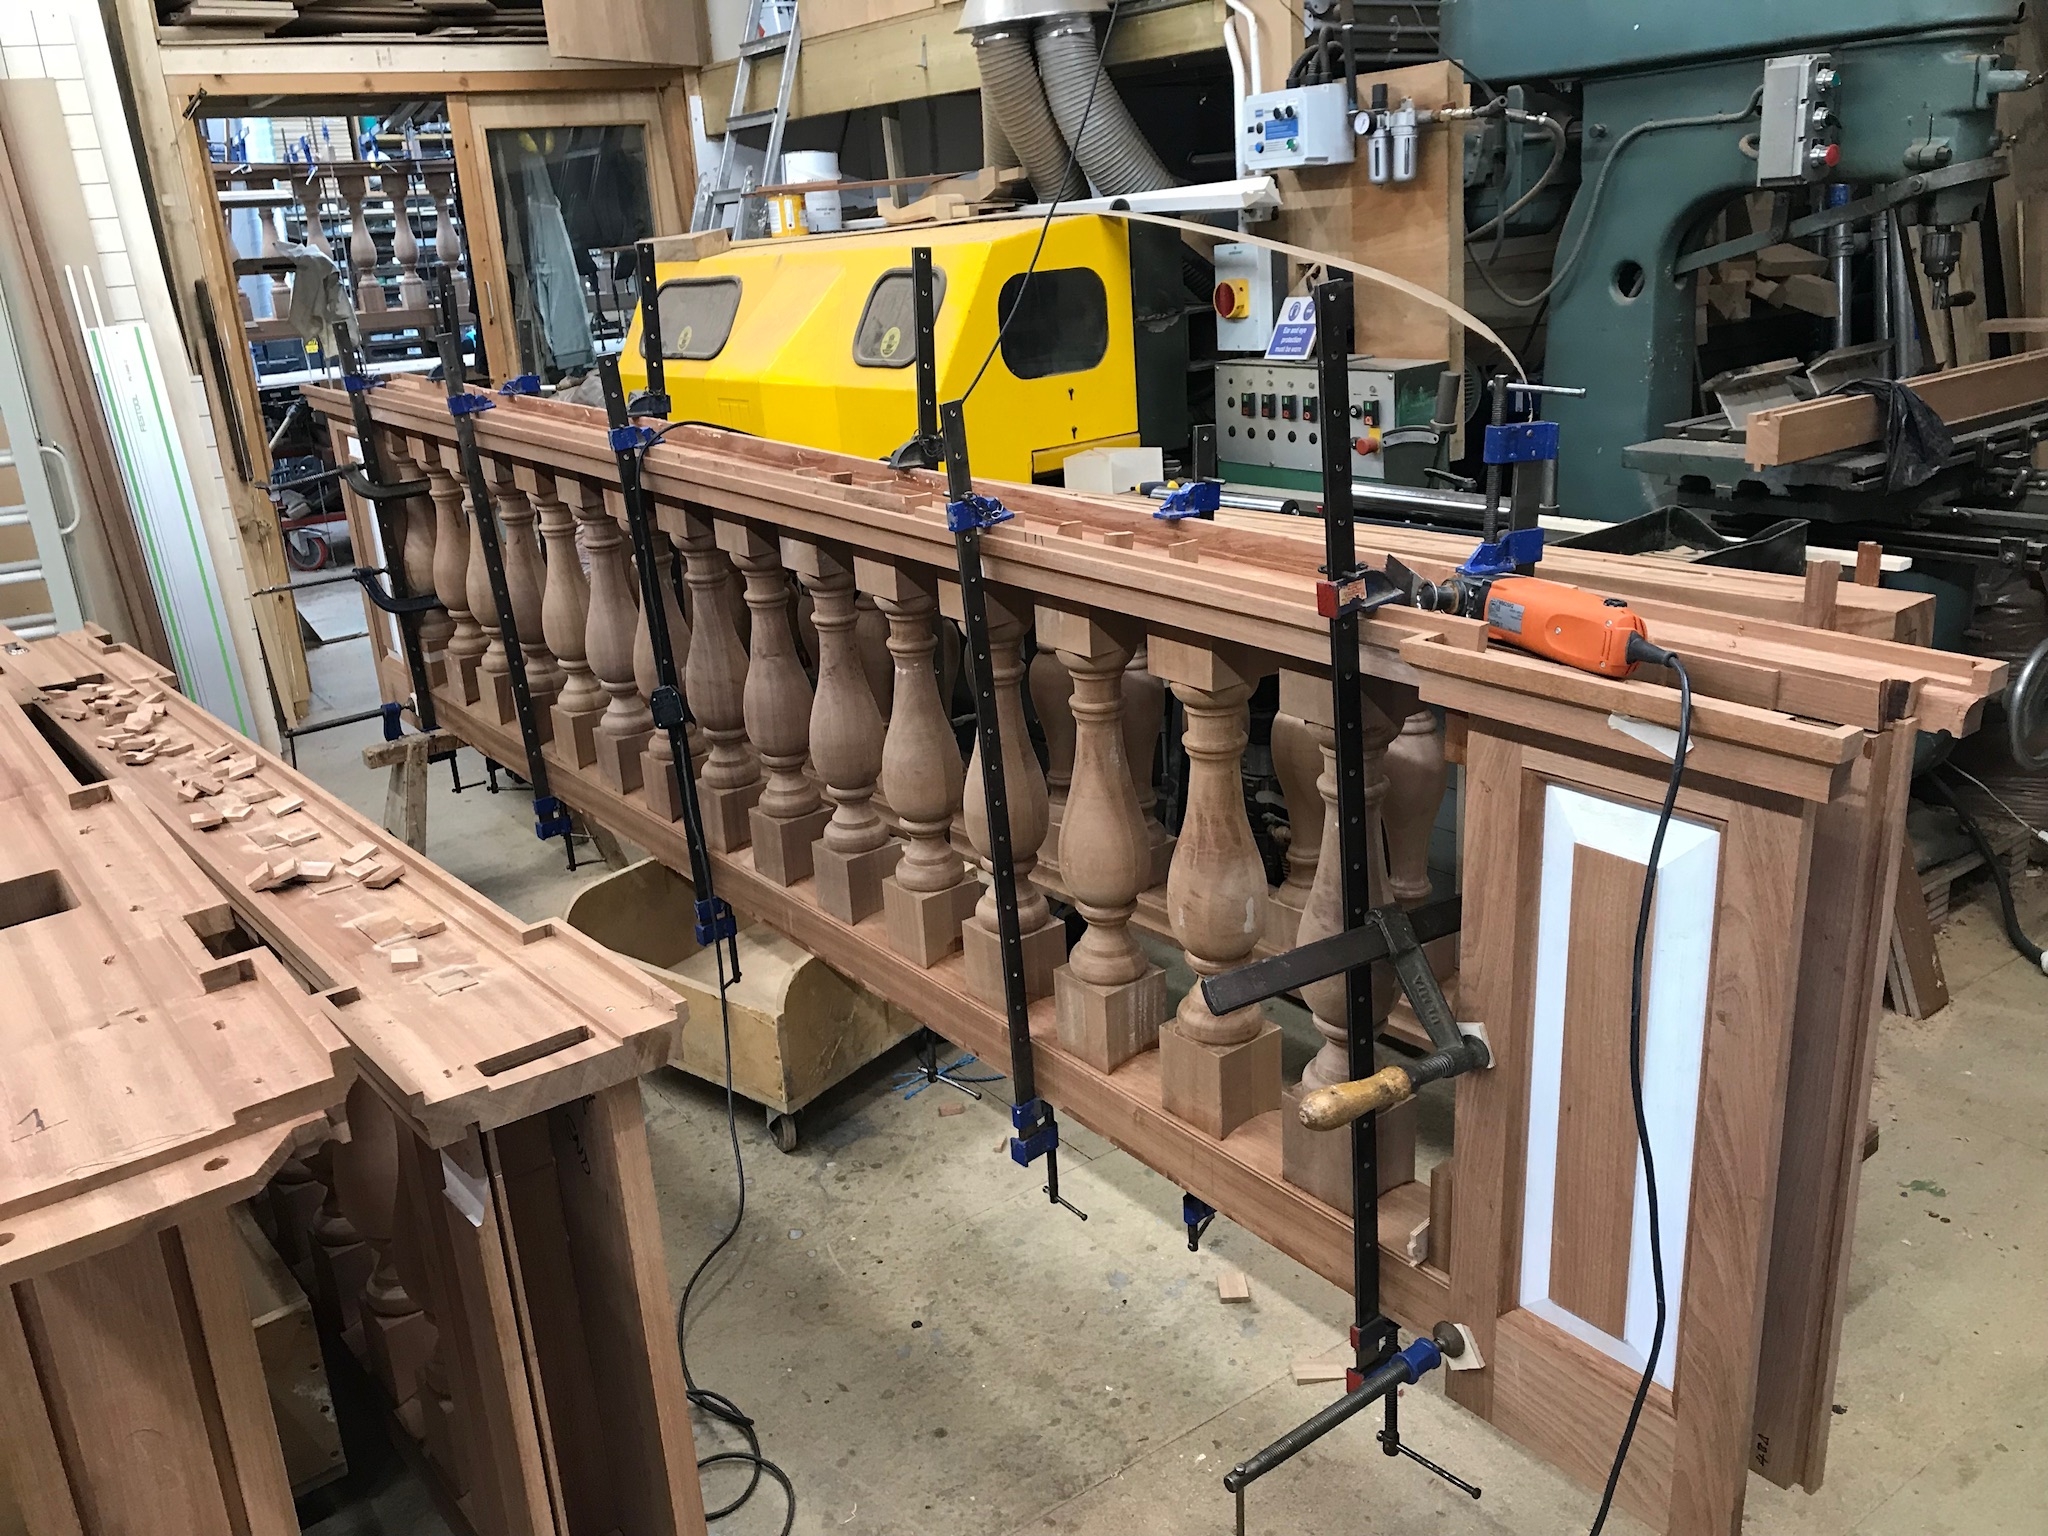
Blomfield Balustrade

The Most Important Stage
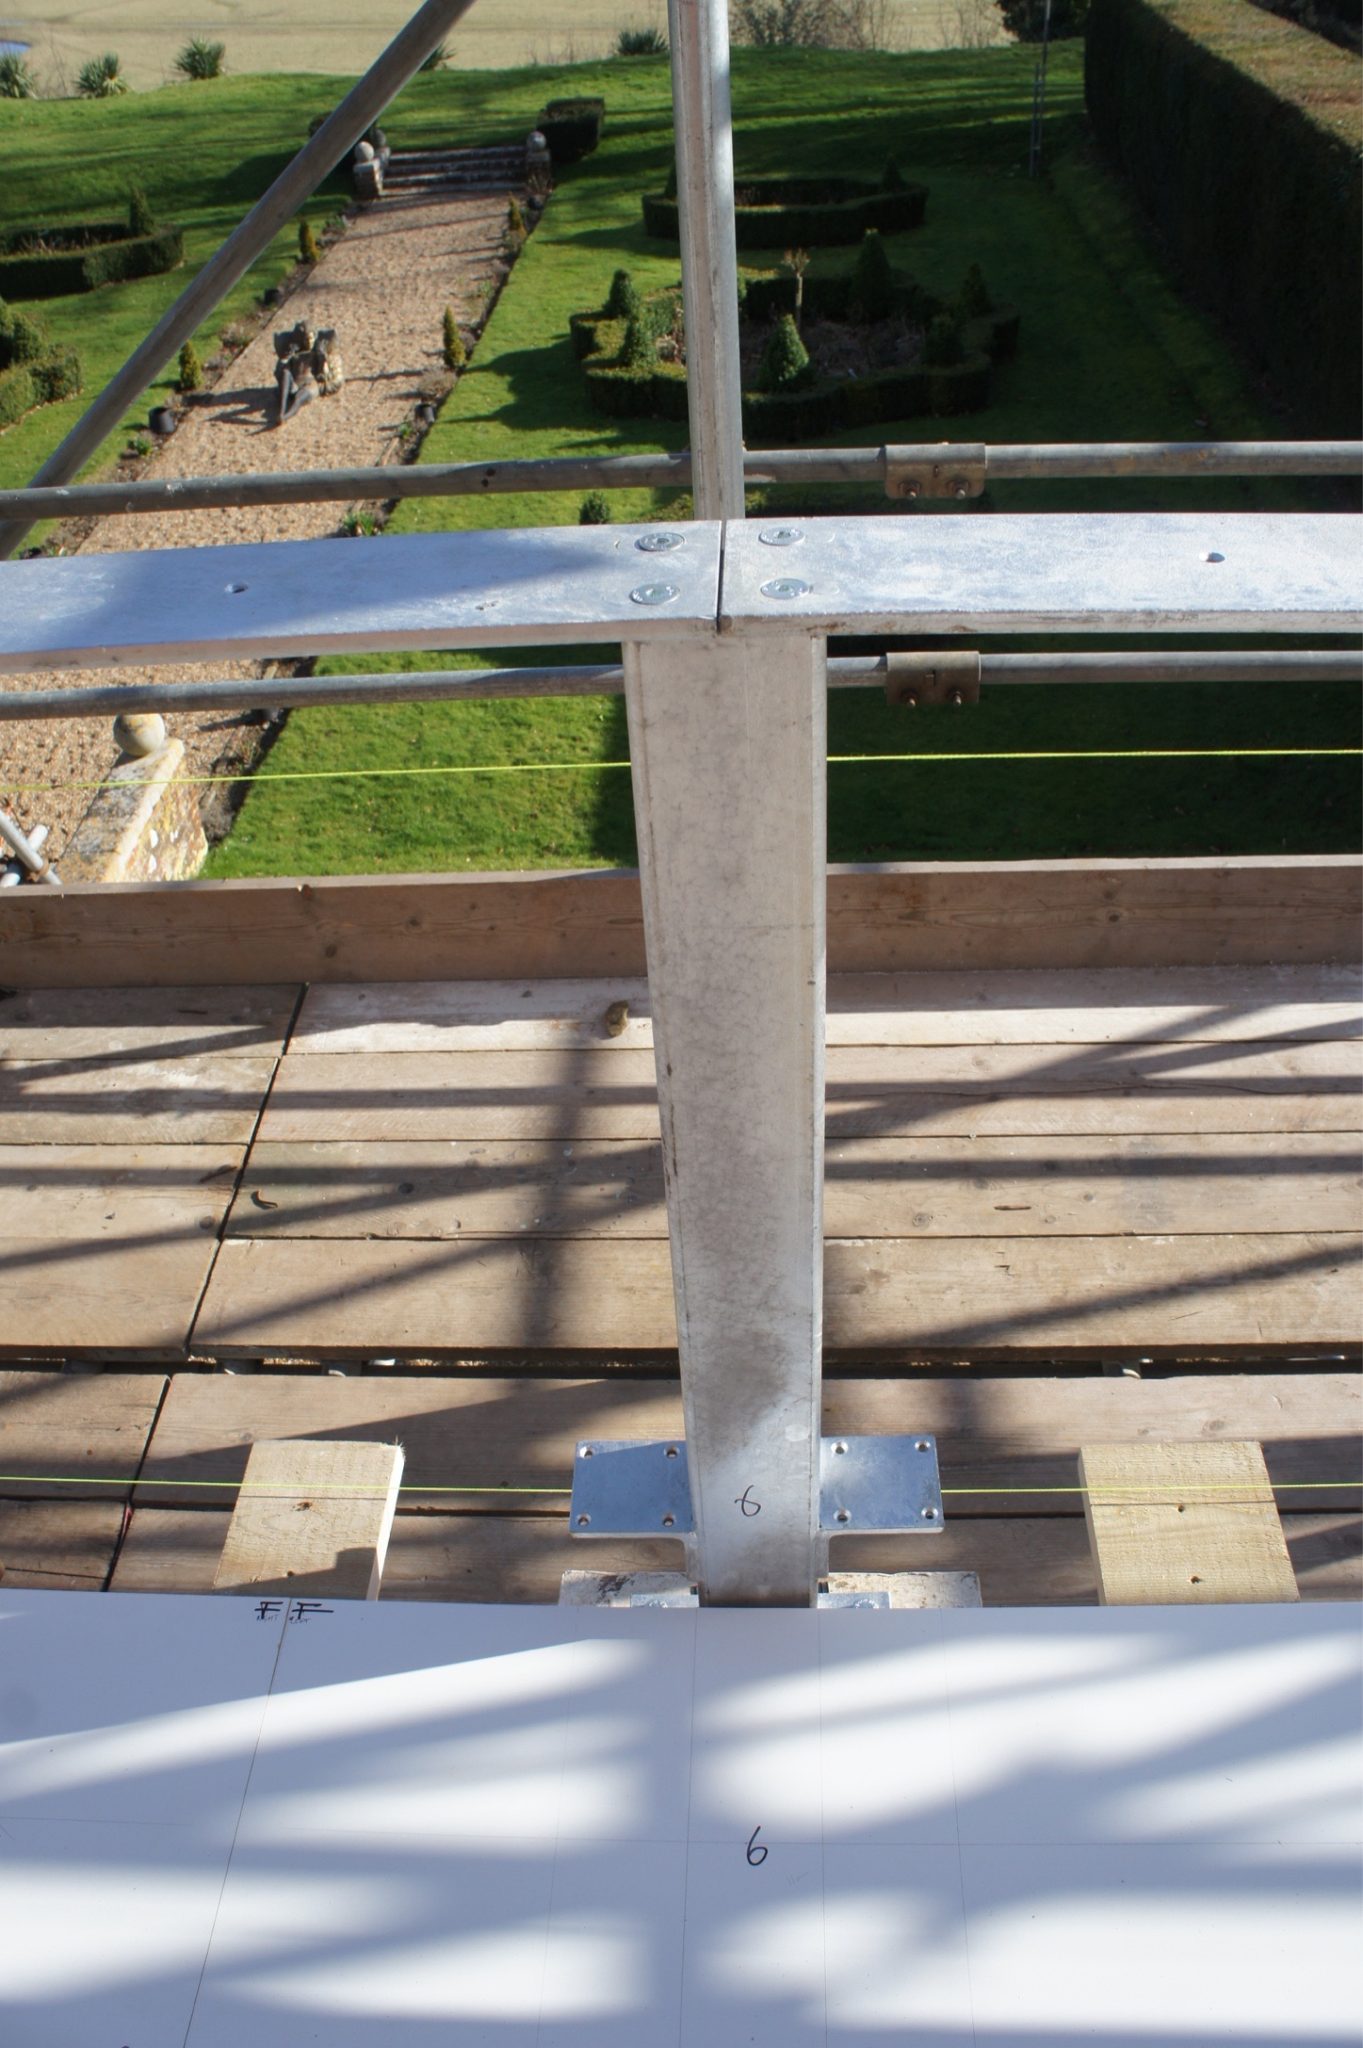

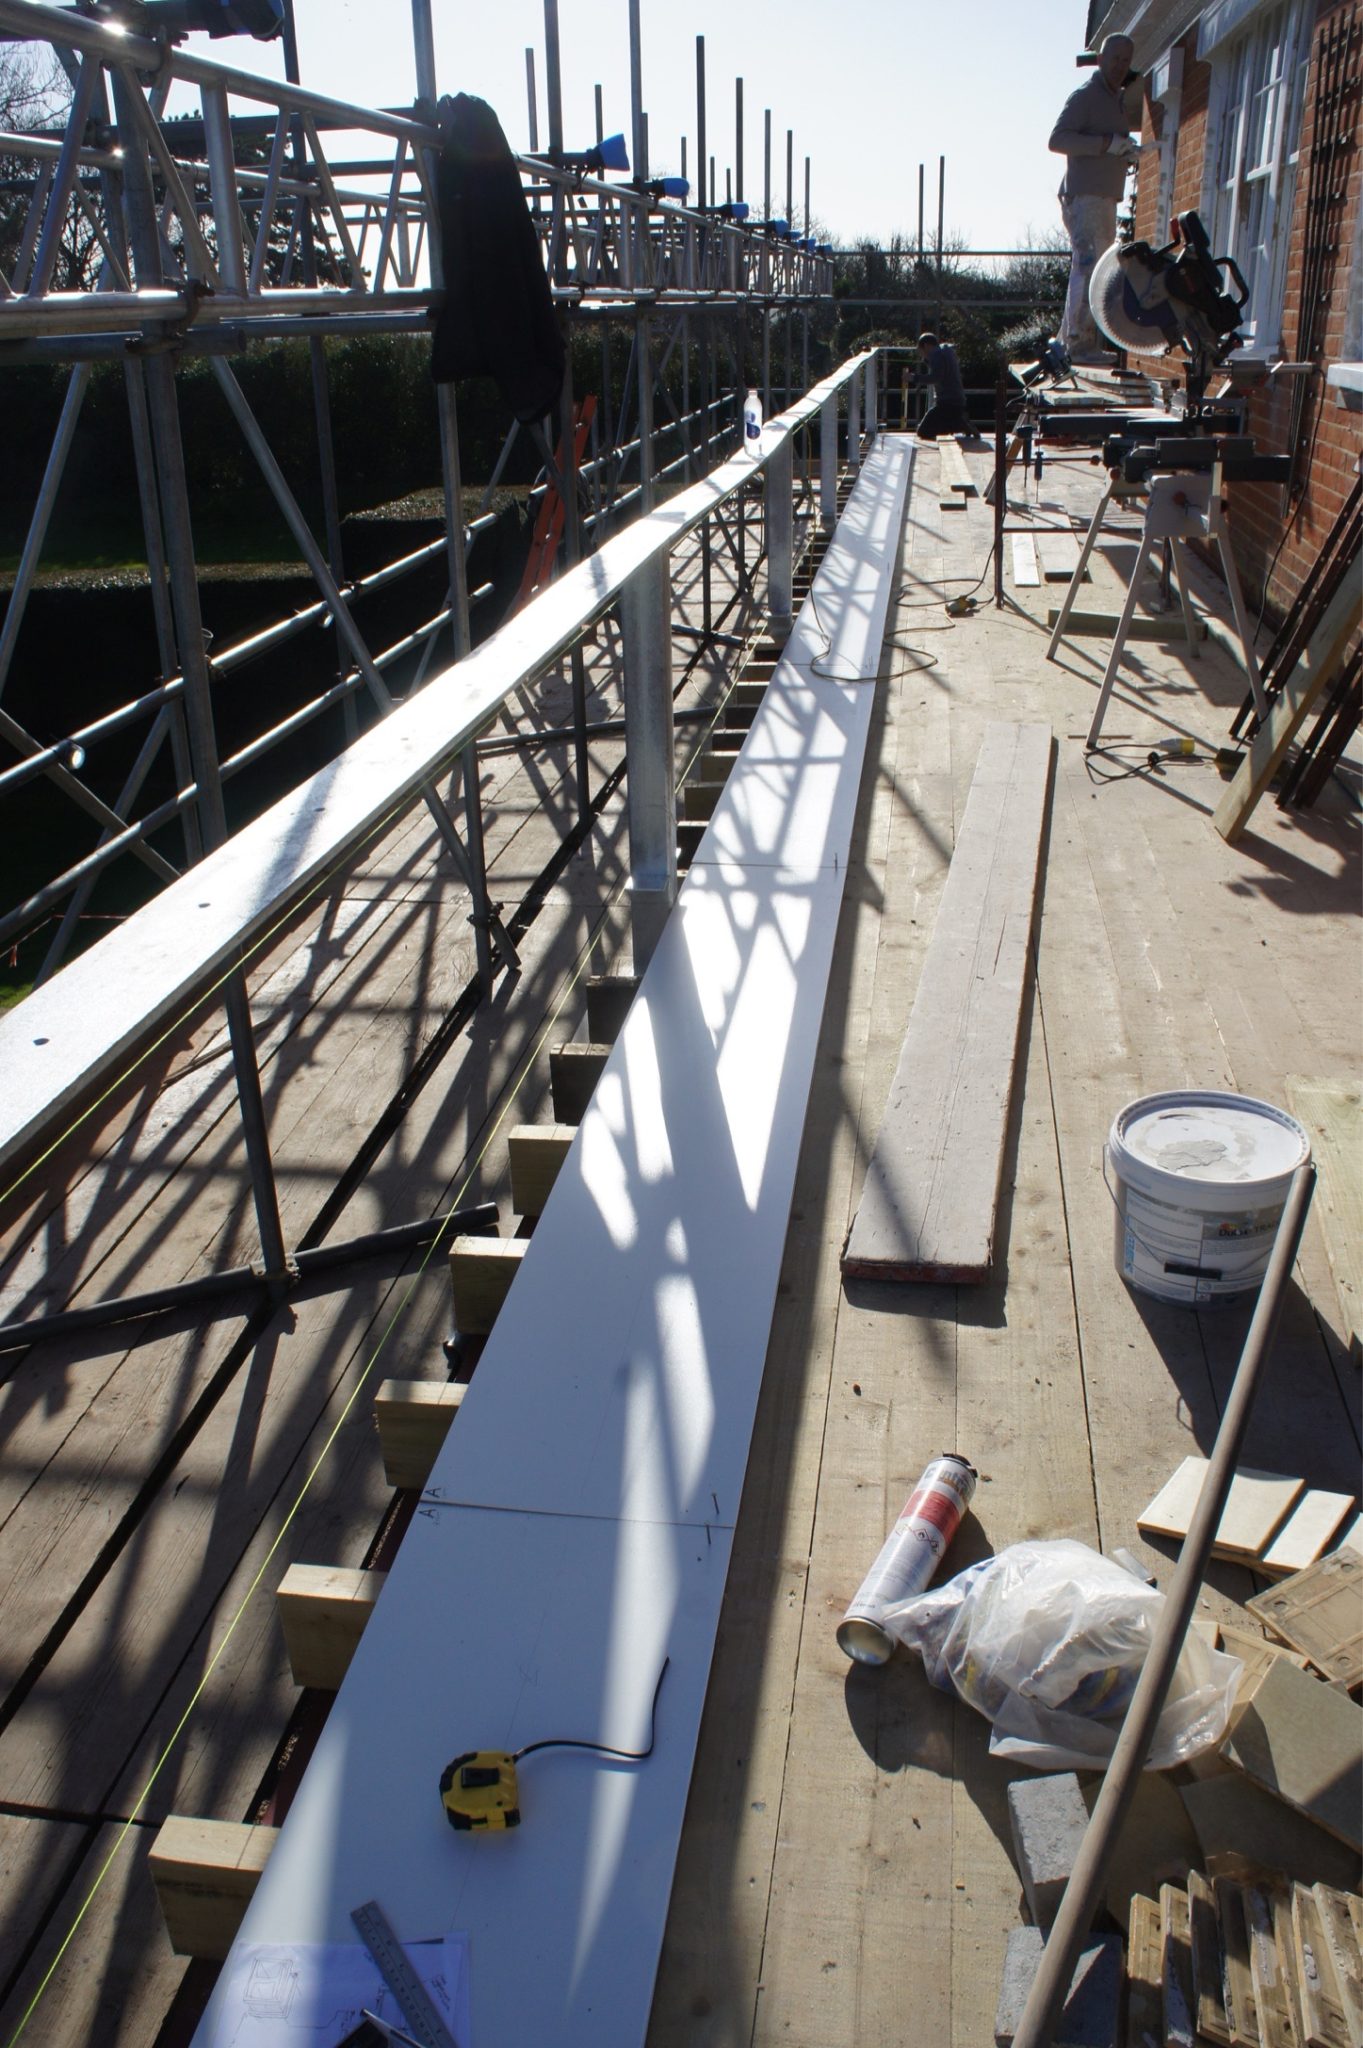
S.A.Spooner’s involvment started at the paper design stage, incorparating the new structrual engineers requirments into a pratical workable instalation that had to work with the new leaded roofing deck. Once the galanized posts were installed by the fabractors onto the decking RSJ’s, the whole assemble was then checked by us to confirm if it was fit for purpose. The tolerances were very tight +/- 3mm over the whole length, 65 feet or 19.812 m !
This was due to the inportance of keeping to the historic overall external dimensions of the Blomfield original
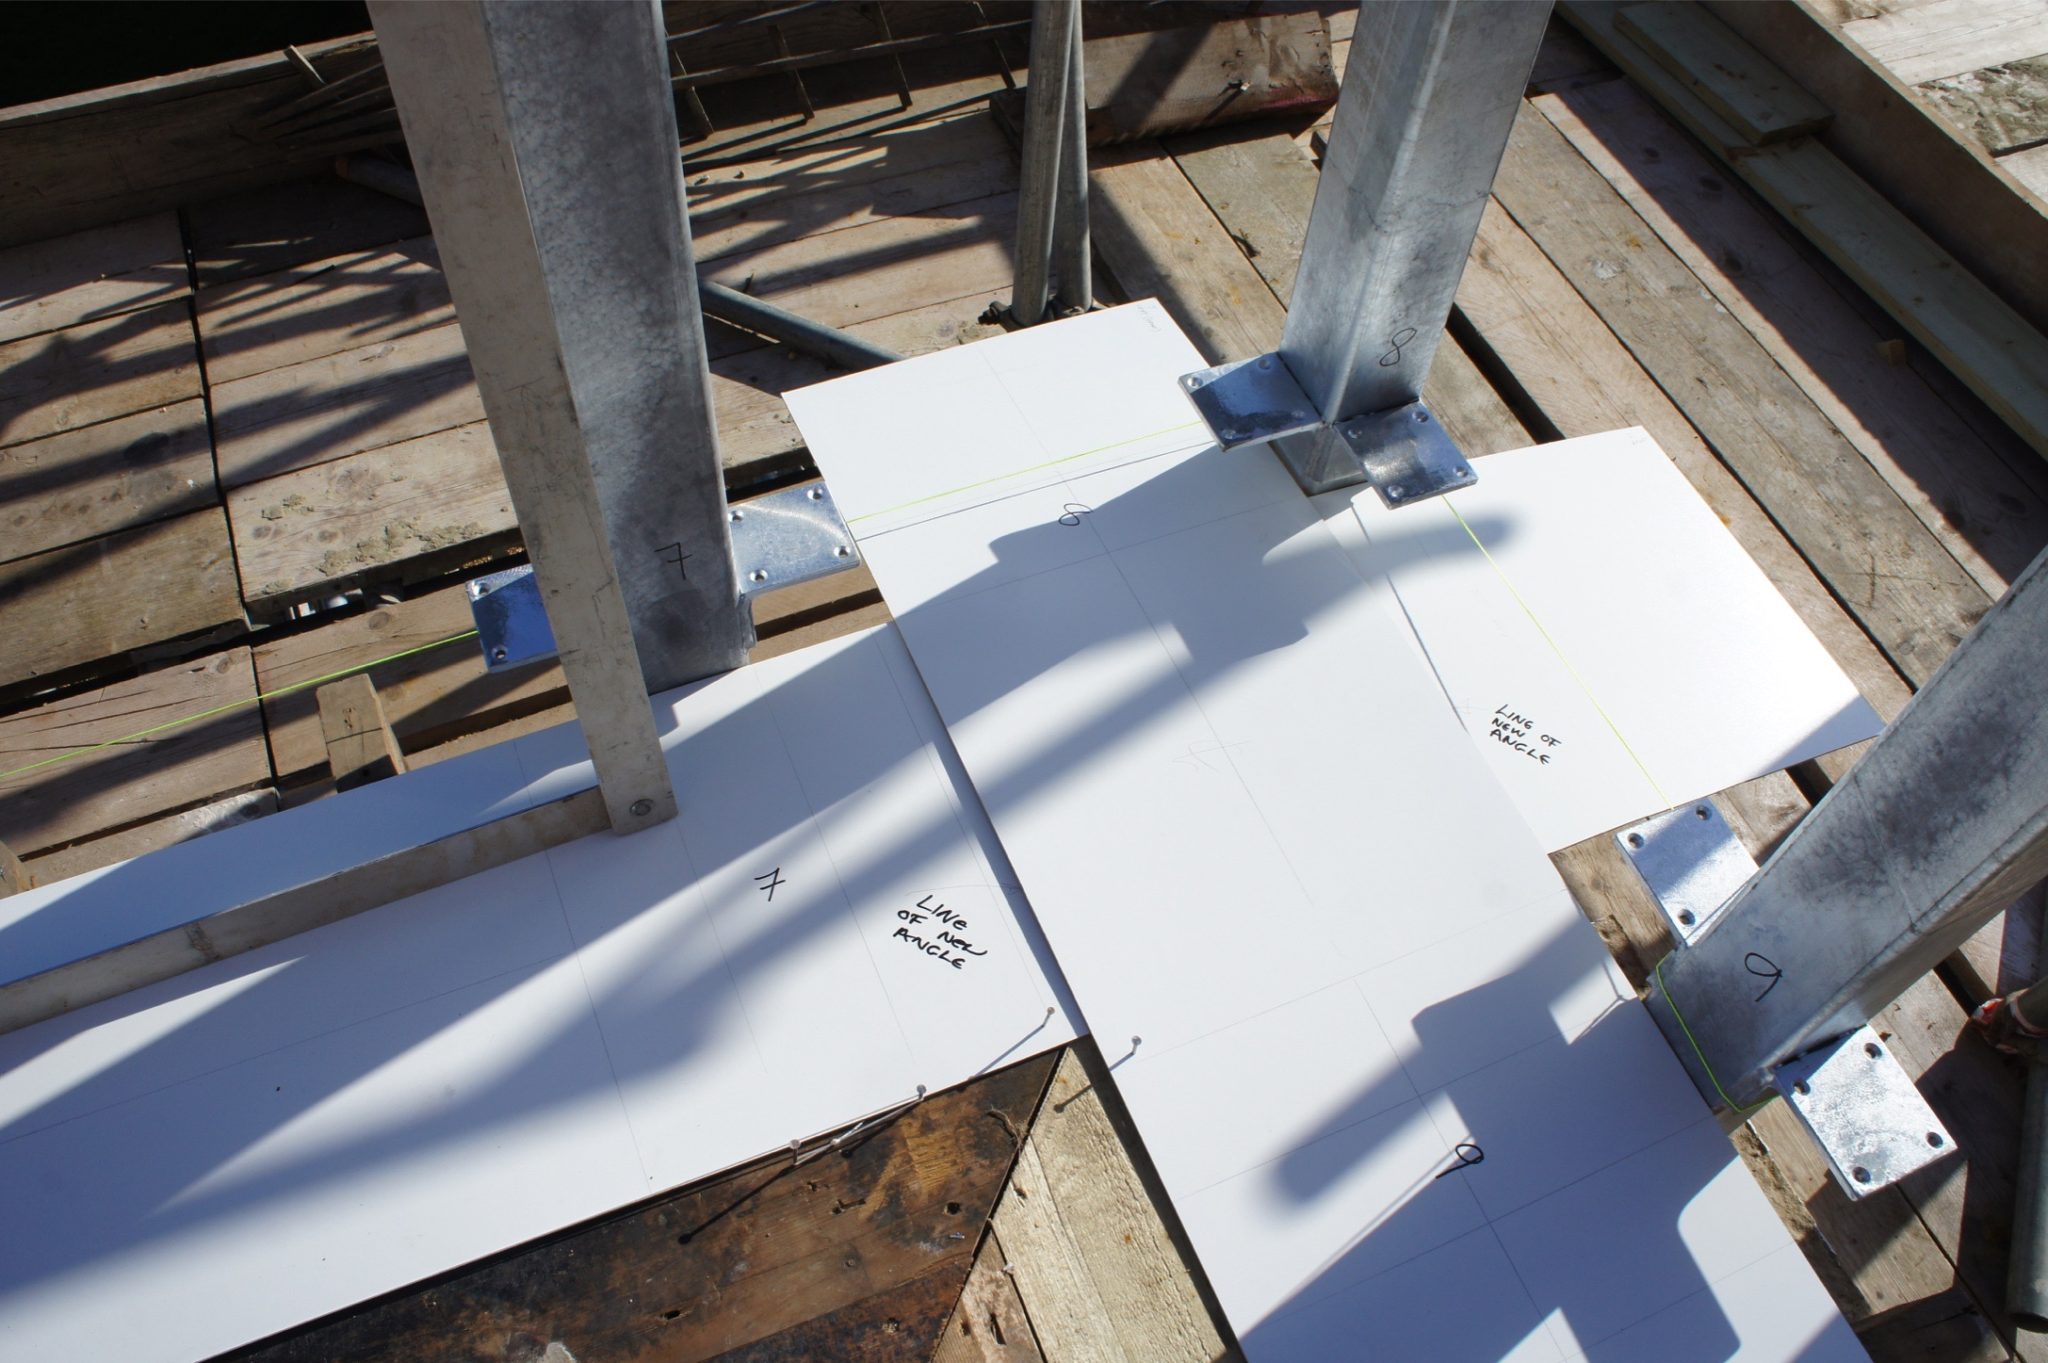
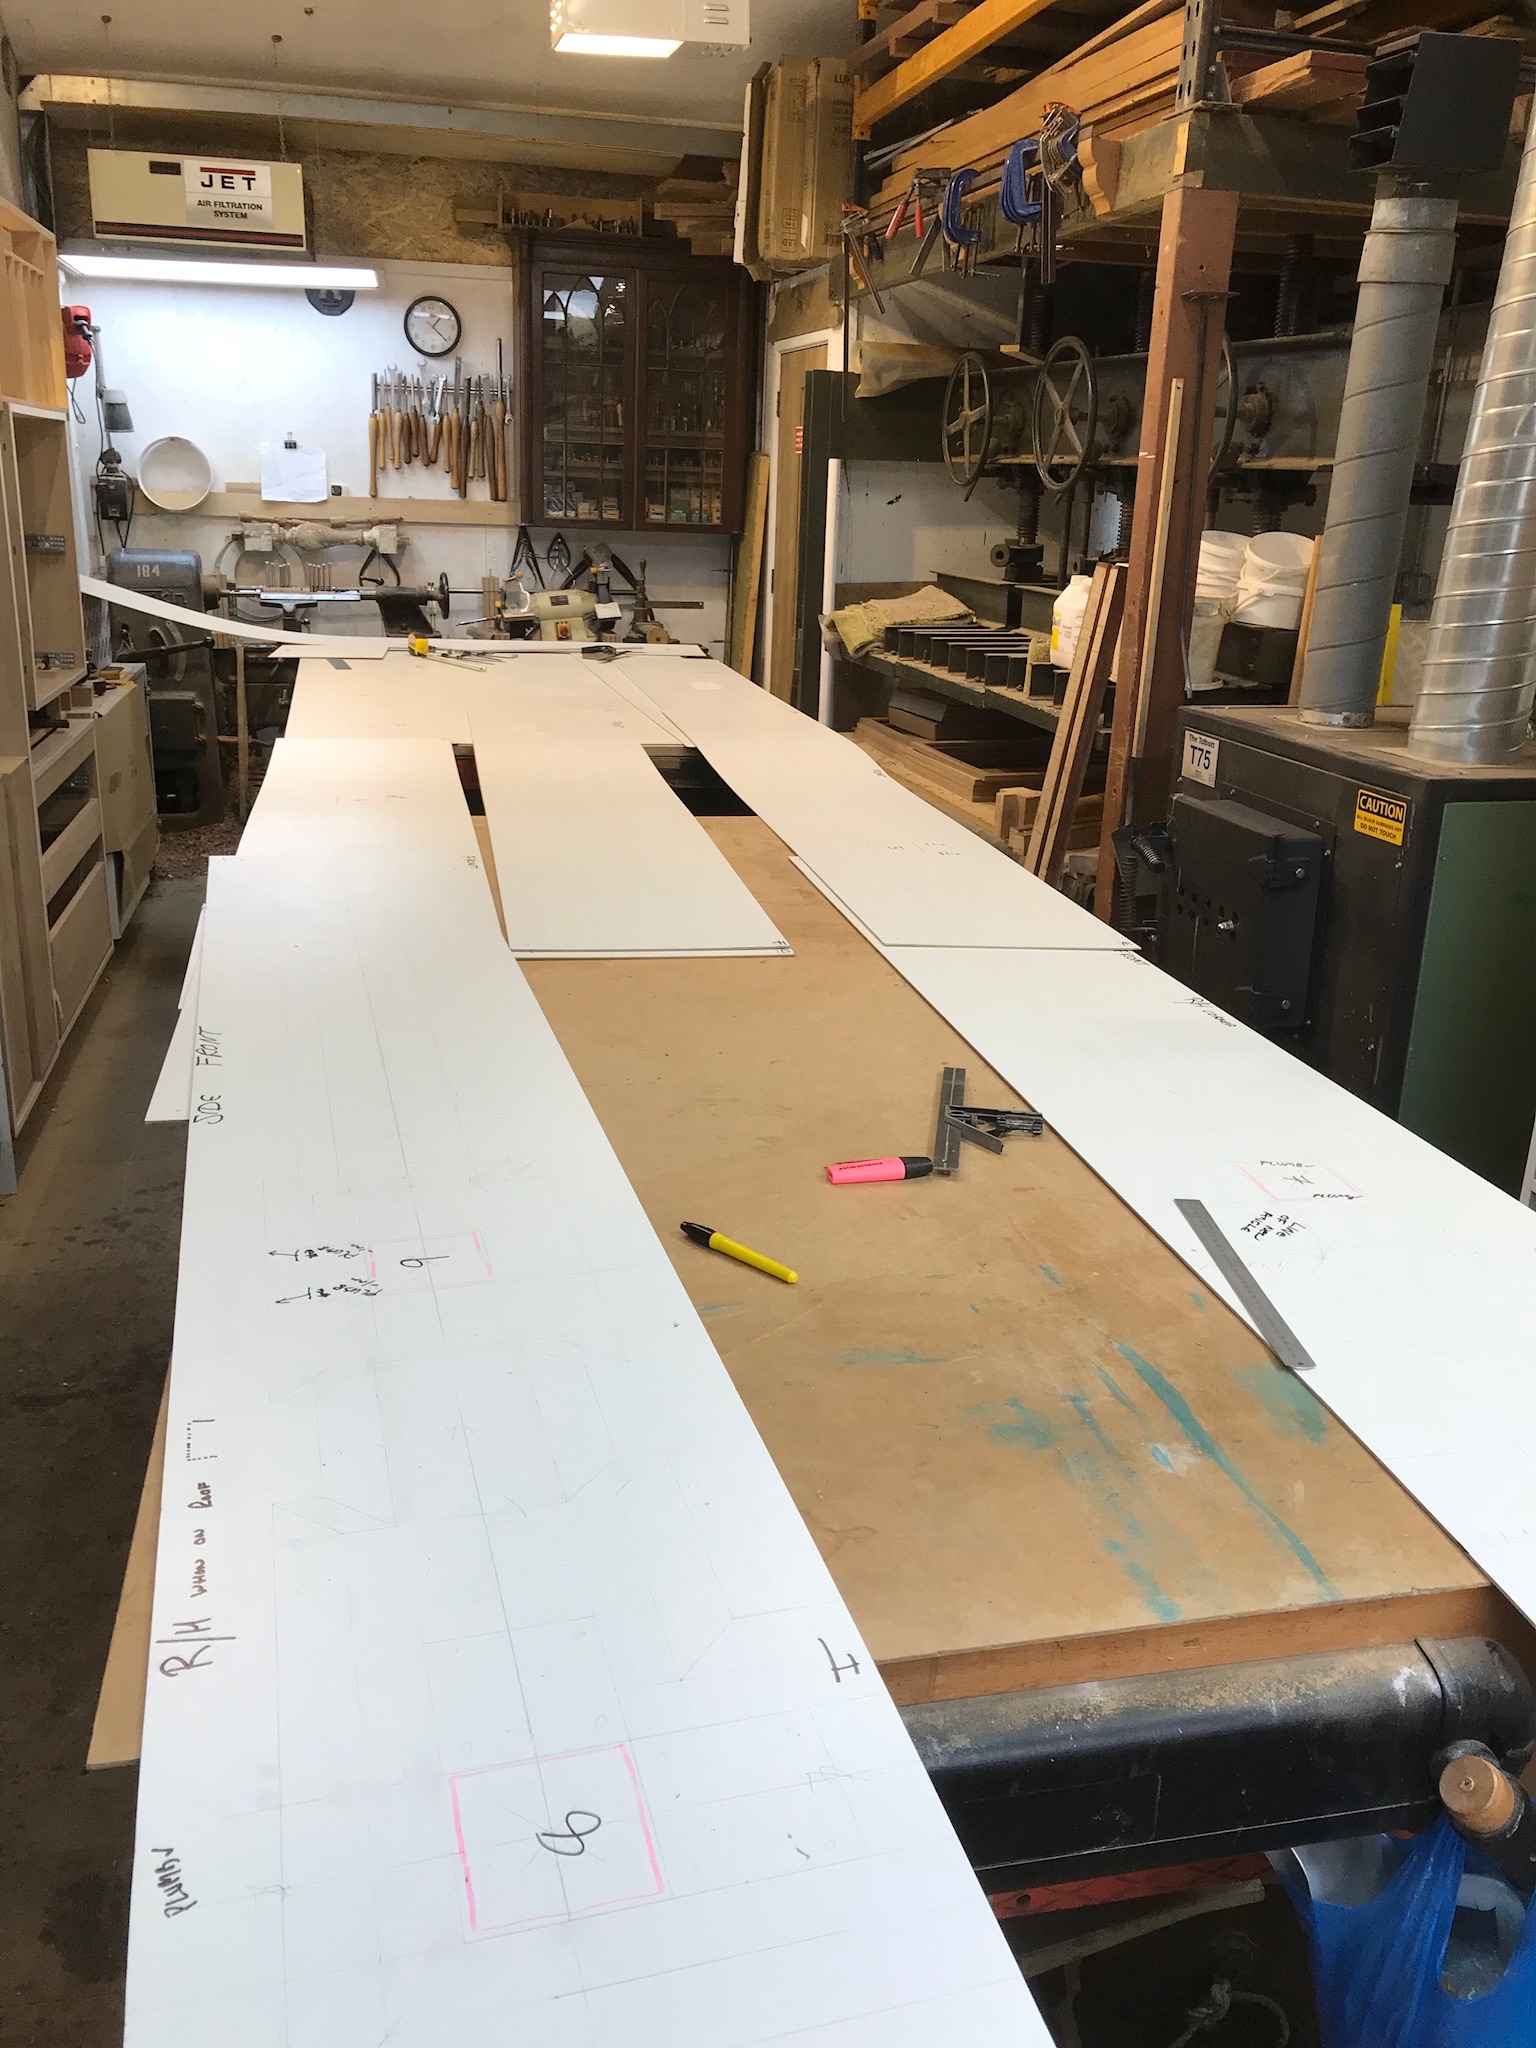
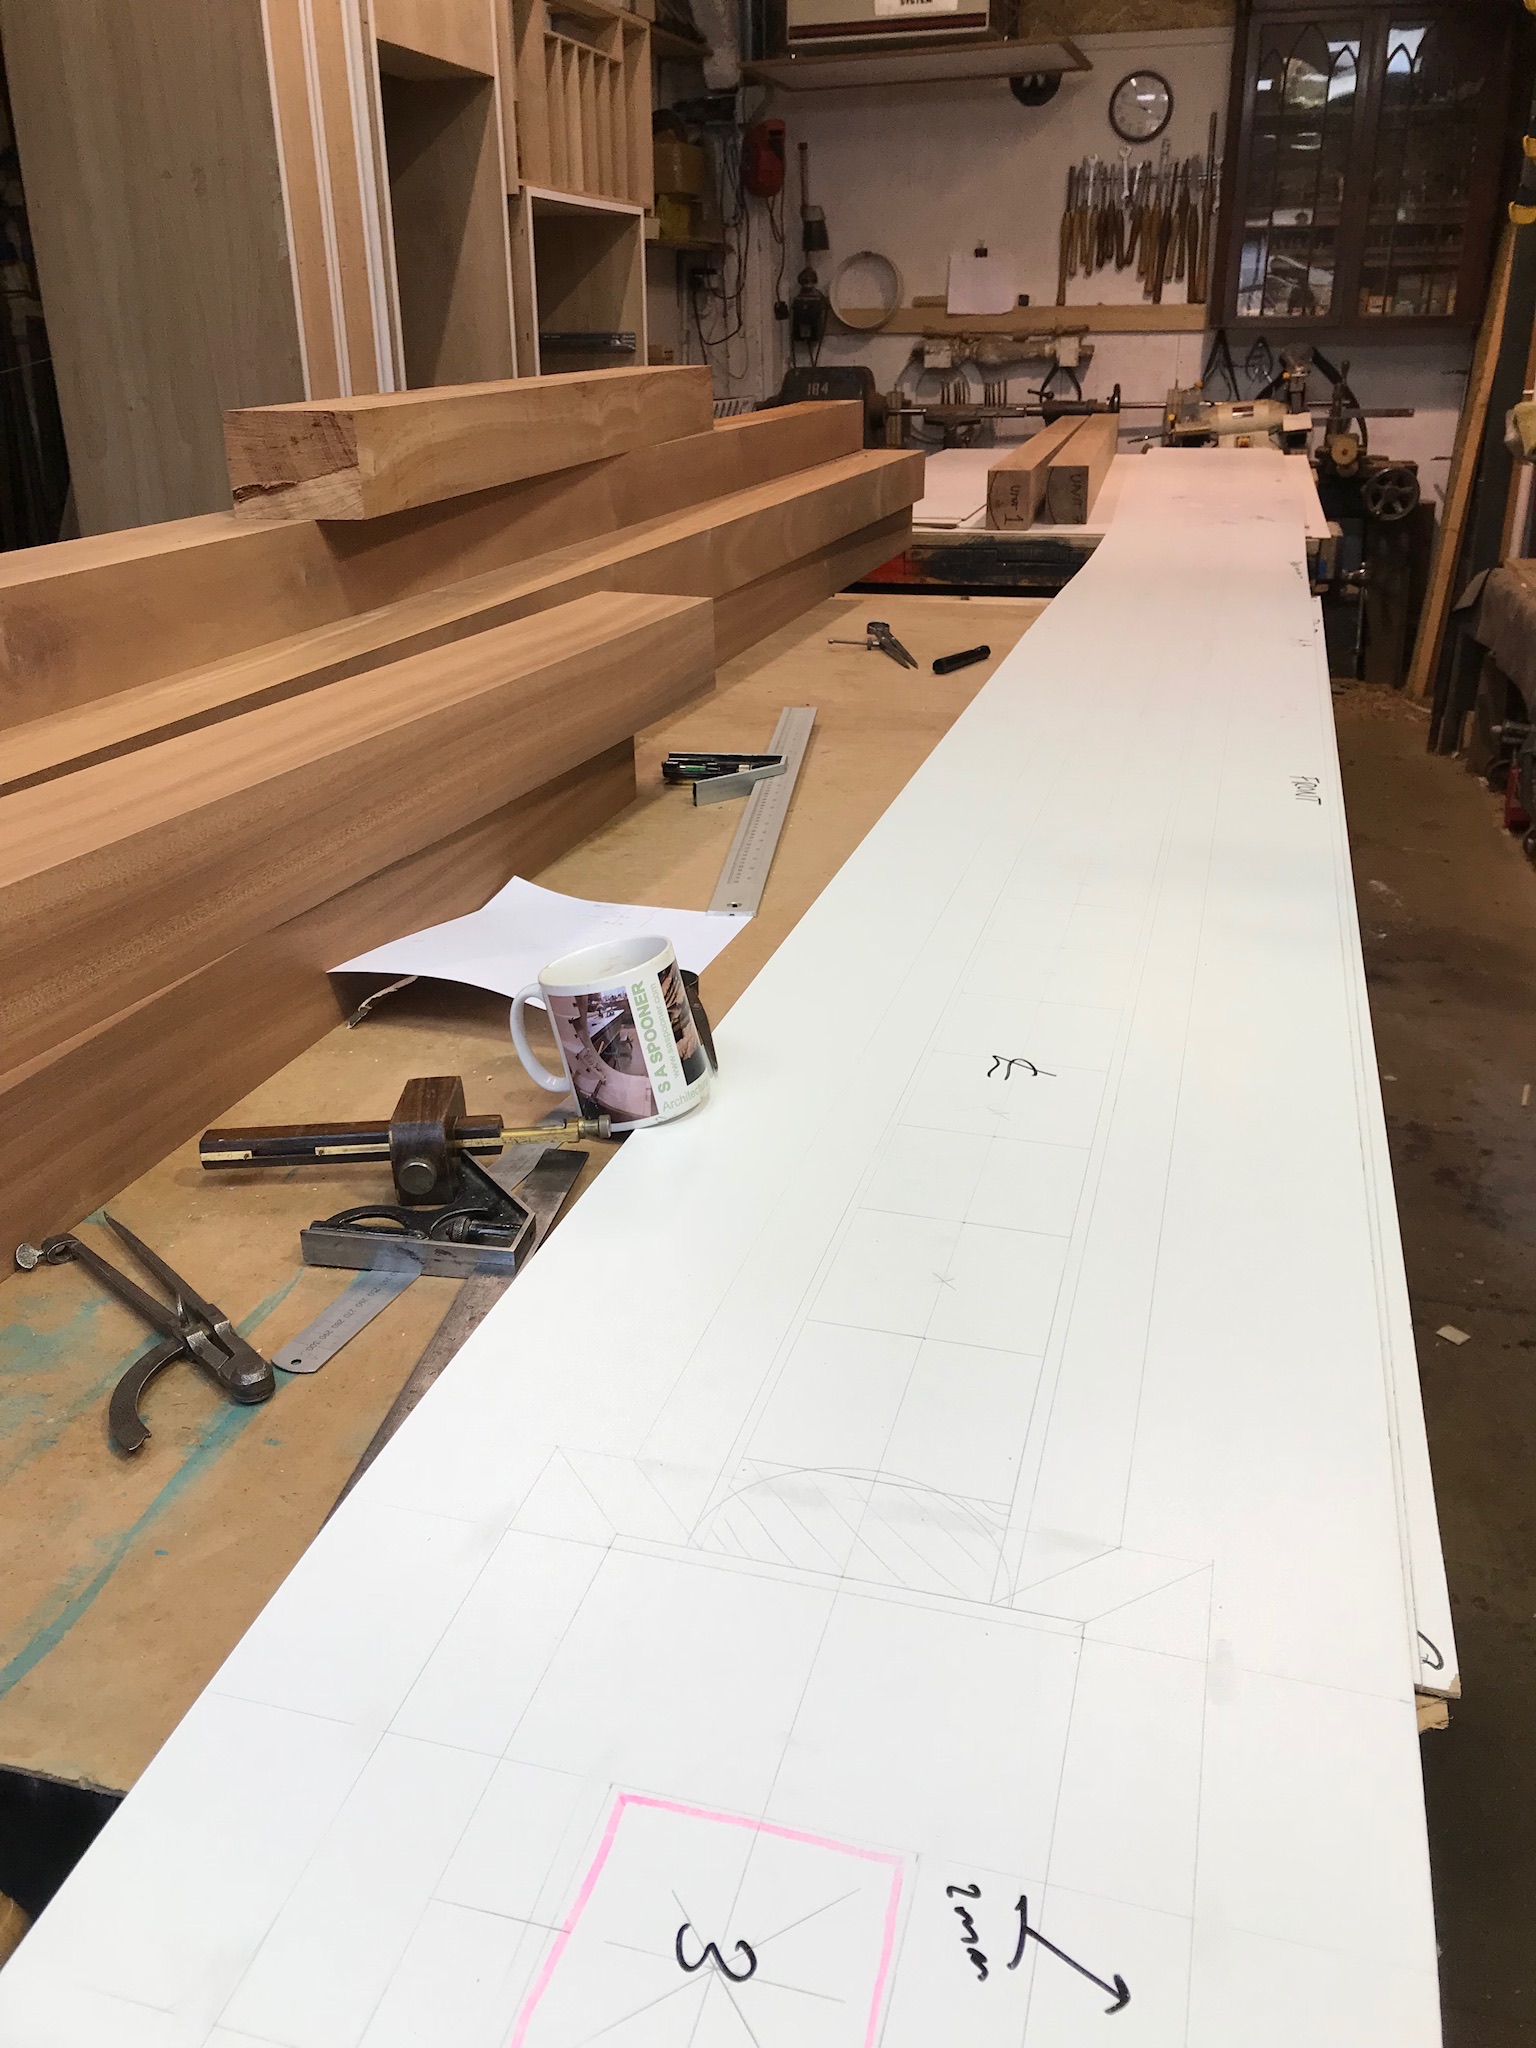
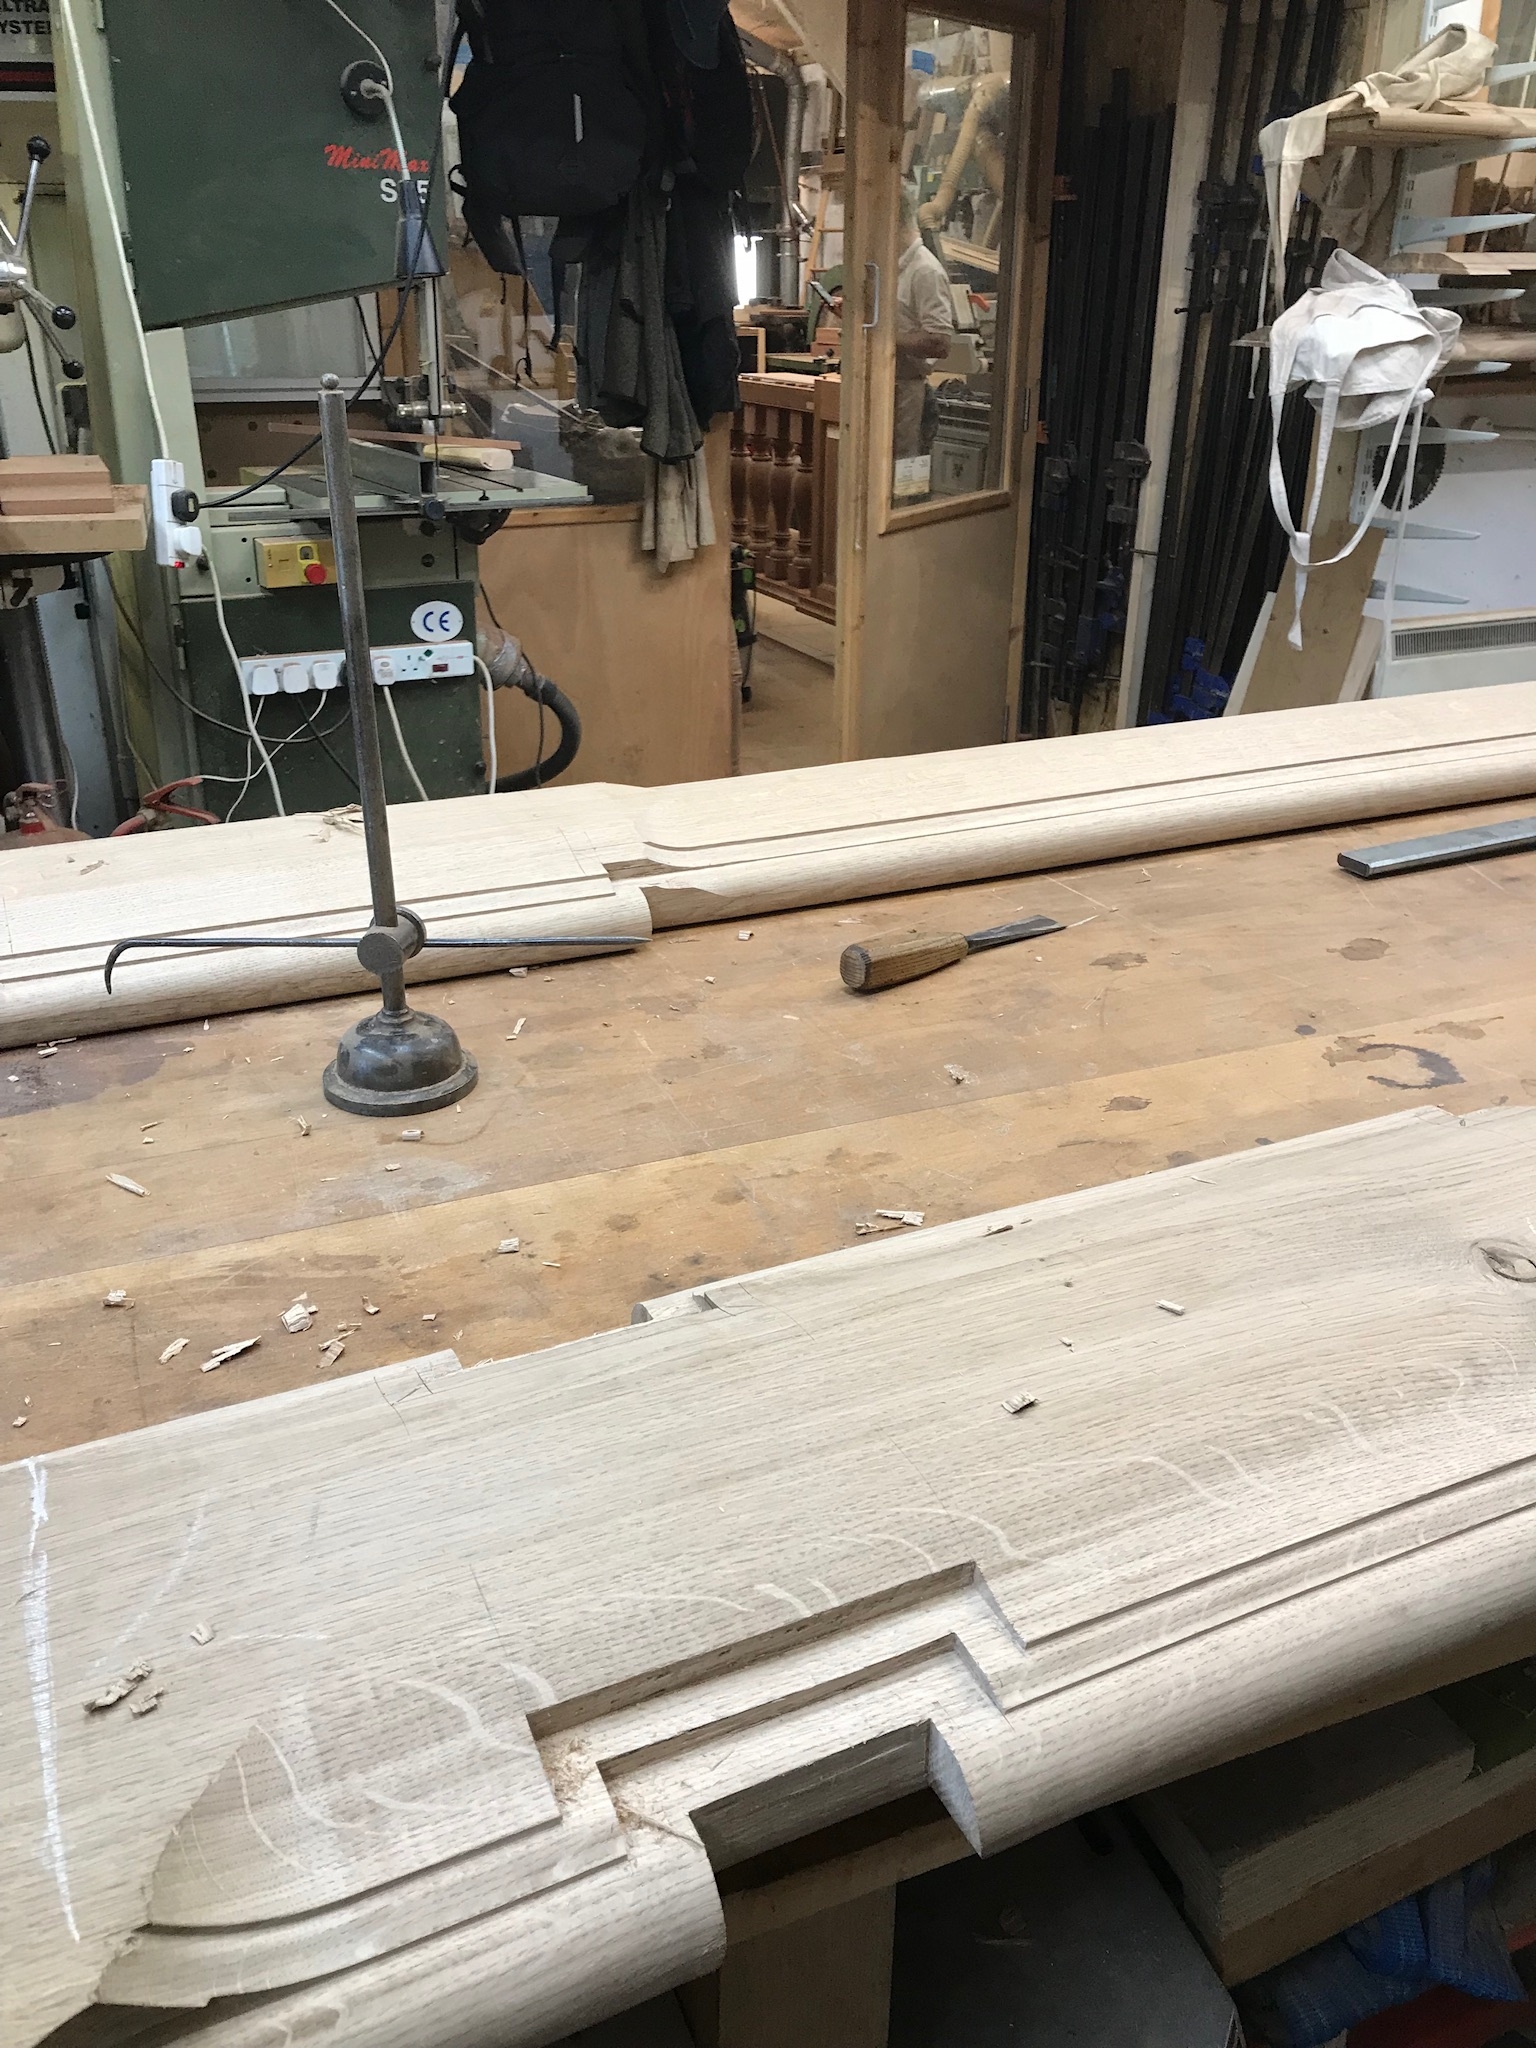
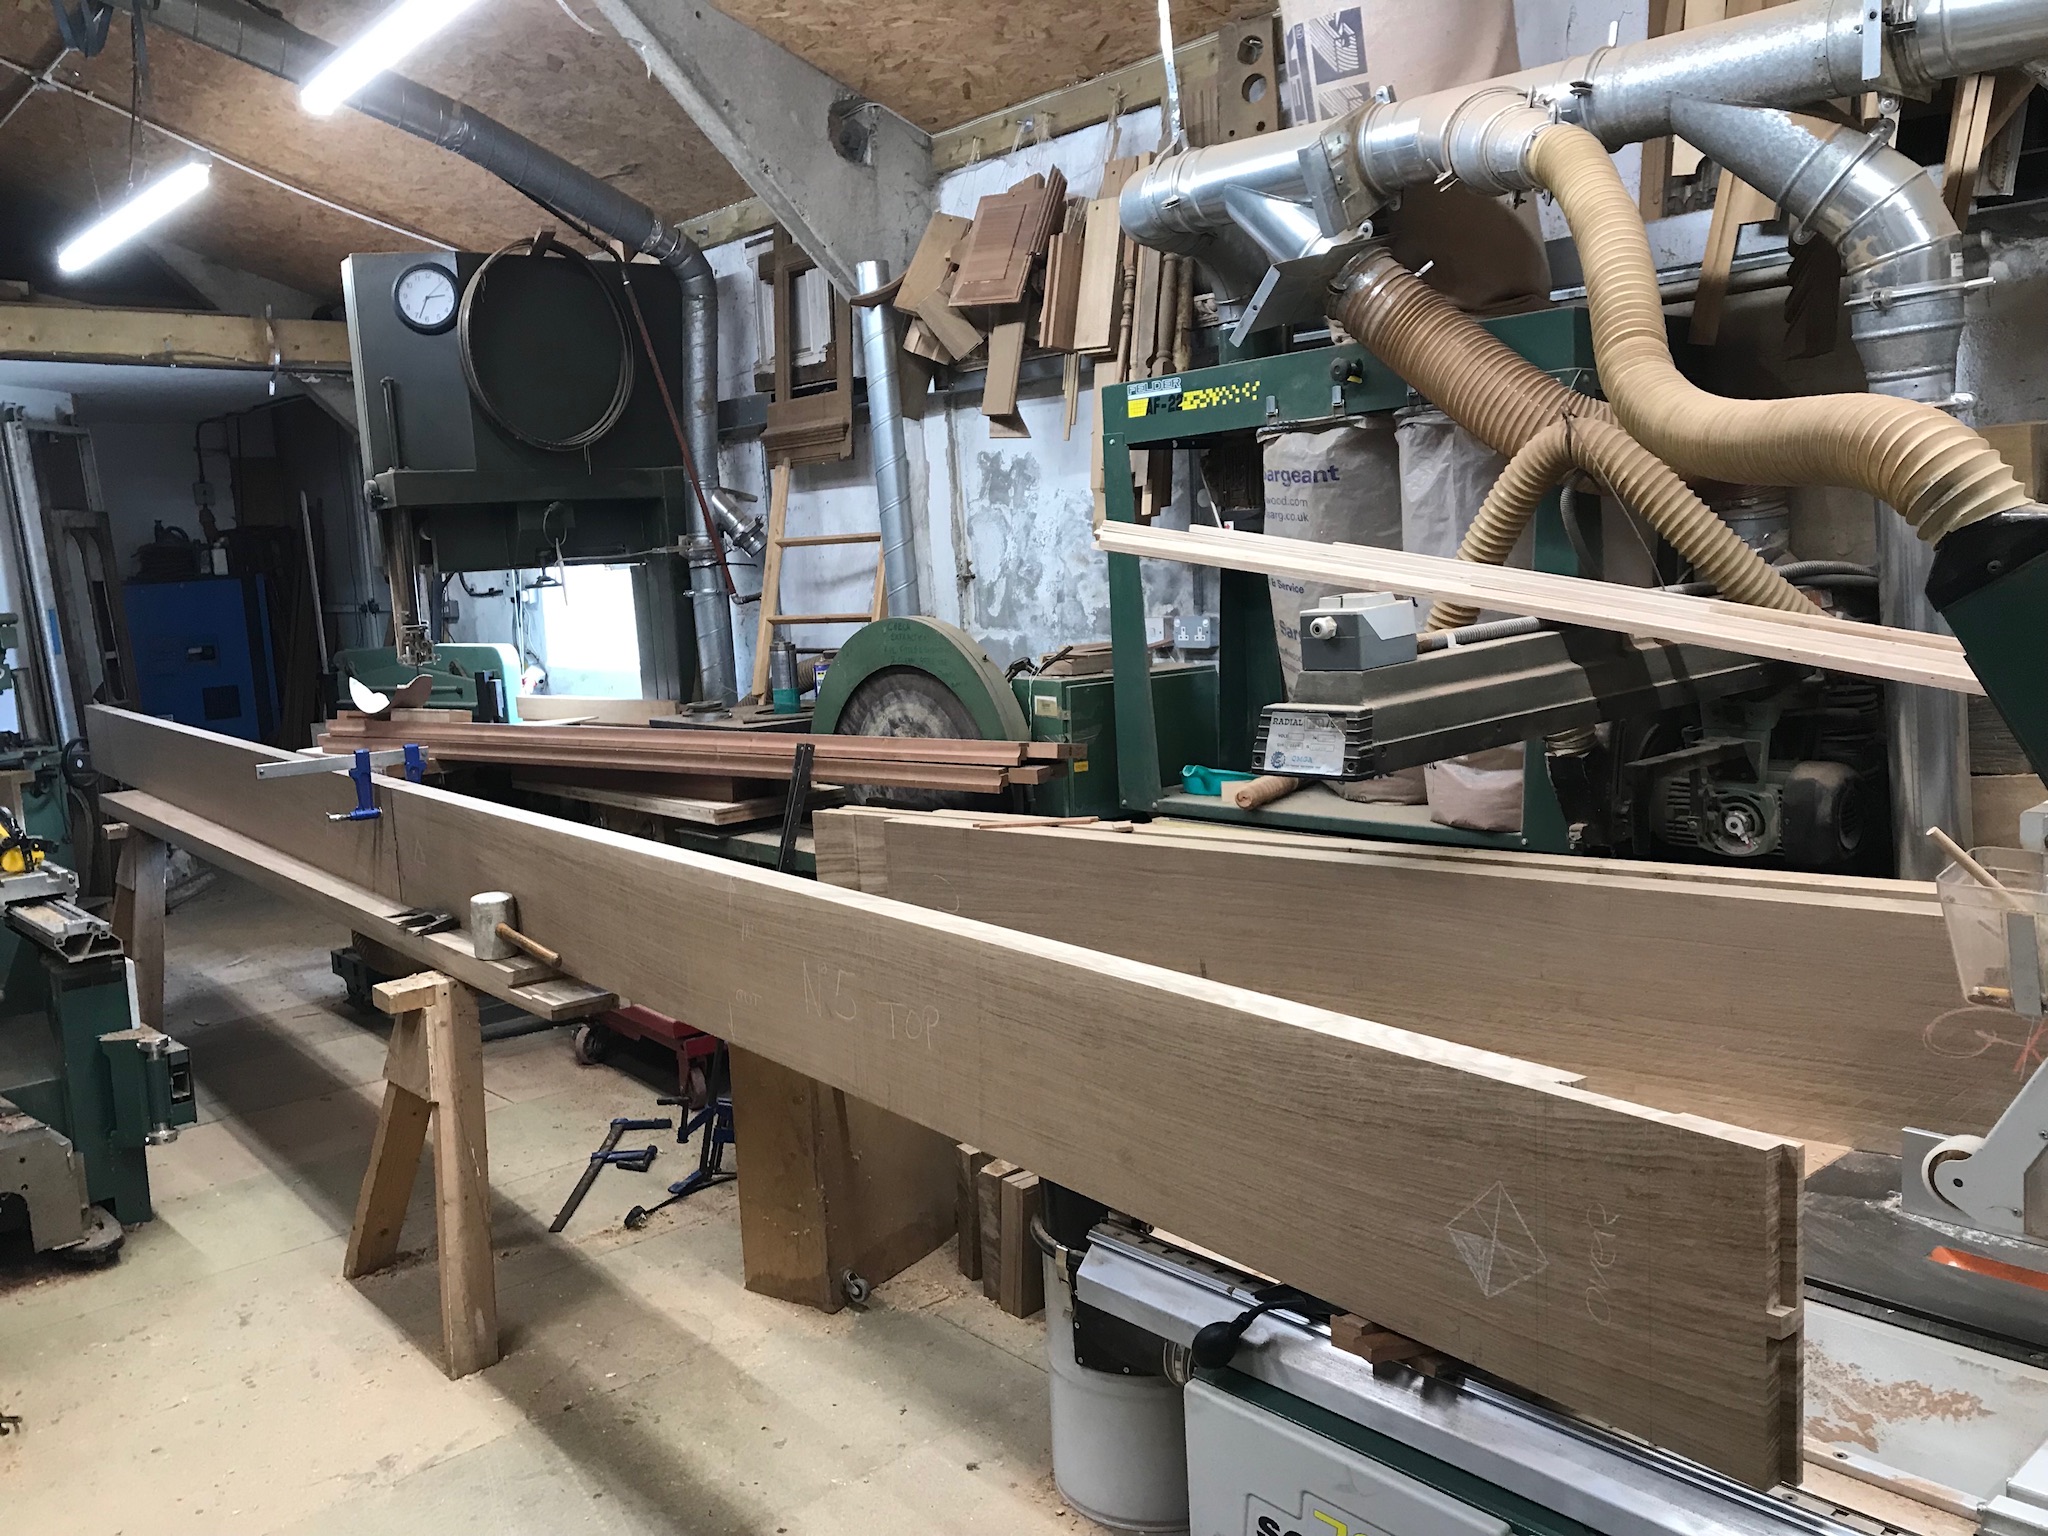
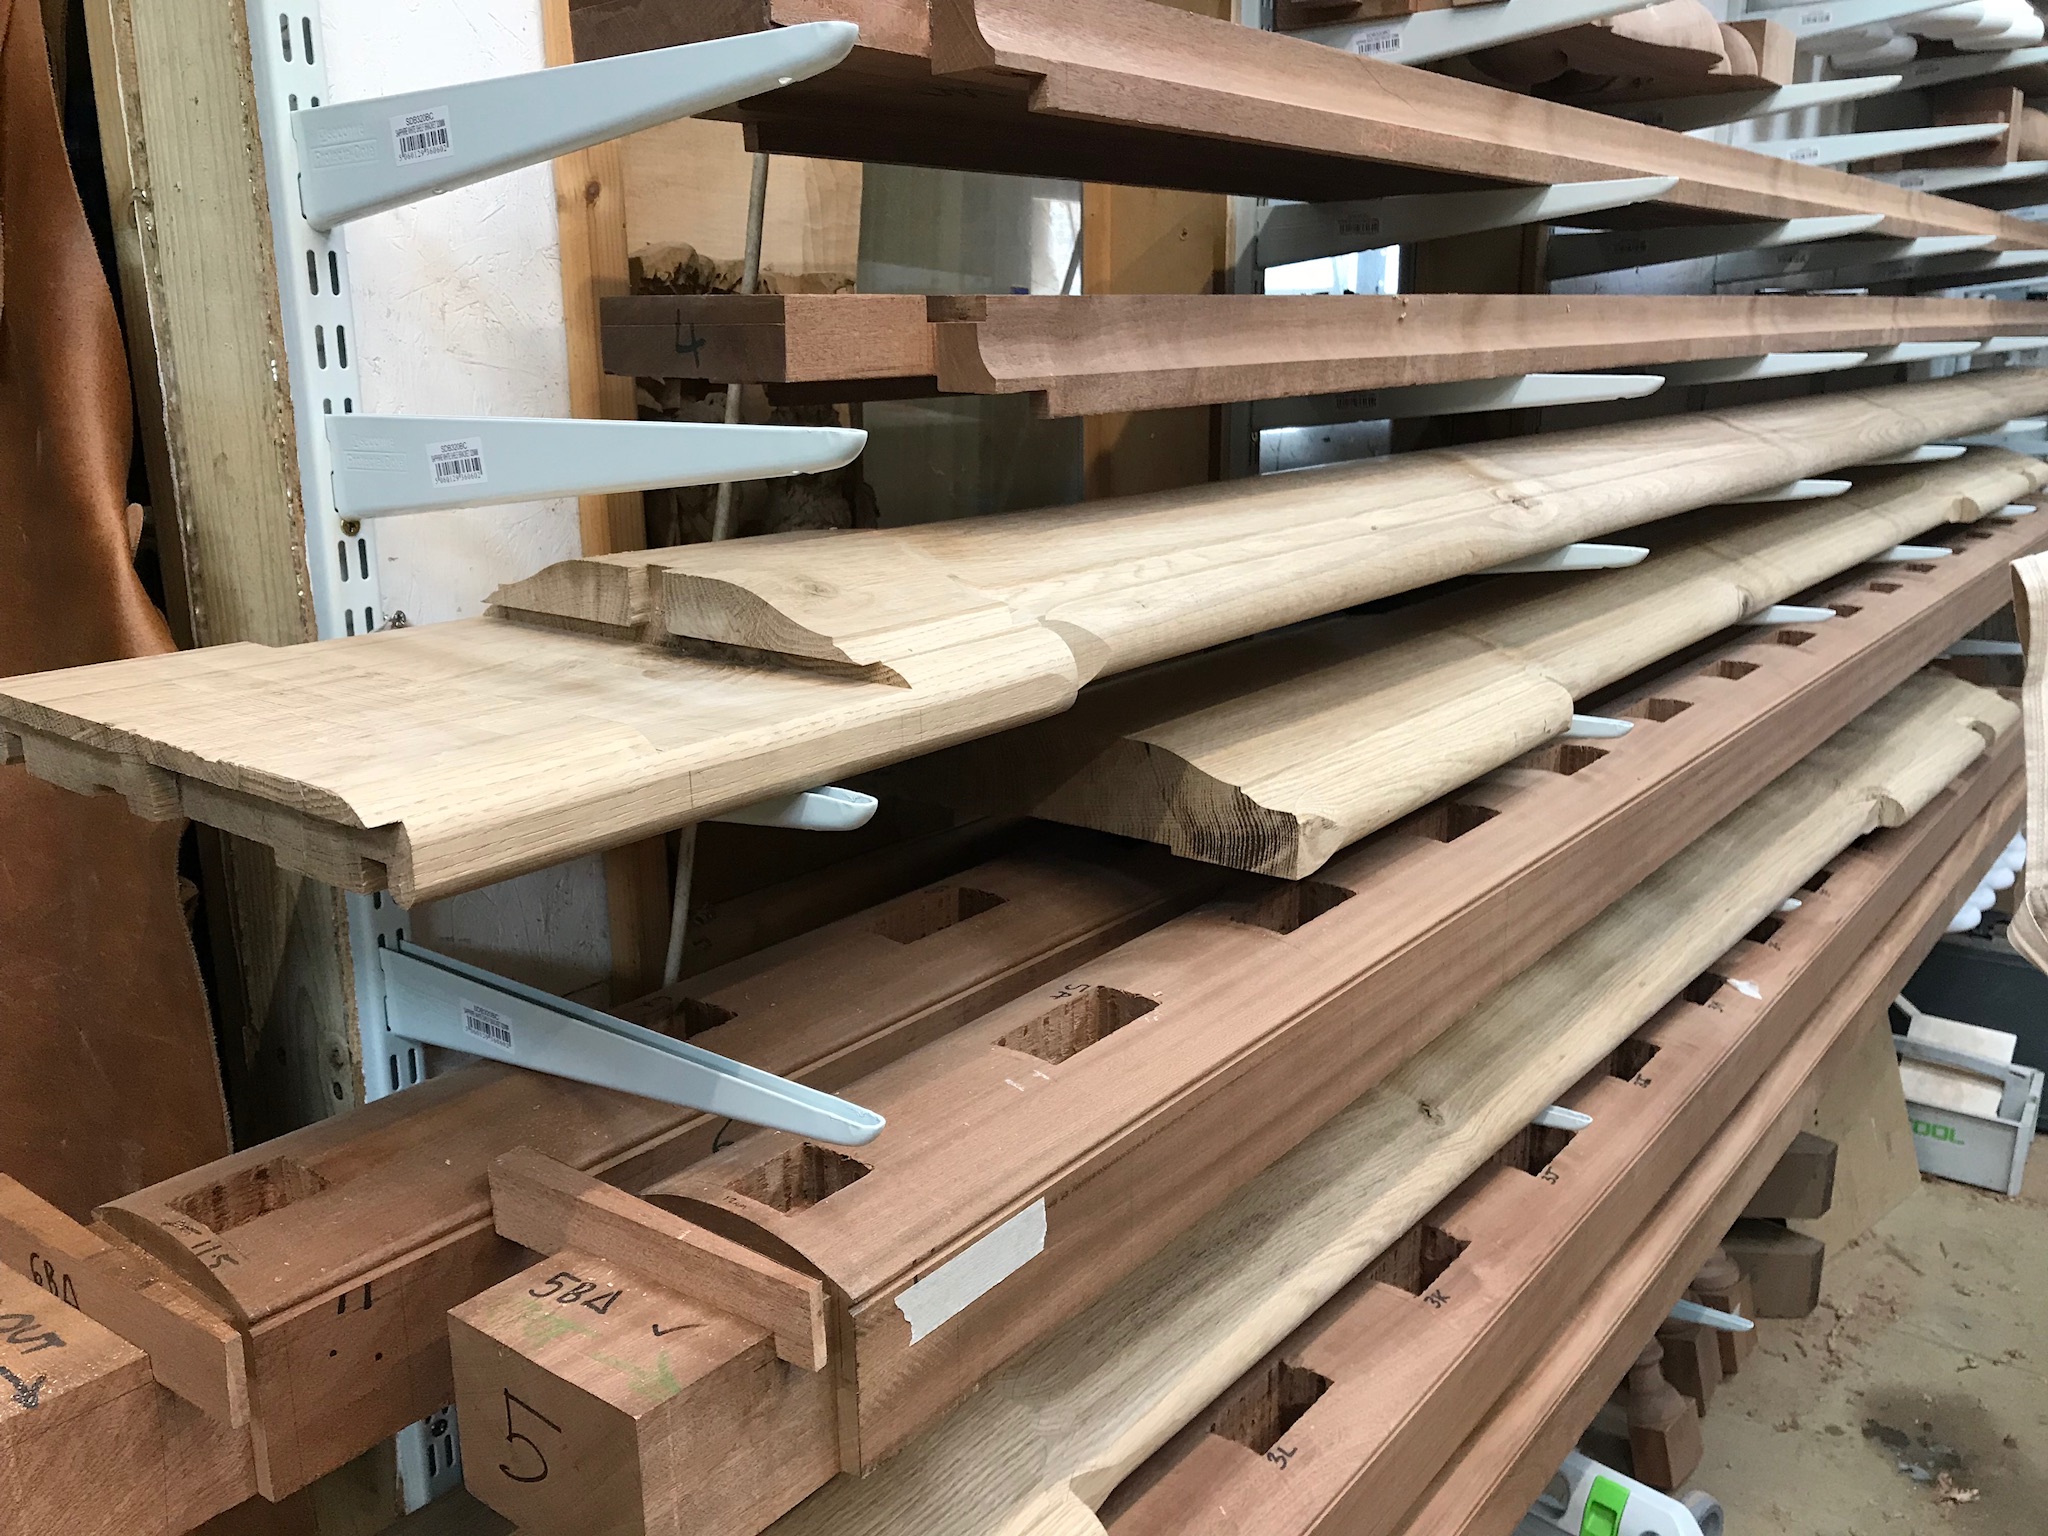
We recorded all the interesting measurments required to manufacture the Balustrade using the age old proven method of full sized rod’s. These can be seen in the pictures as white coloured boards which we draw upon and note anything of interest. This gives us the whole picture when designing and working porportion prior to crafting.
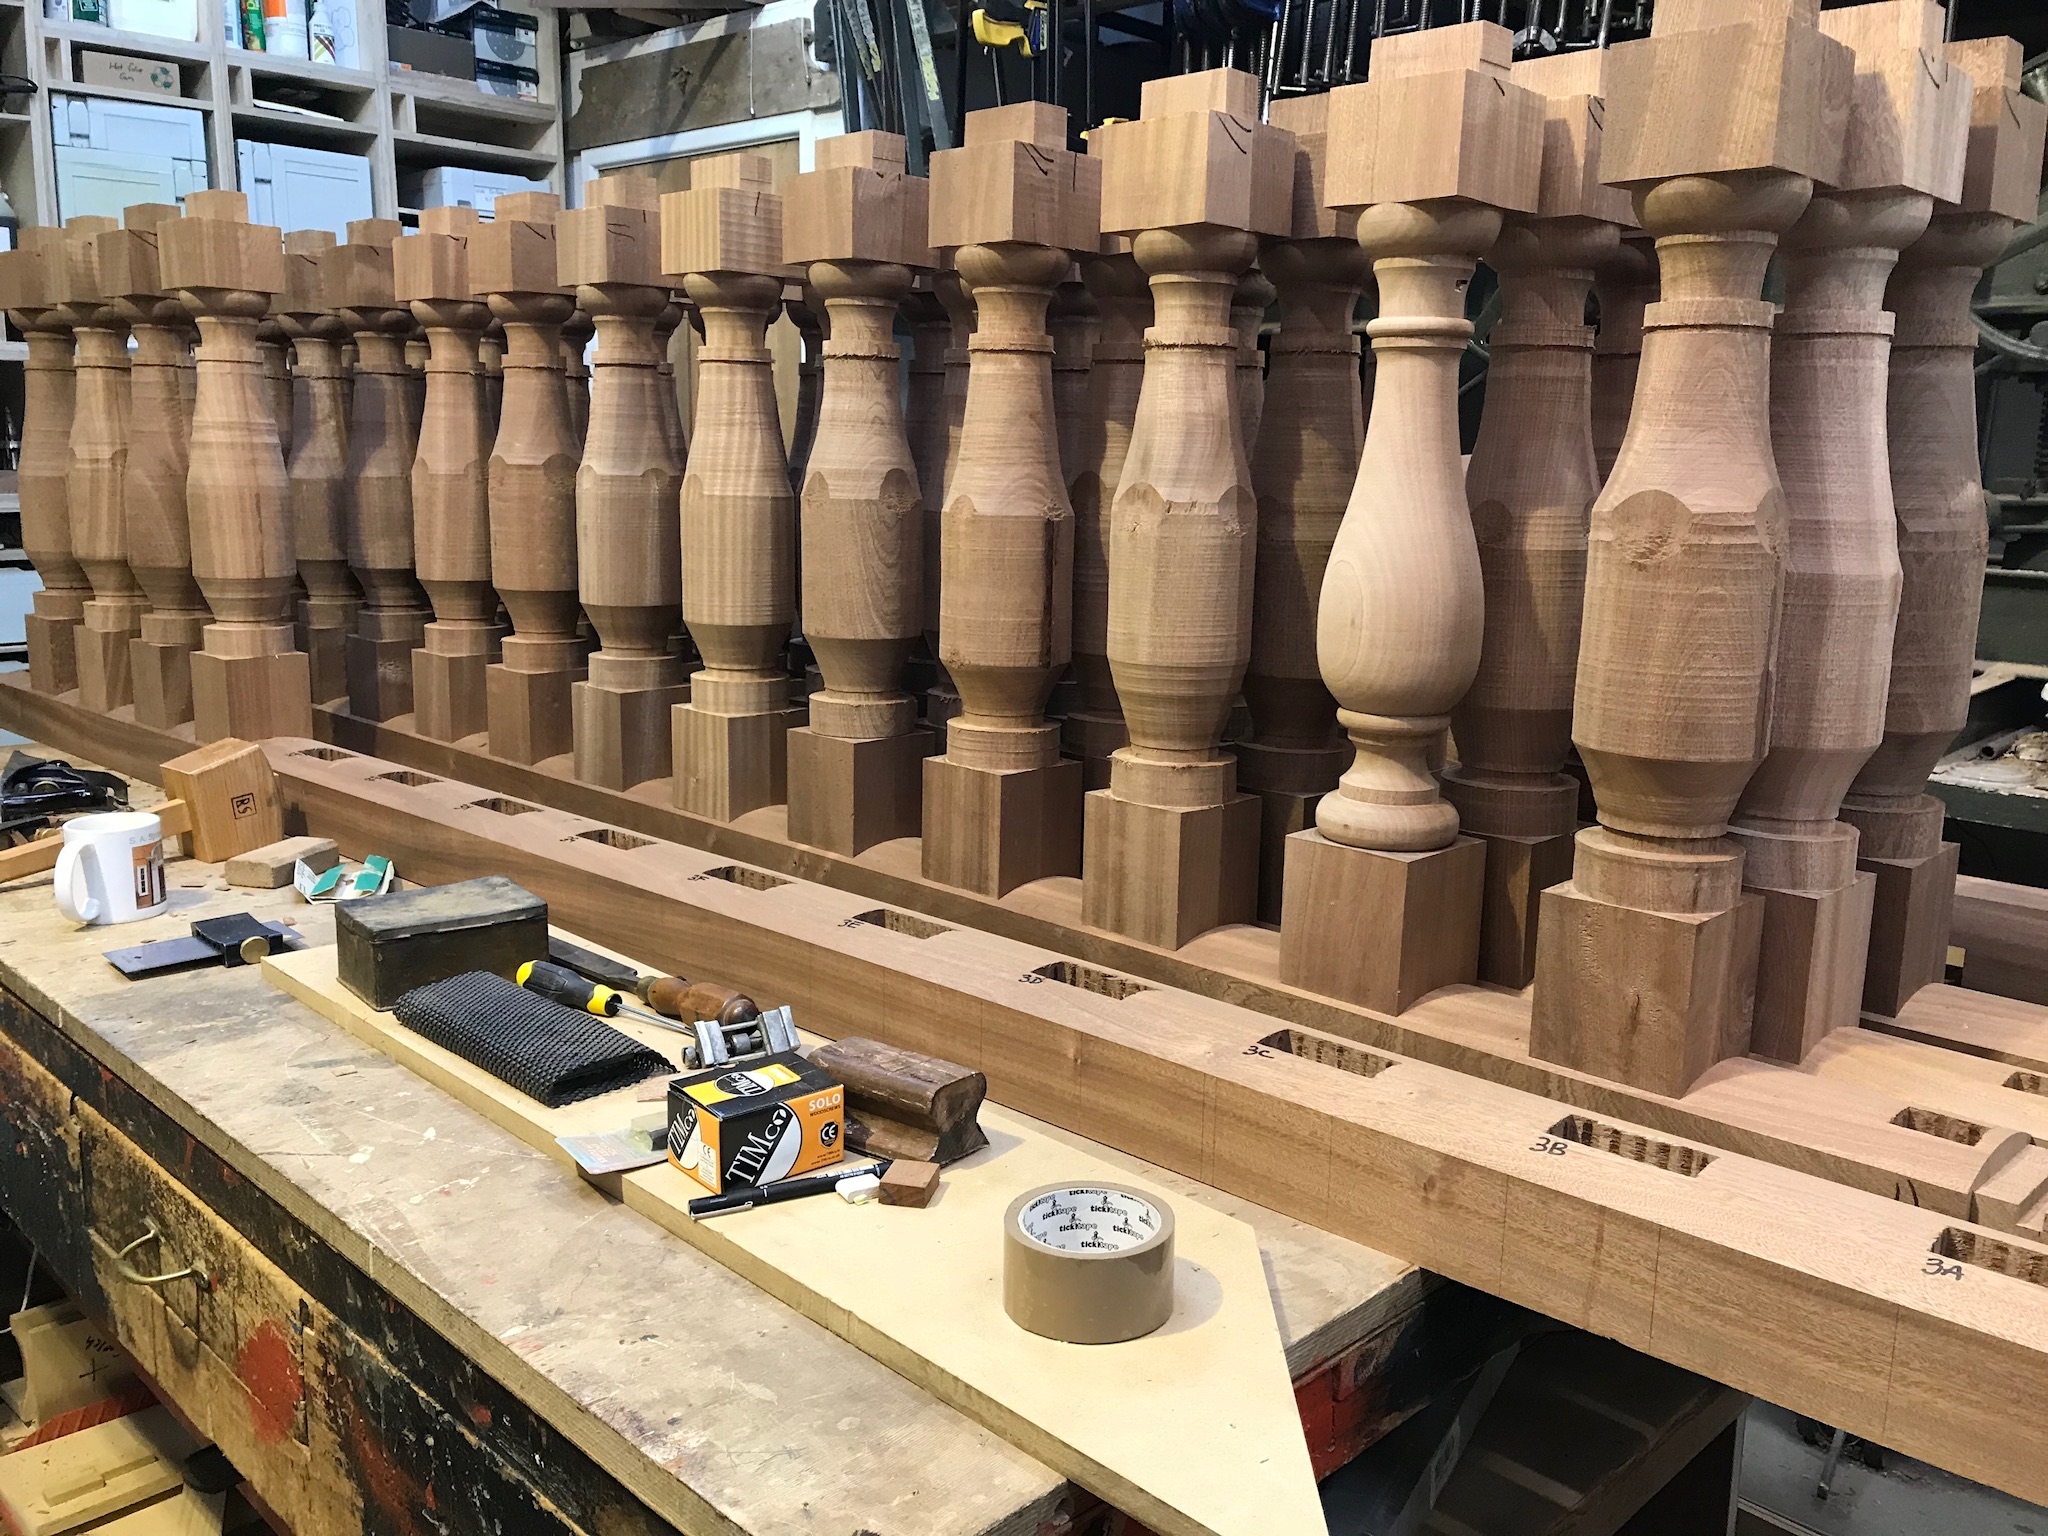
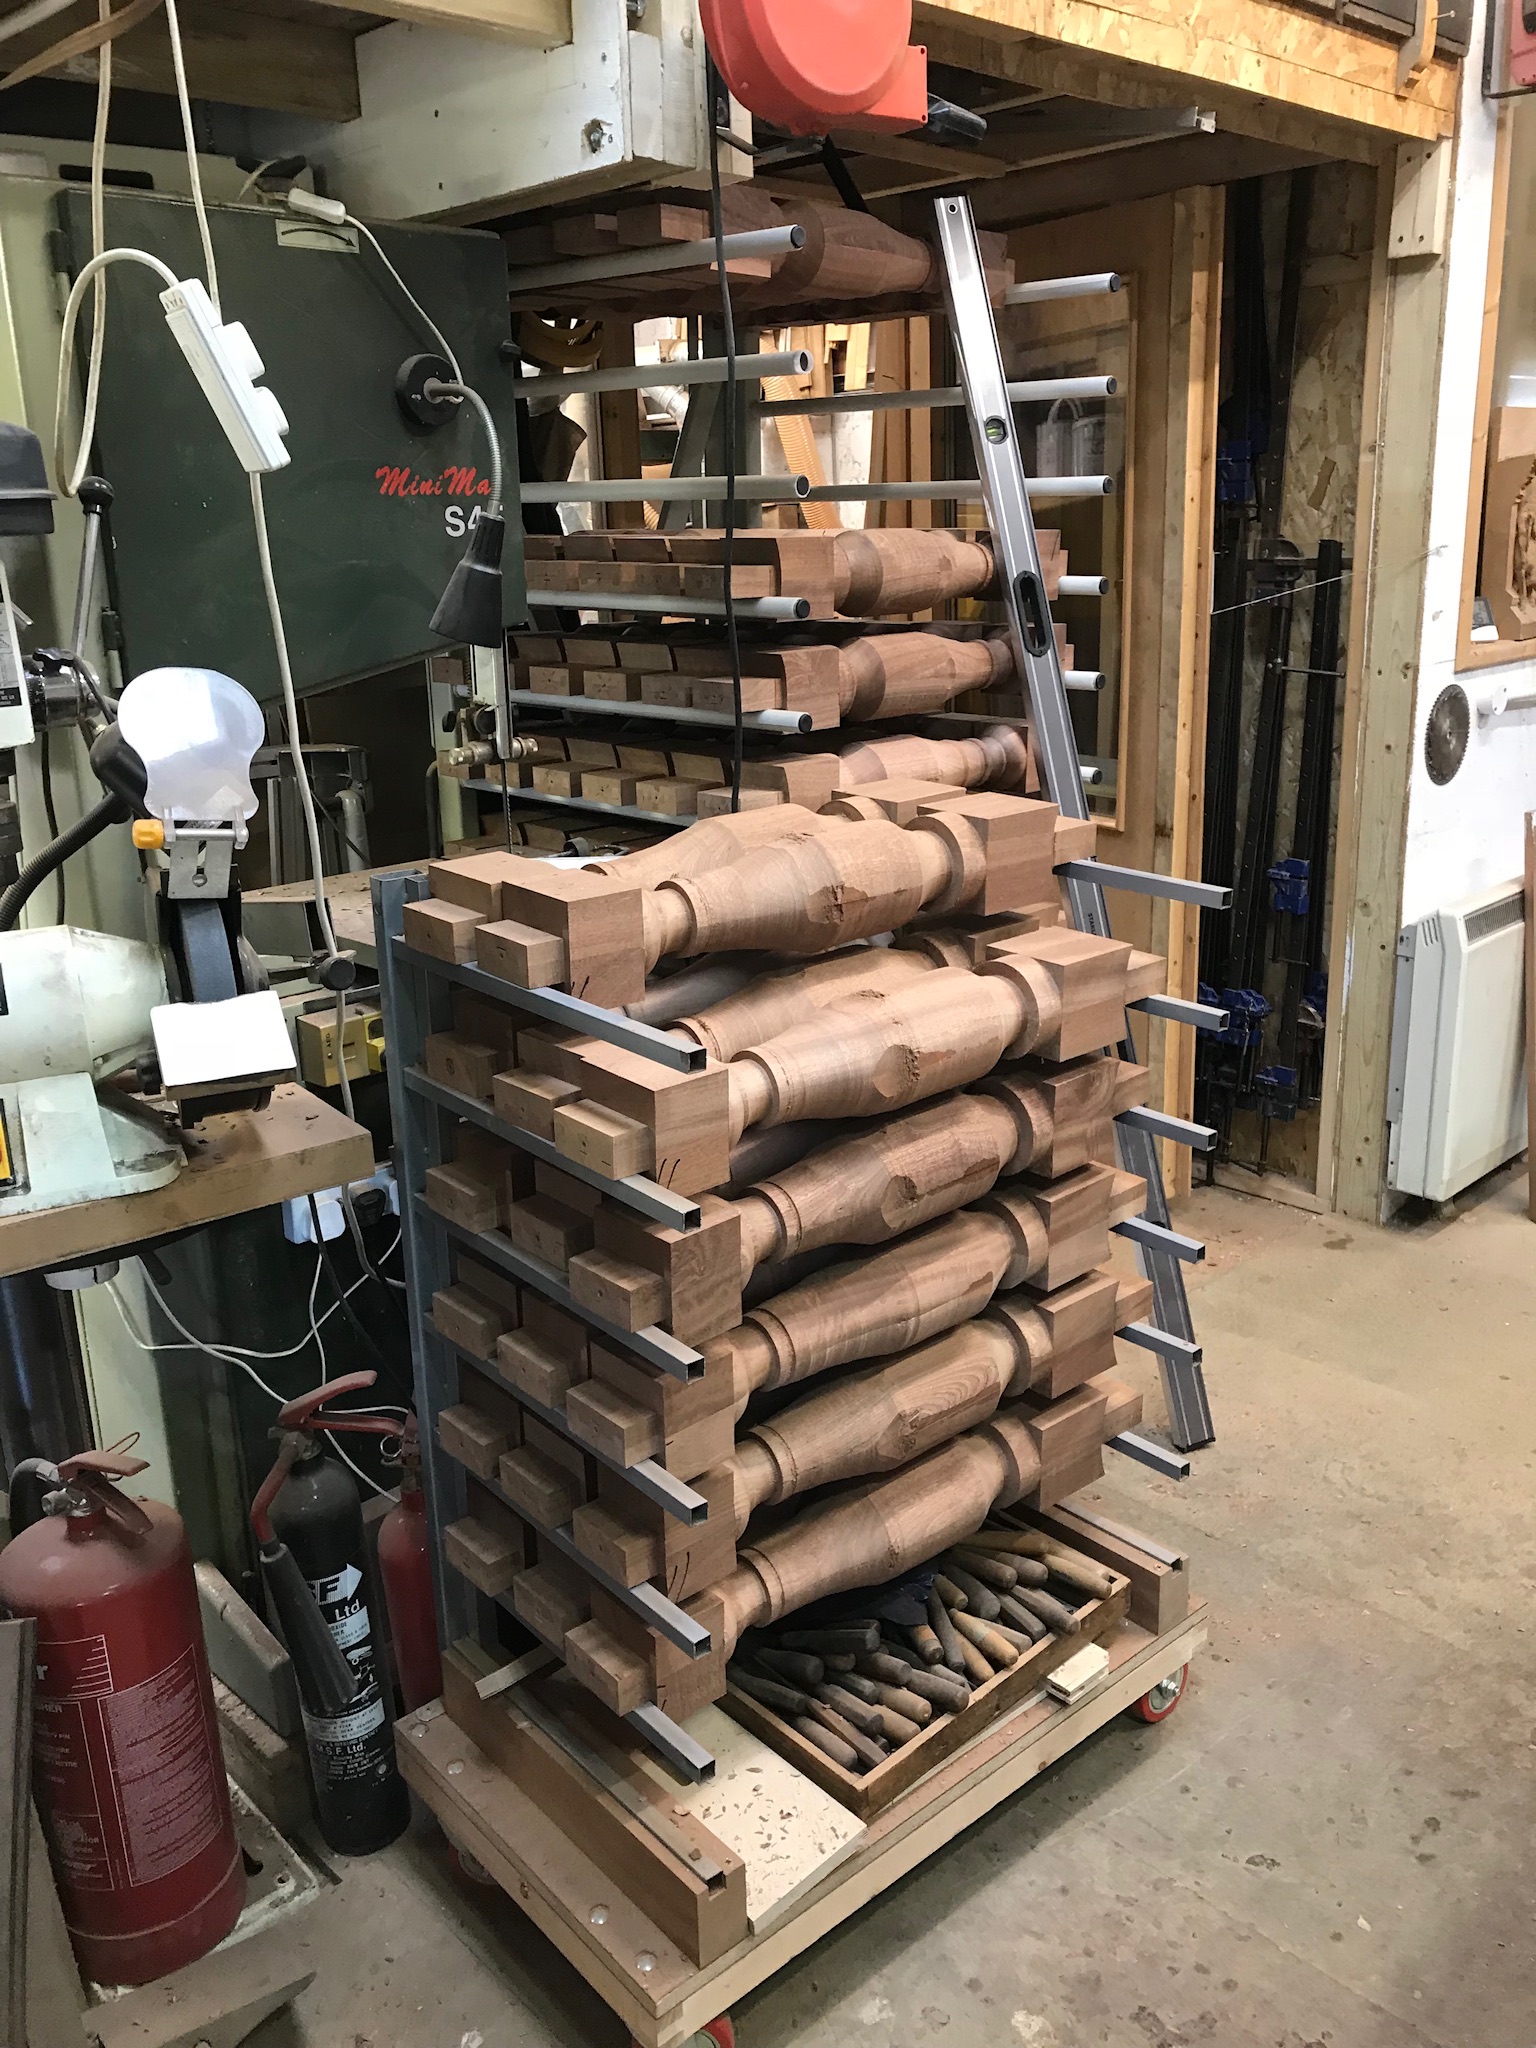
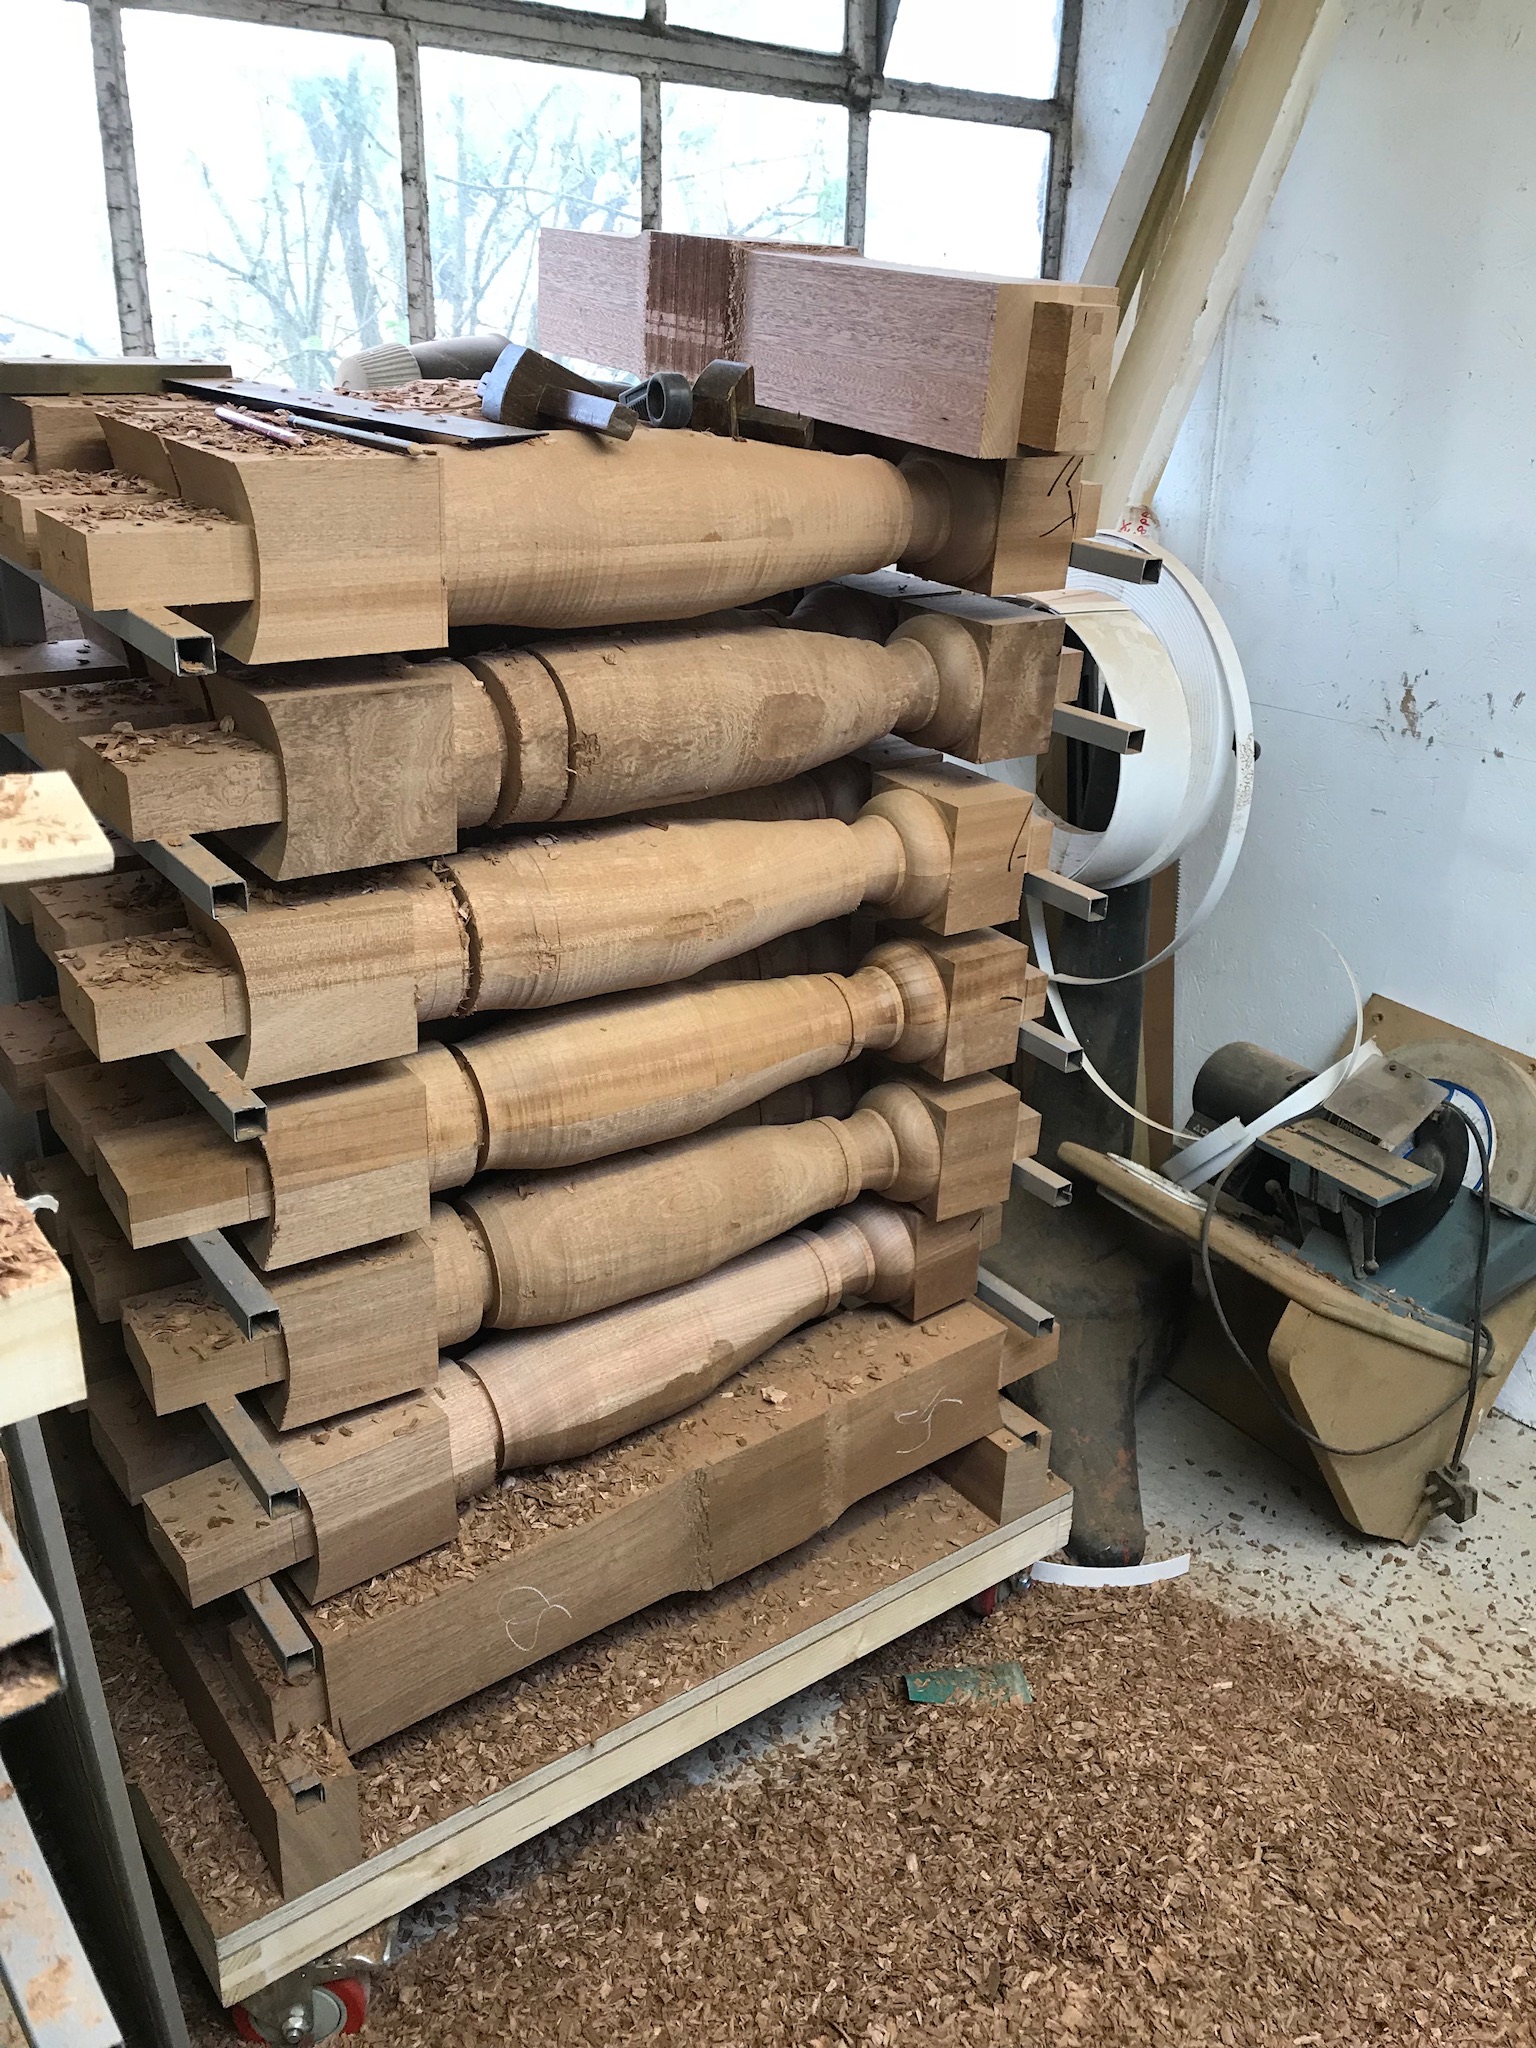
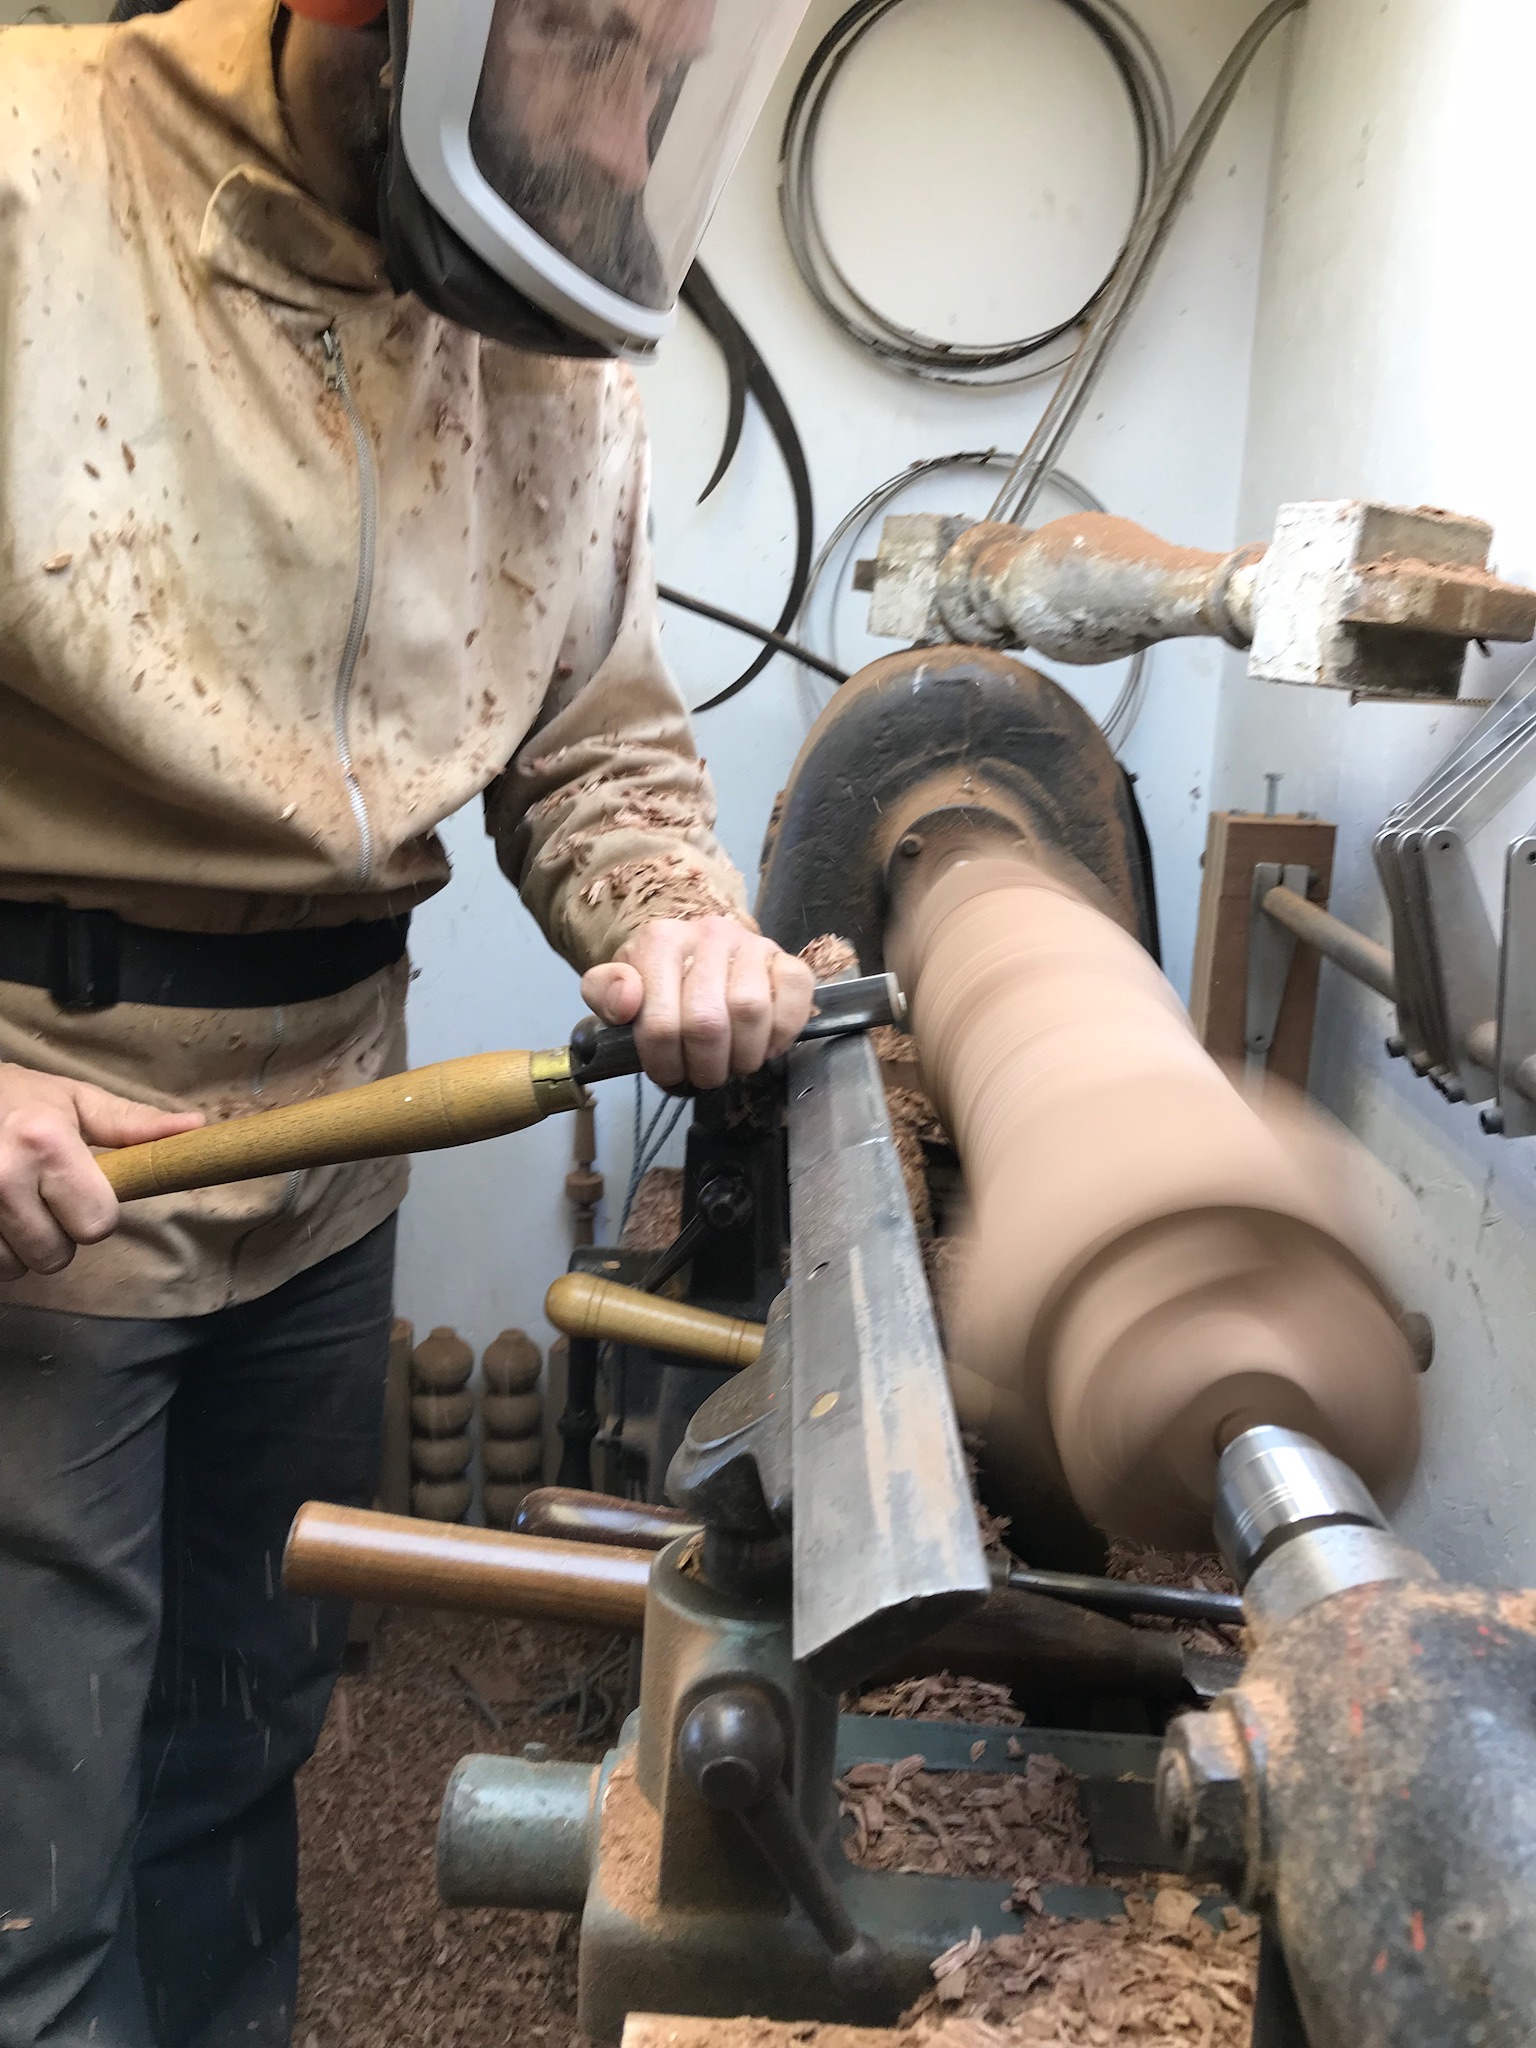
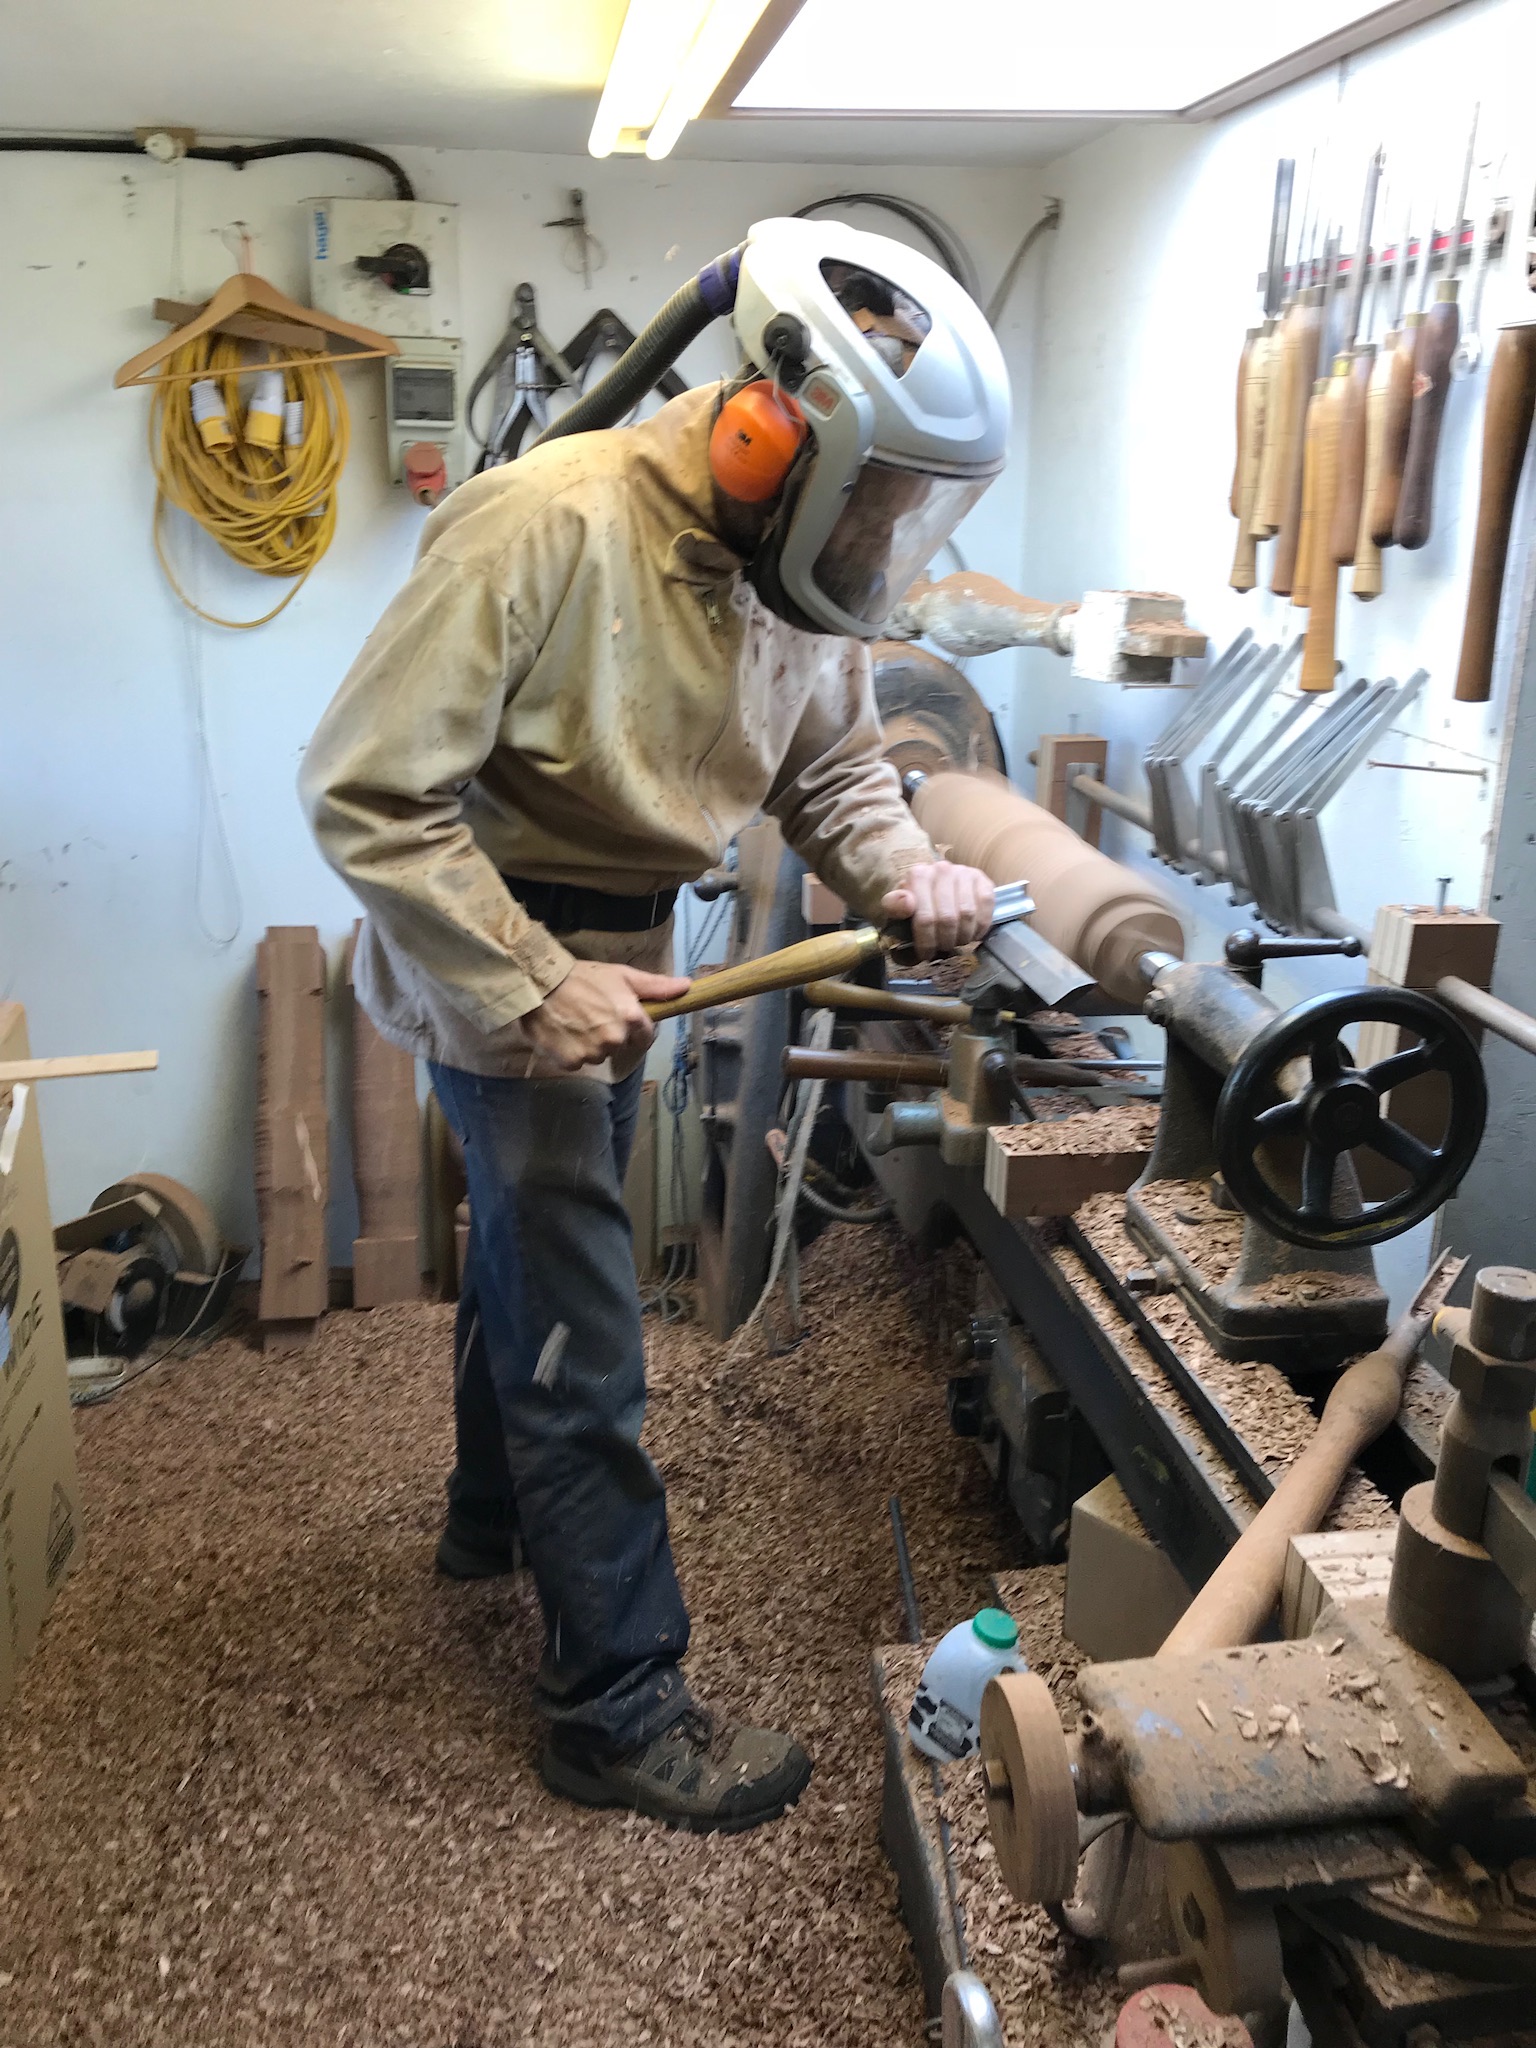
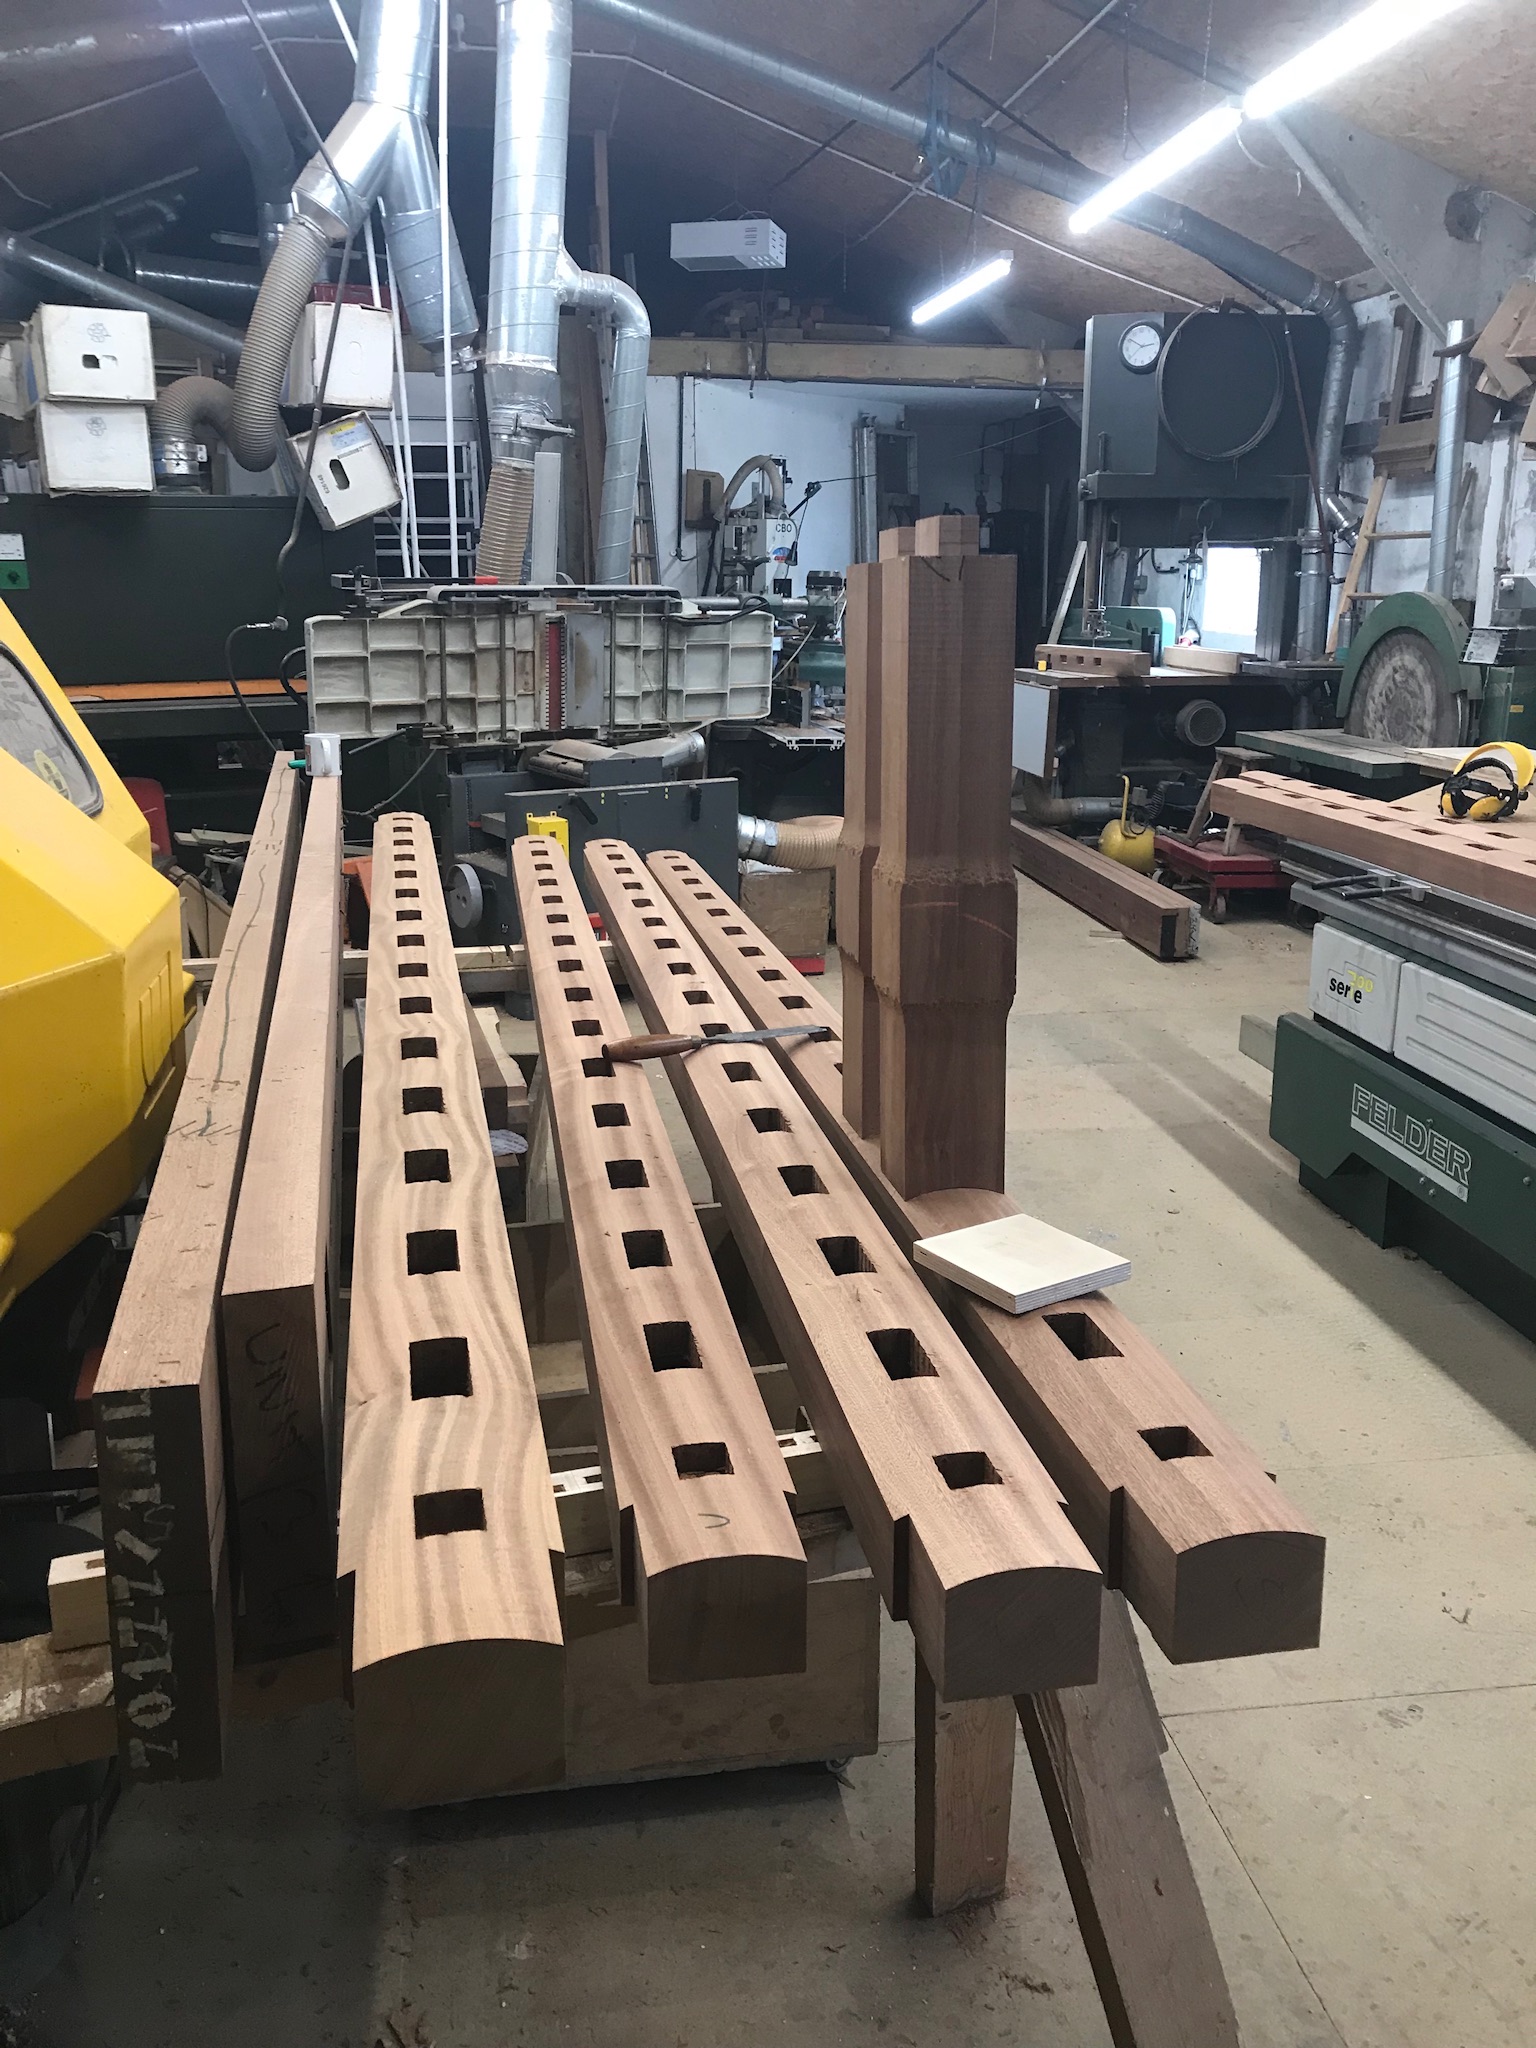
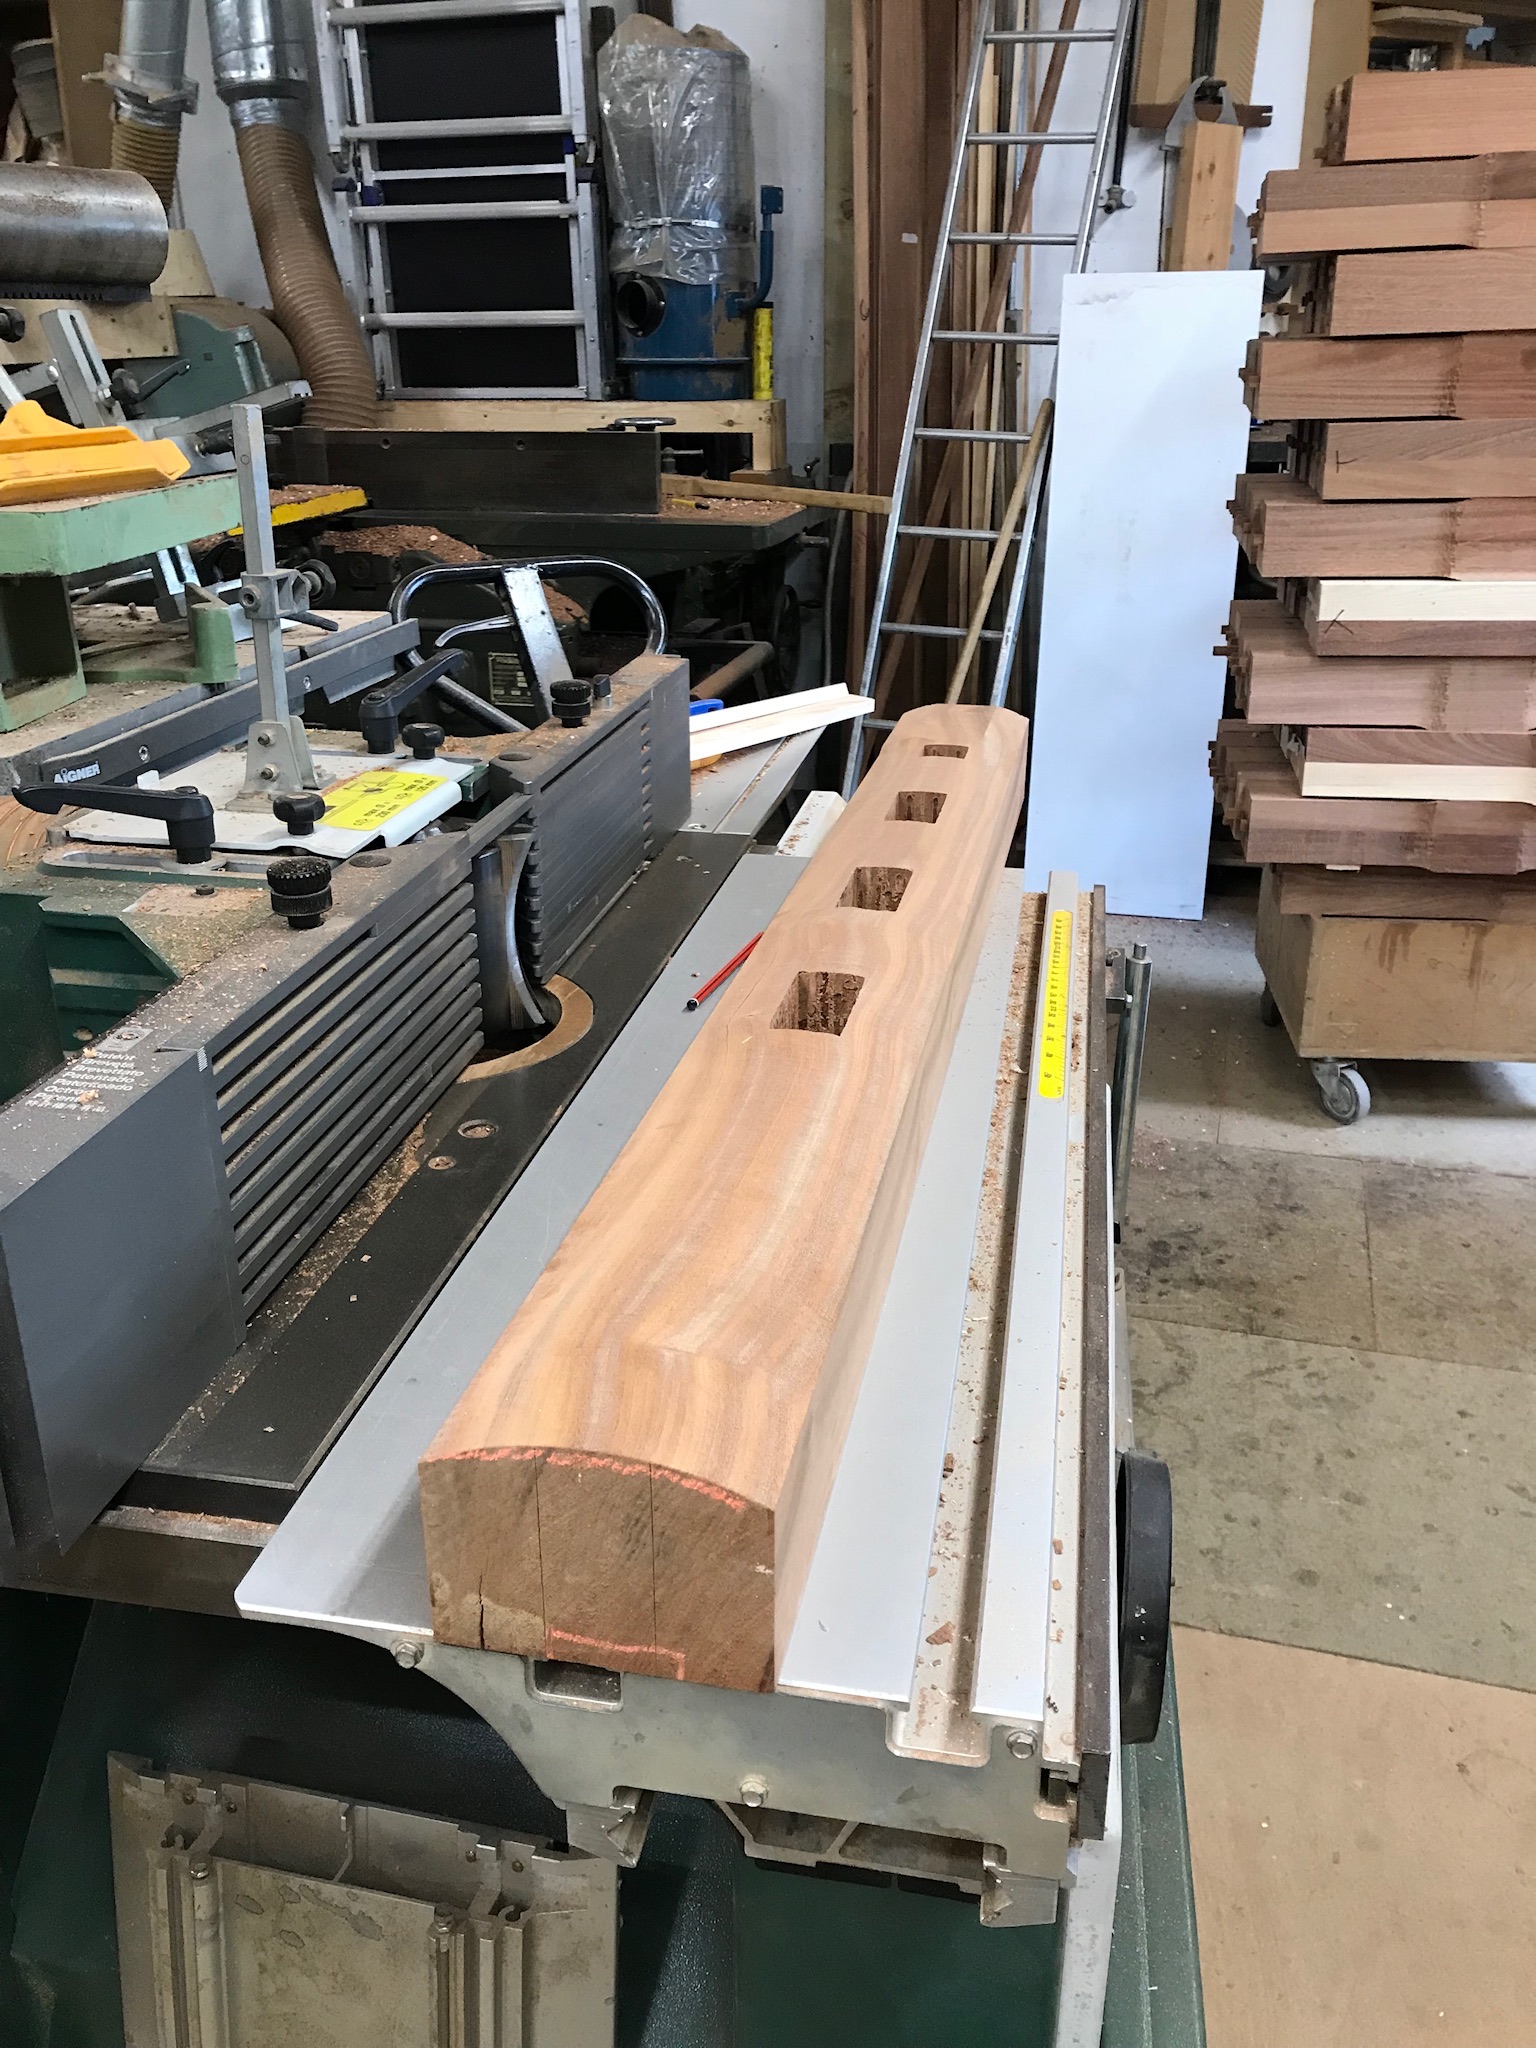
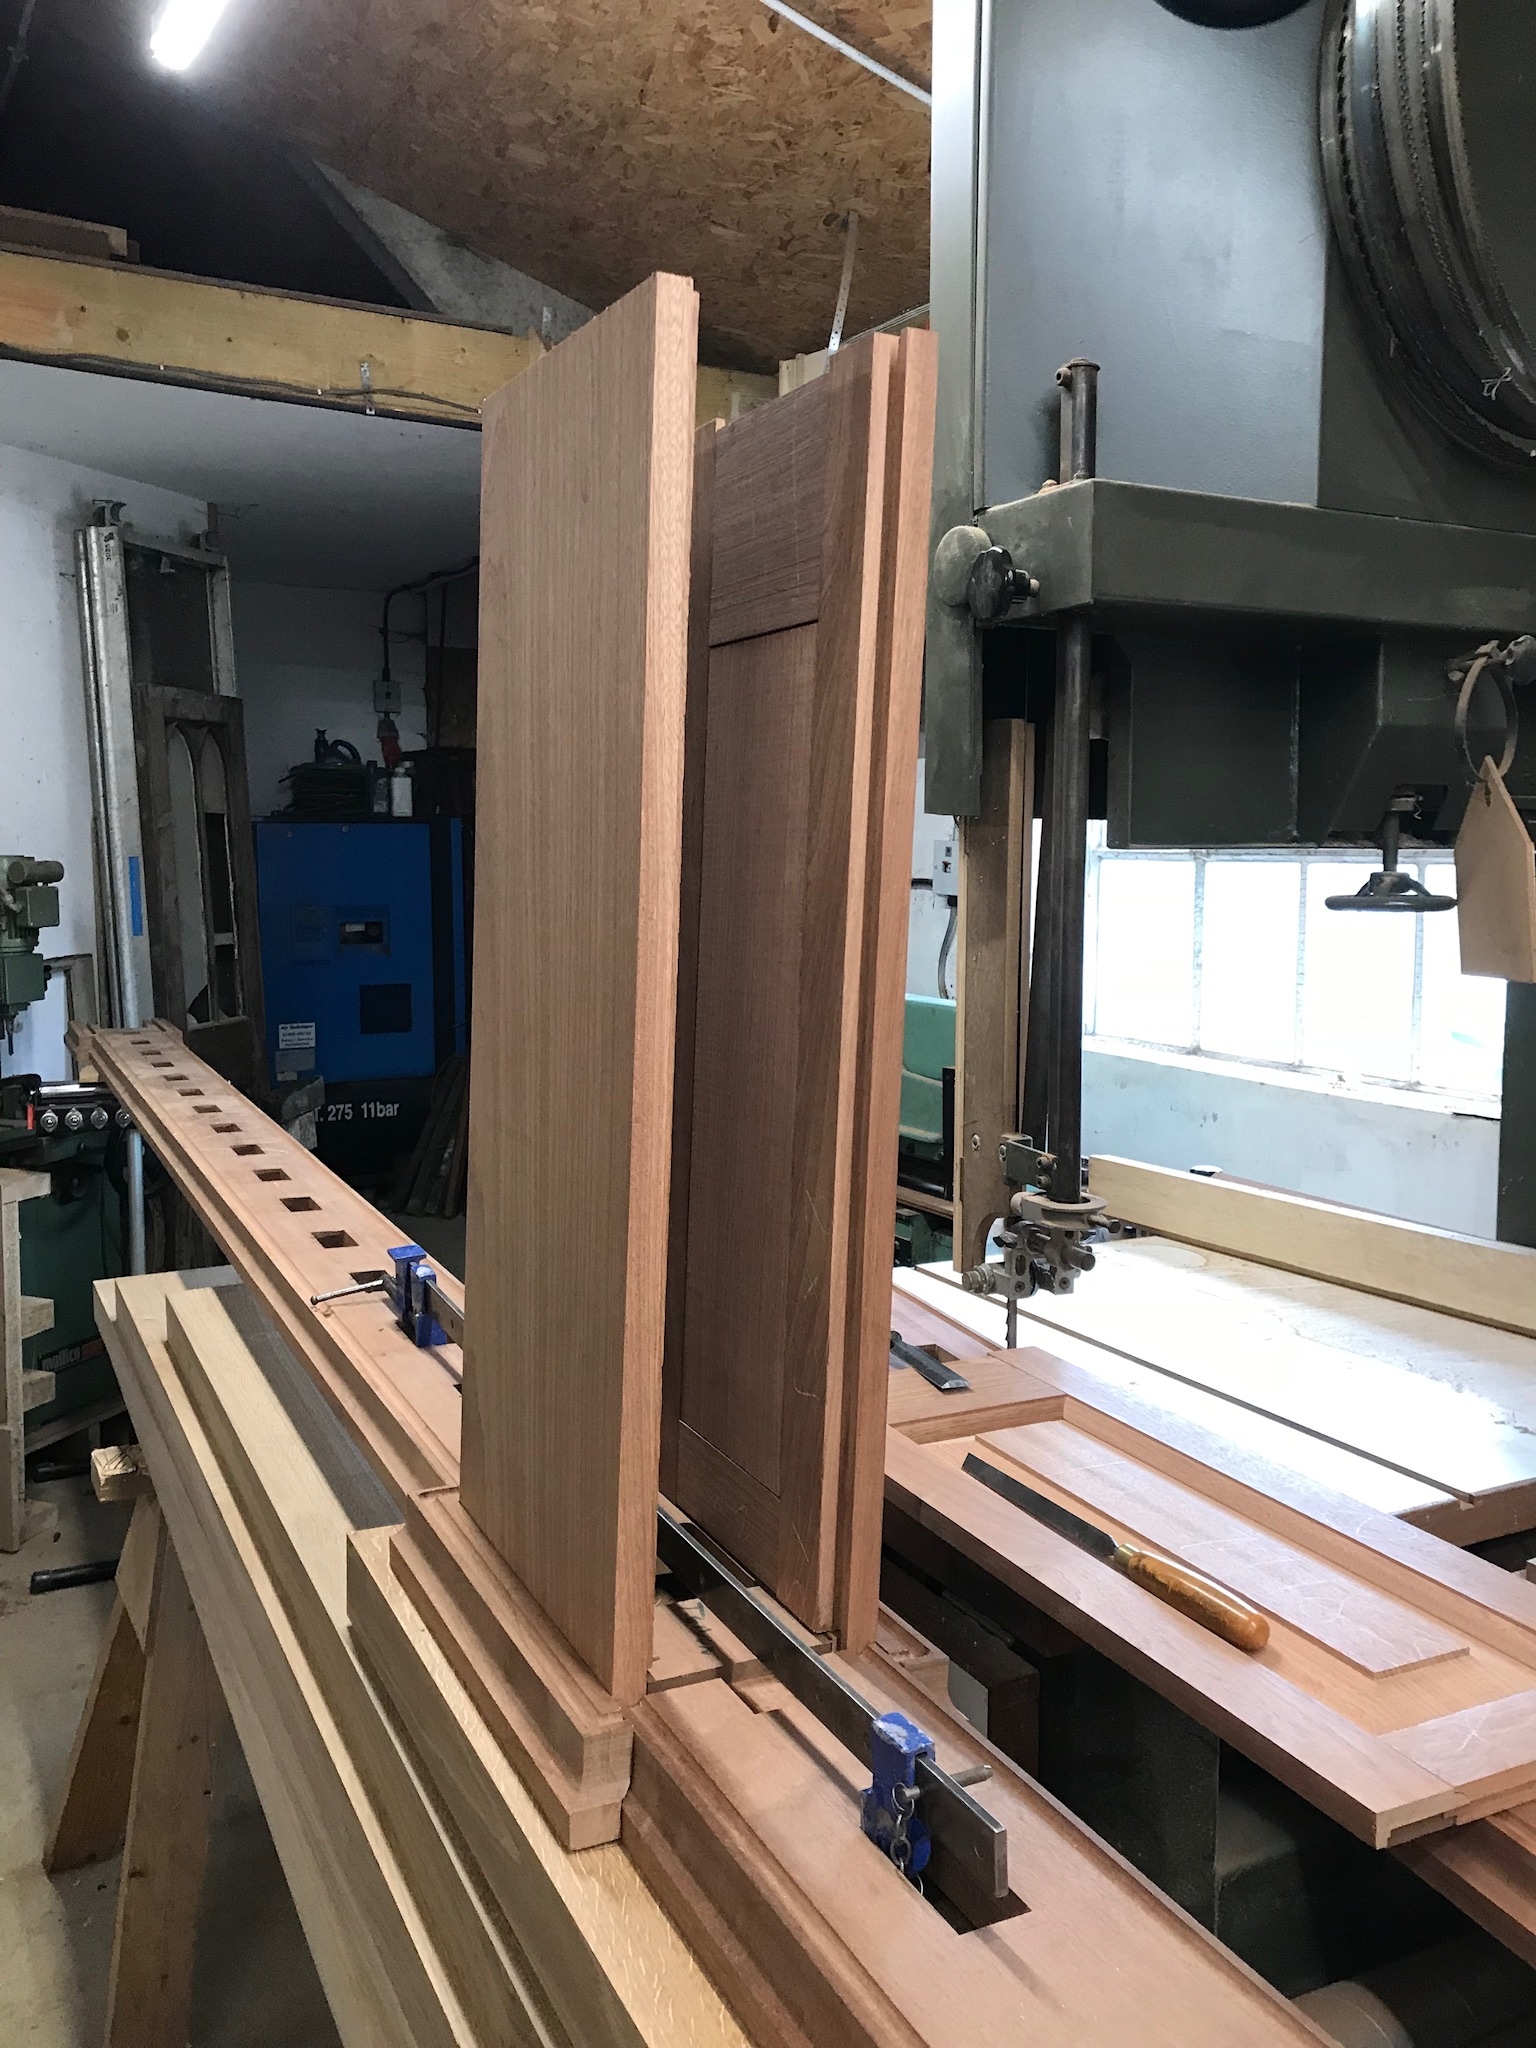
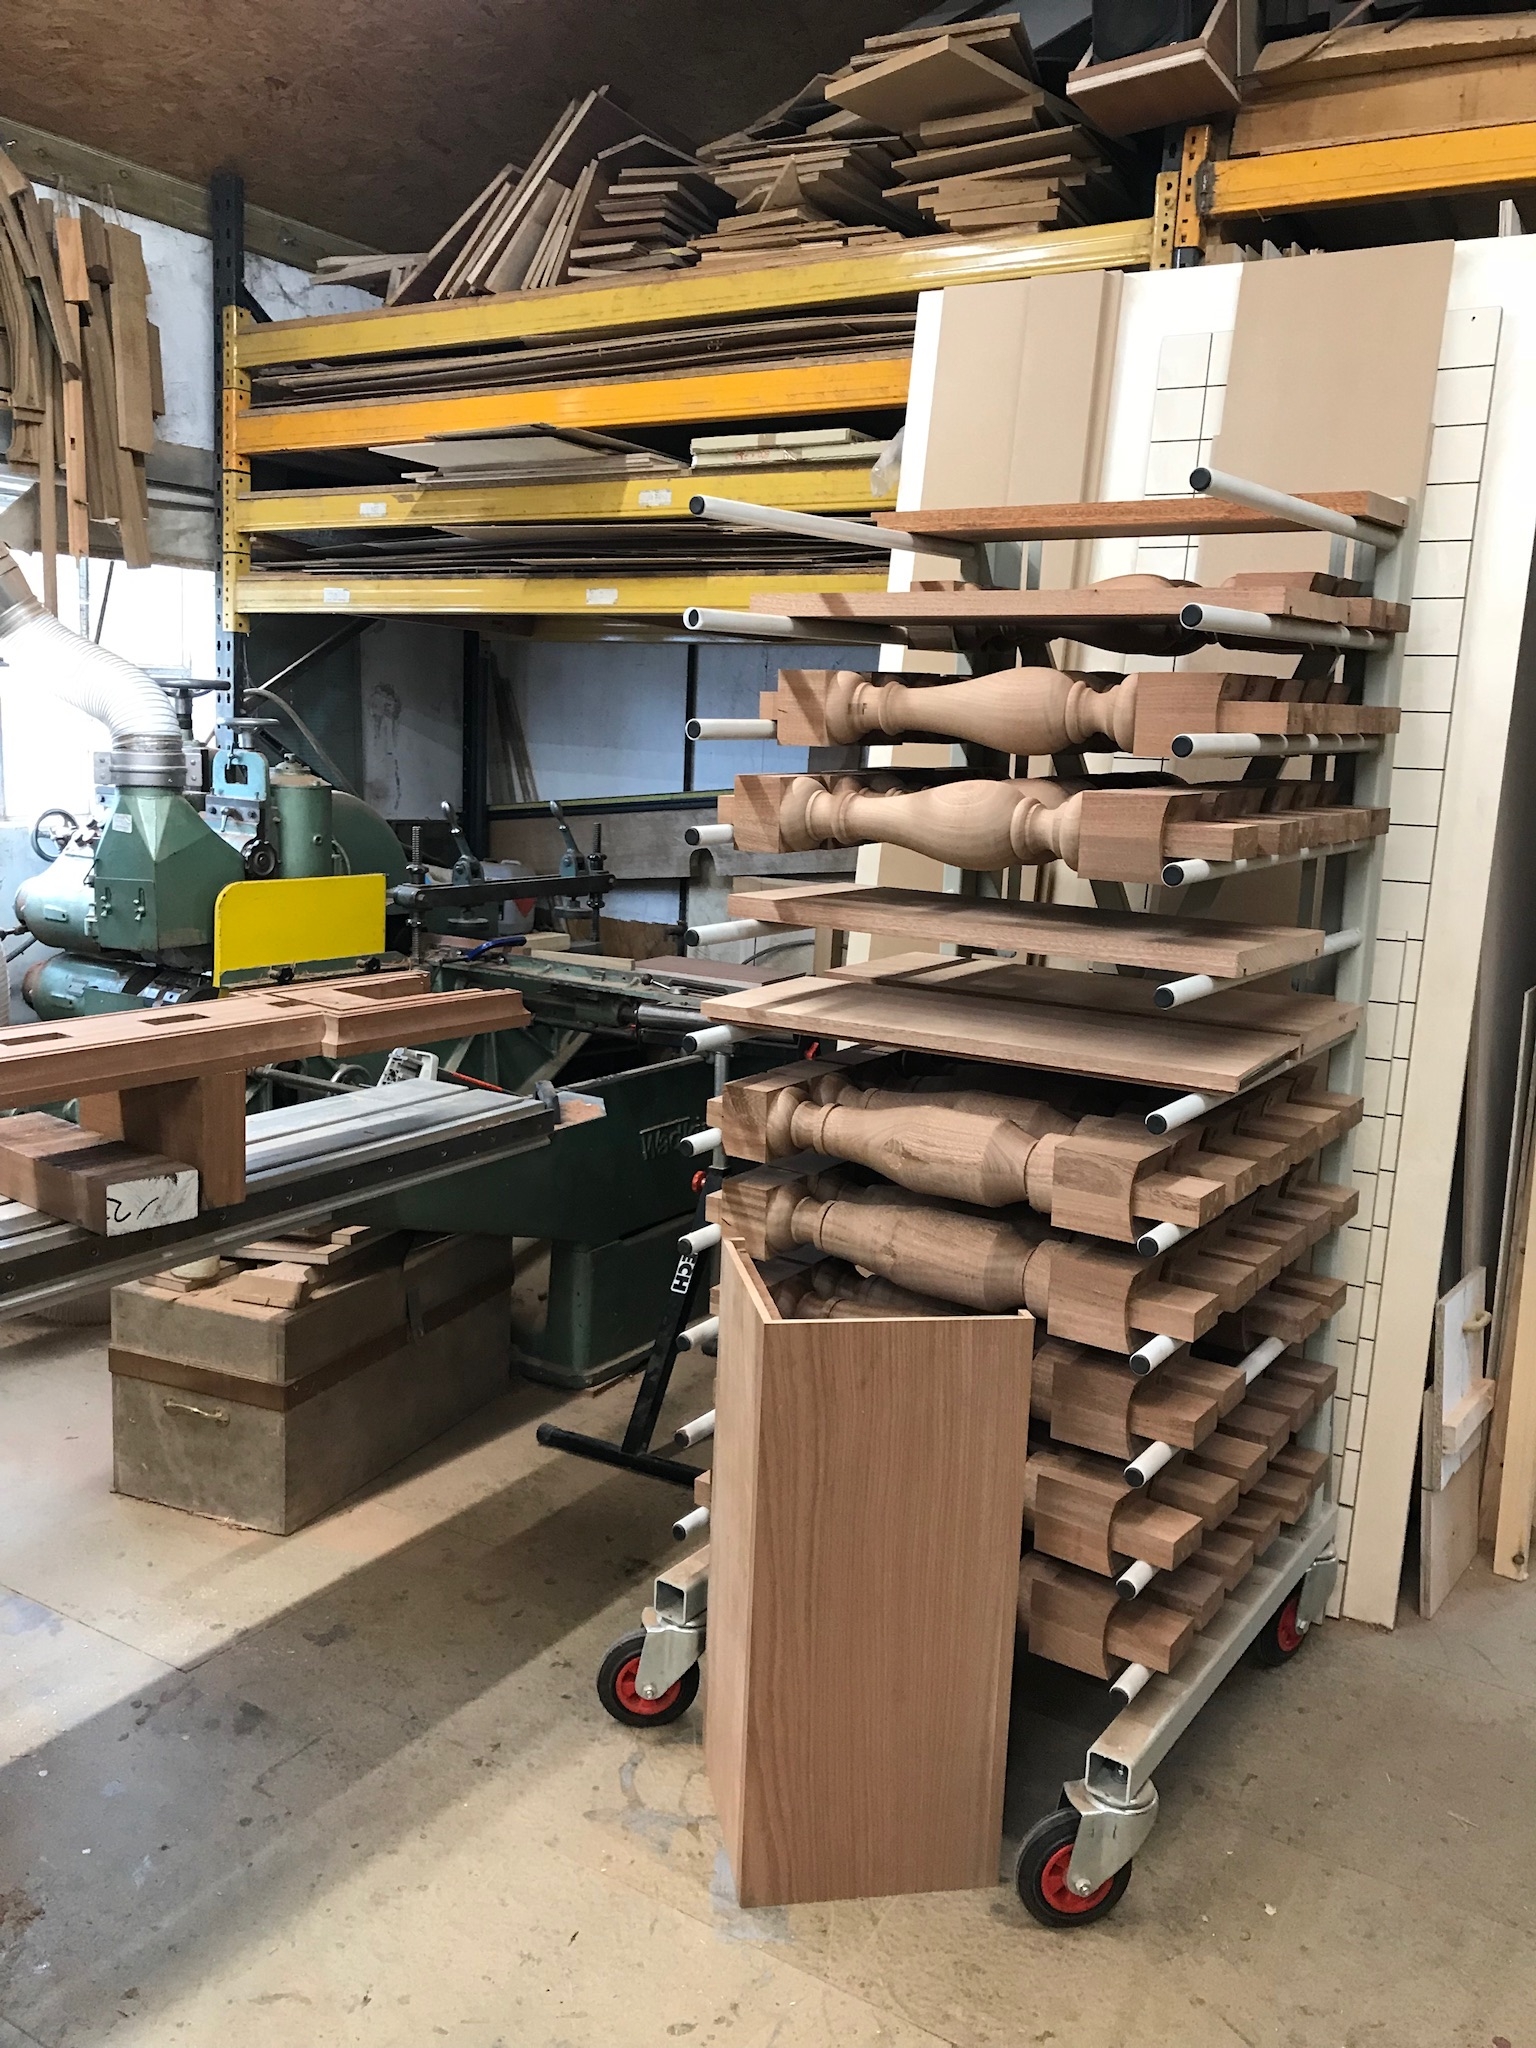
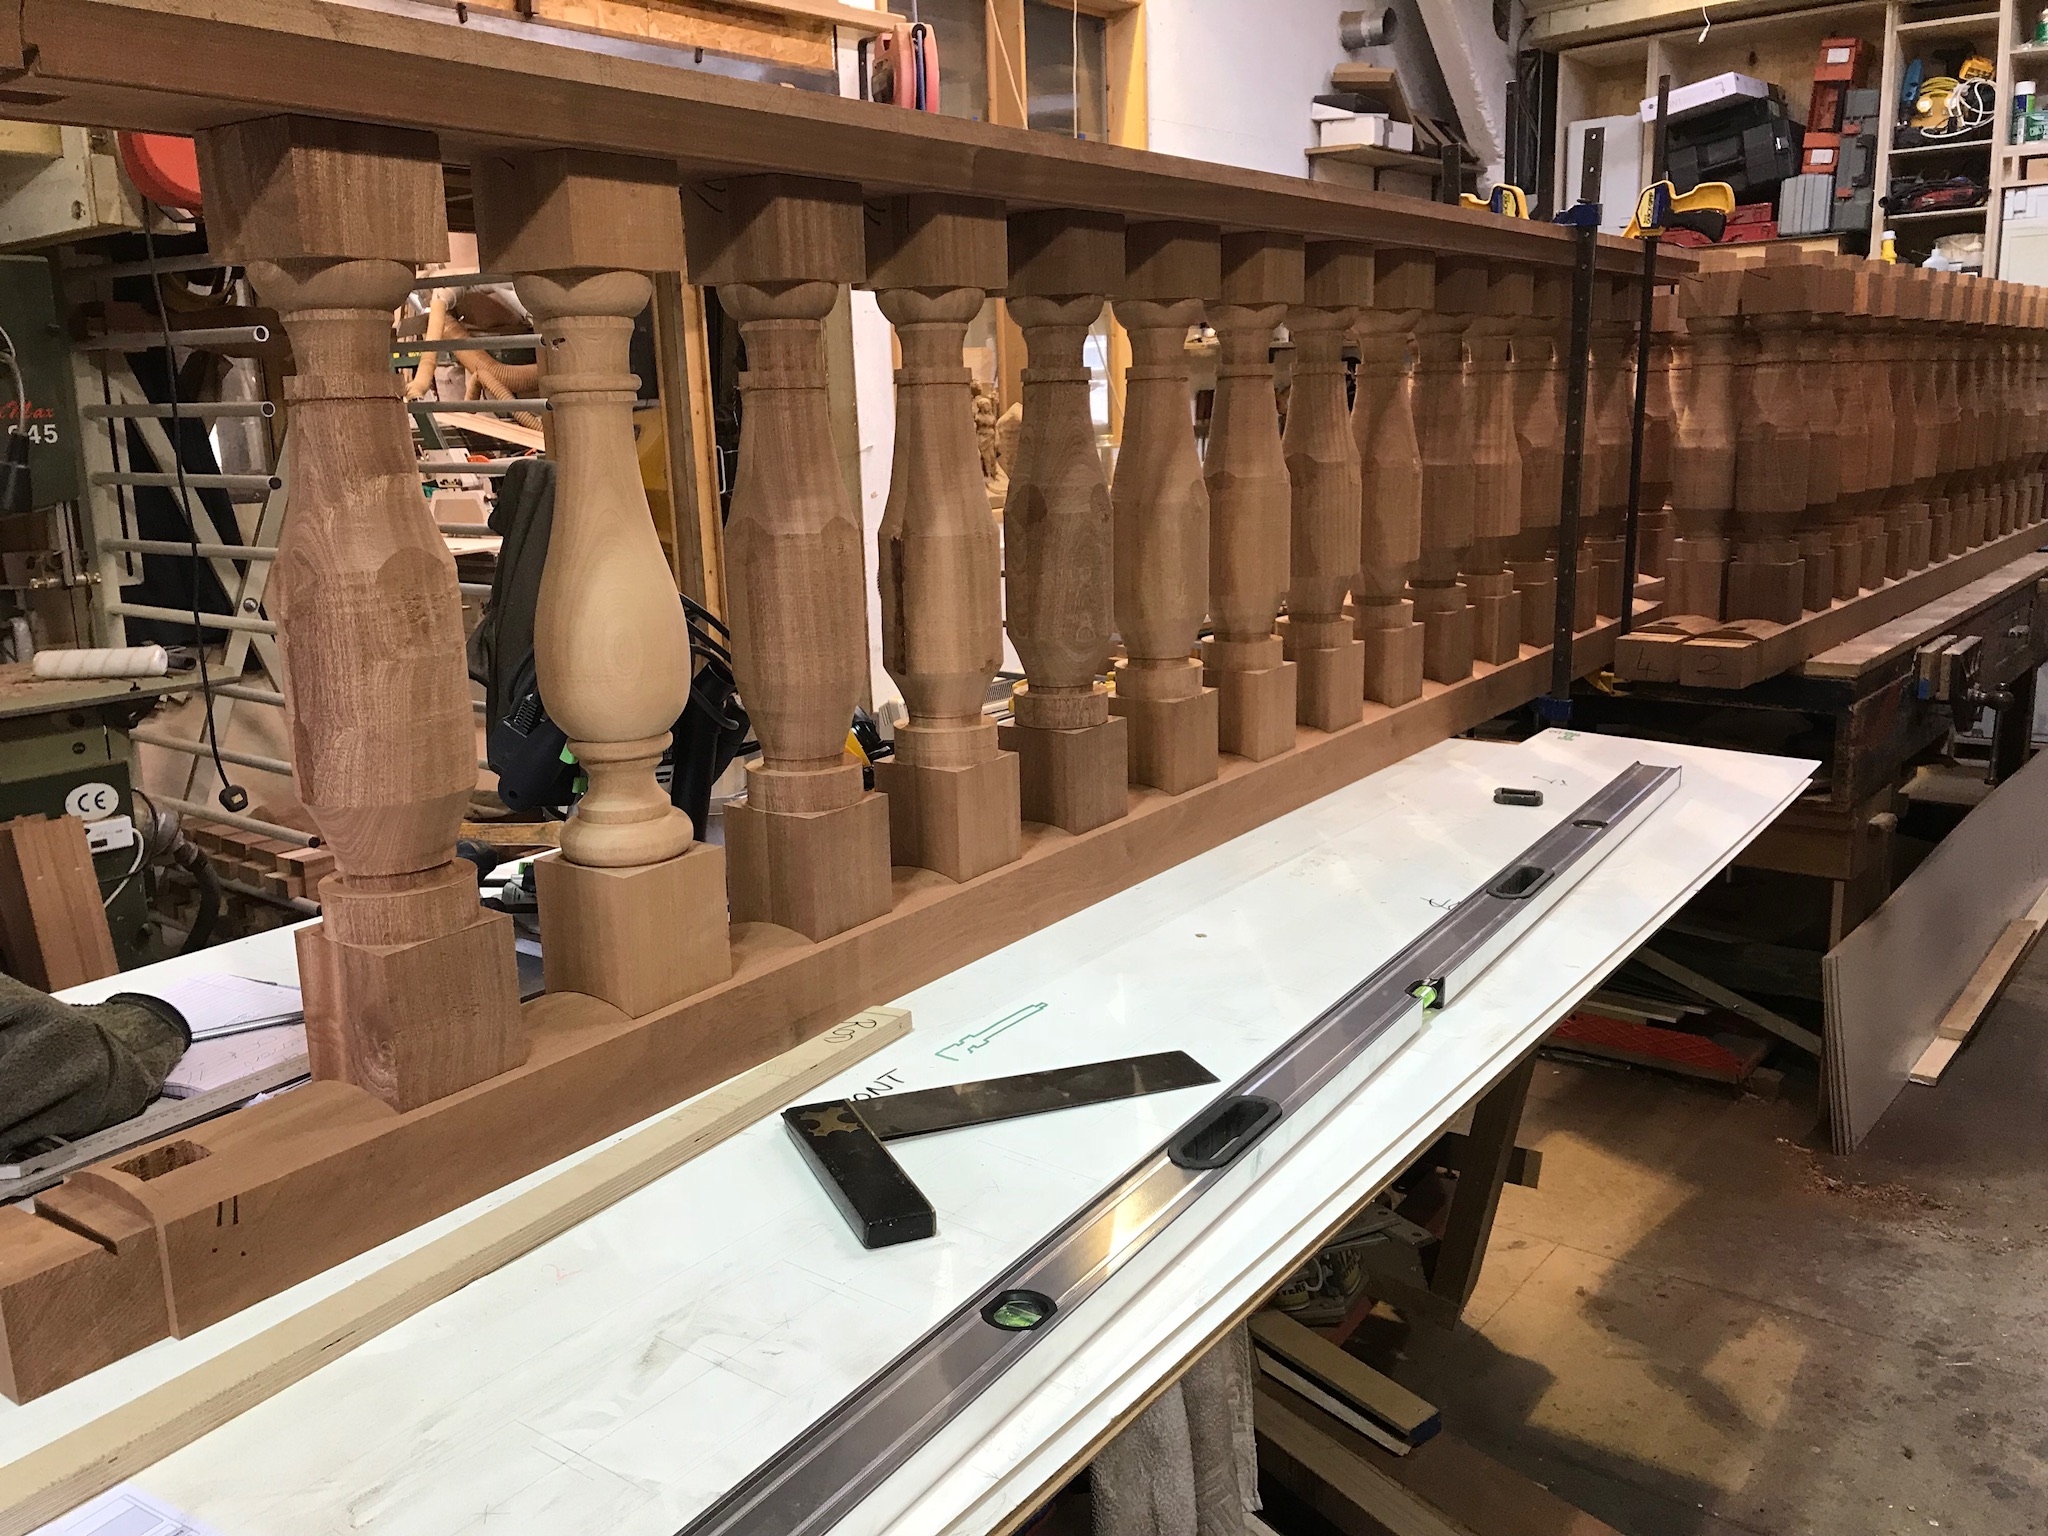
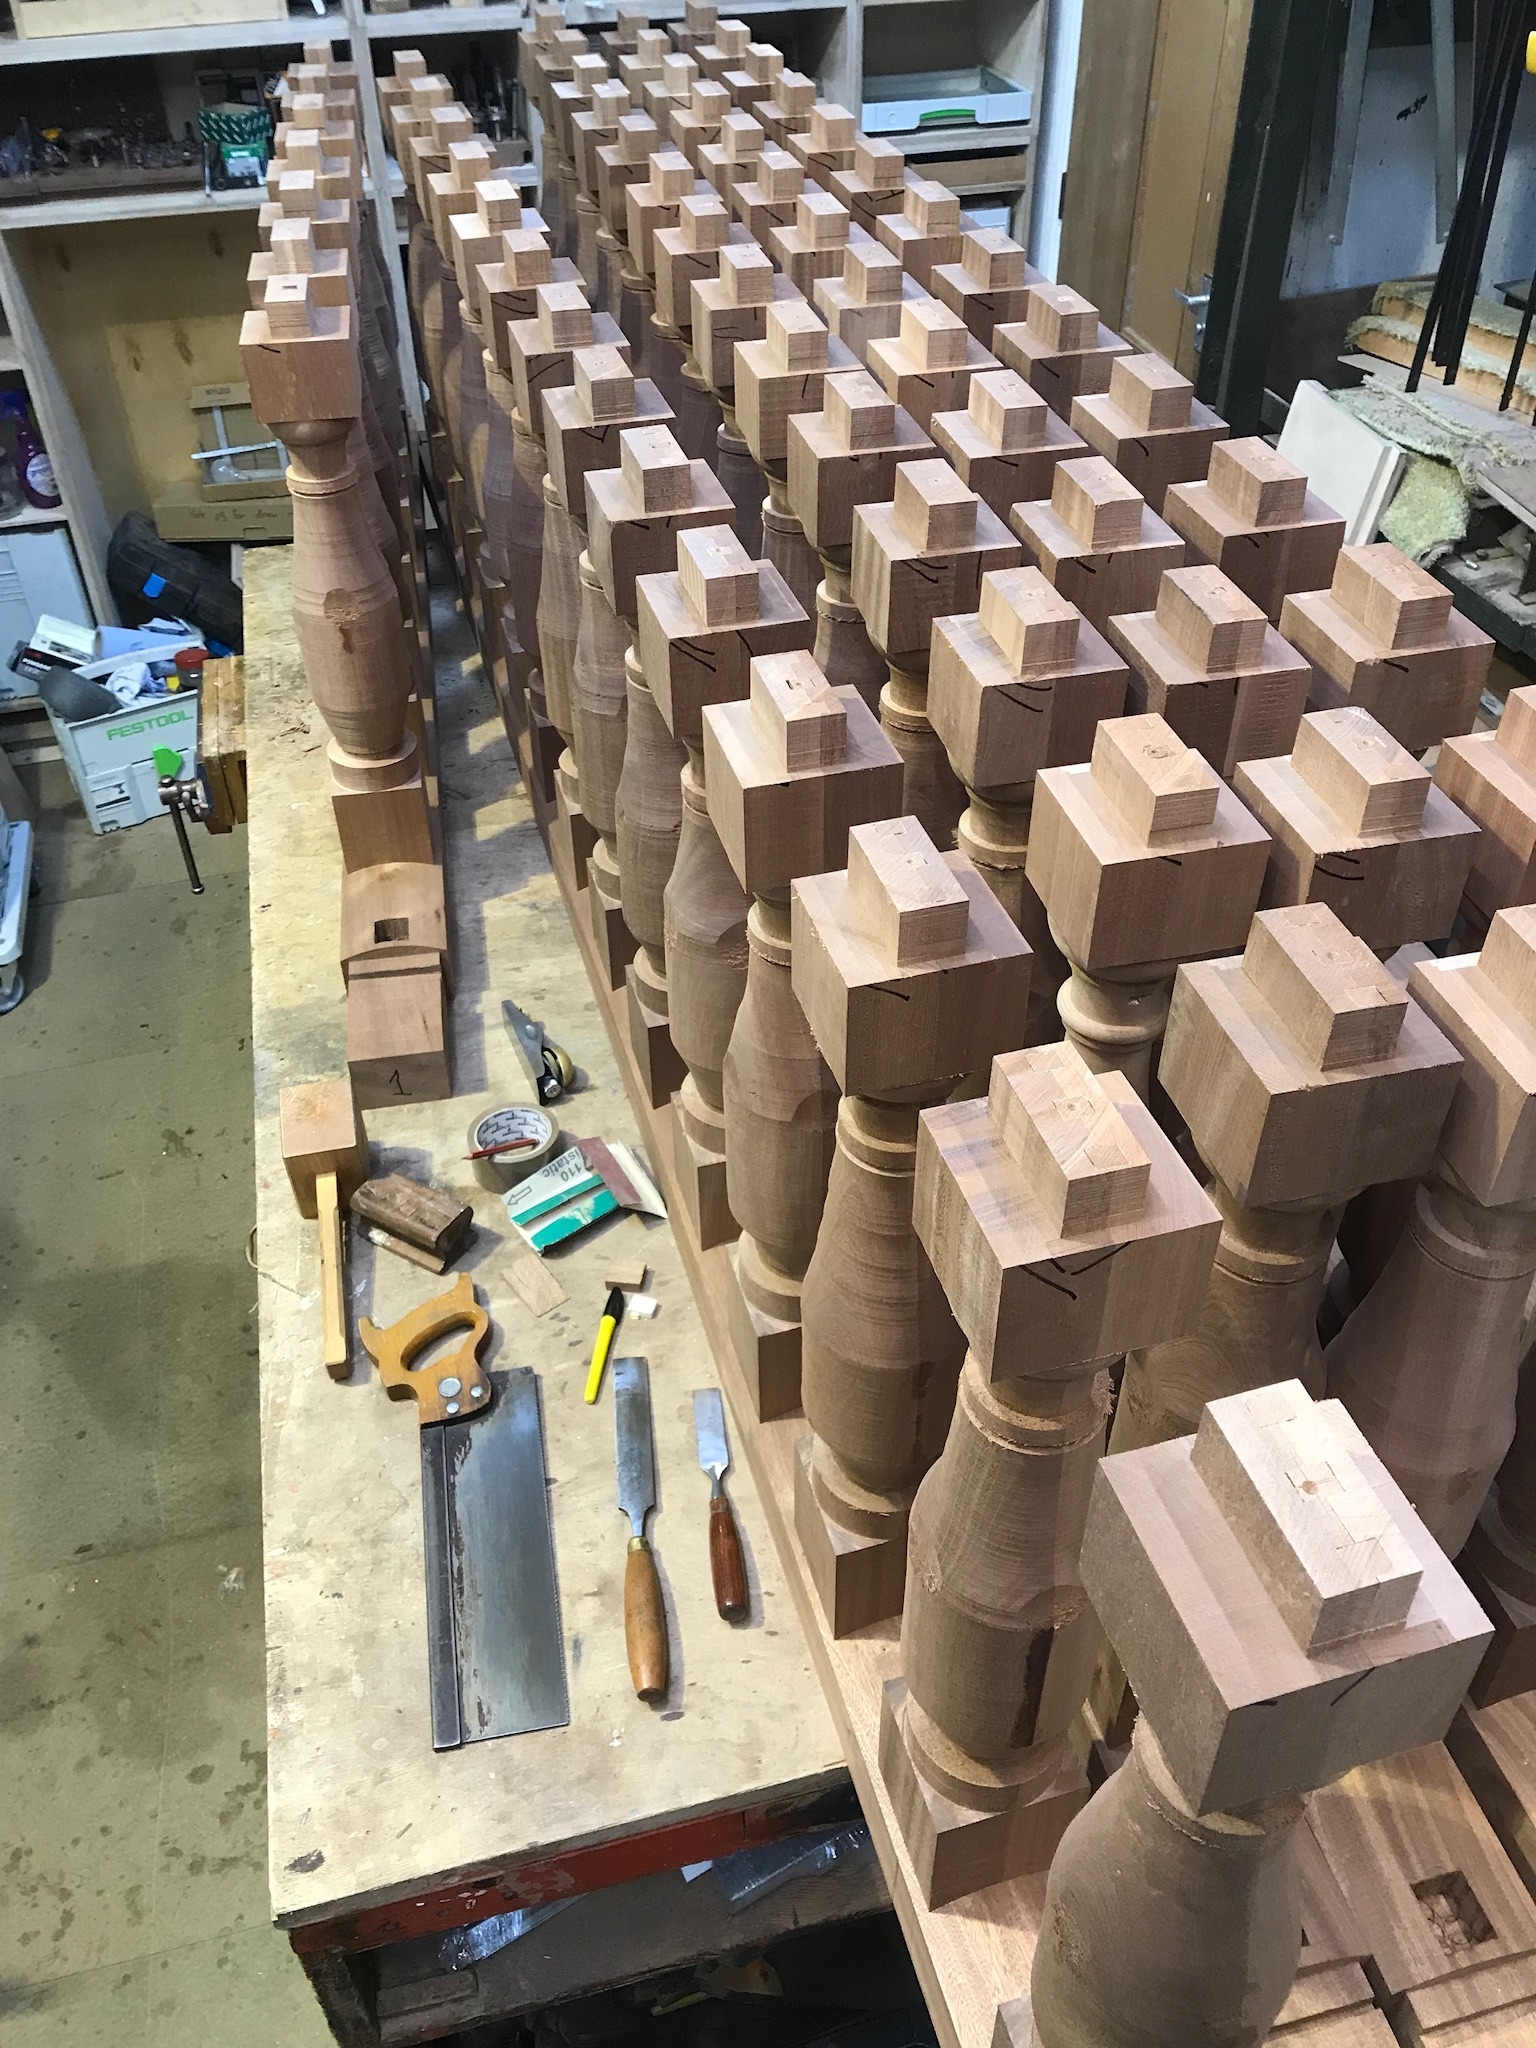
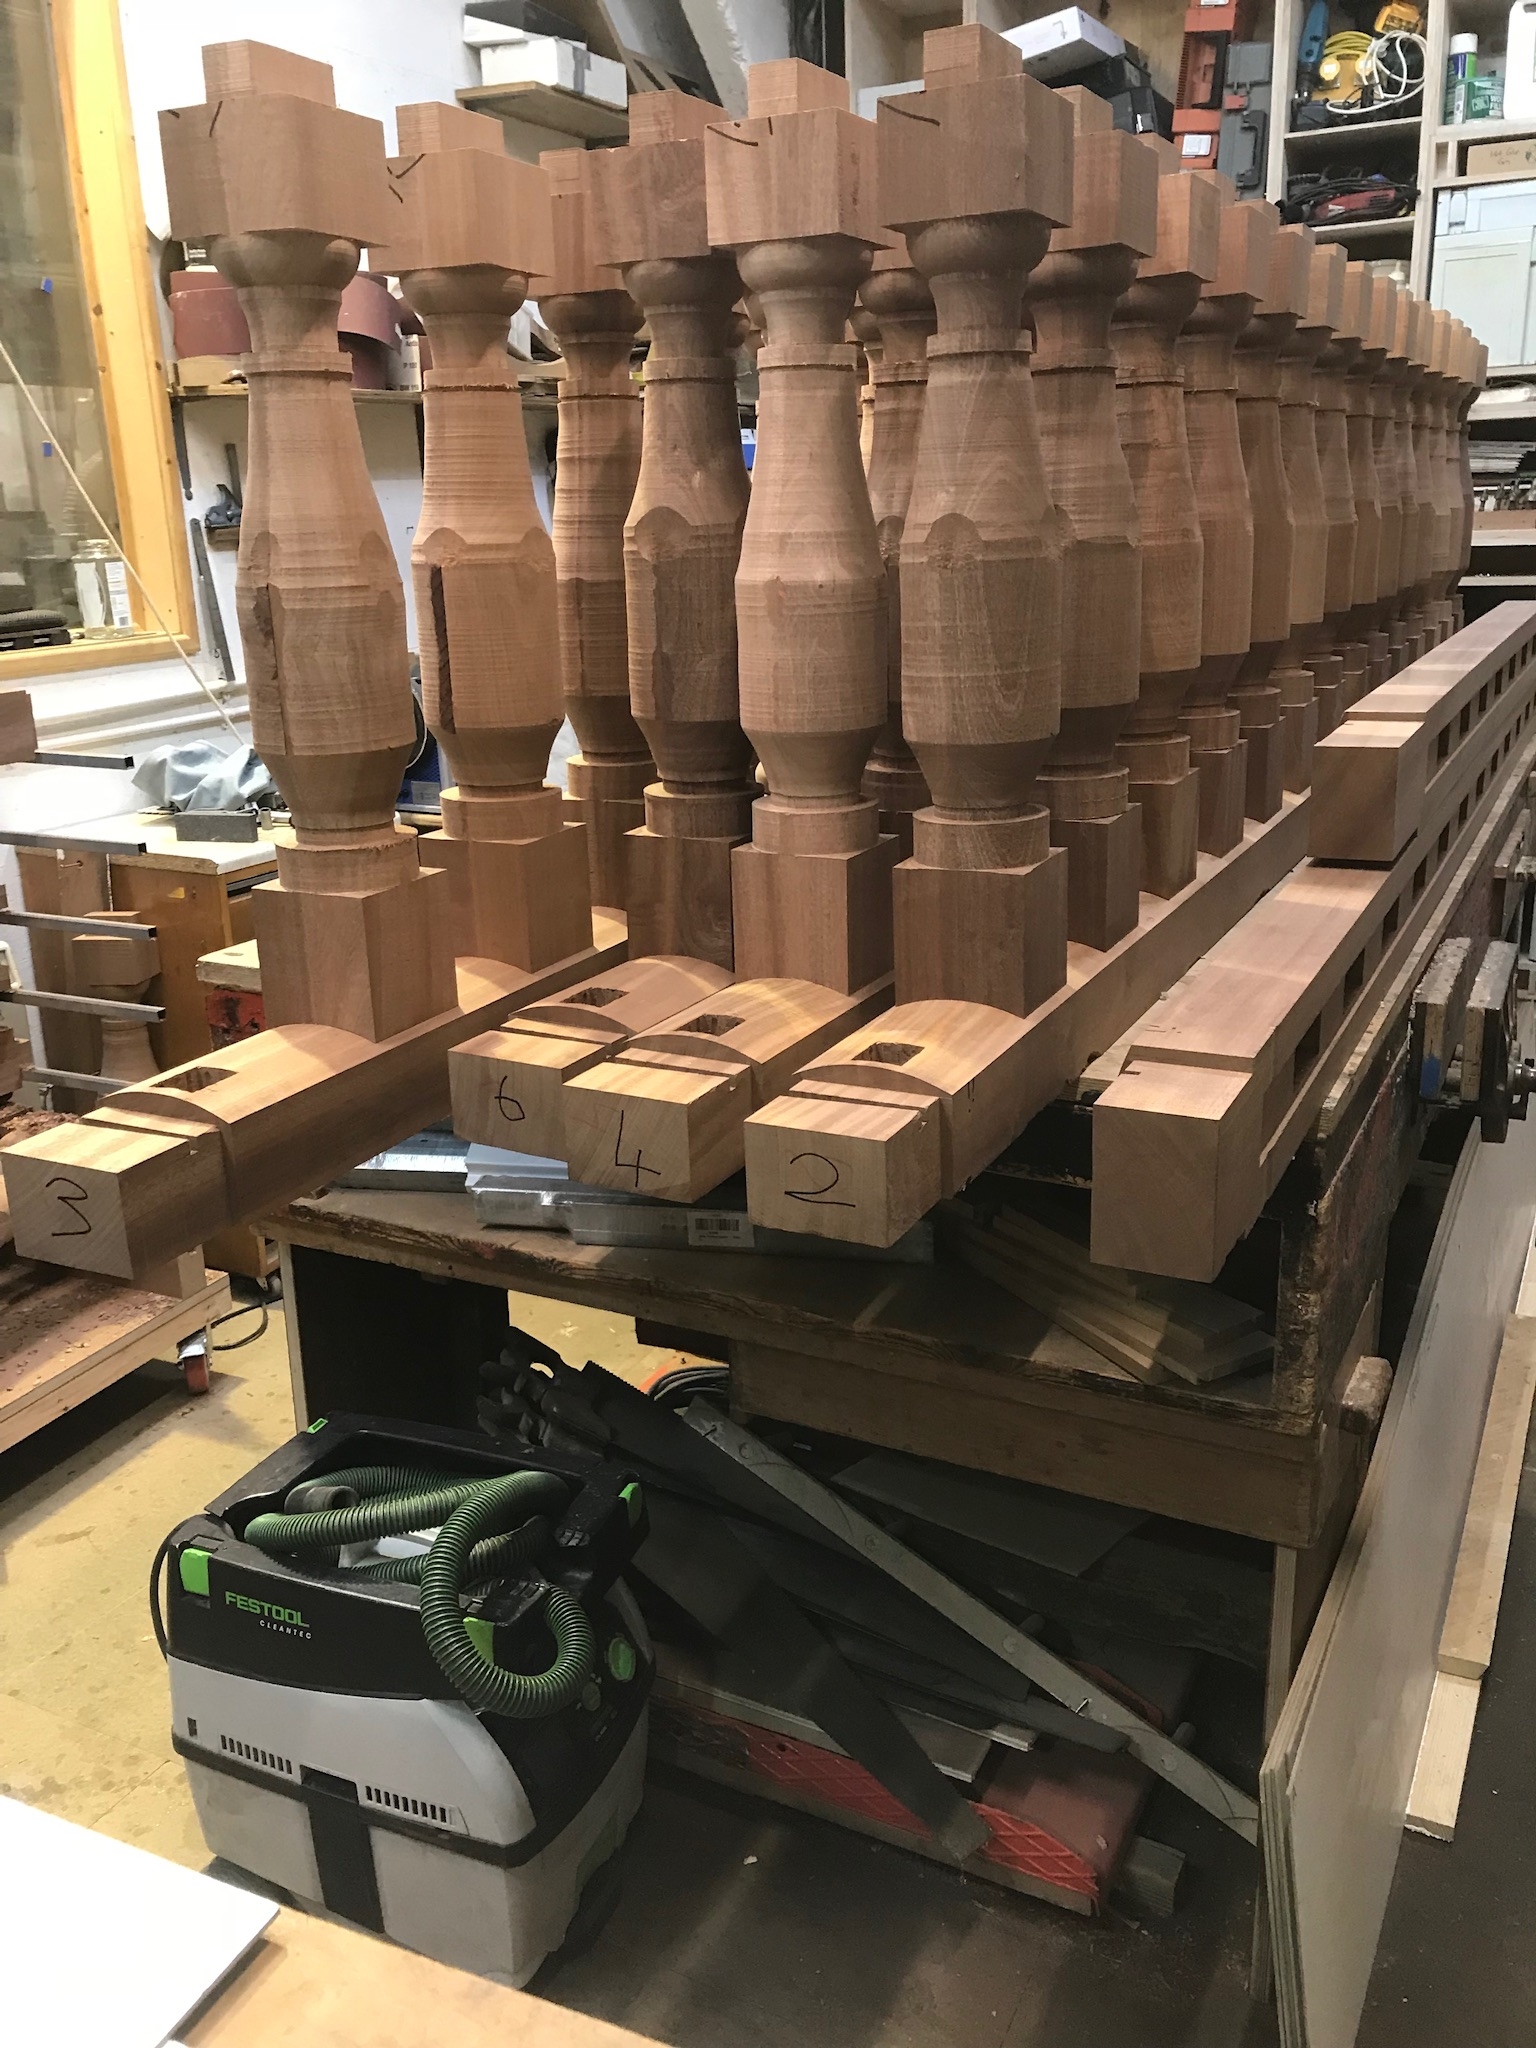
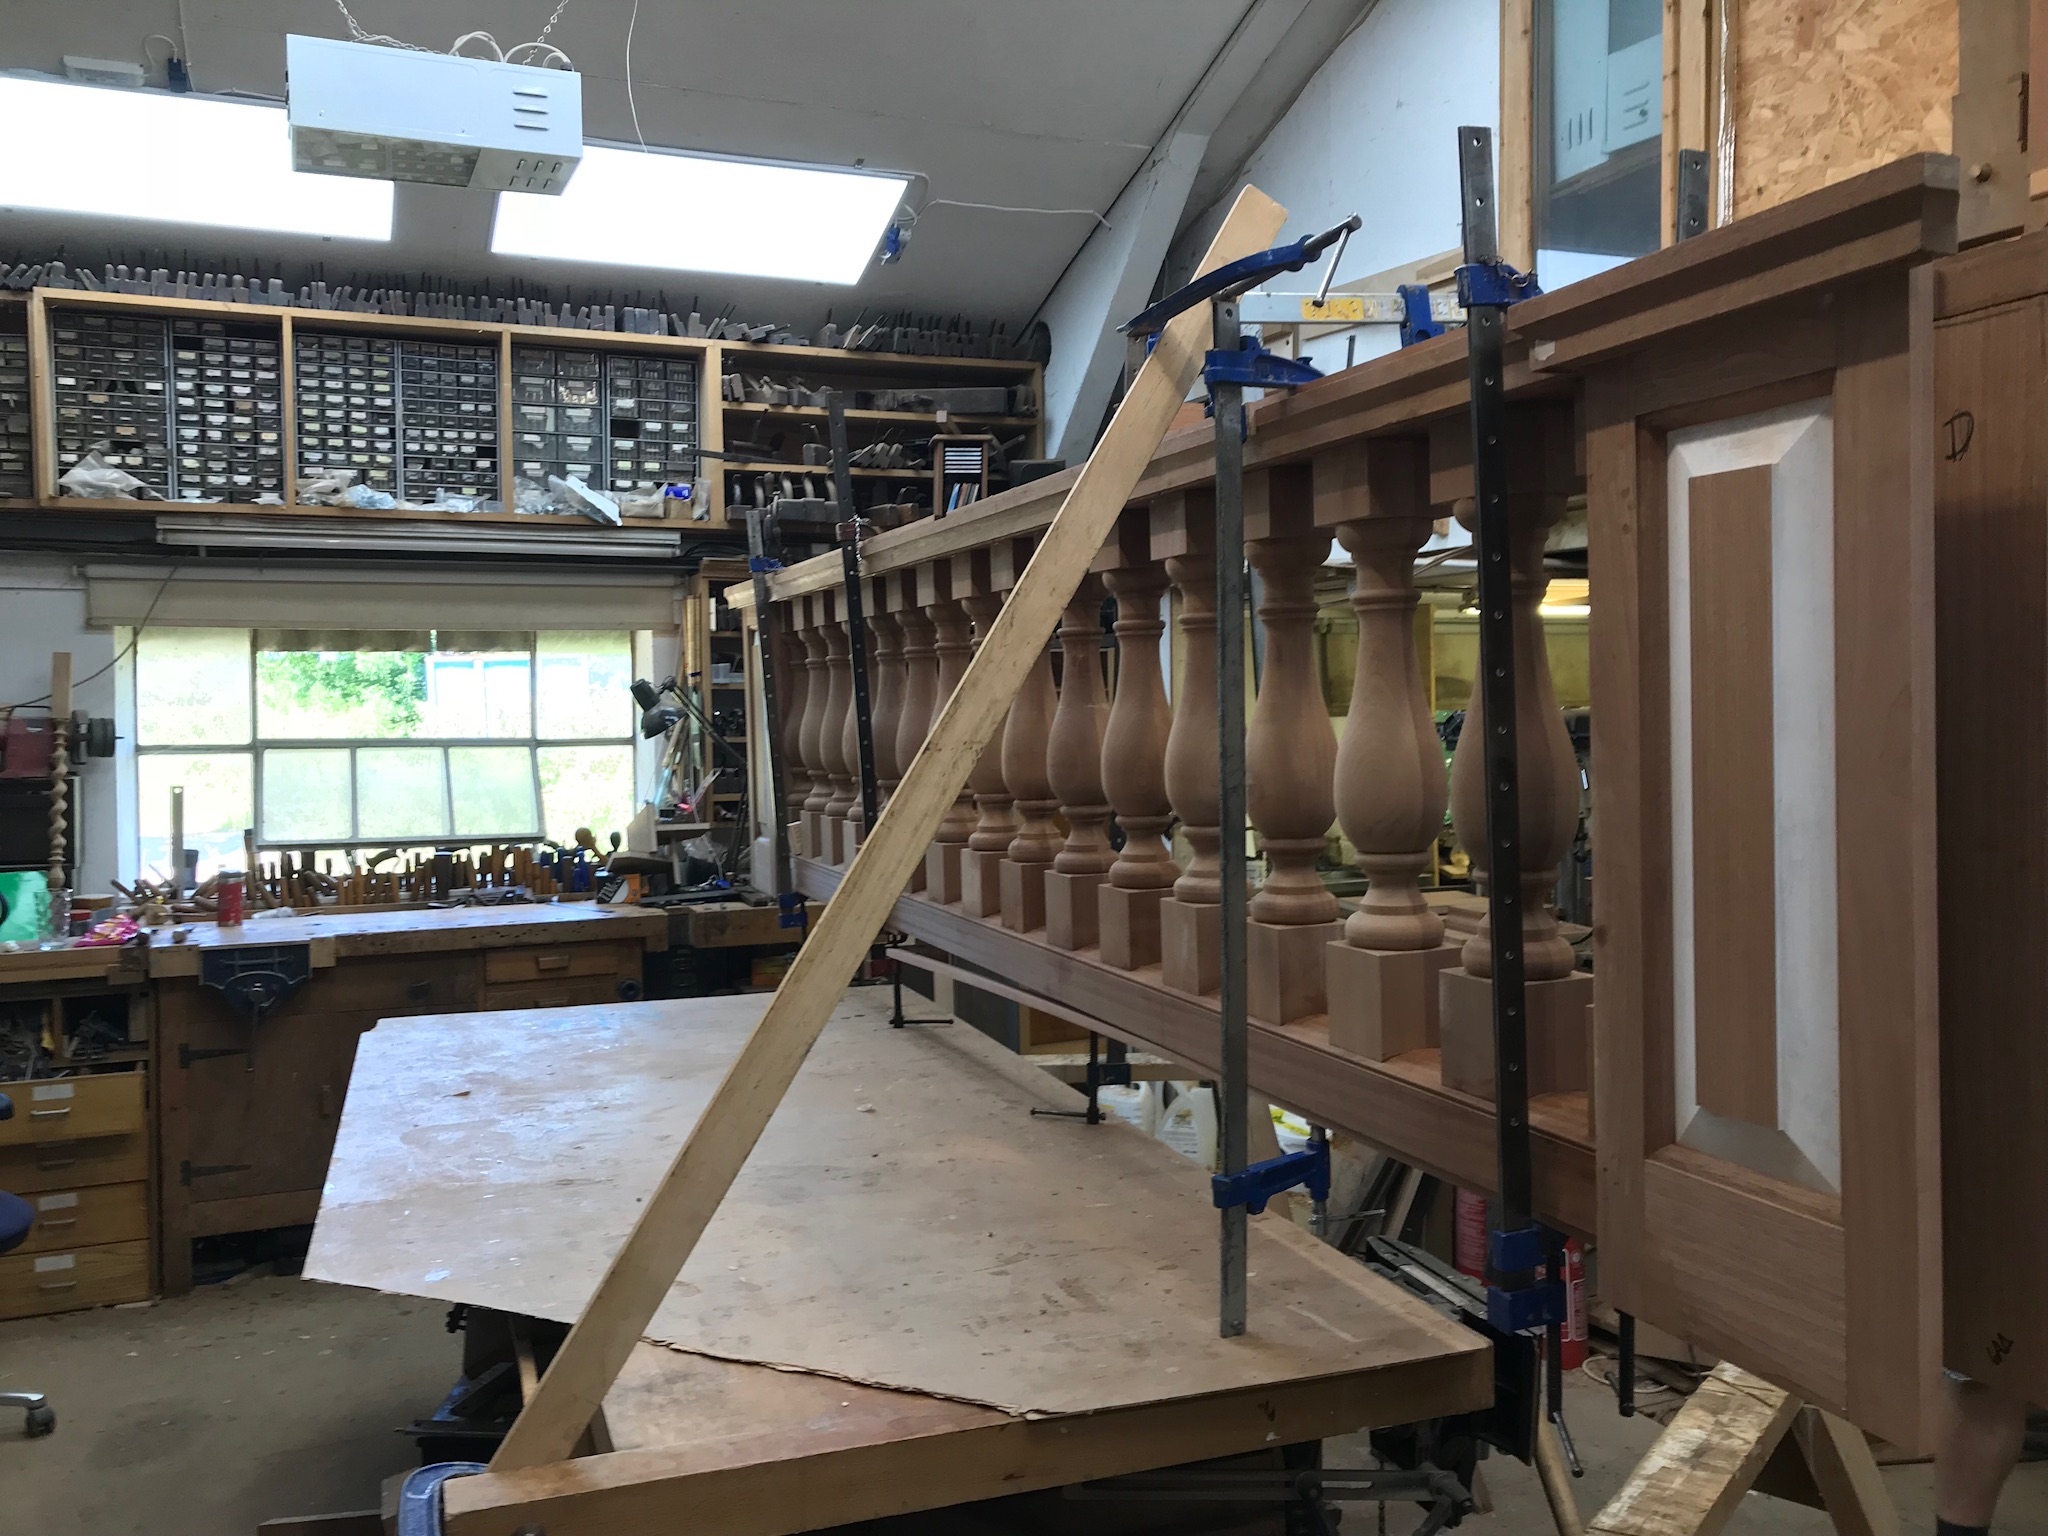
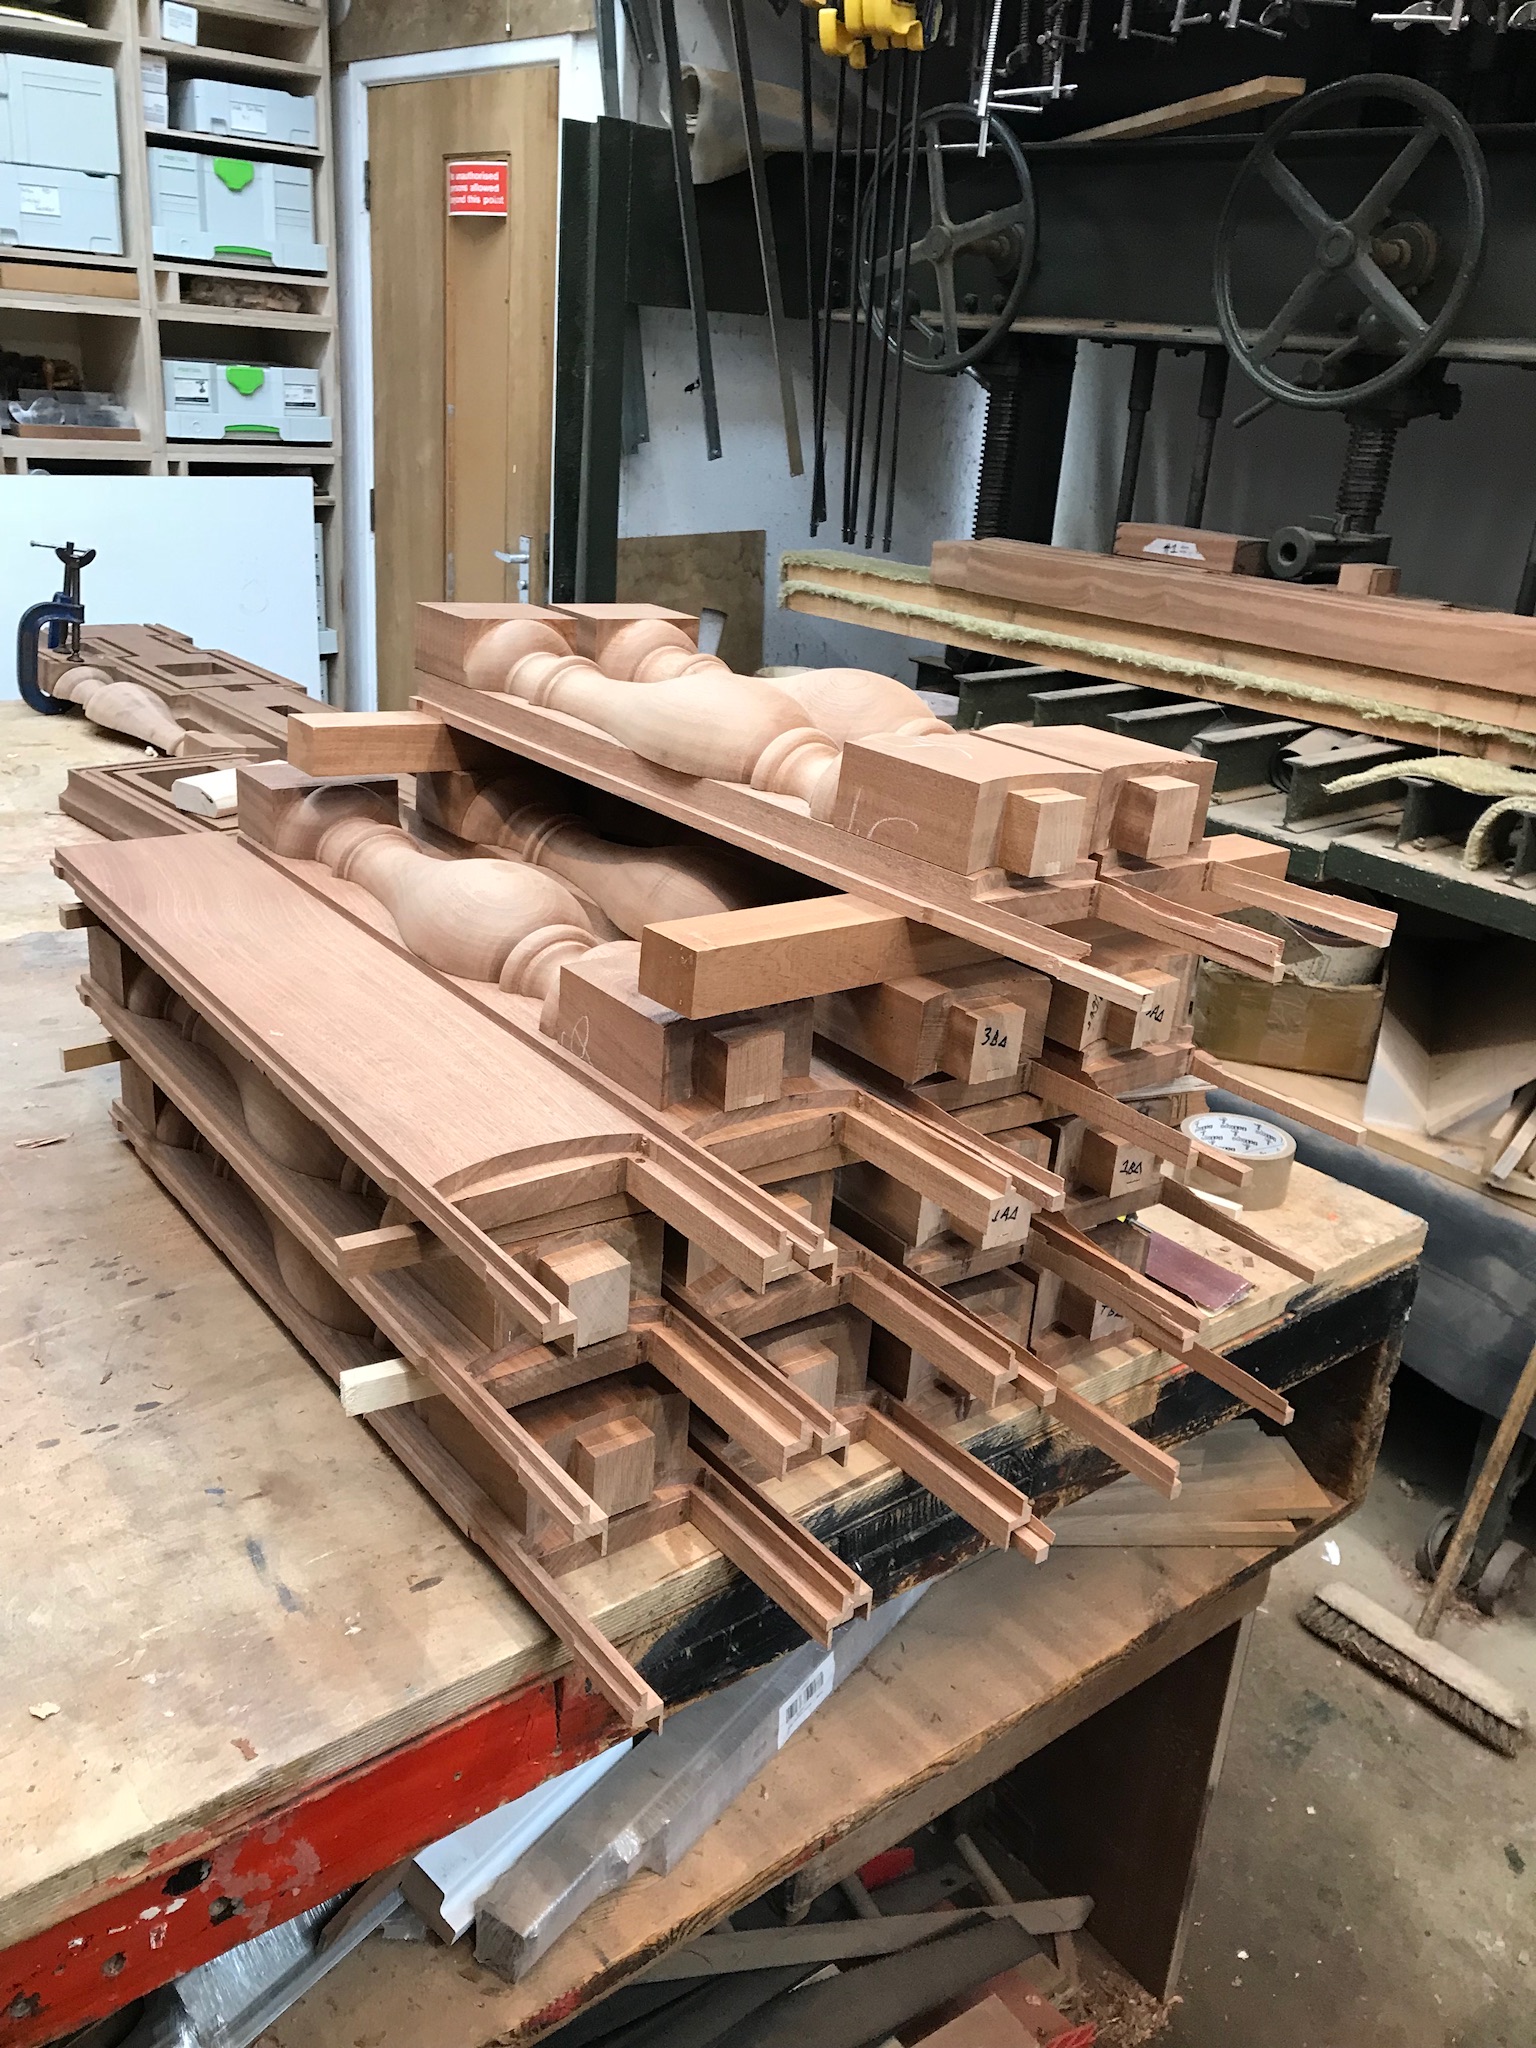
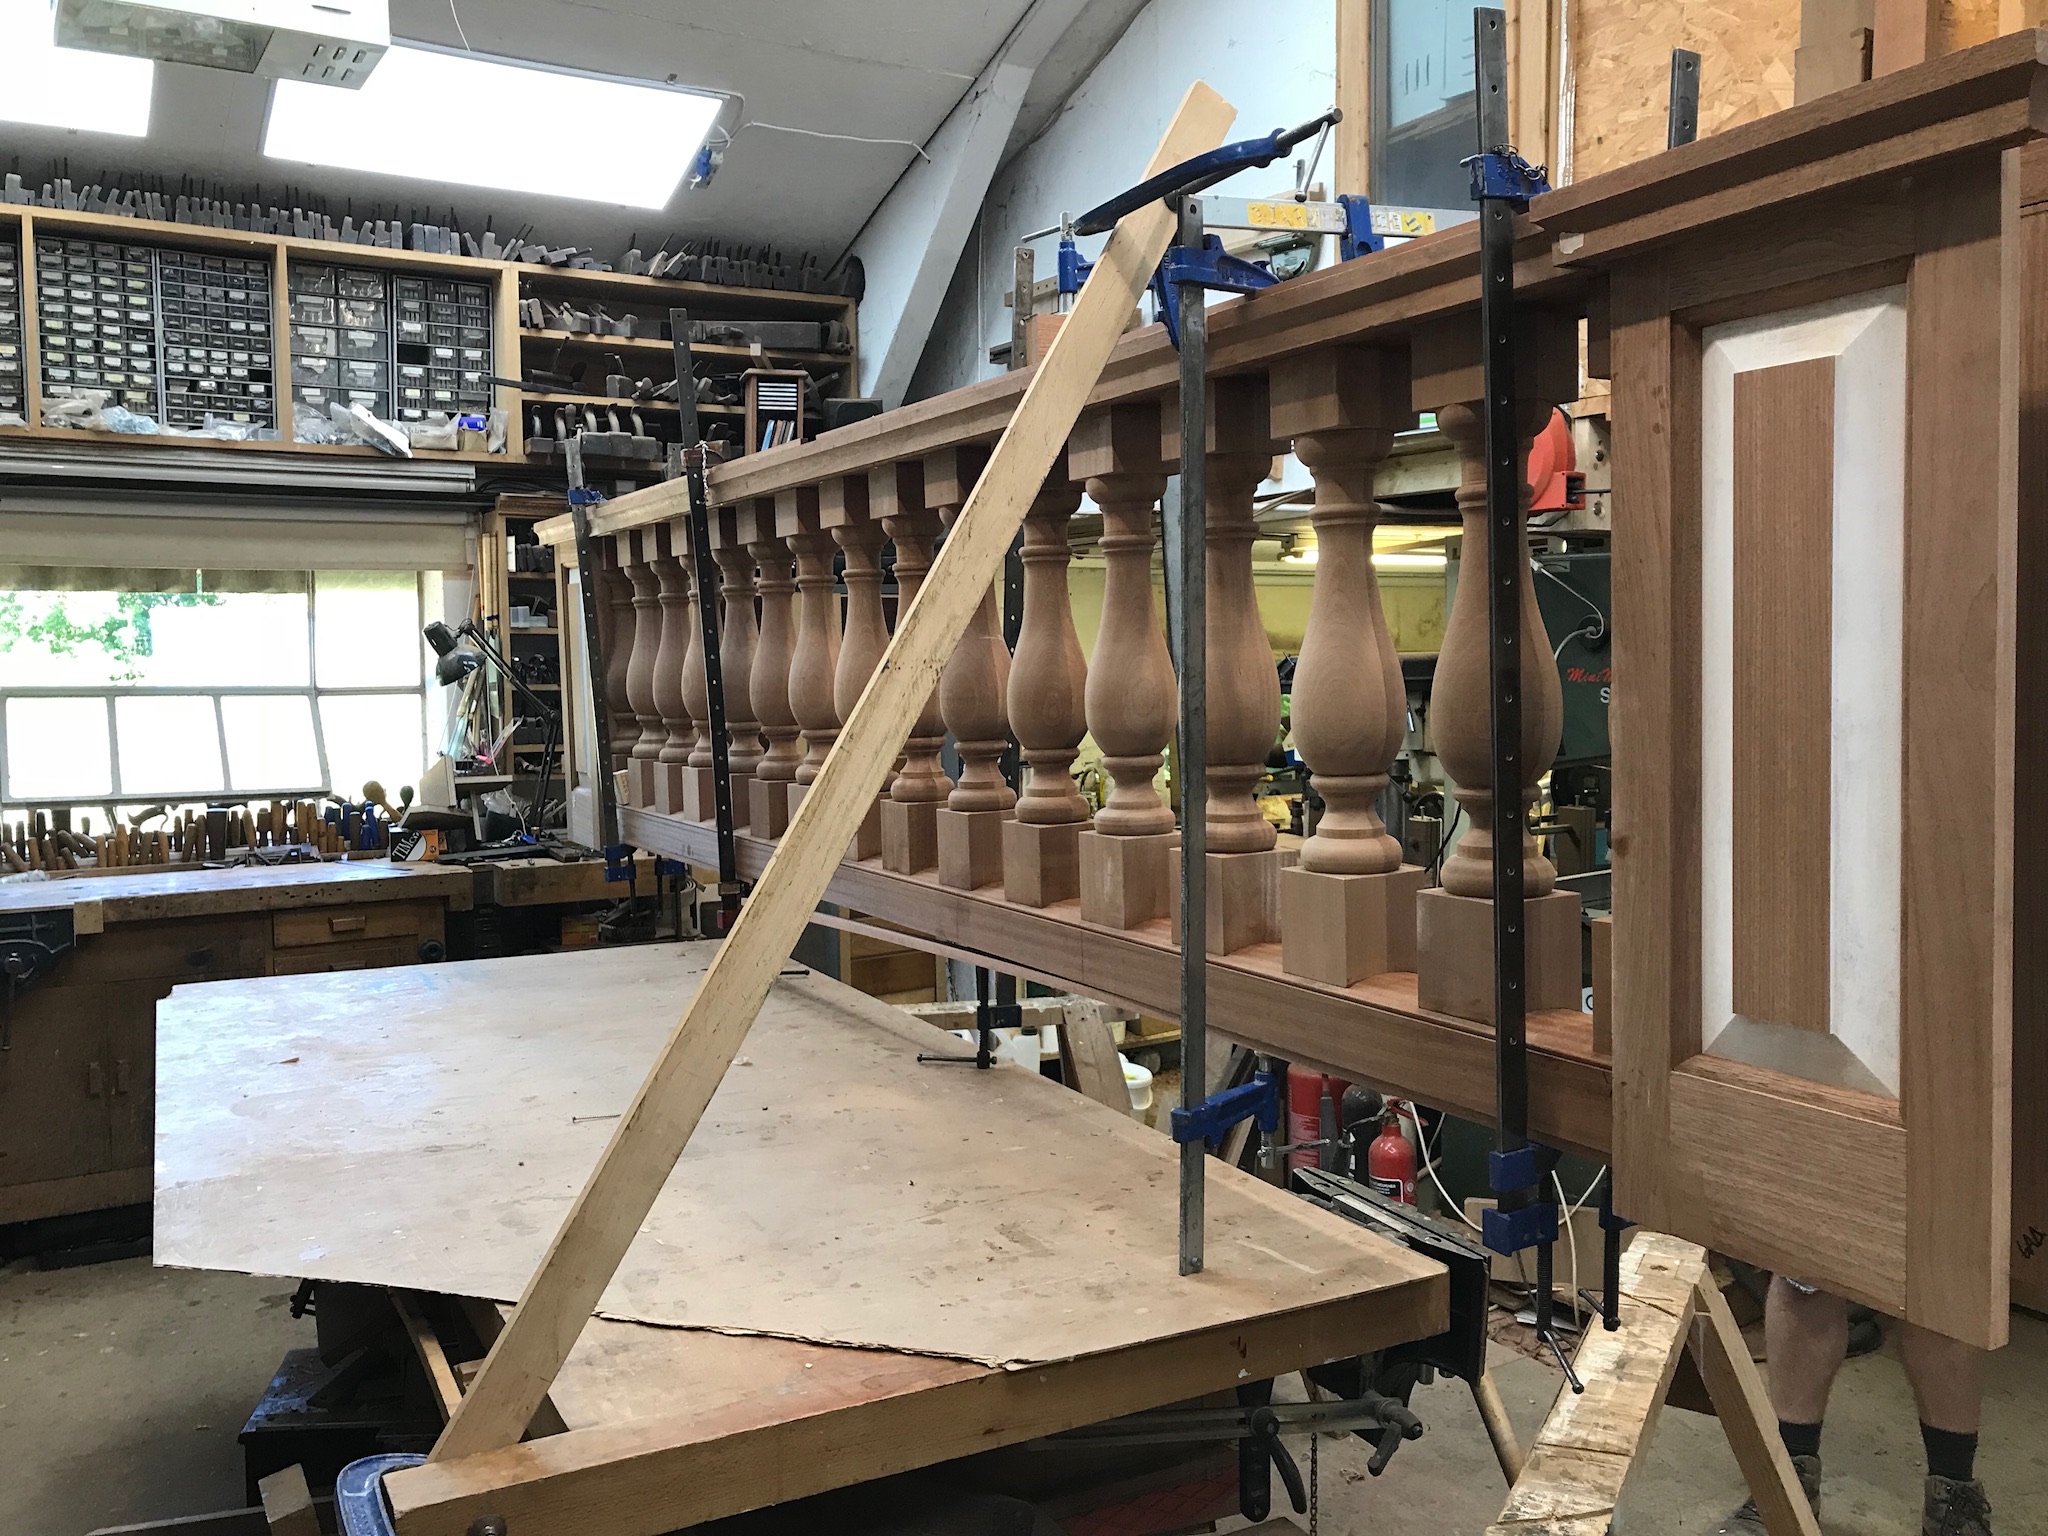
Spindles
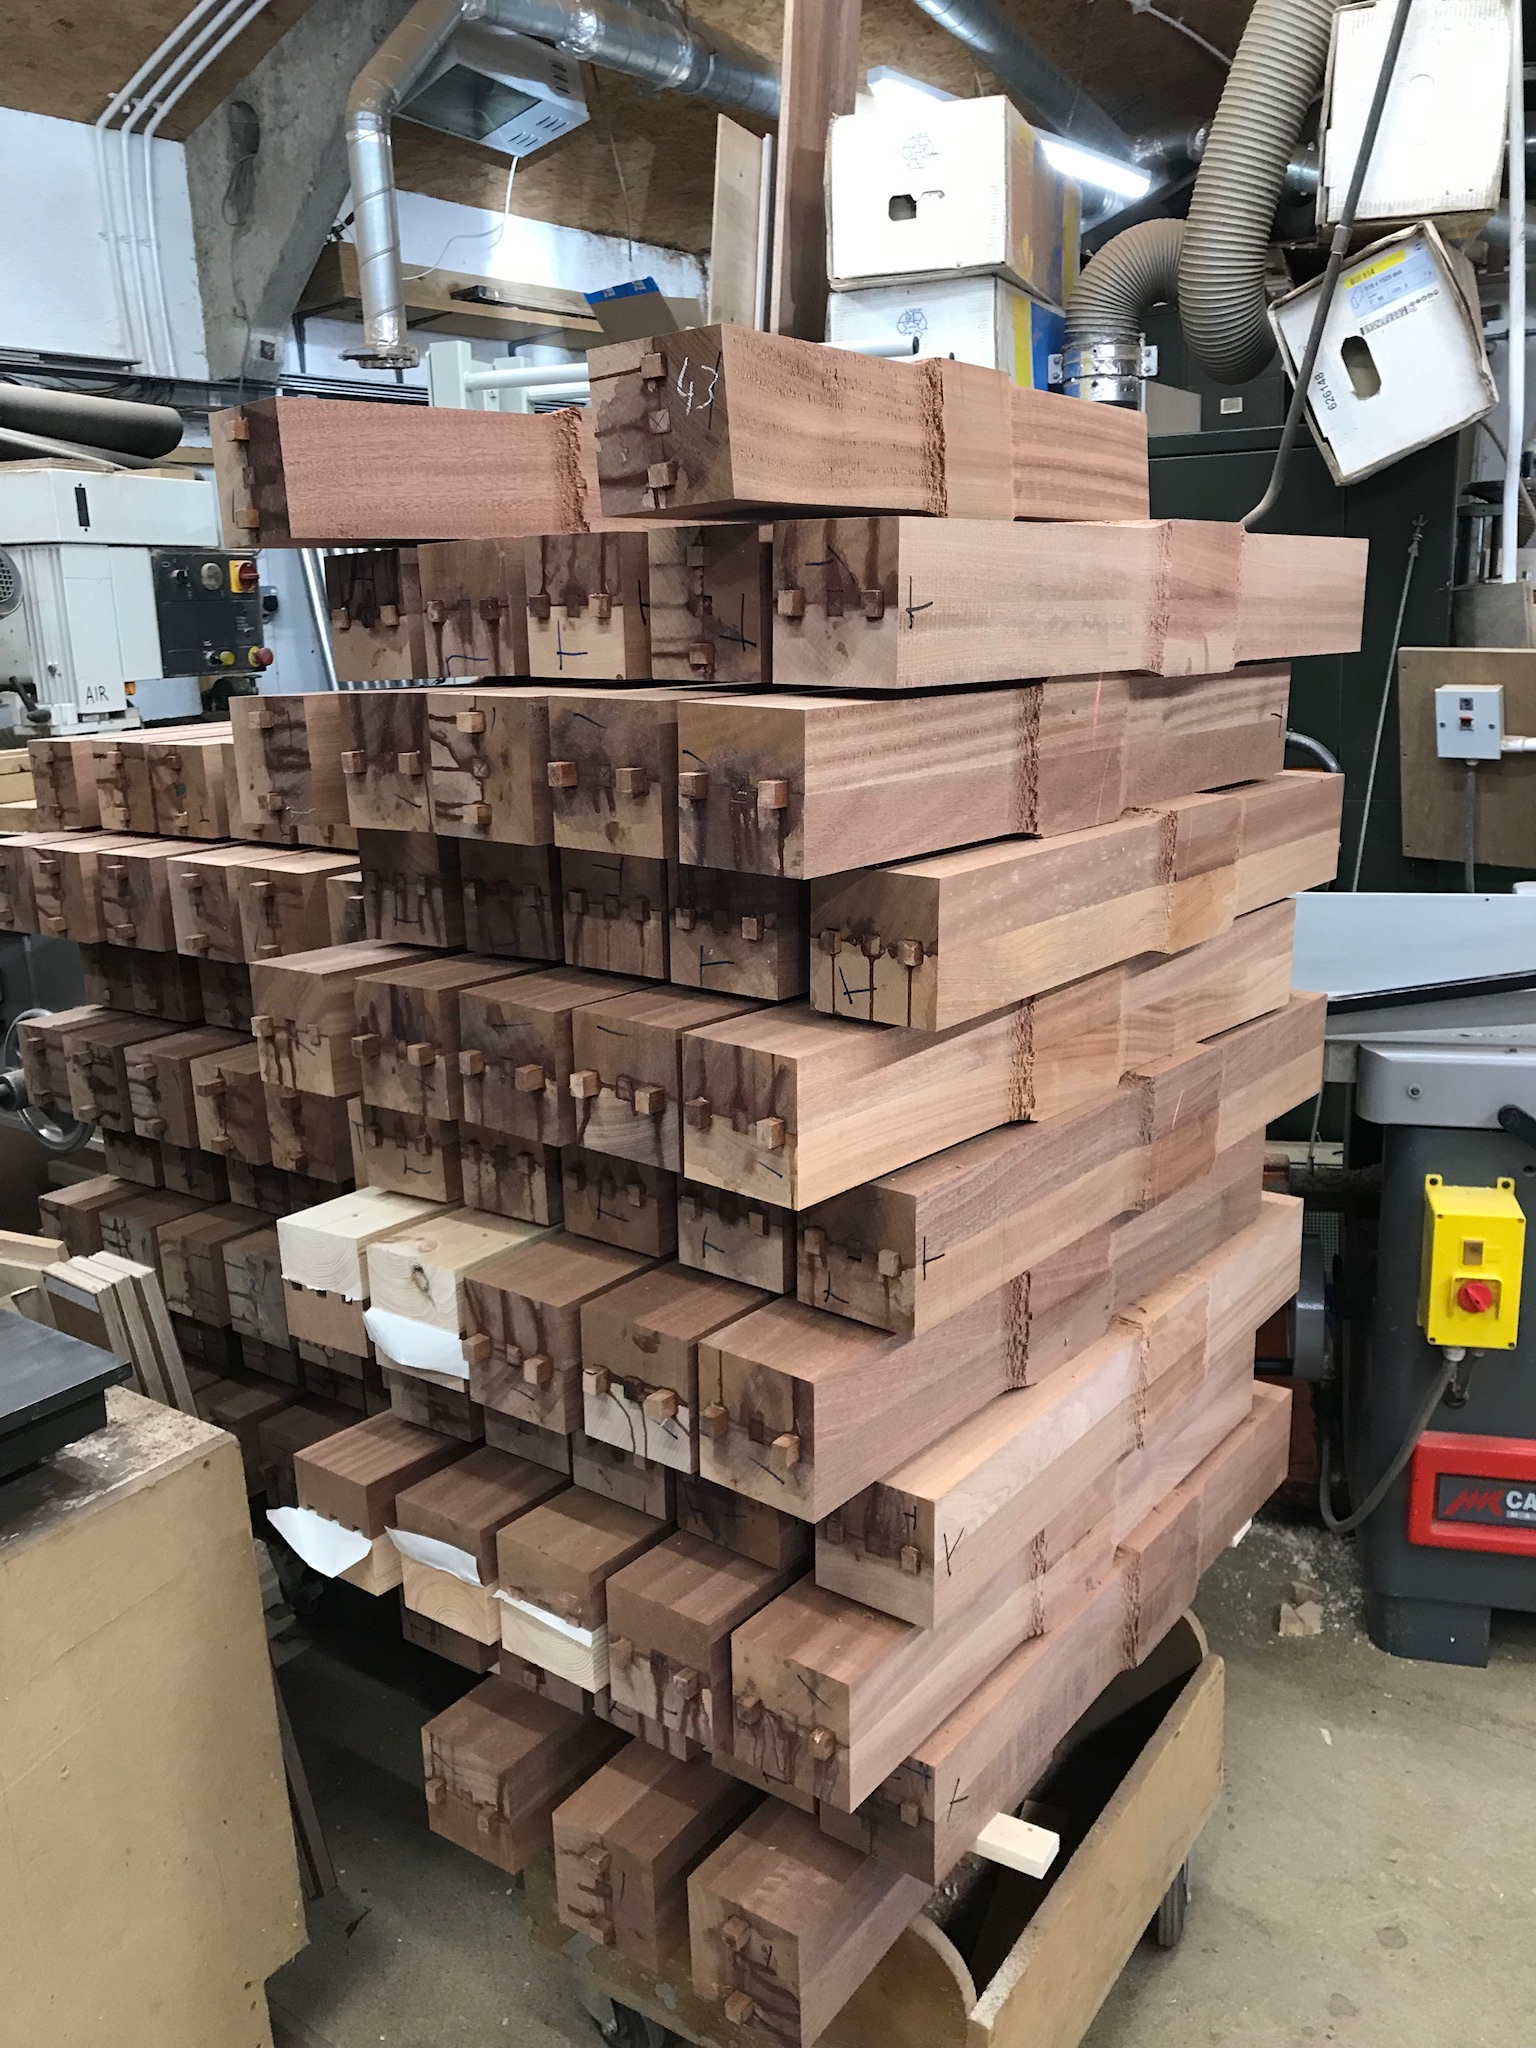
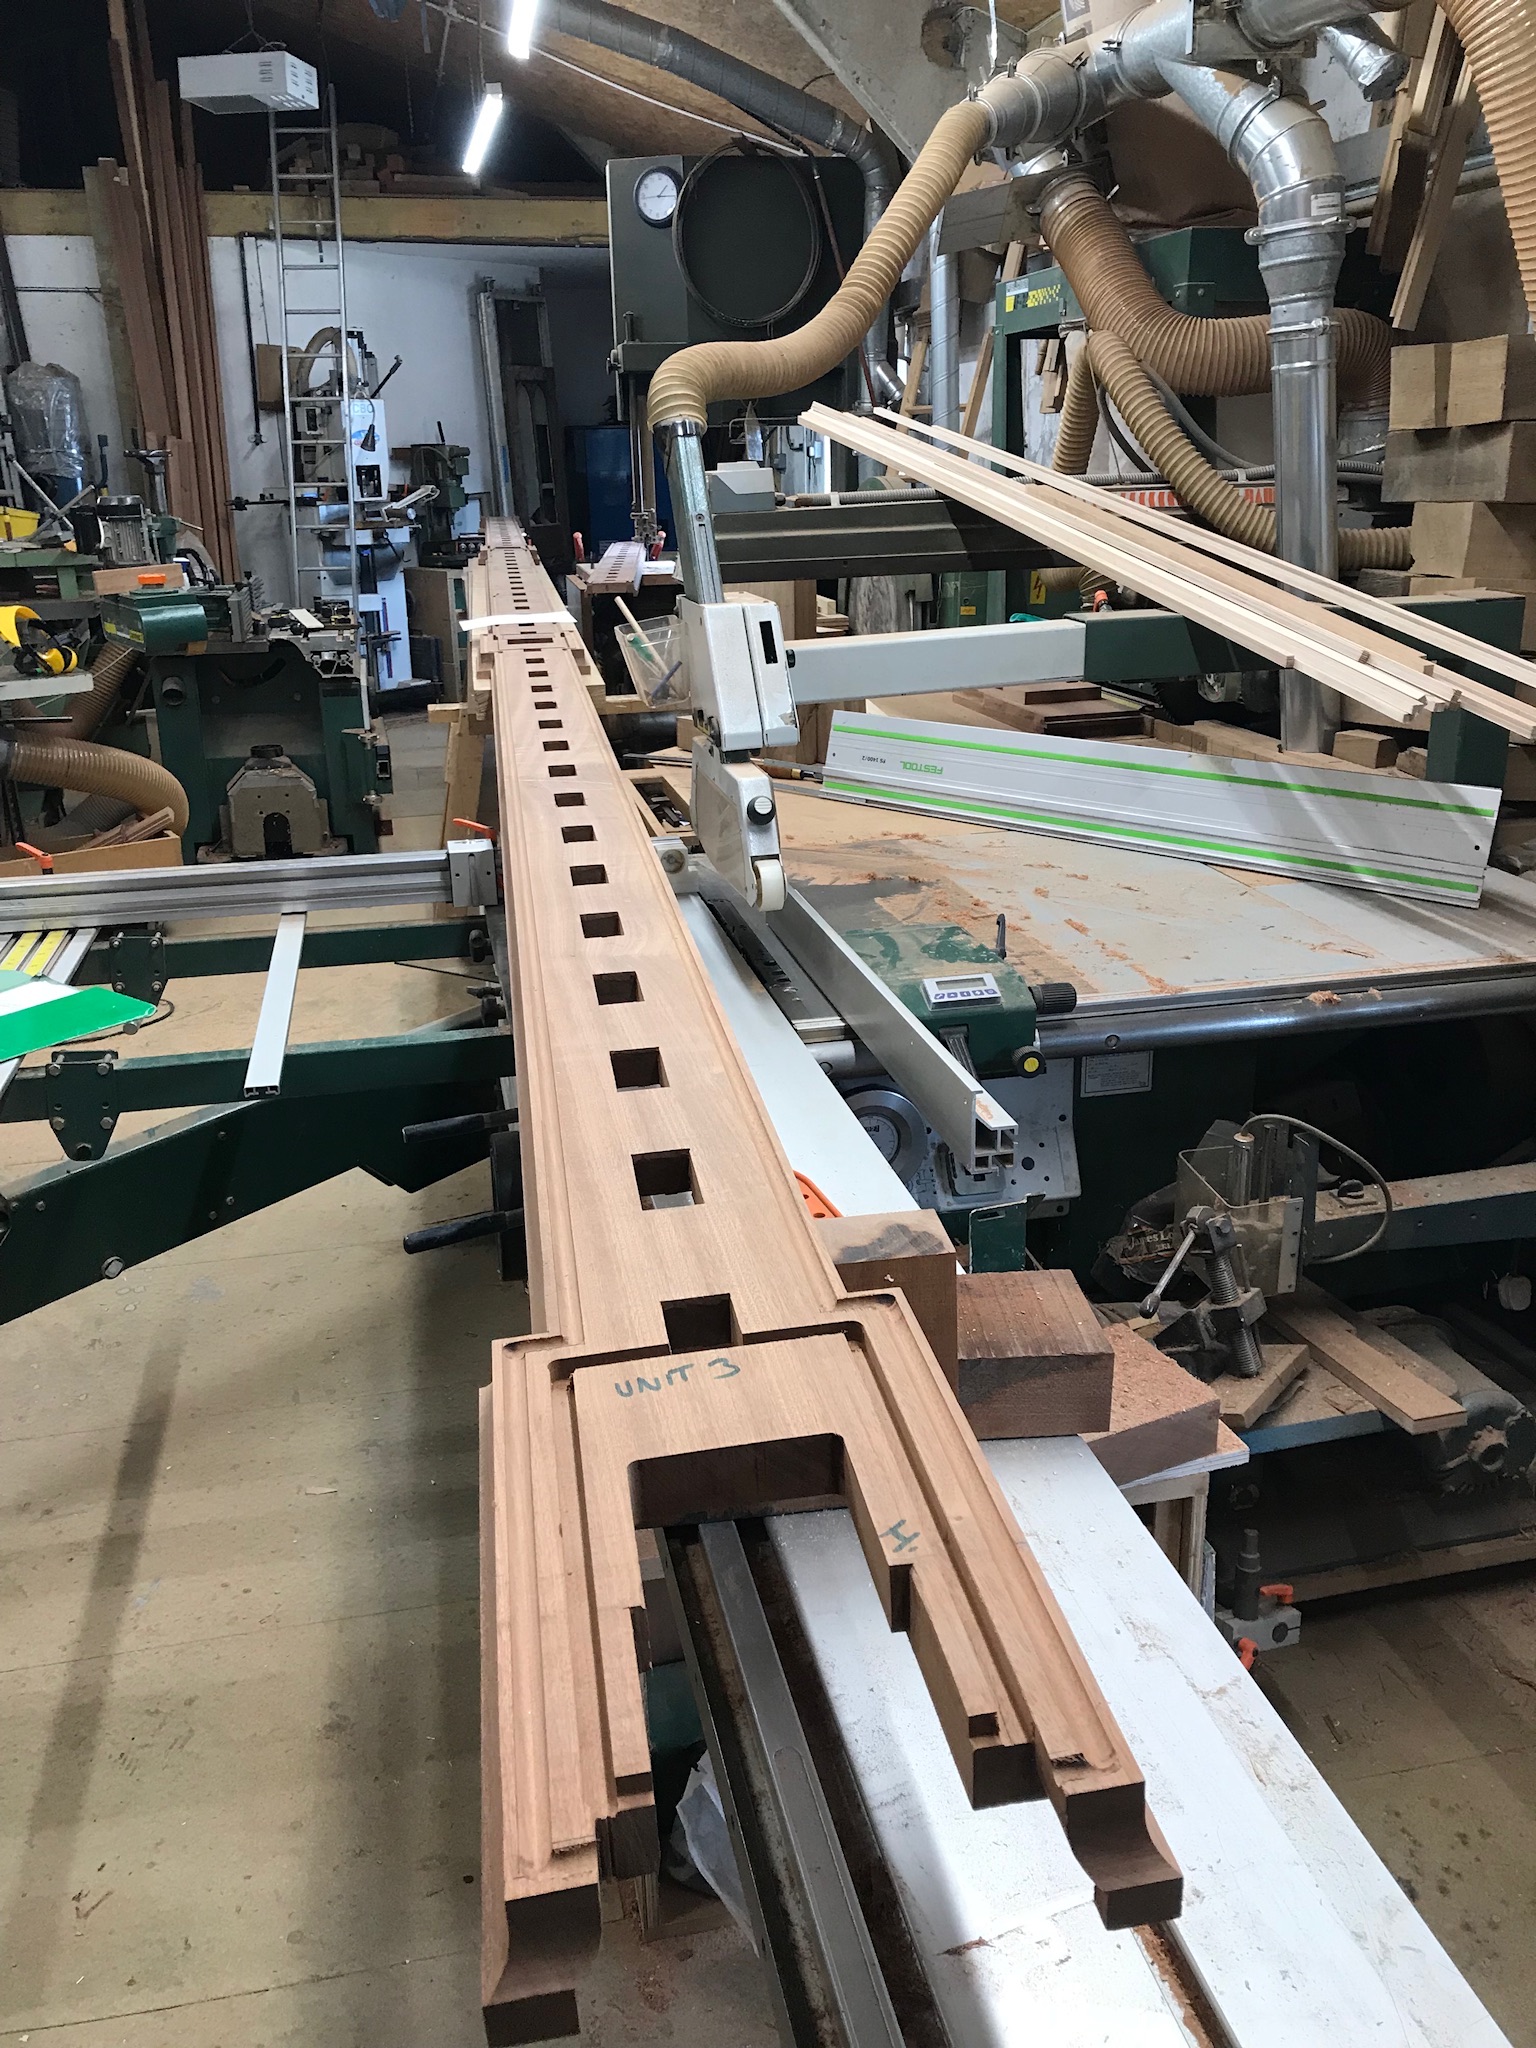
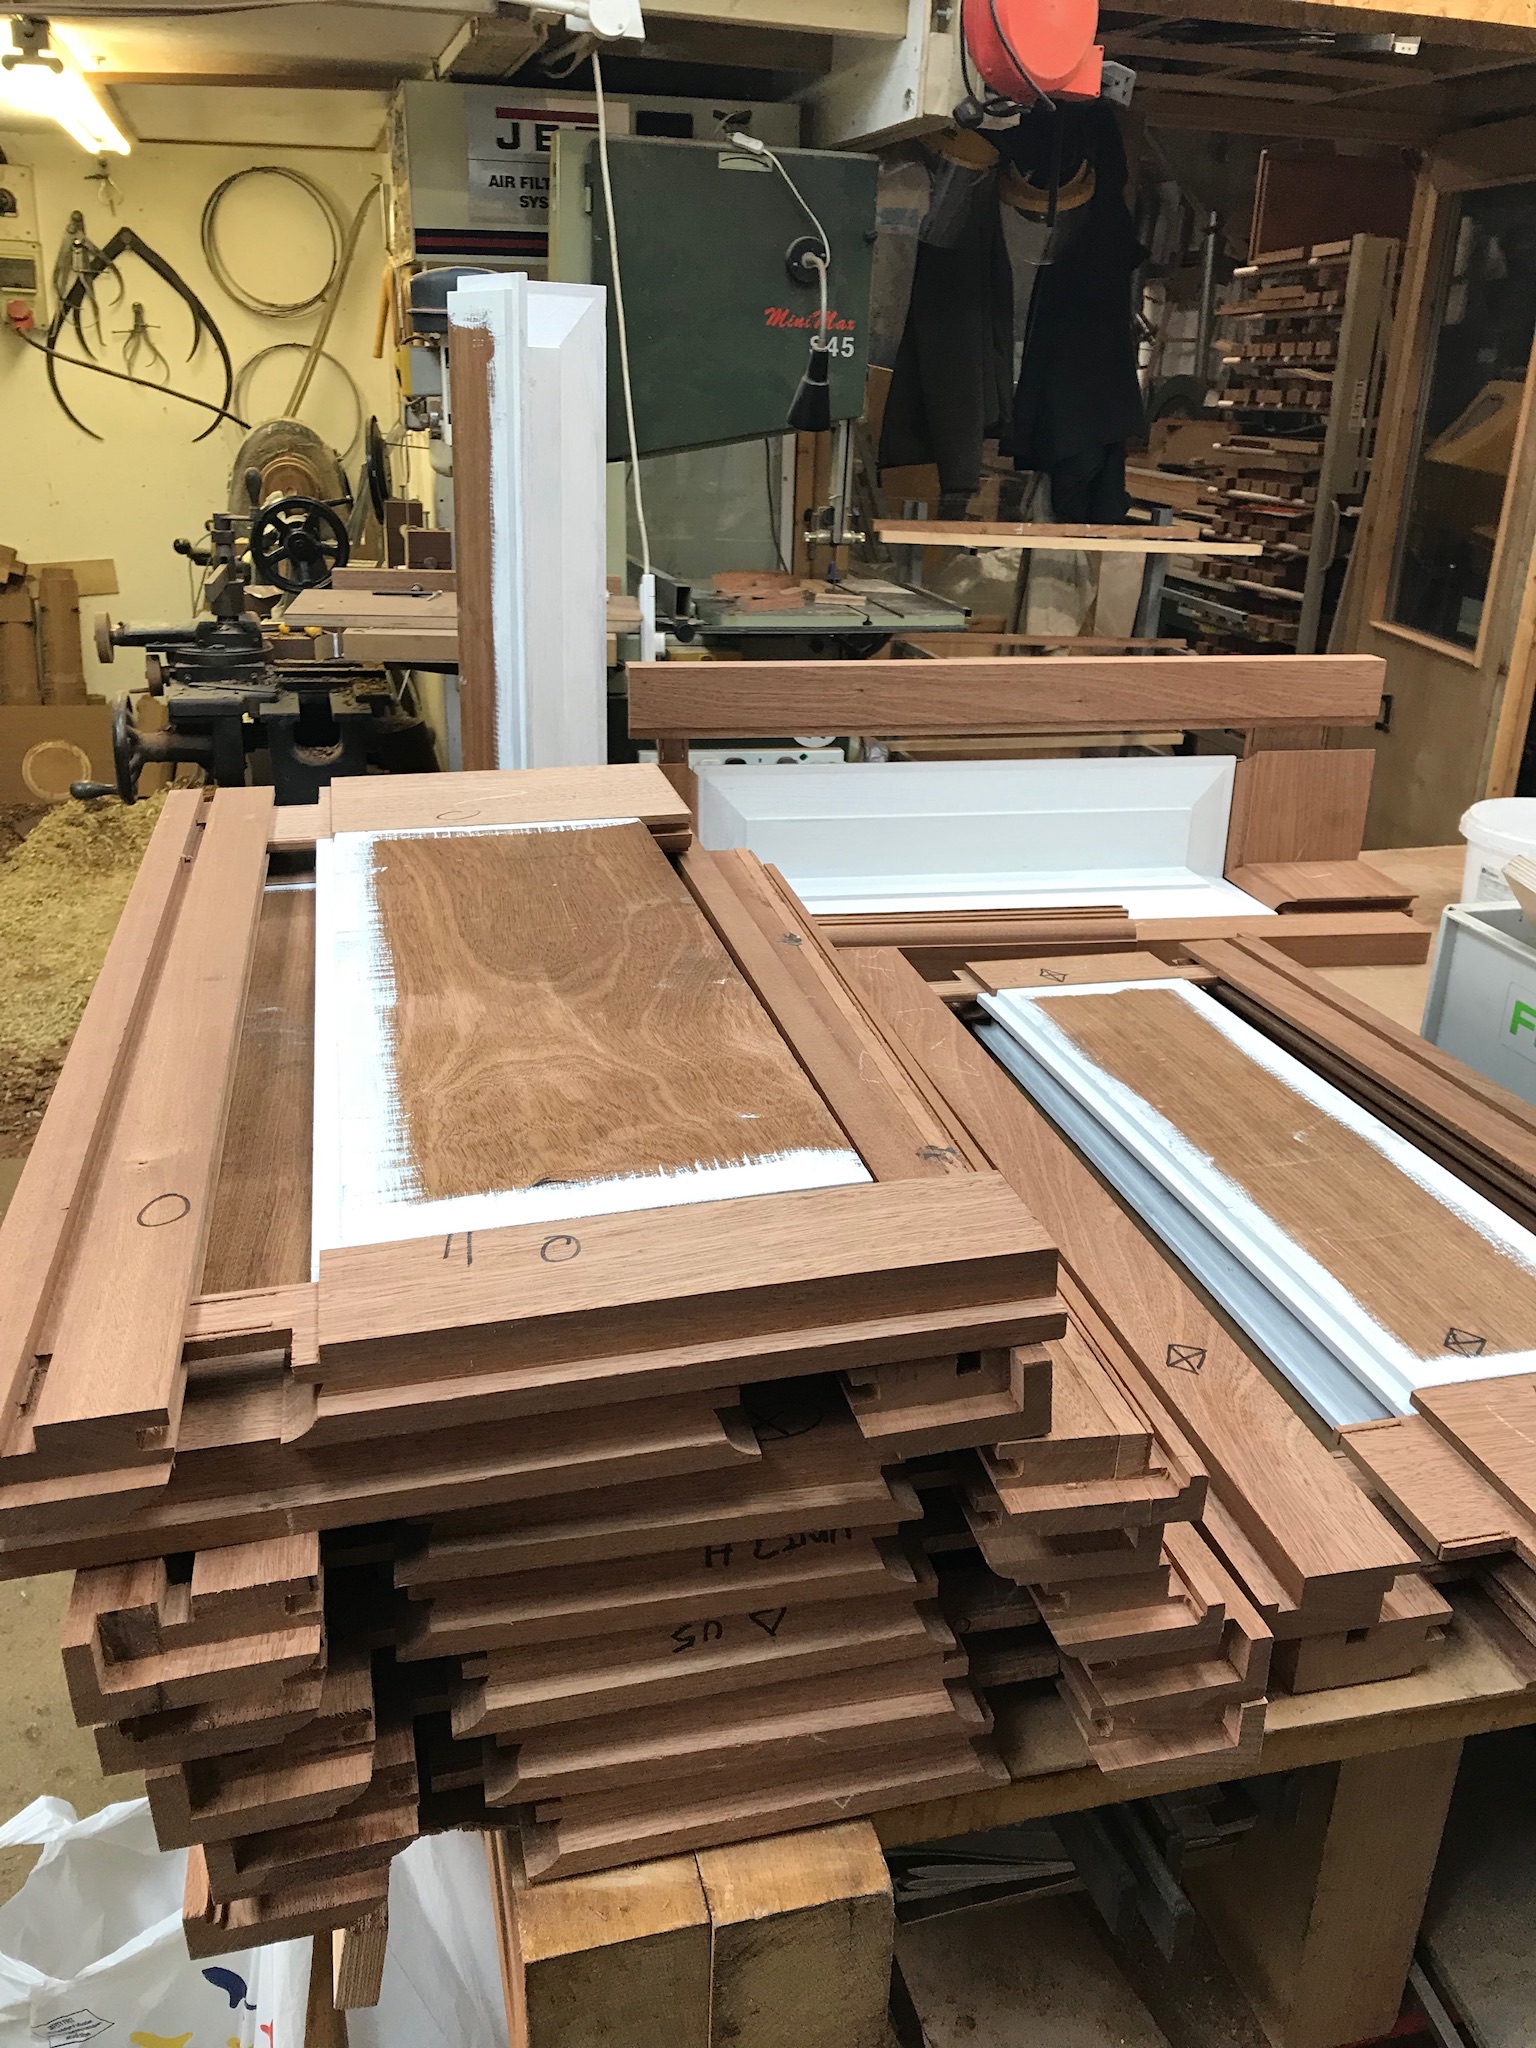
Once the Rods are confirmed, cutting sheets are produced giving the dimemension of every item required for the buying and sellecting of the materials. We pride ourselves on using traceable sustainable materials from managed sources.
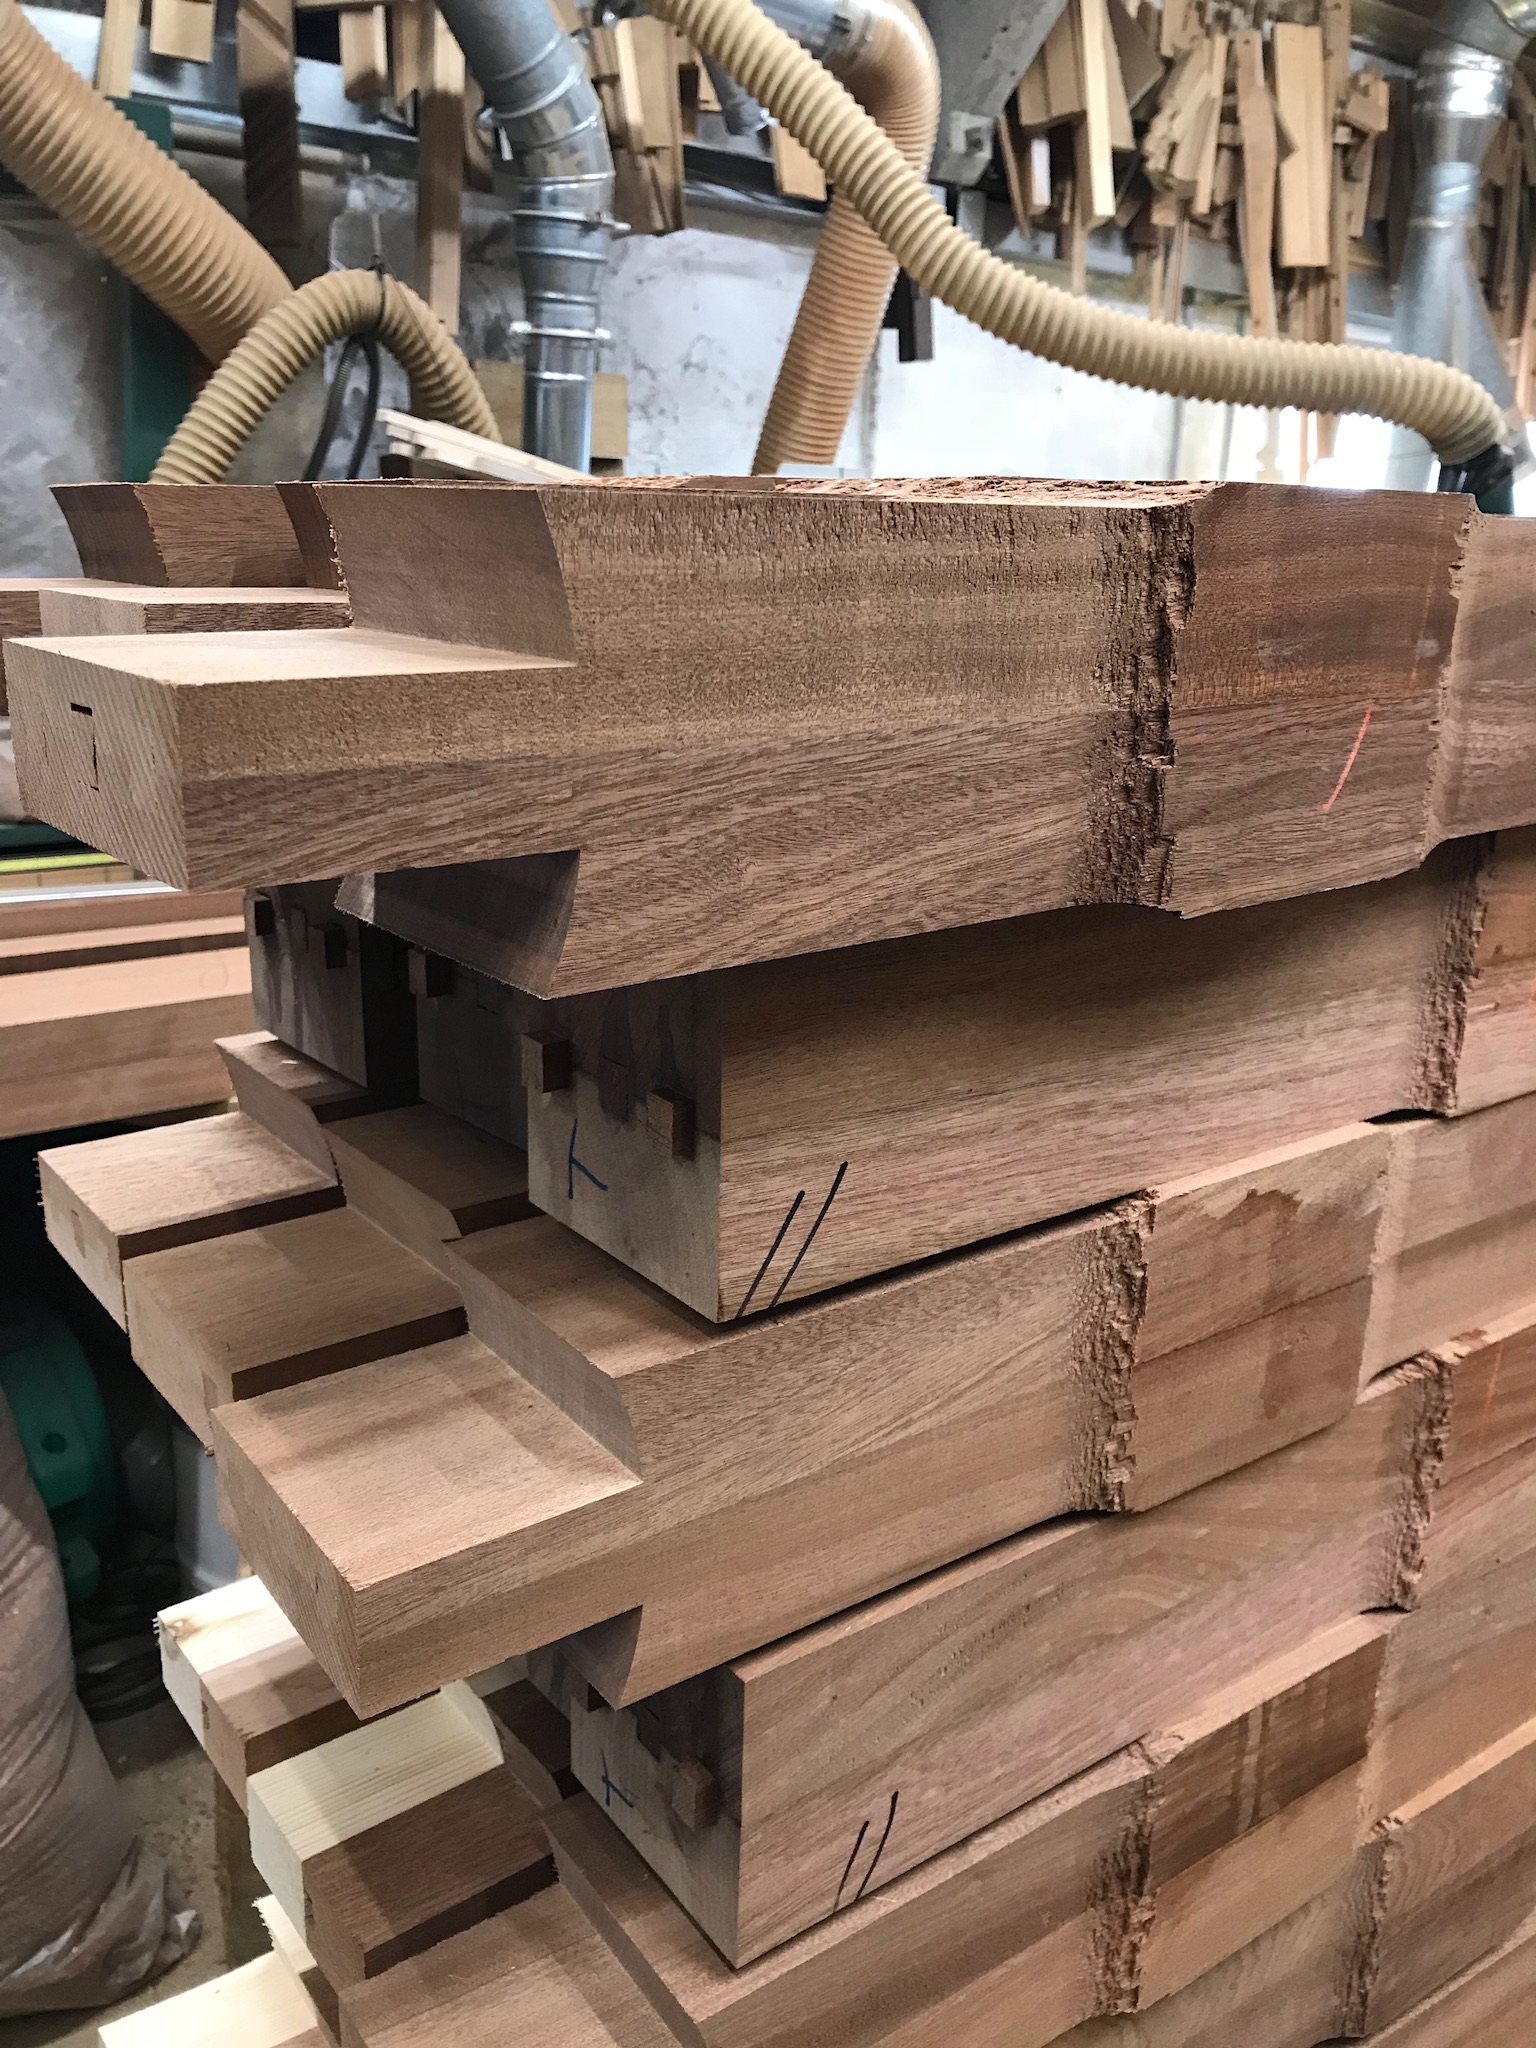
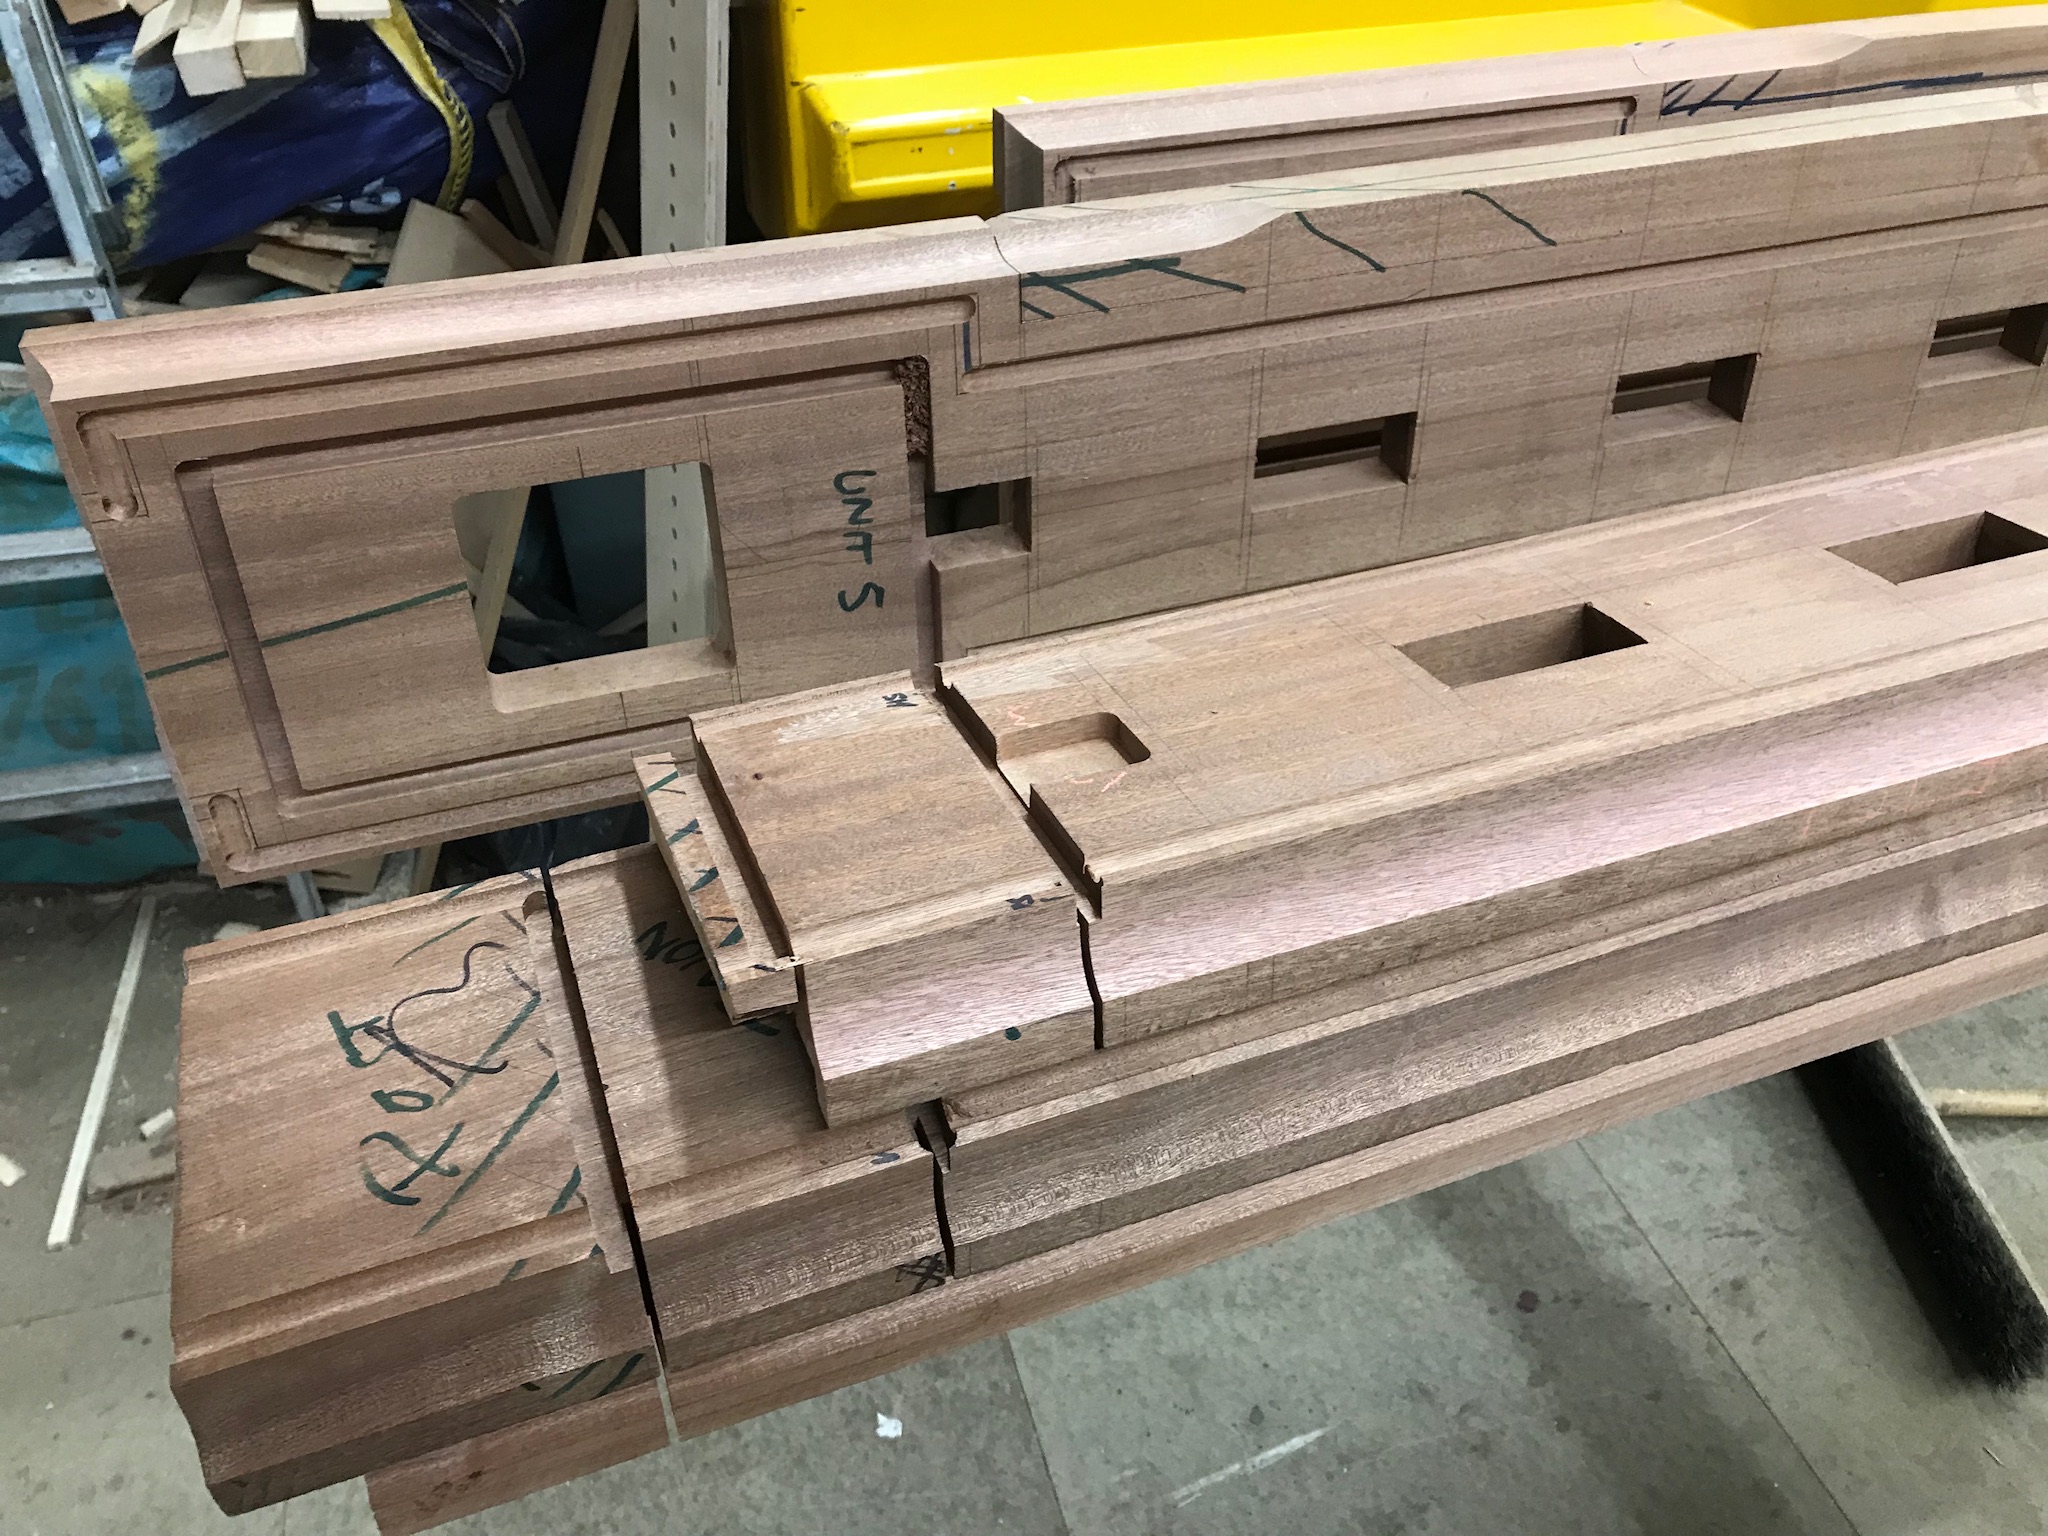
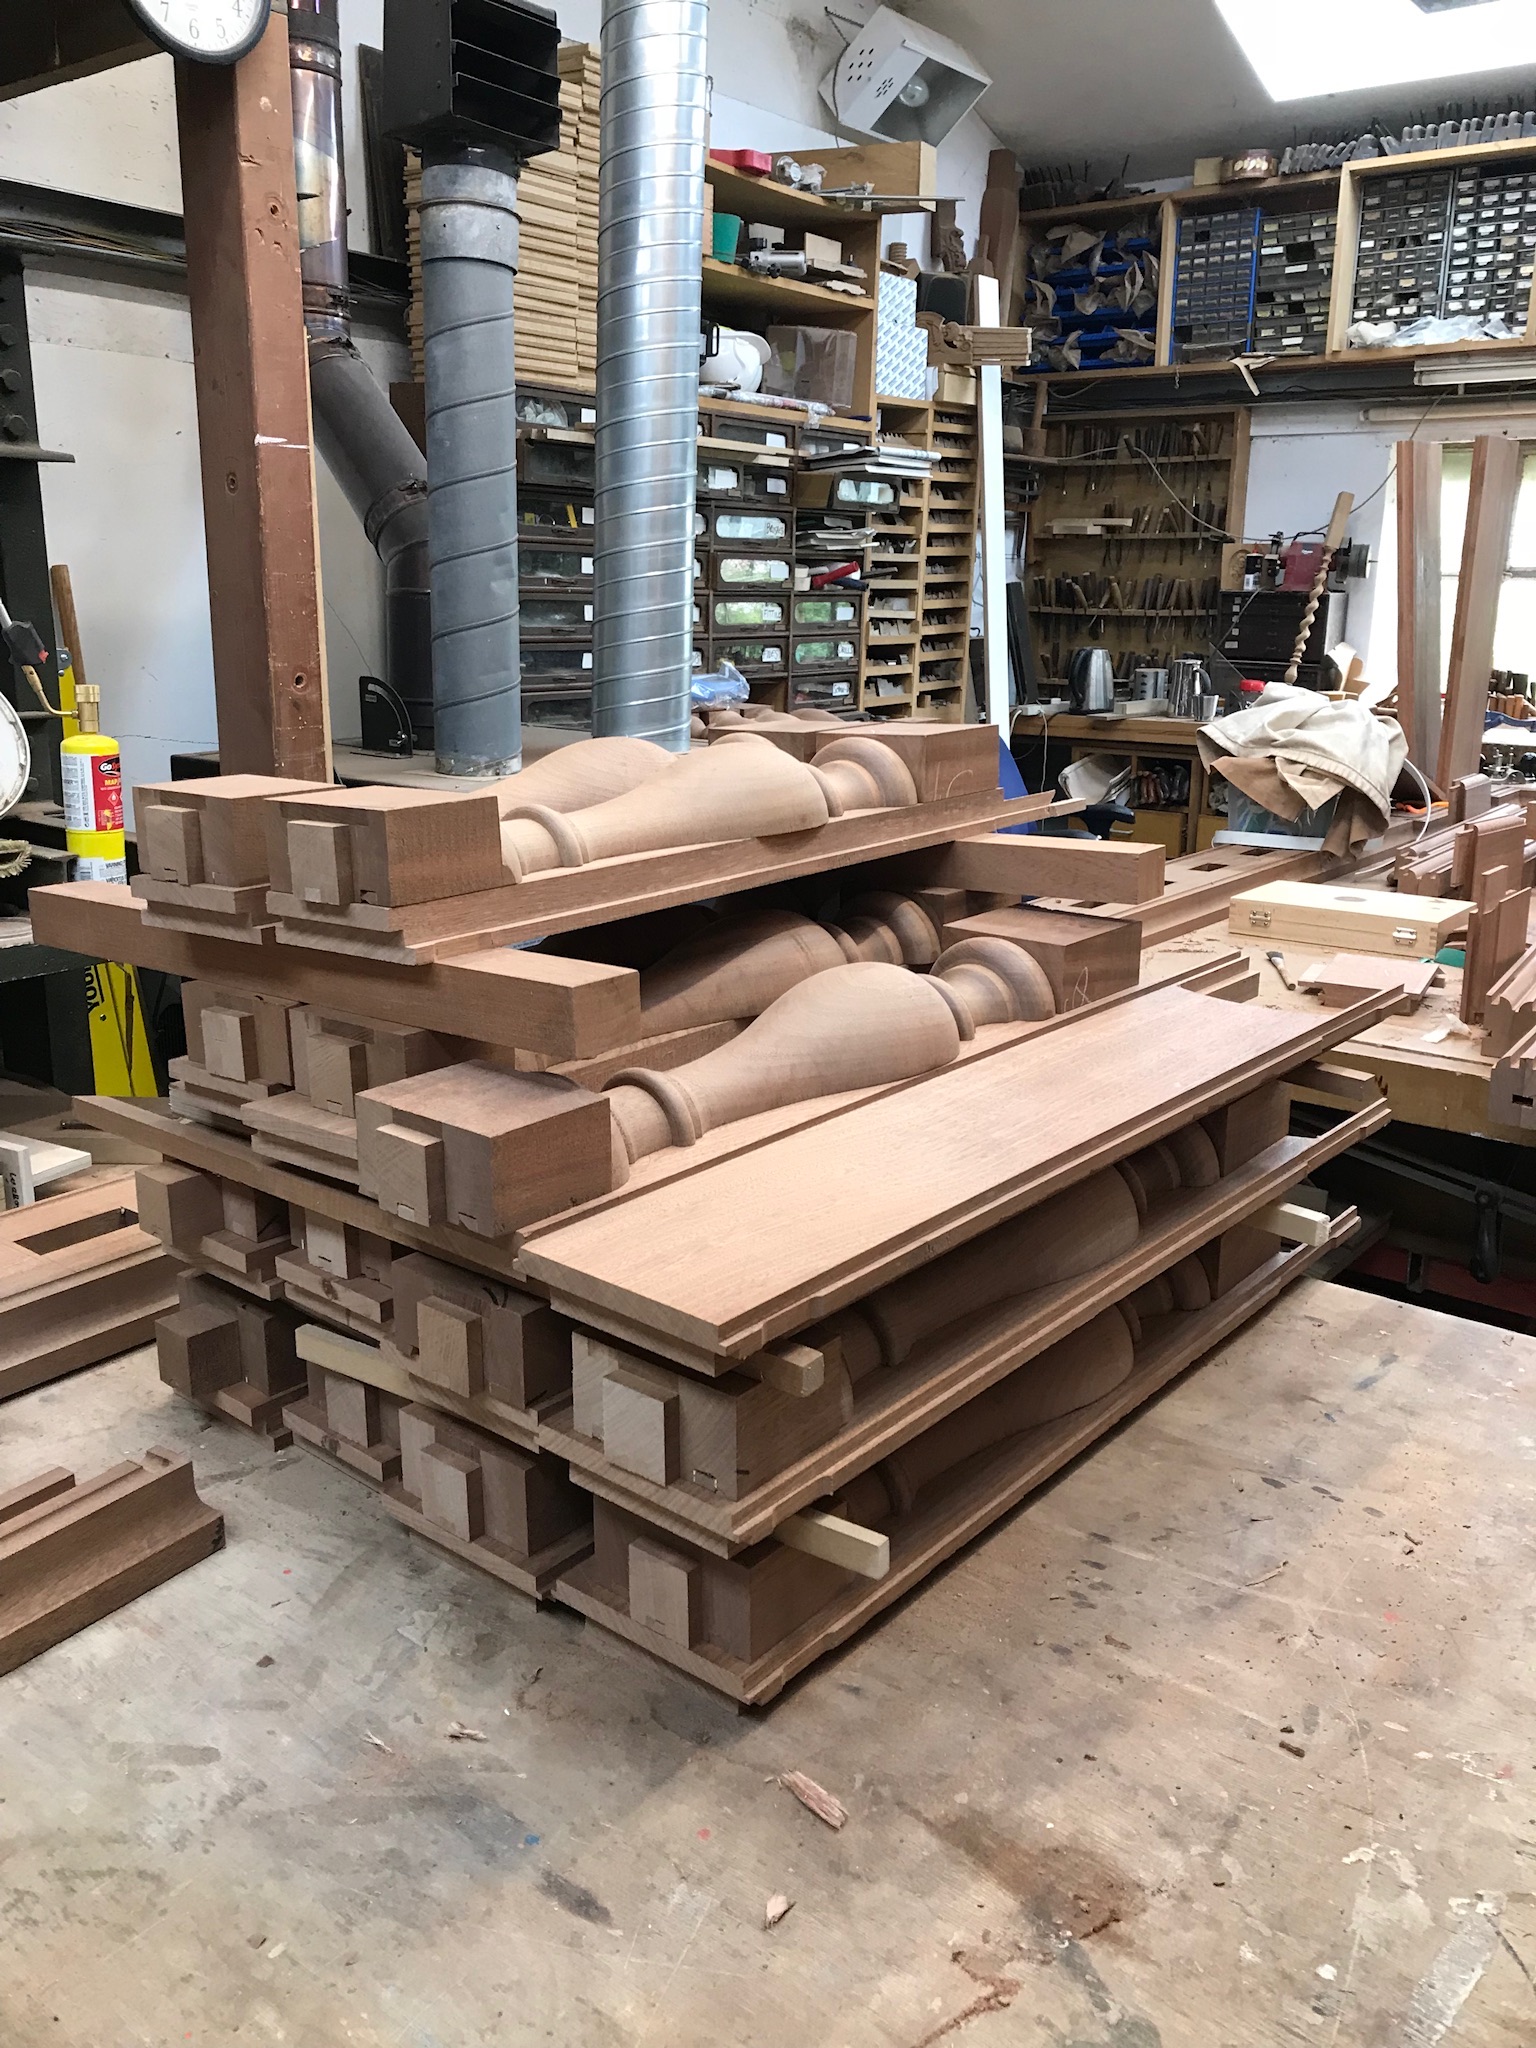
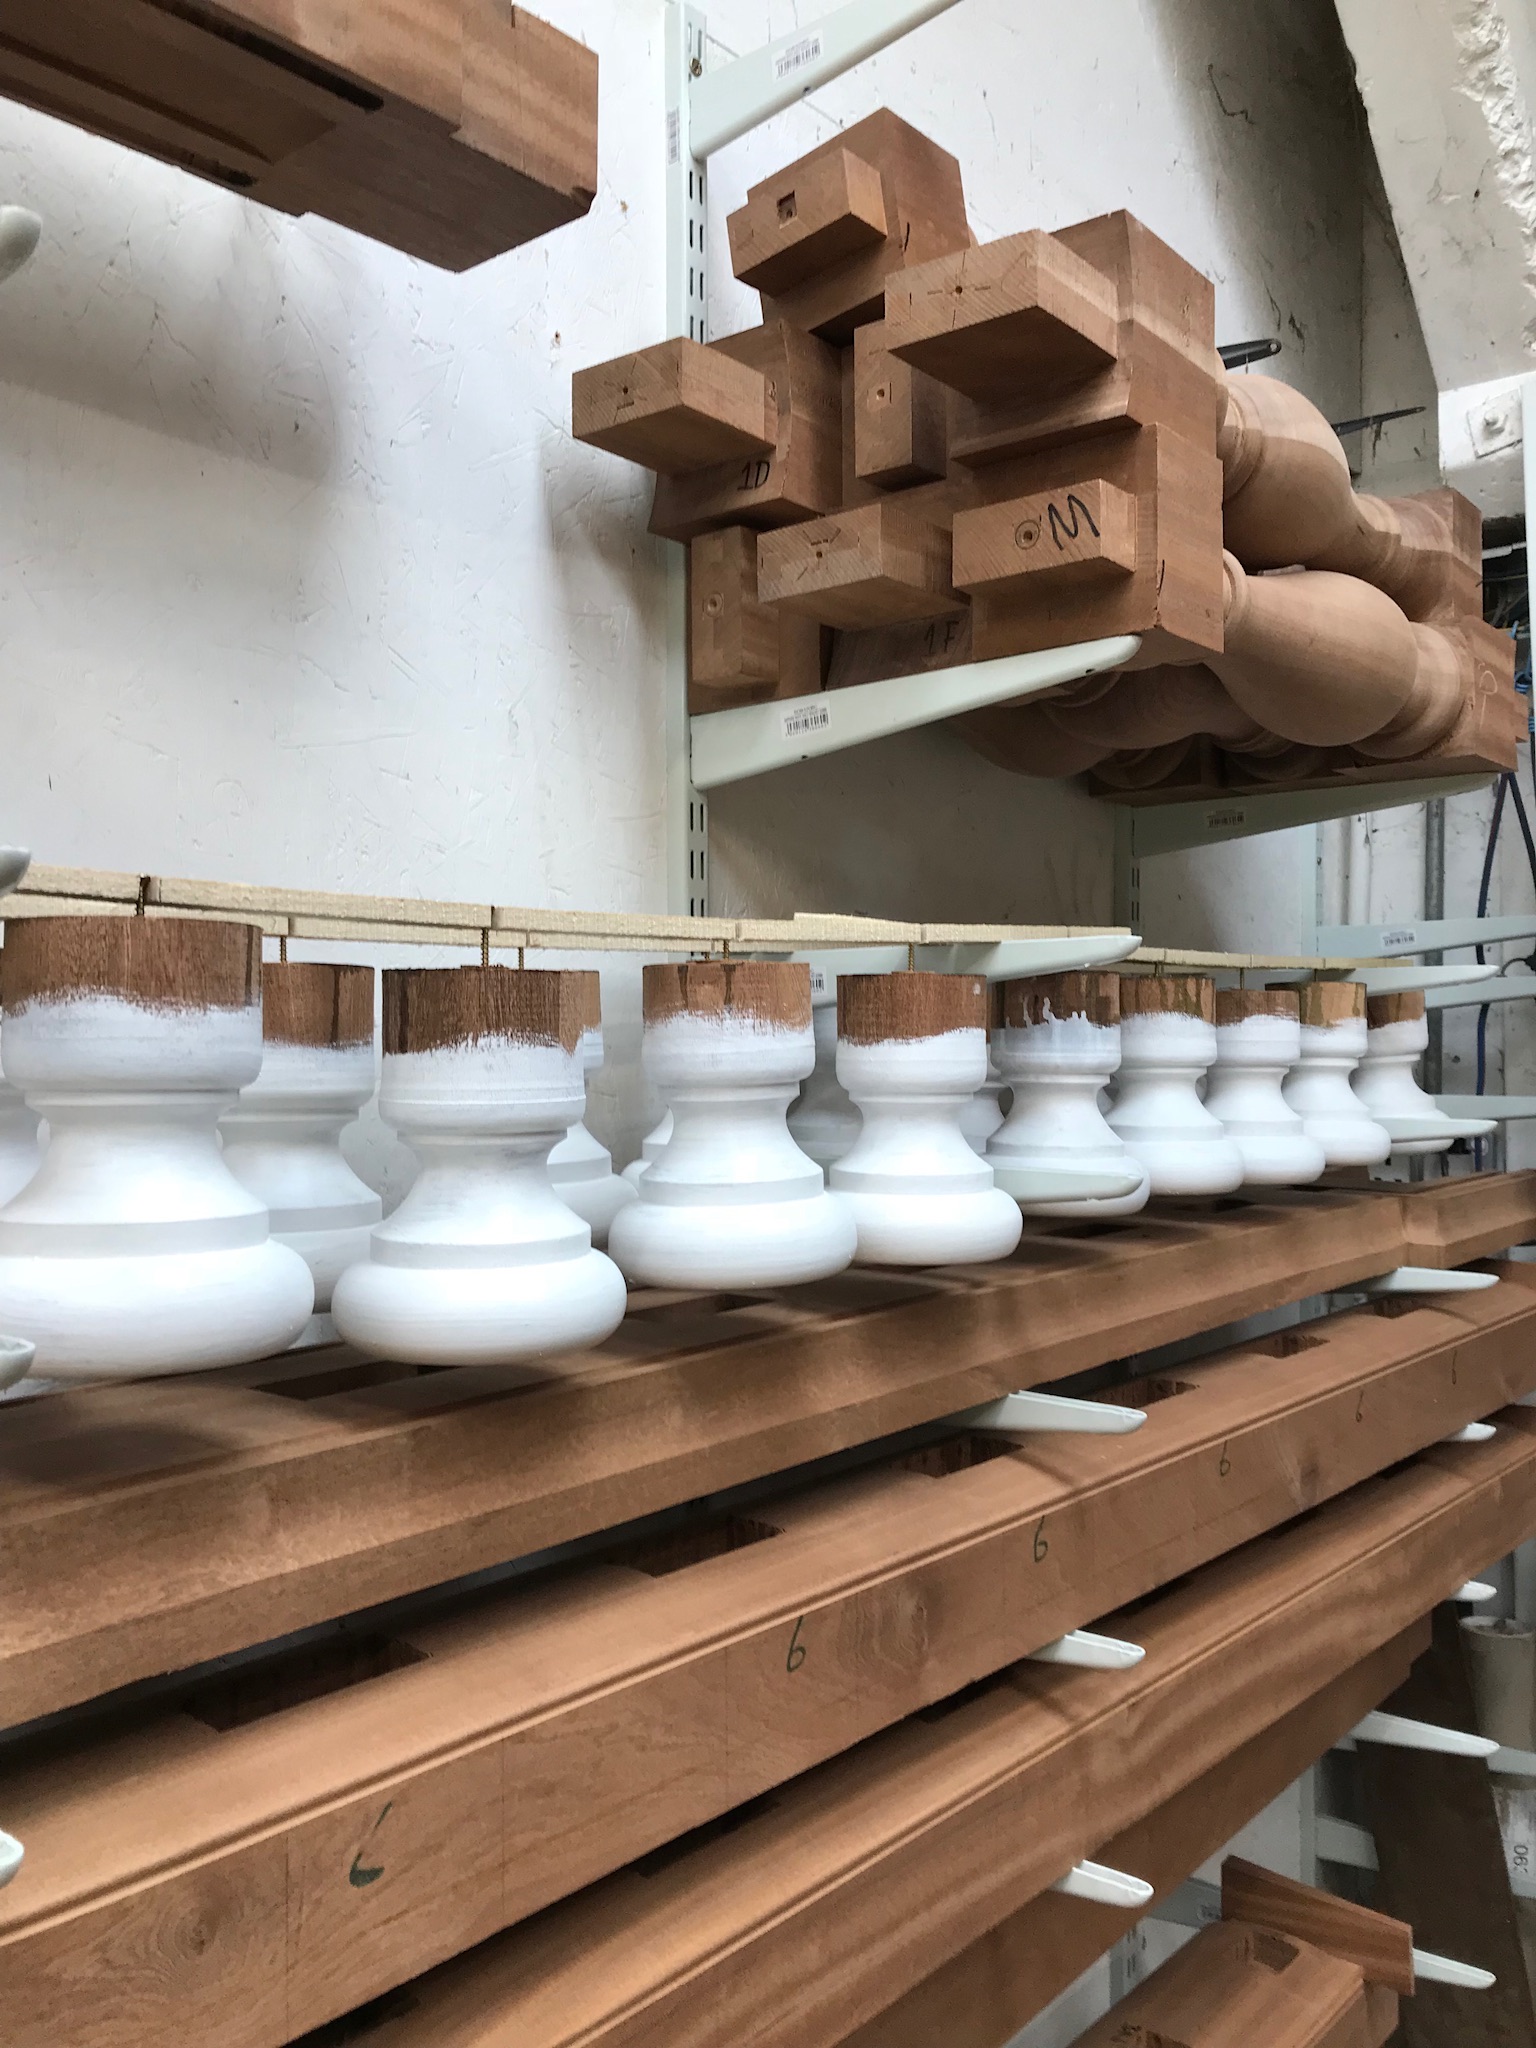
All the materials used for the painted items were made using Sapele, A west African timber. The reasons for this choice was dictated by the sizes required also the density and stability of the product which means longevity.
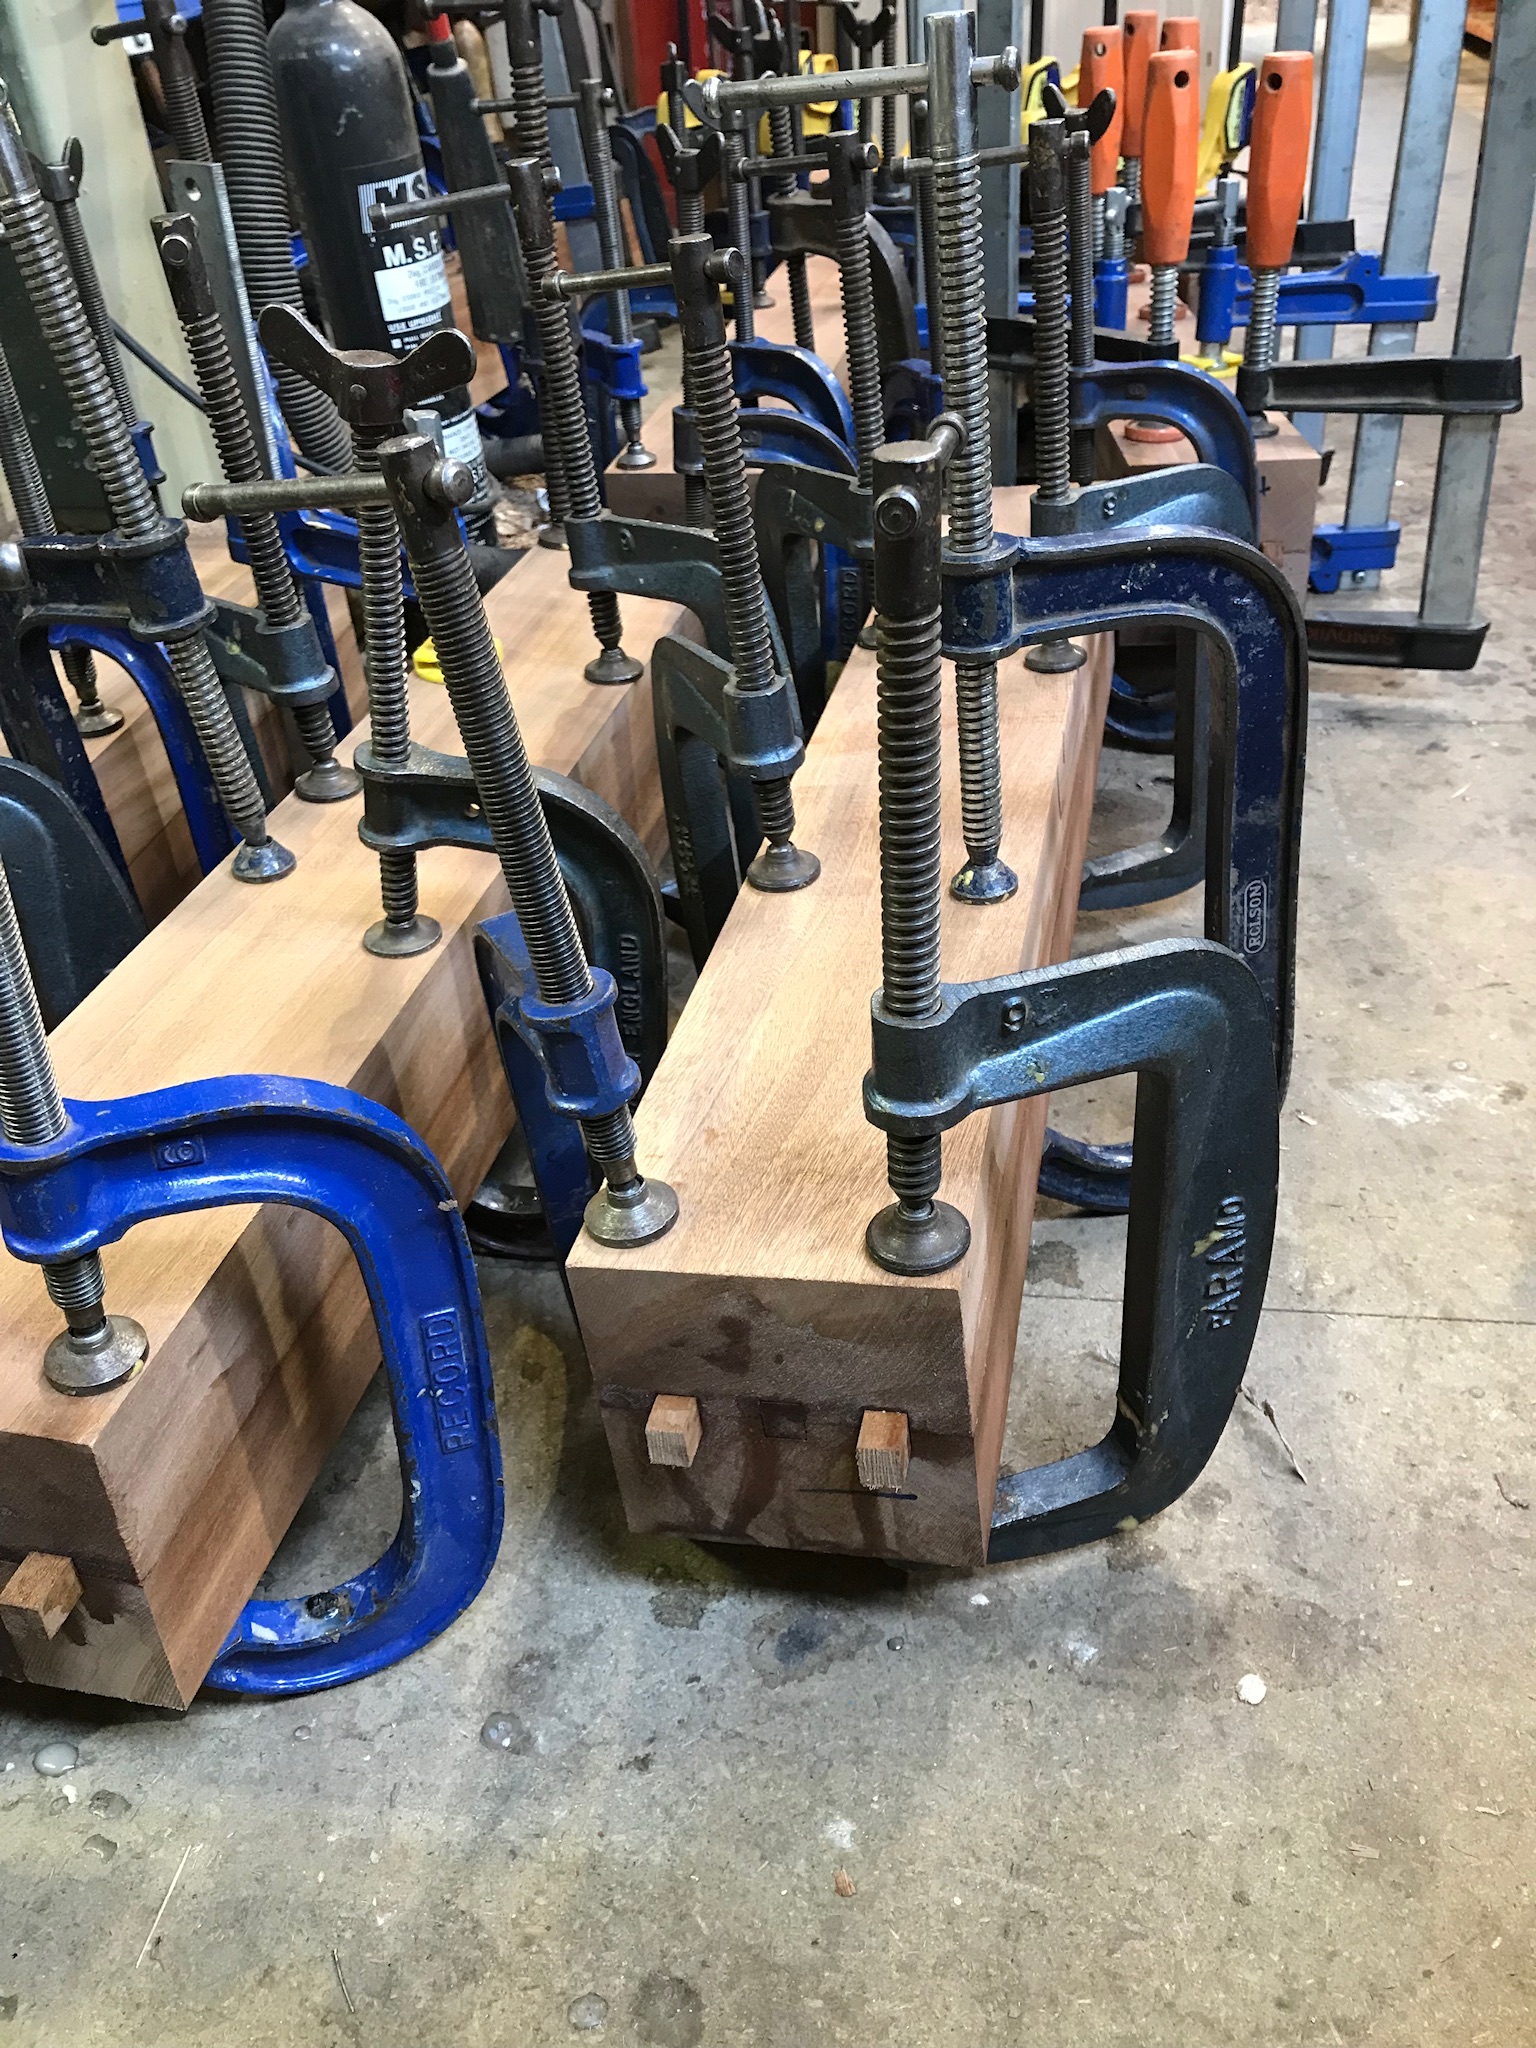
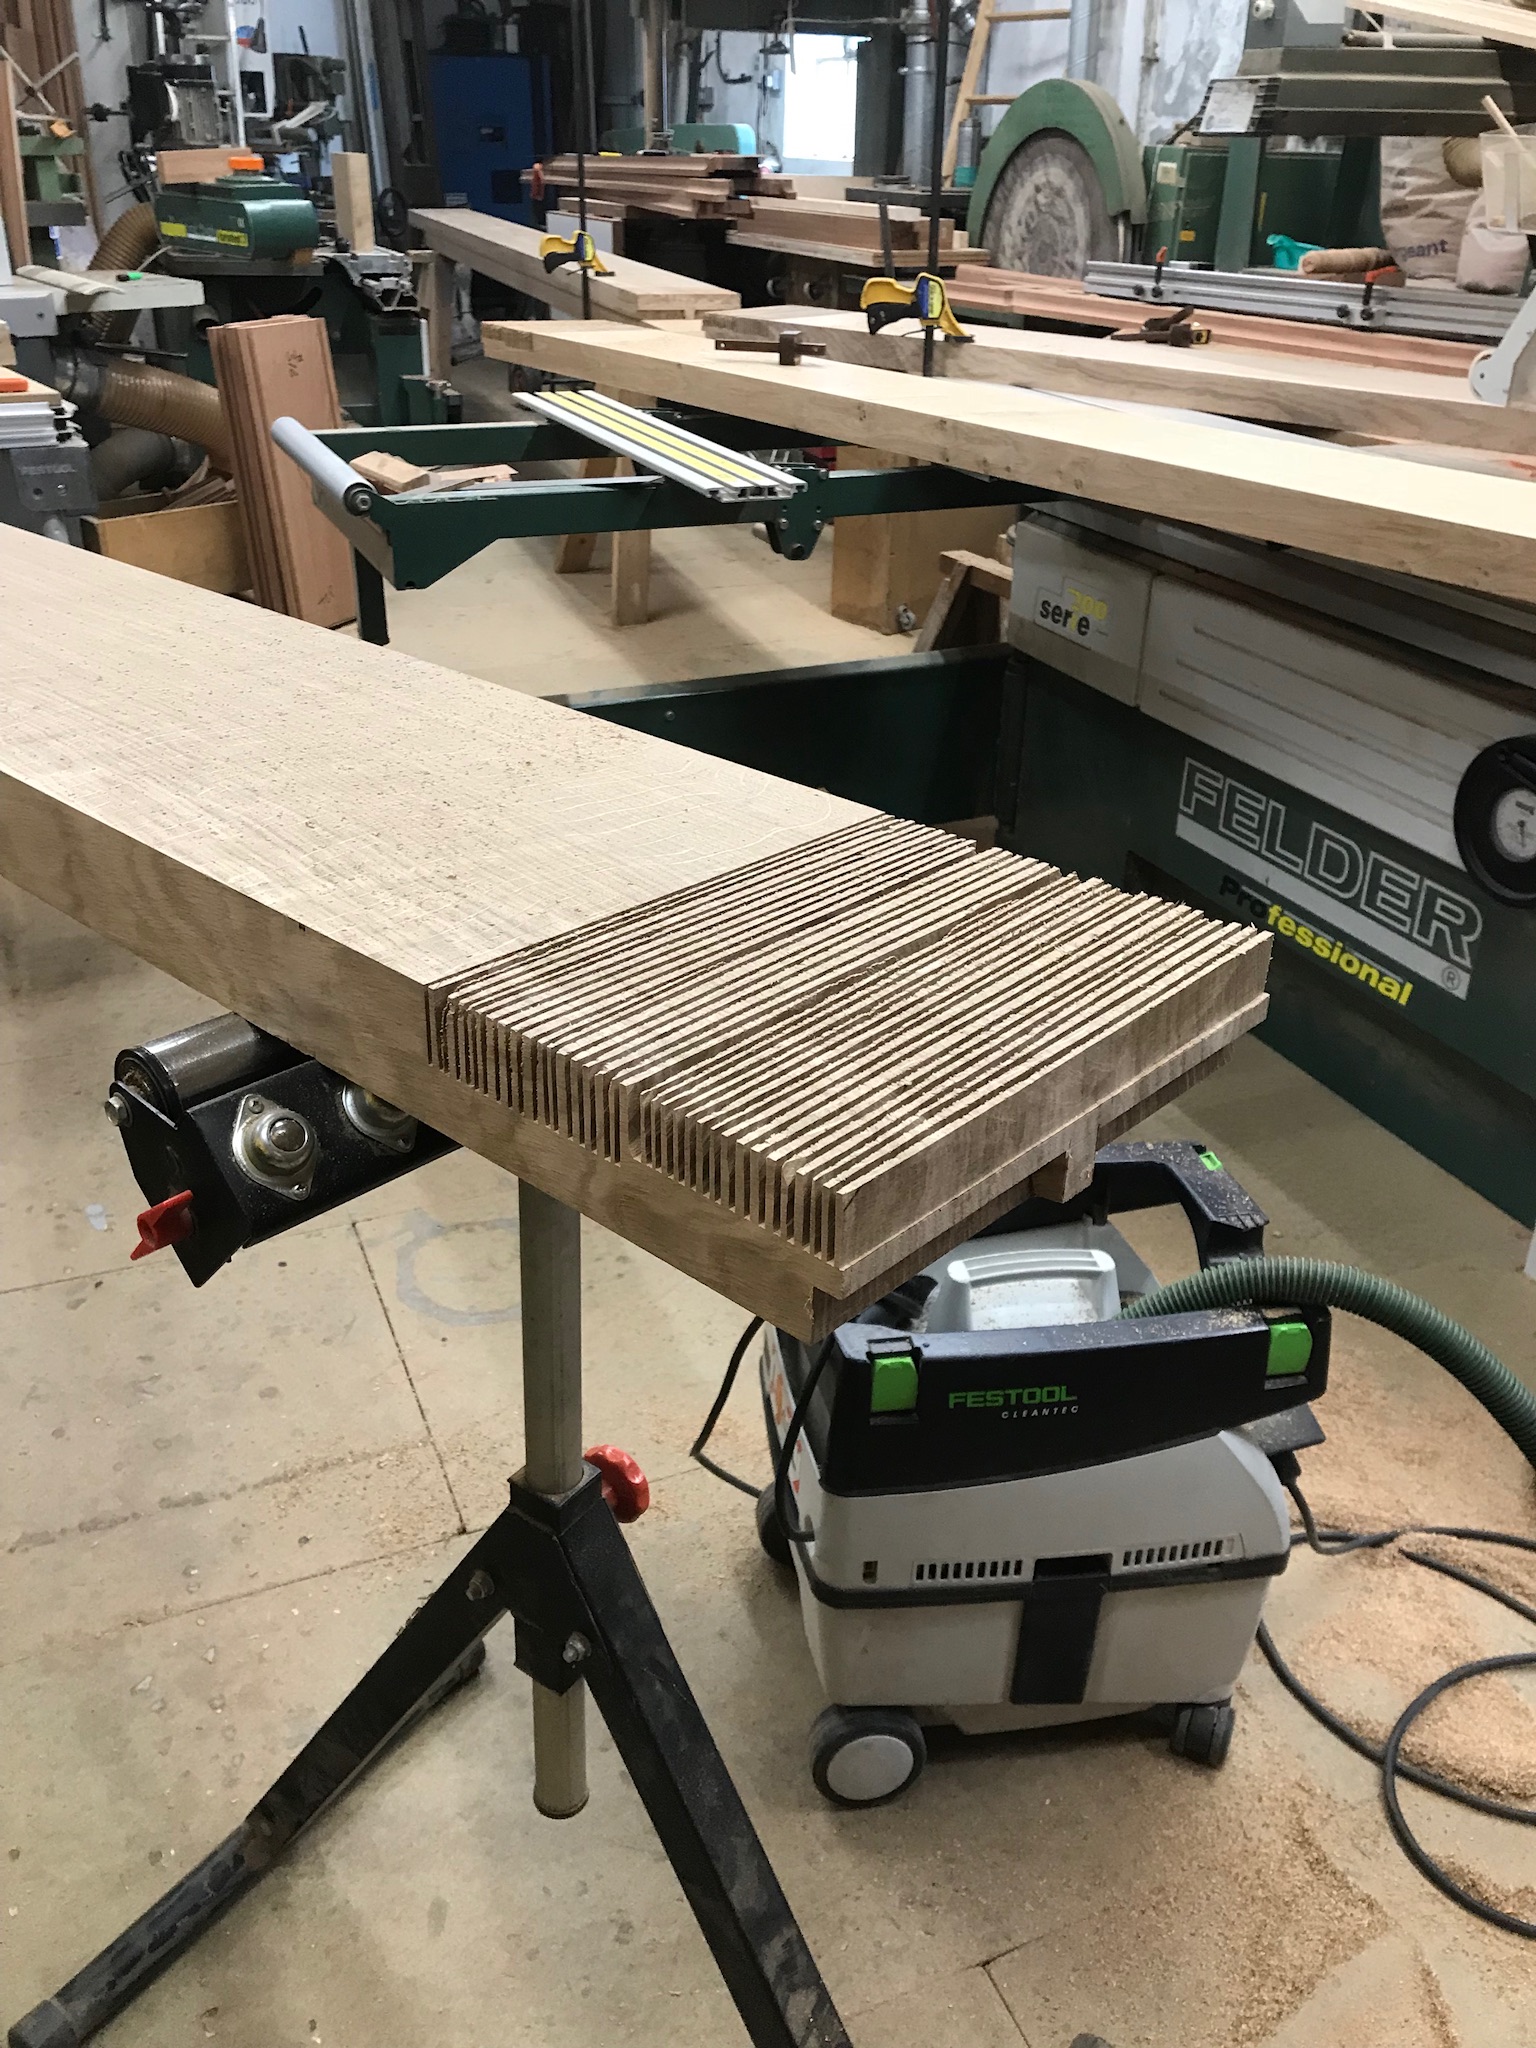
The basic blanks were machined and then grooved which are to lock the two halves together at the fattist points of the ” Turned” spindle. The glue joints will be orientated to not be exposed to the weather and will also be locked inside the ” tenon joint “. The turnings were 10mm fatter then the squares shoulder blocks which gave us a lot of work but we are into small details like that !

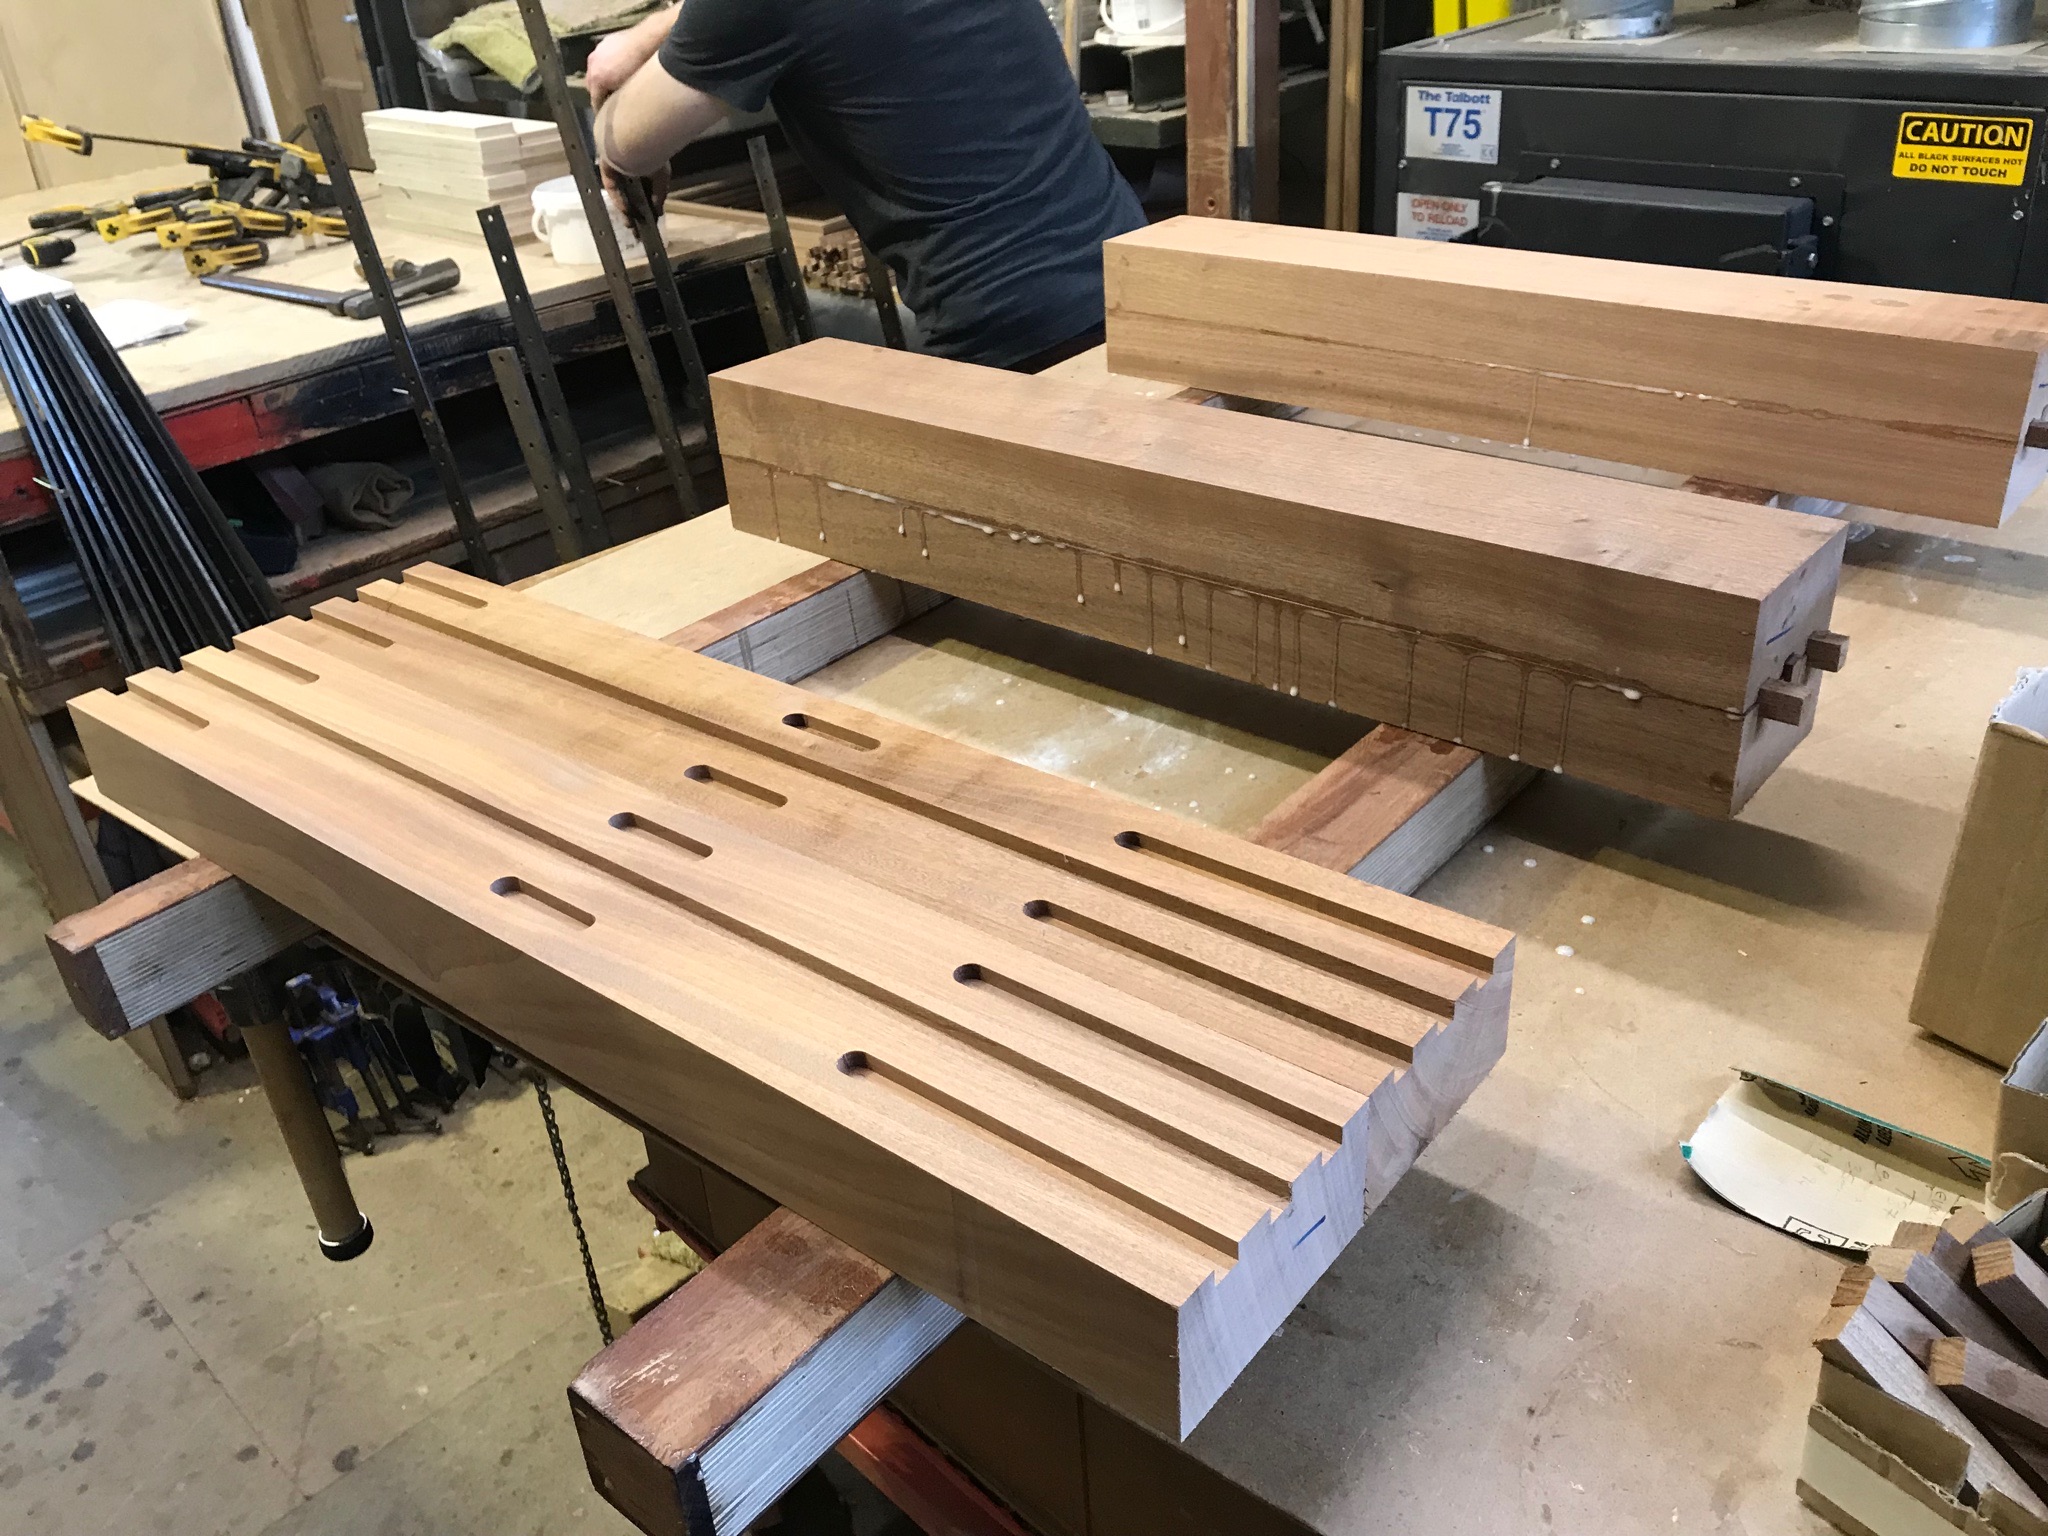
Sole Plates
The Sole plates are the main structrial strength to the Balustrade and these hold every thing up!
A better view of the “Rods” being used to mark the “Mortise” holes for the spacing of the spindles, each bay between palasters was a different length, these were govened by the historic stone coloumns the Loggia sat upon.
We went to great lengths to restrict and prevent water penatration from joints and surfaces inorder to perlong the life of the new balustrade from its exposed location.
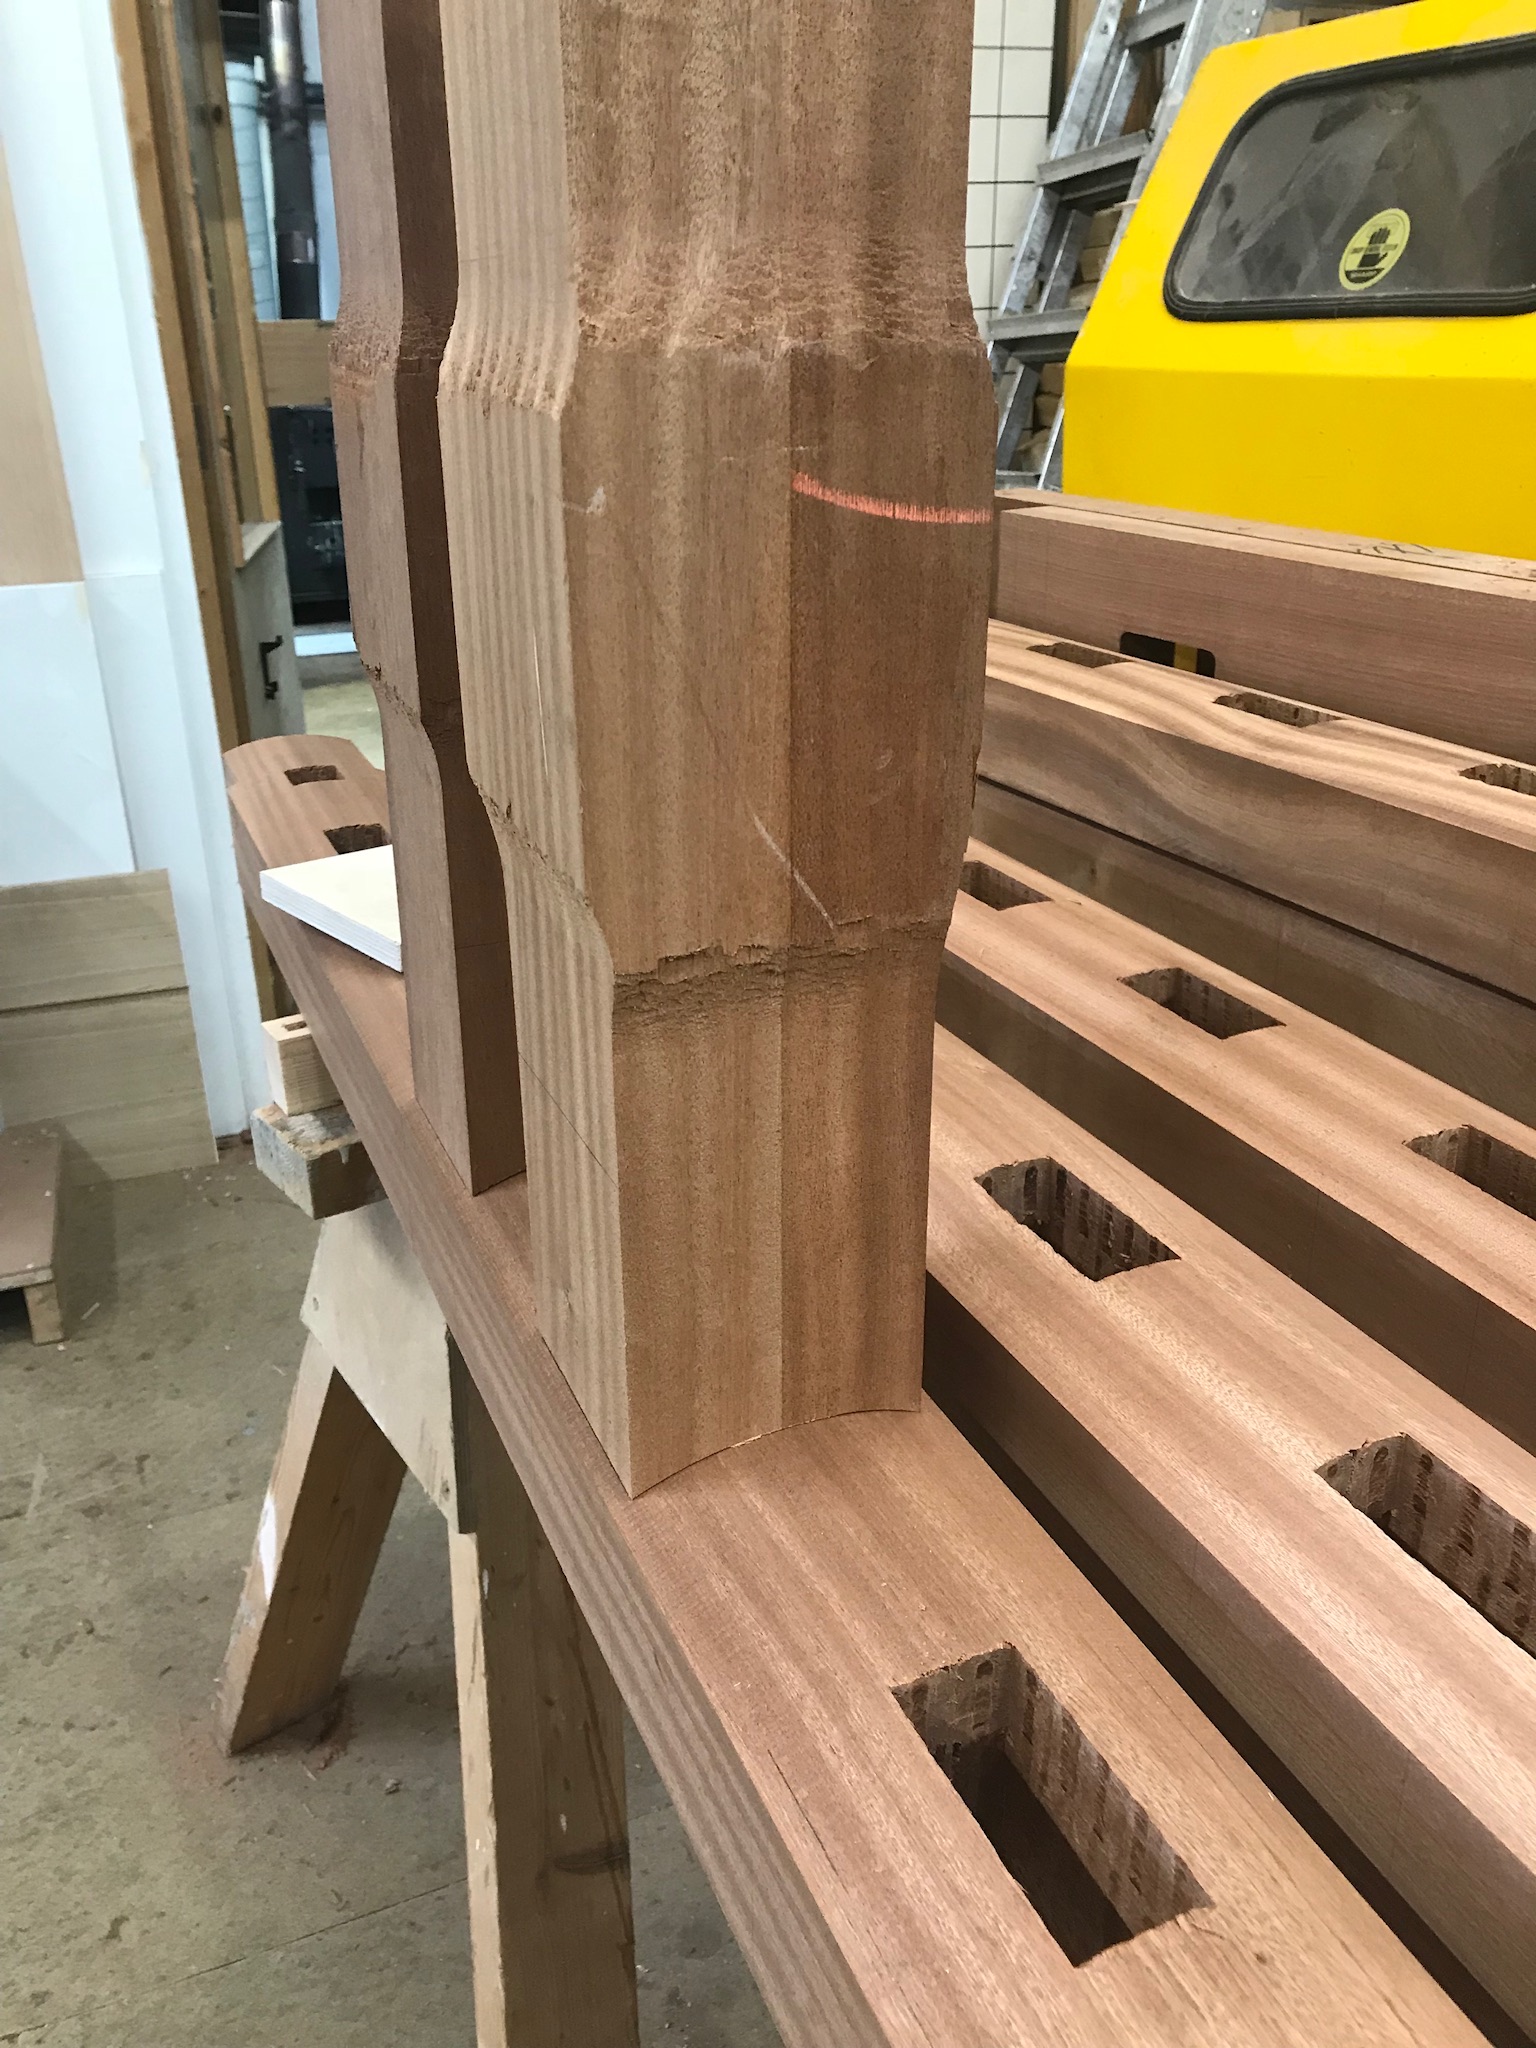
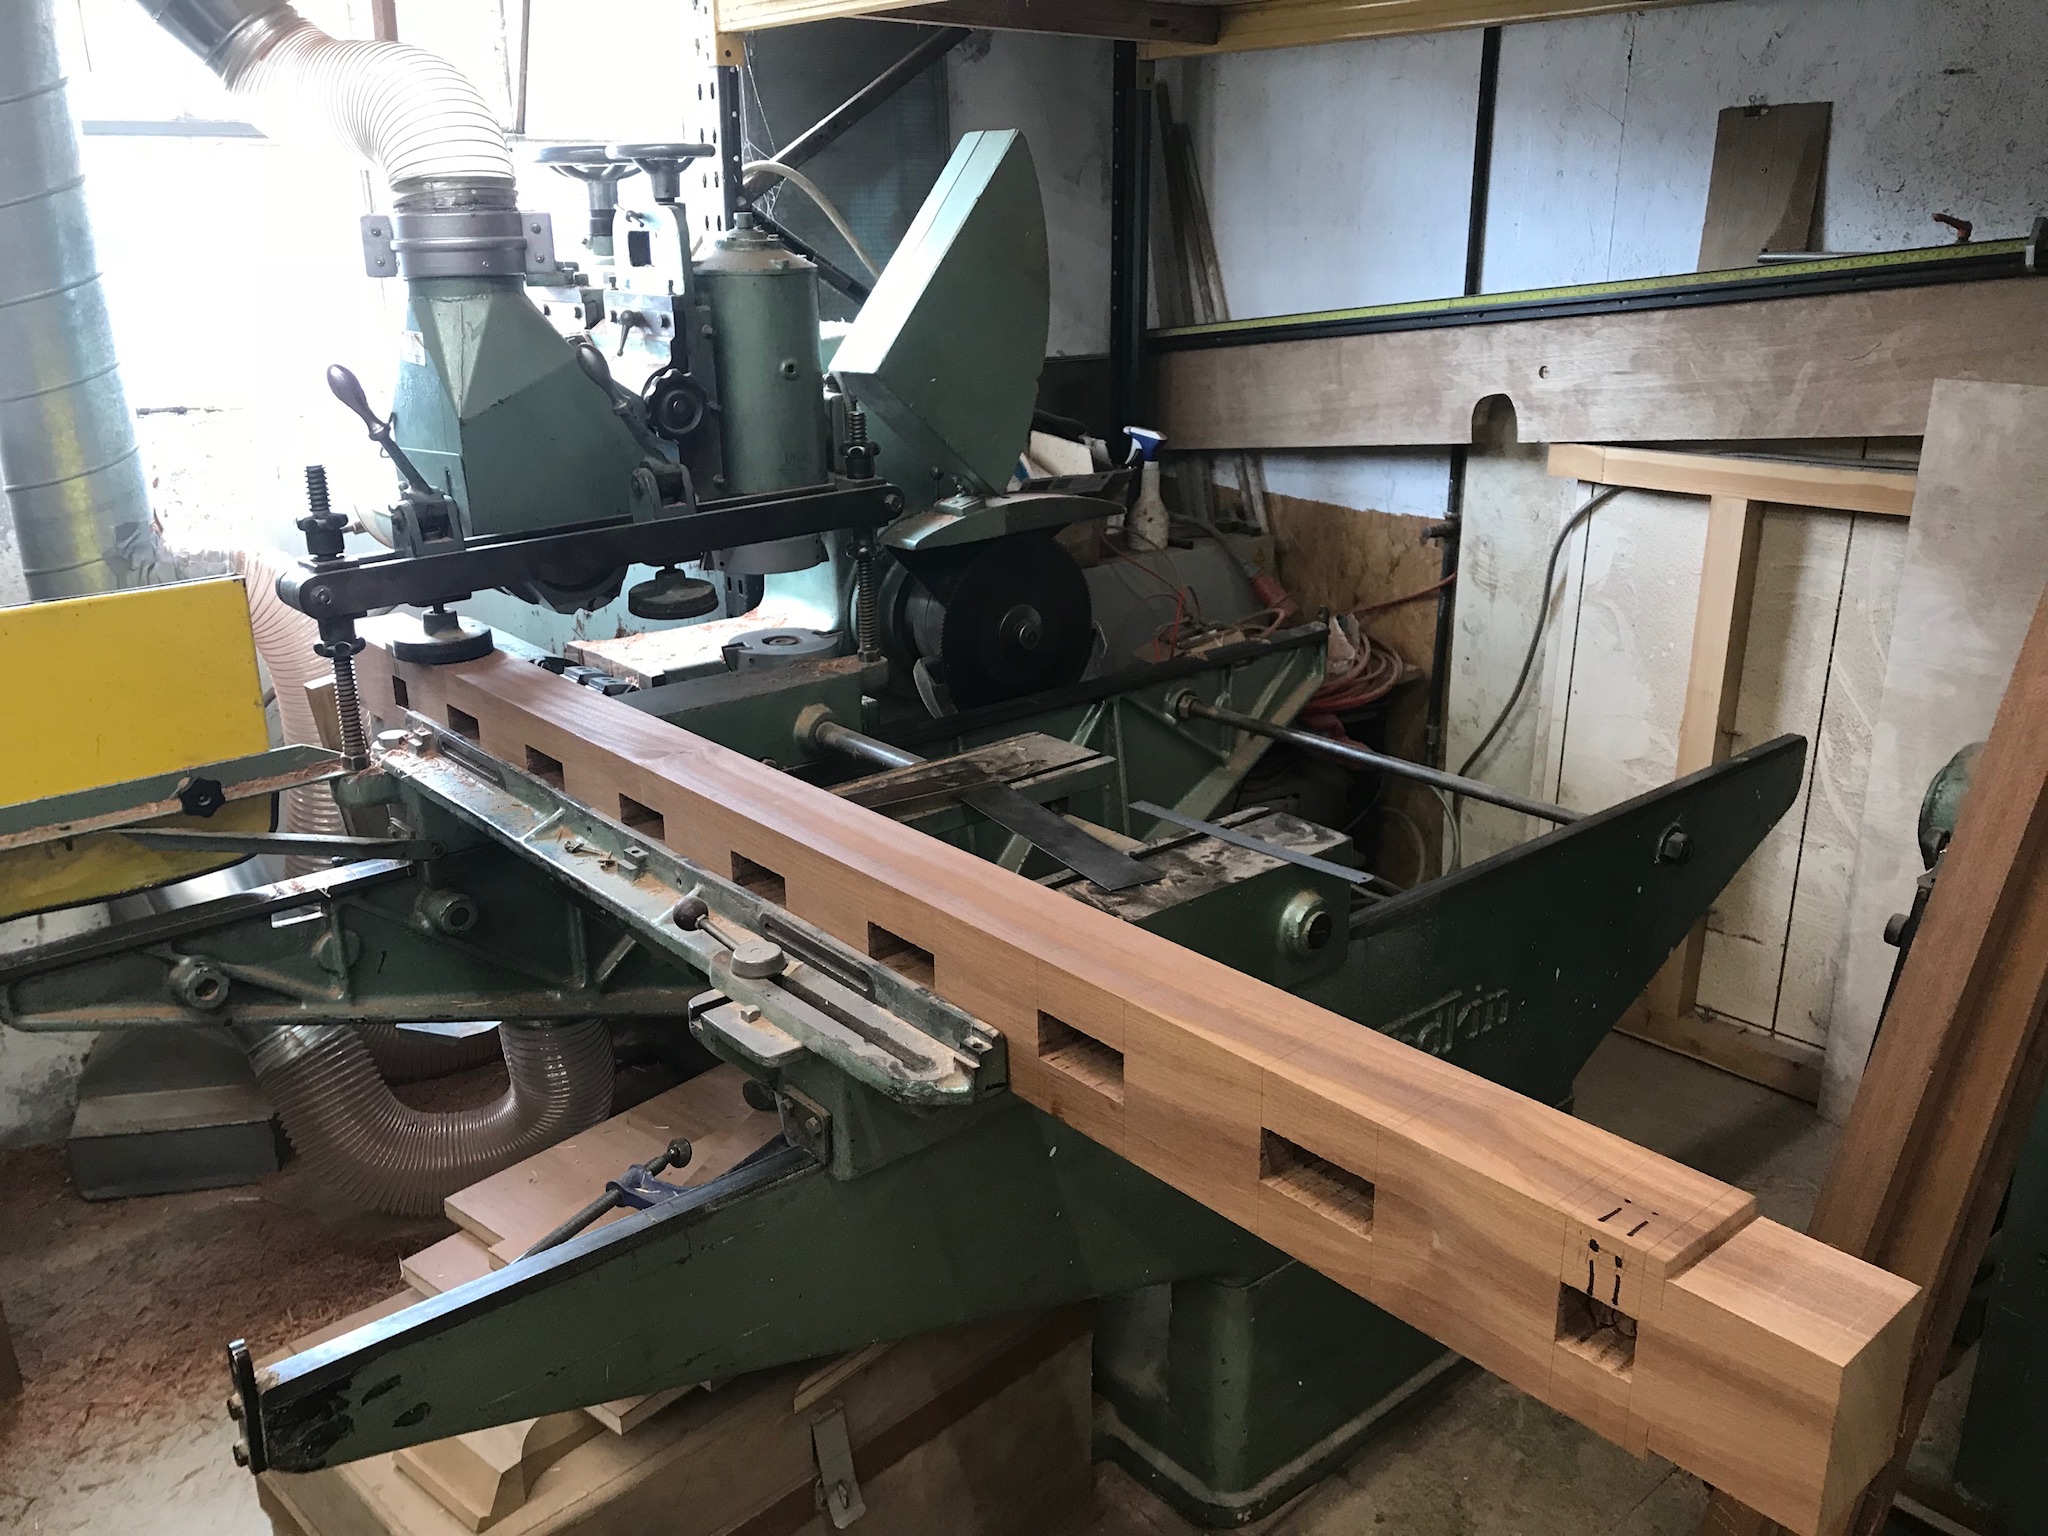
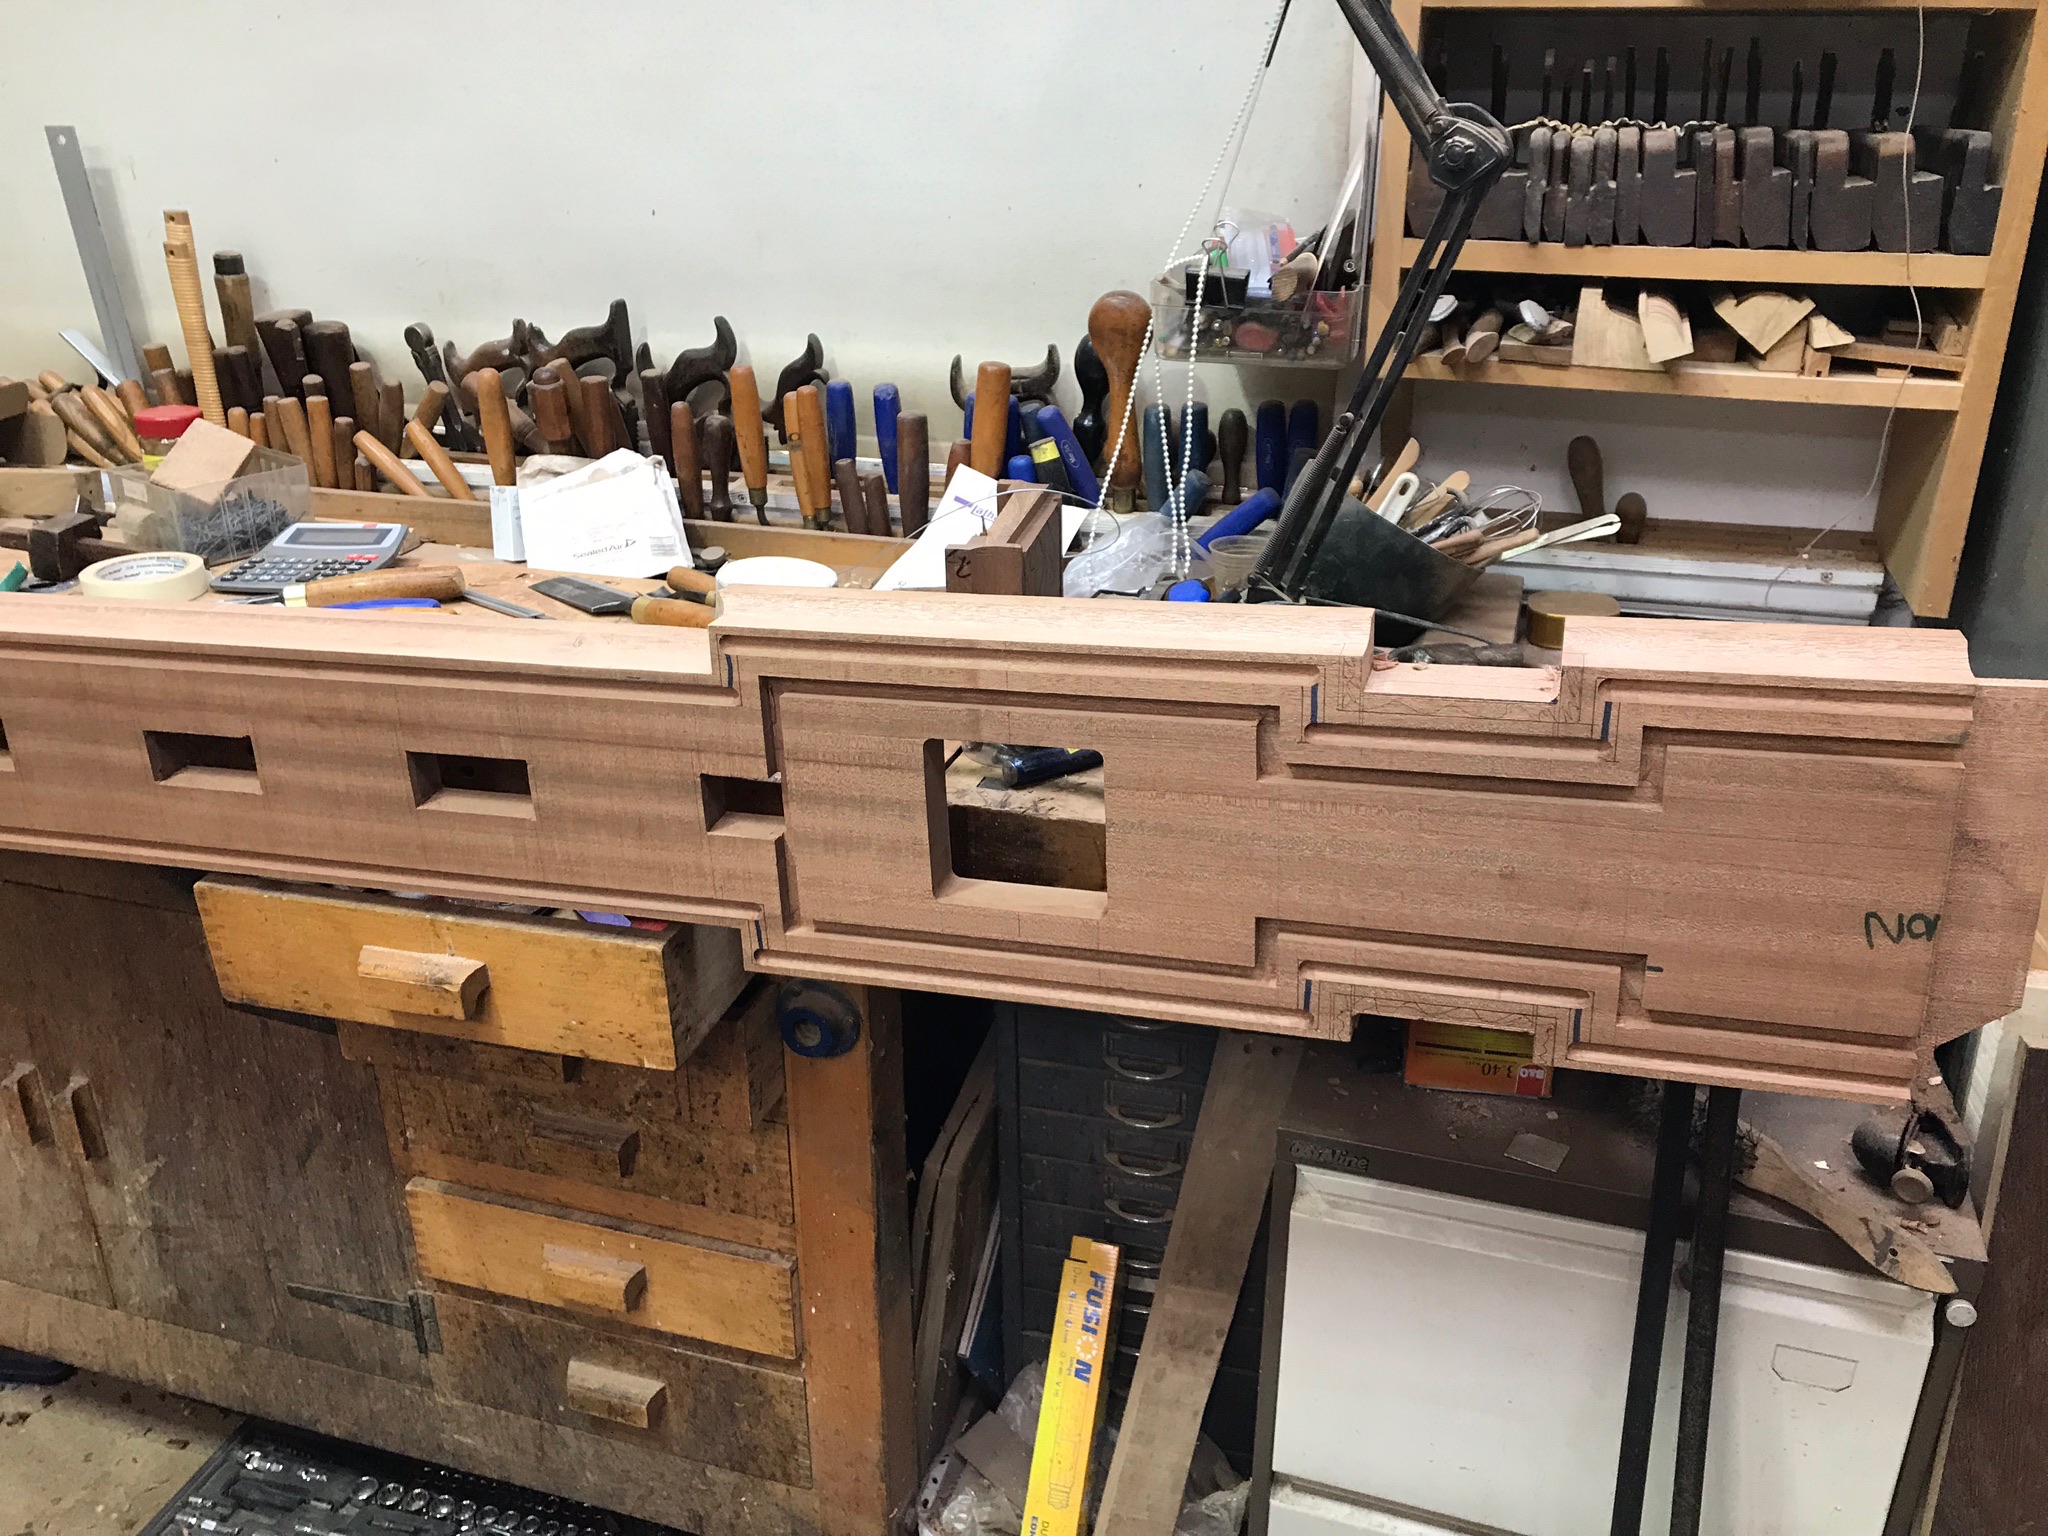
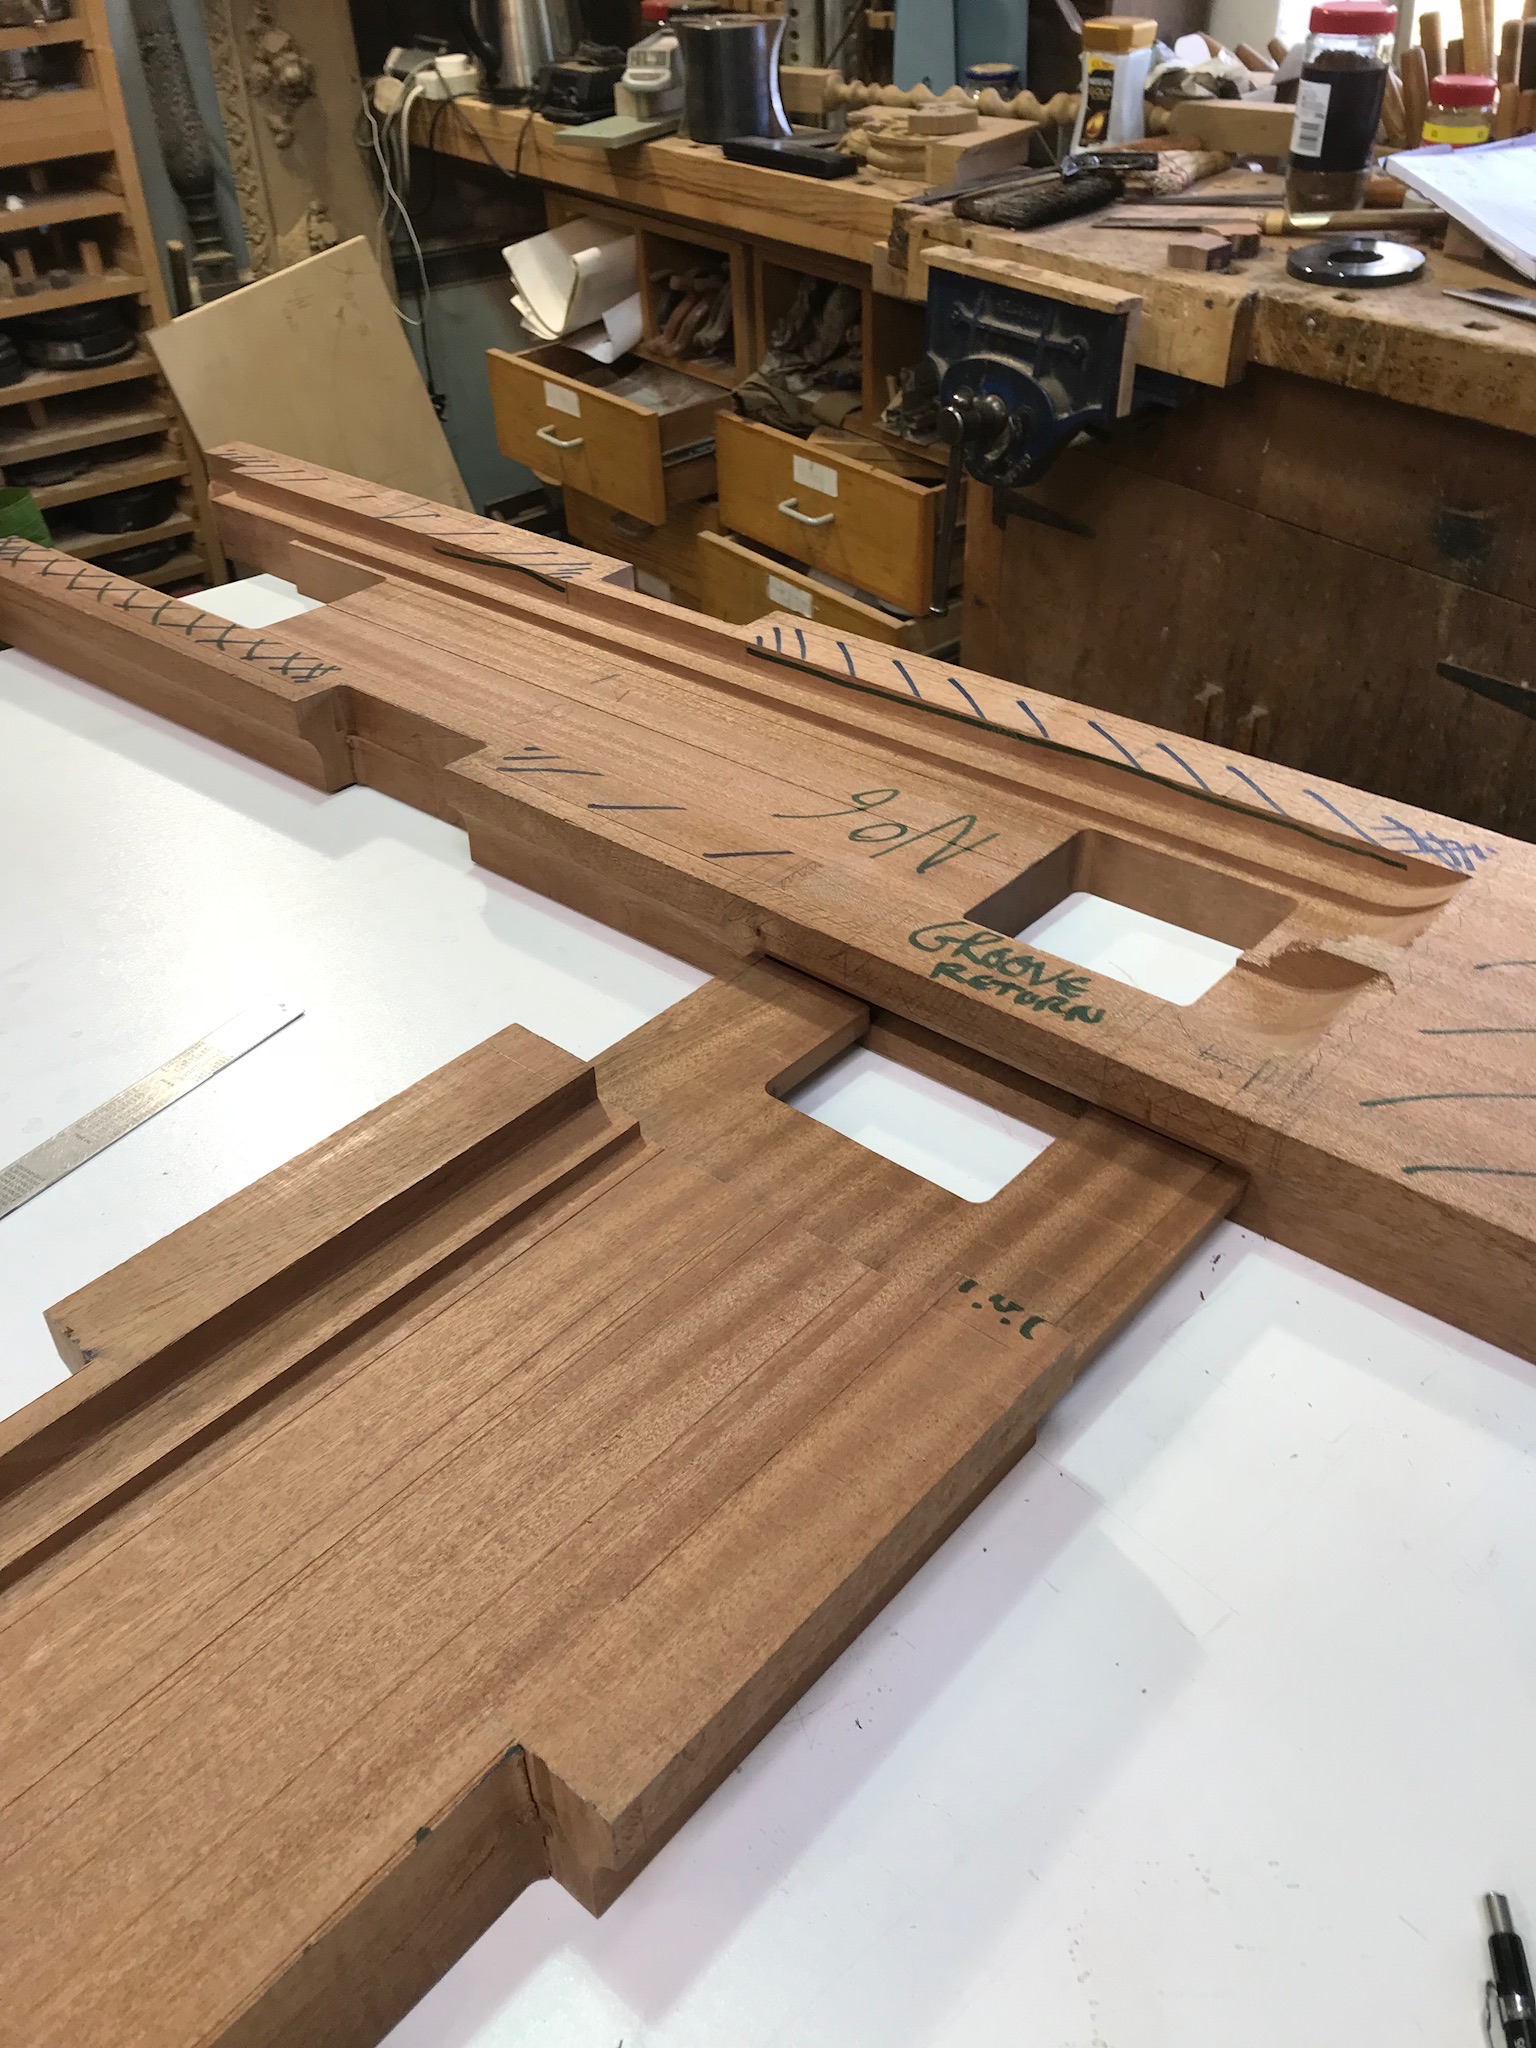
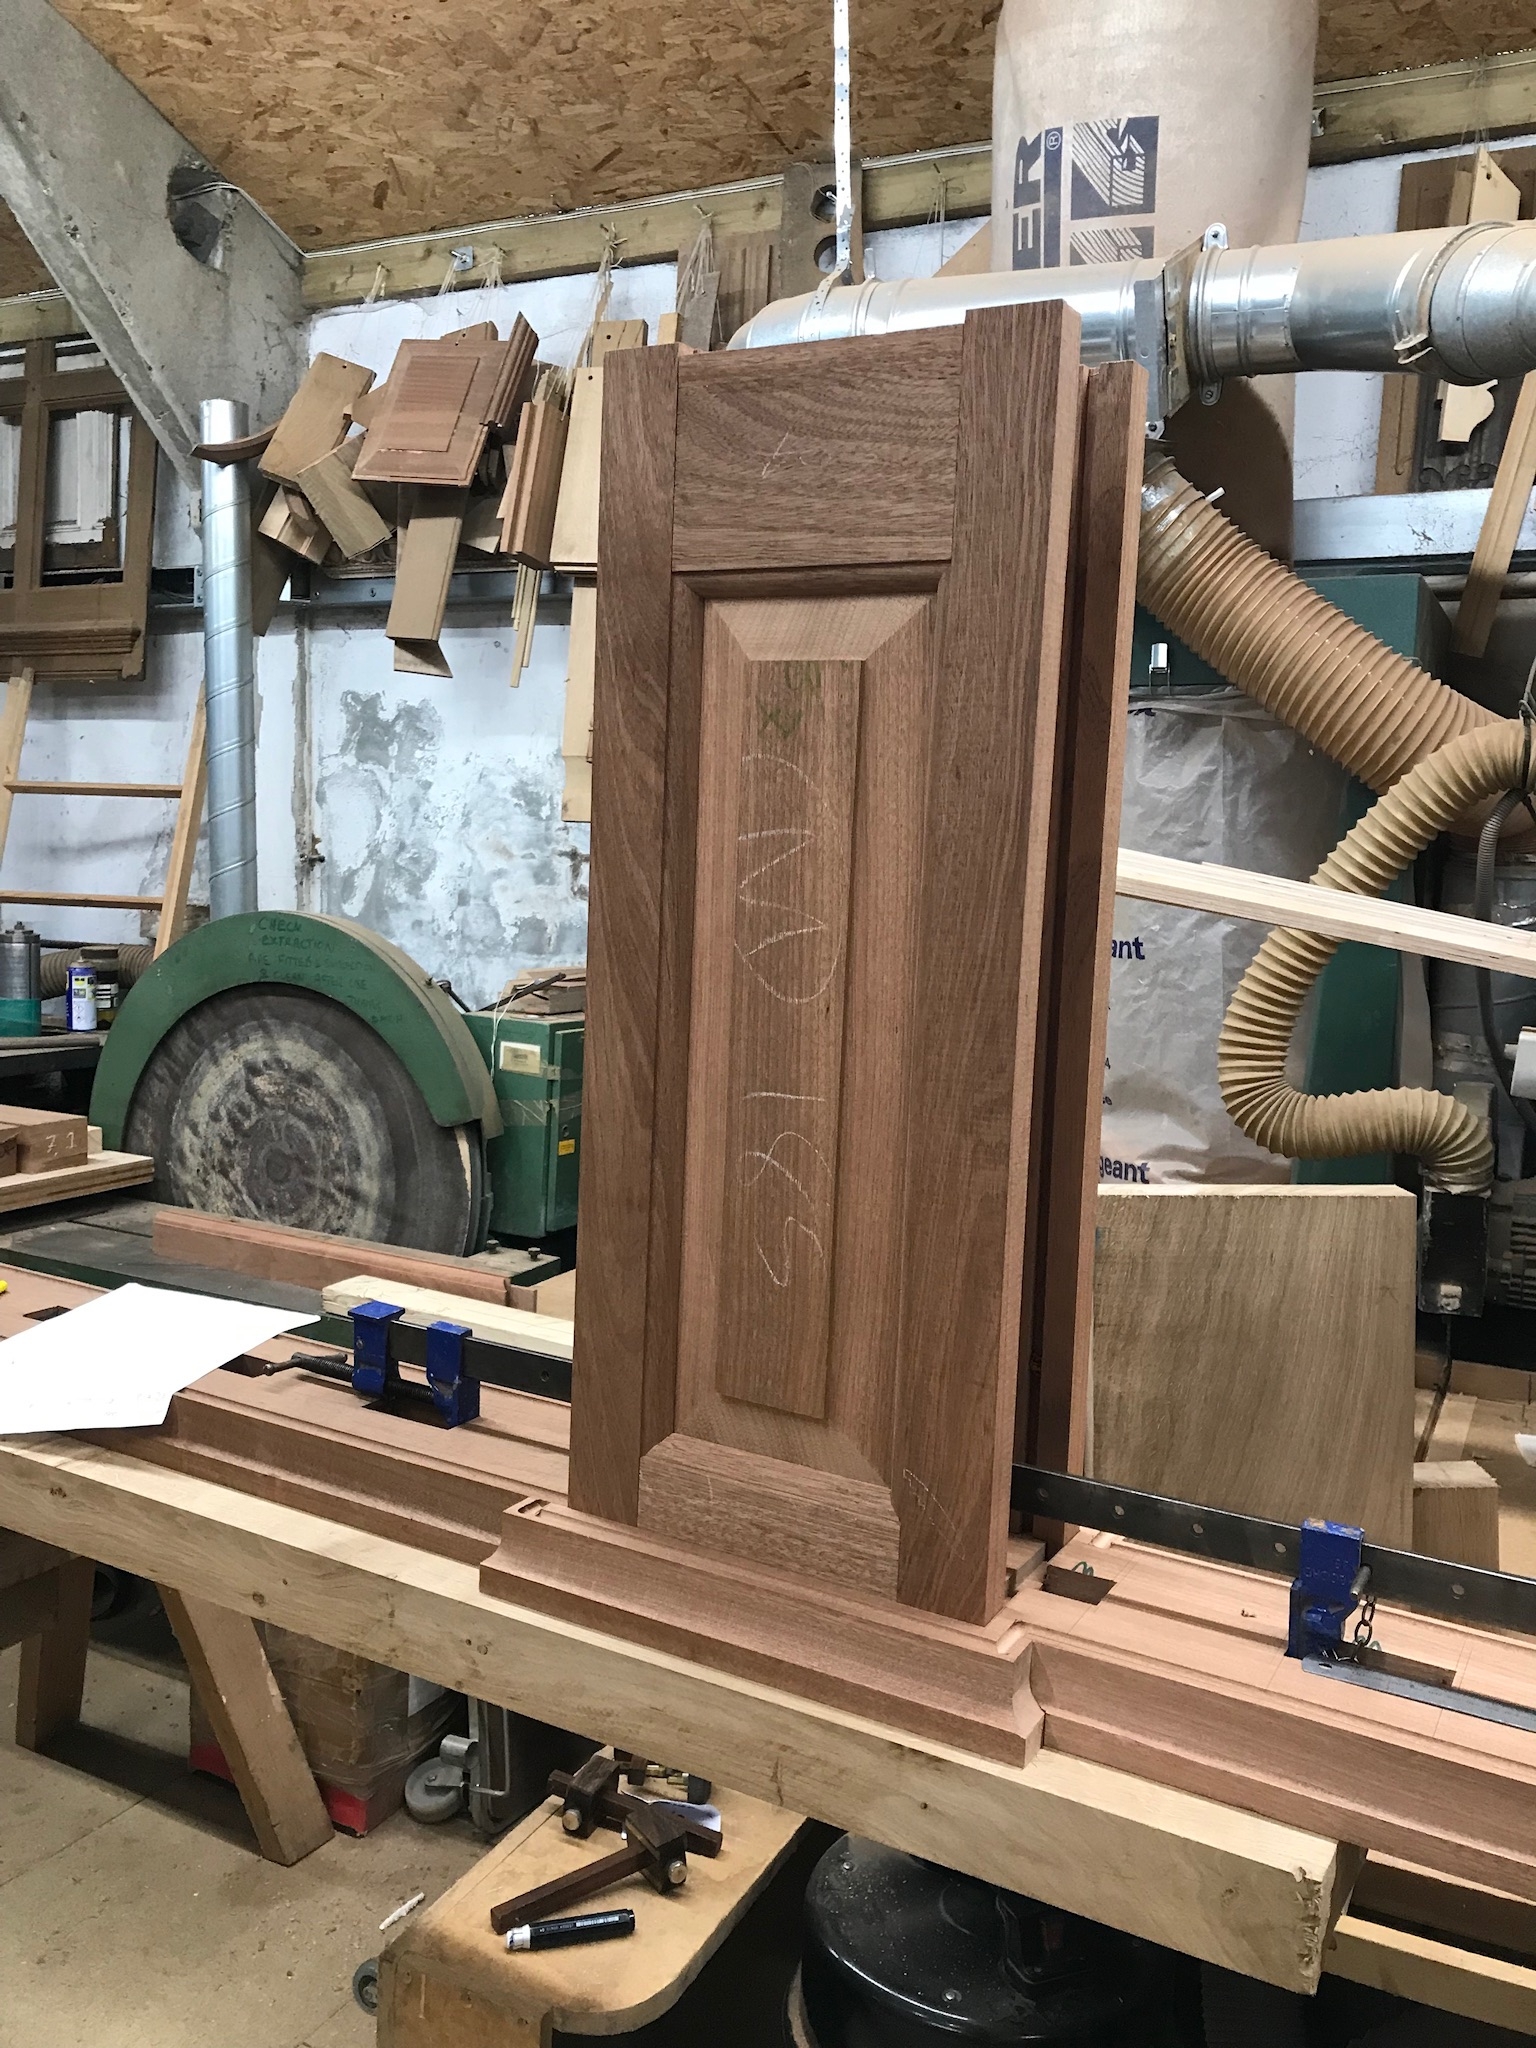
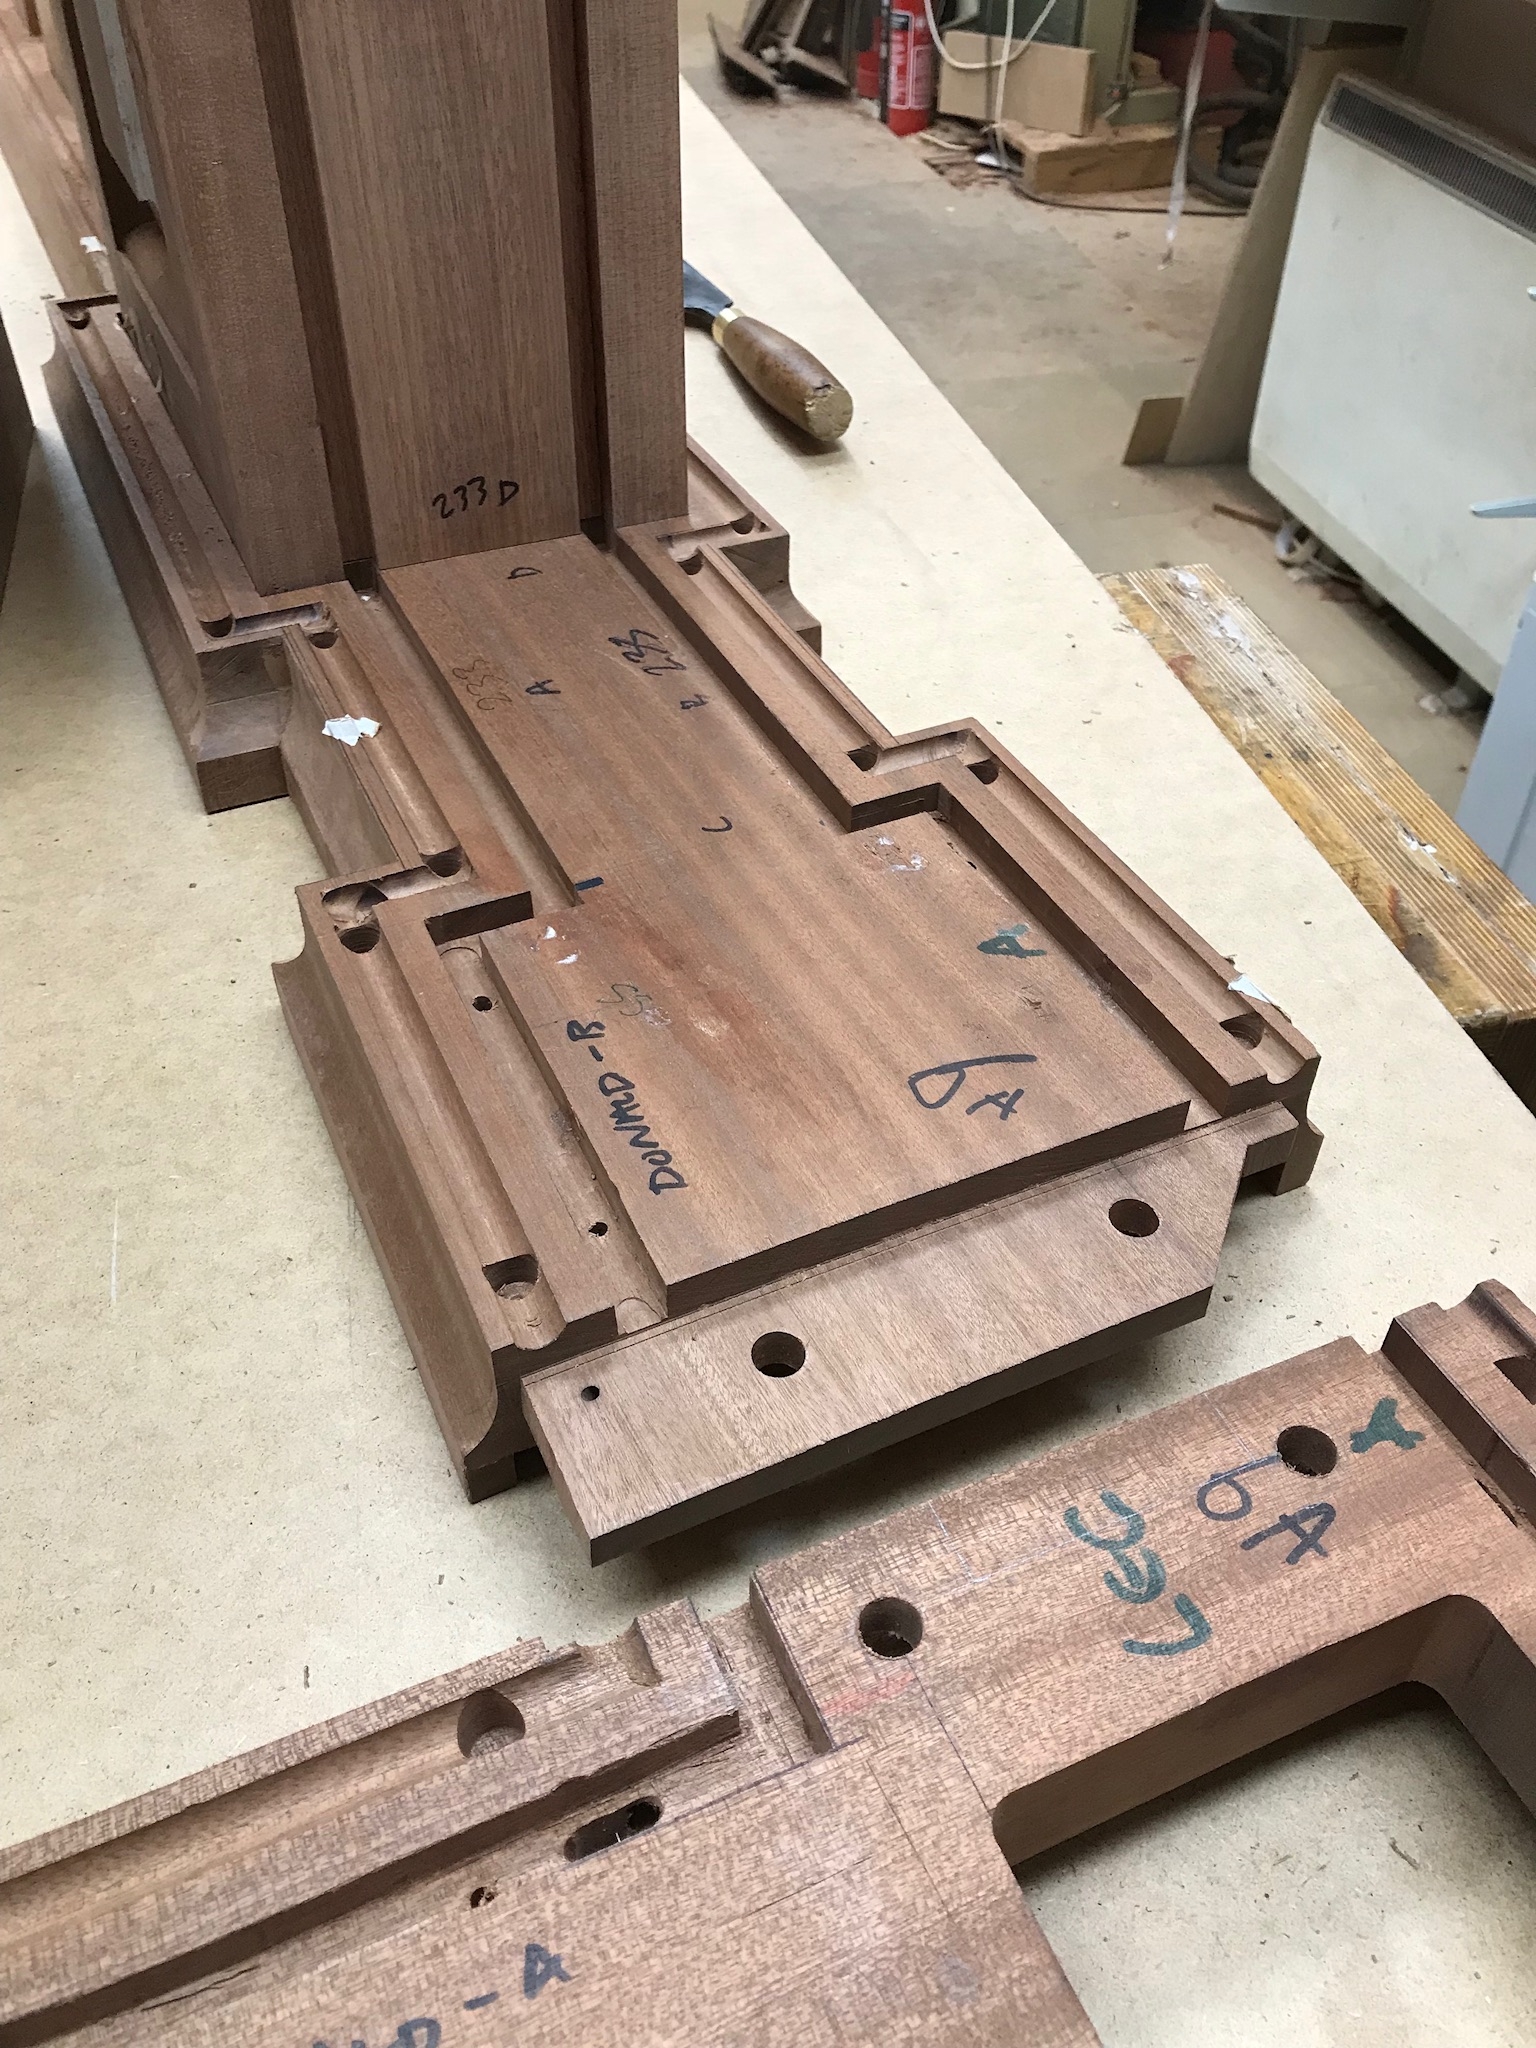
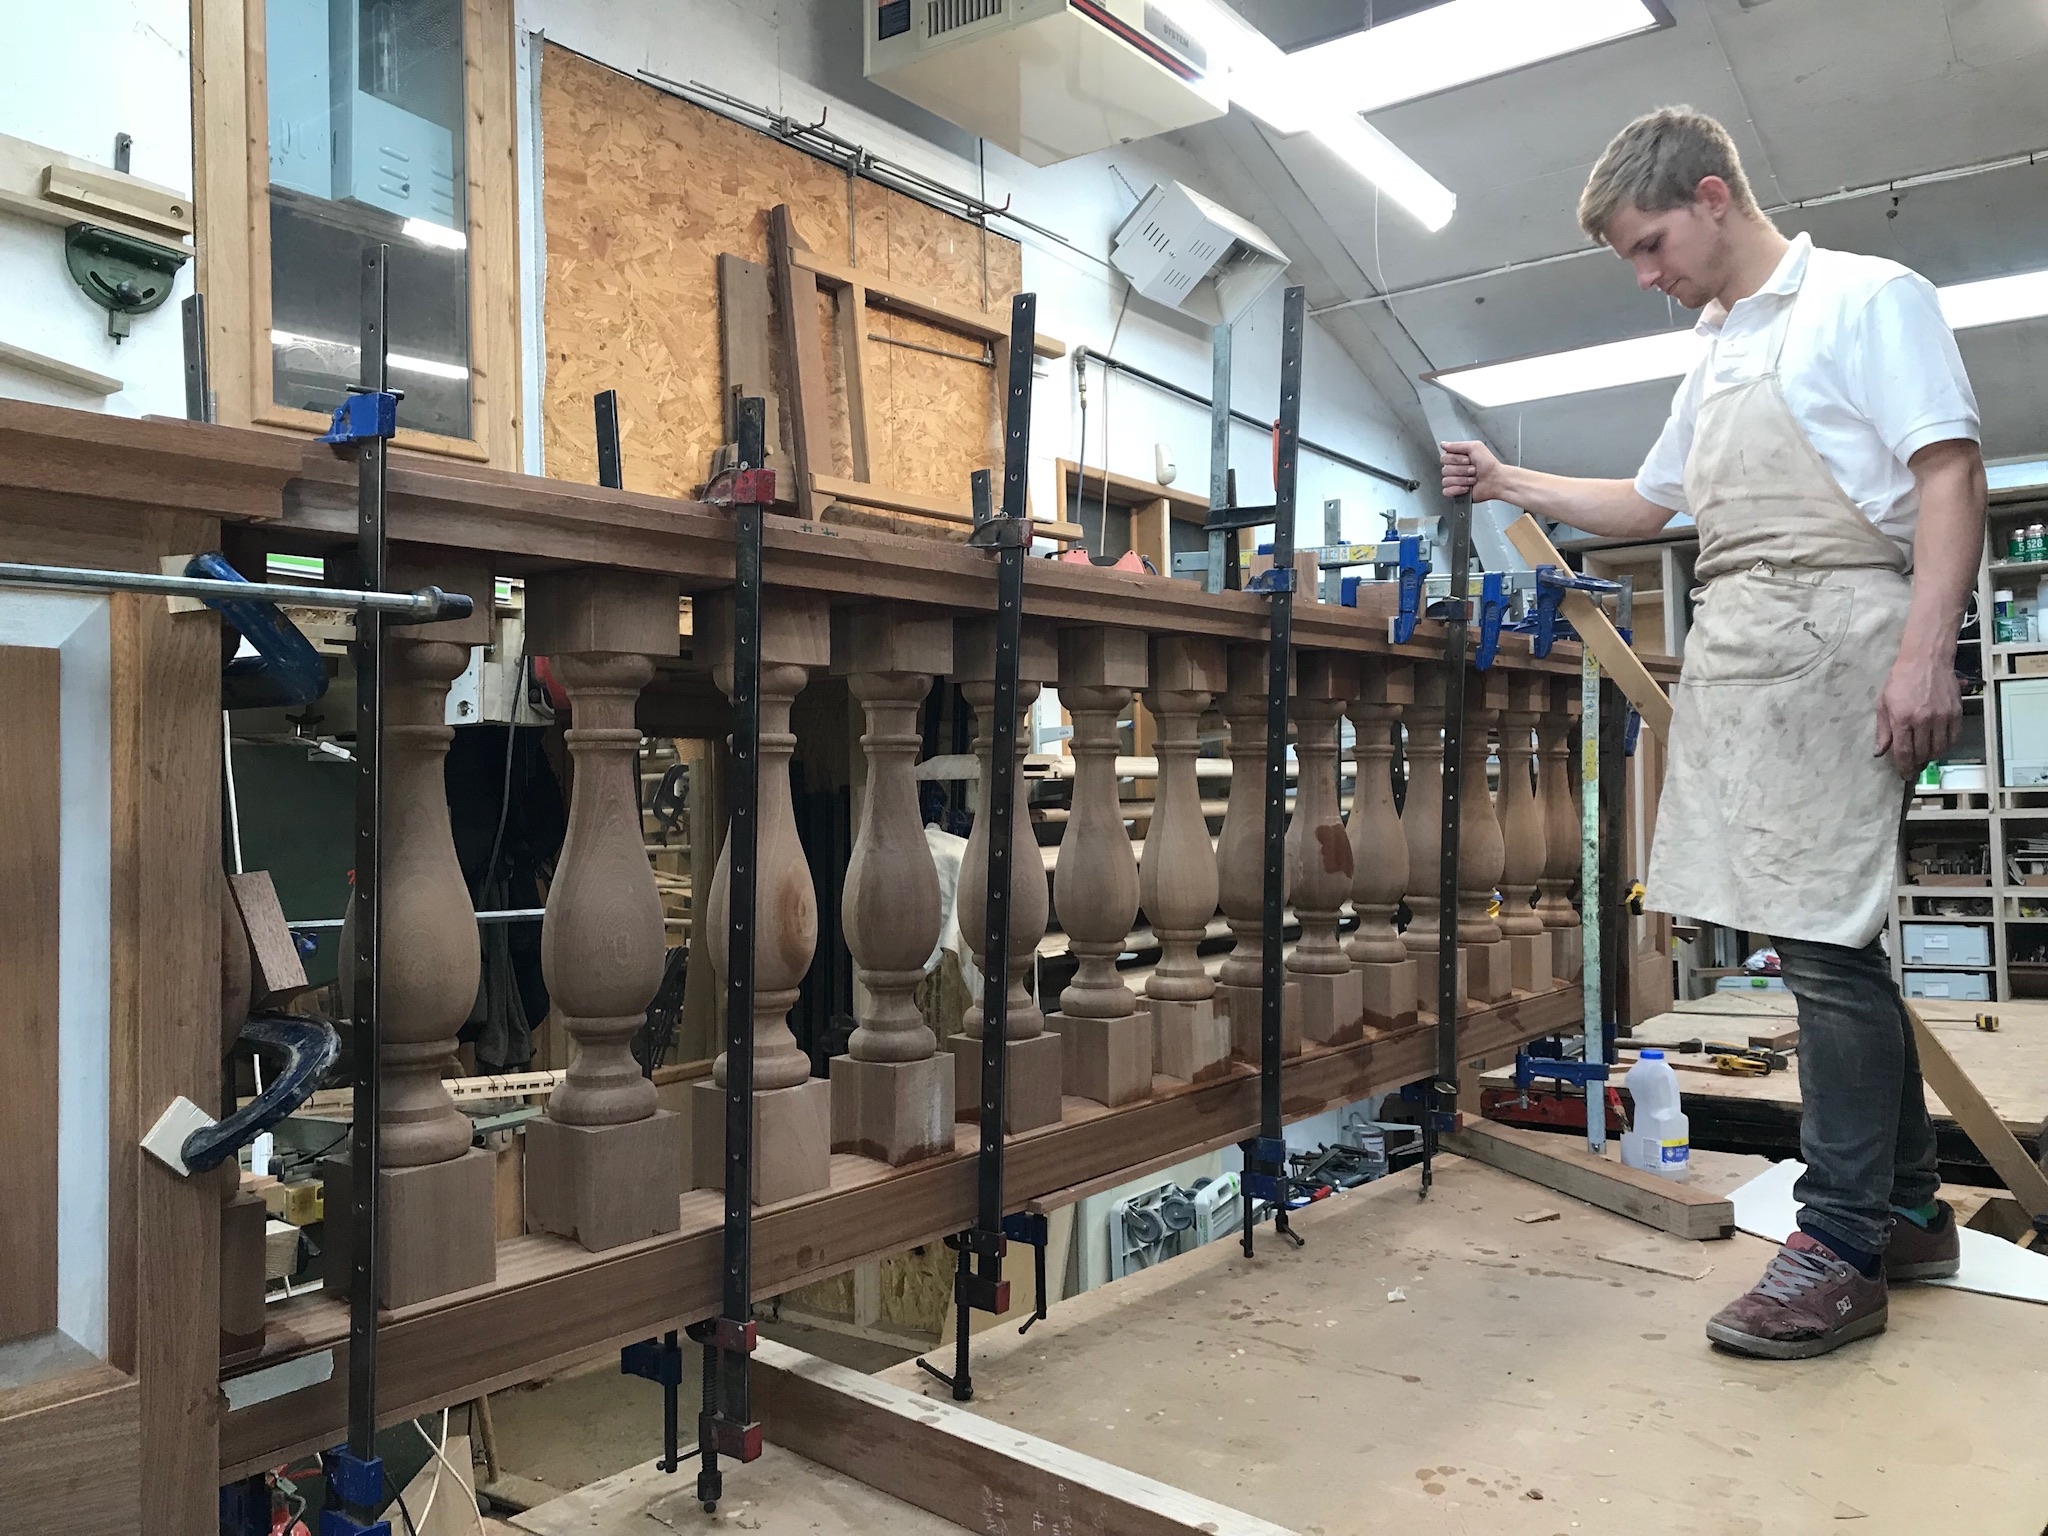
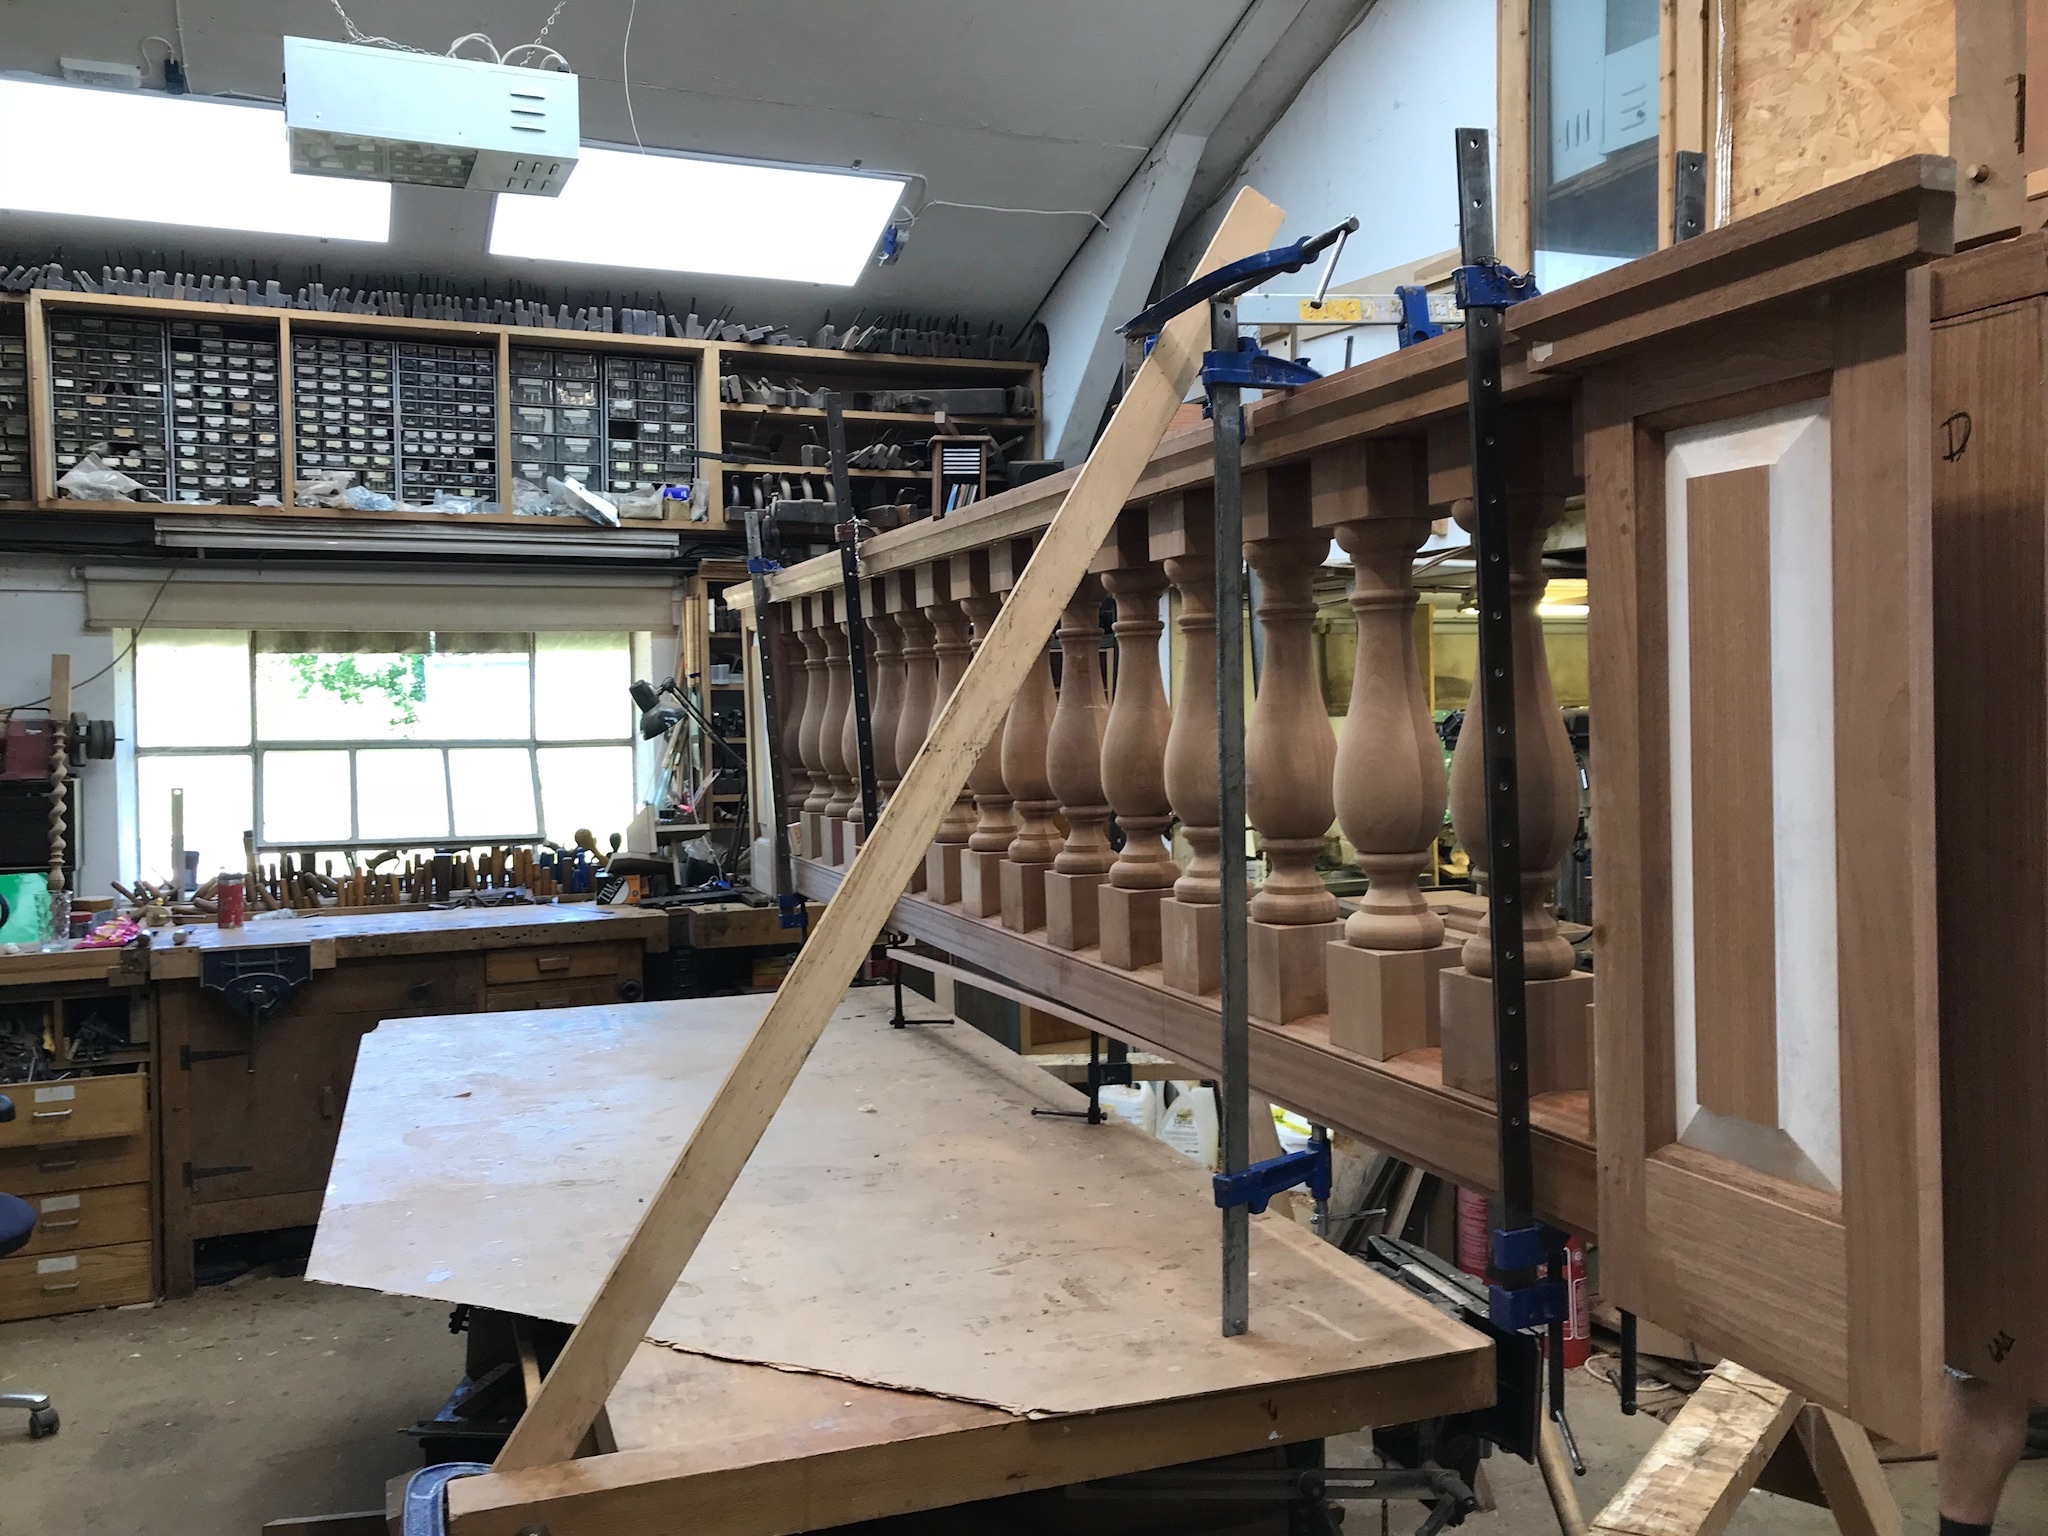
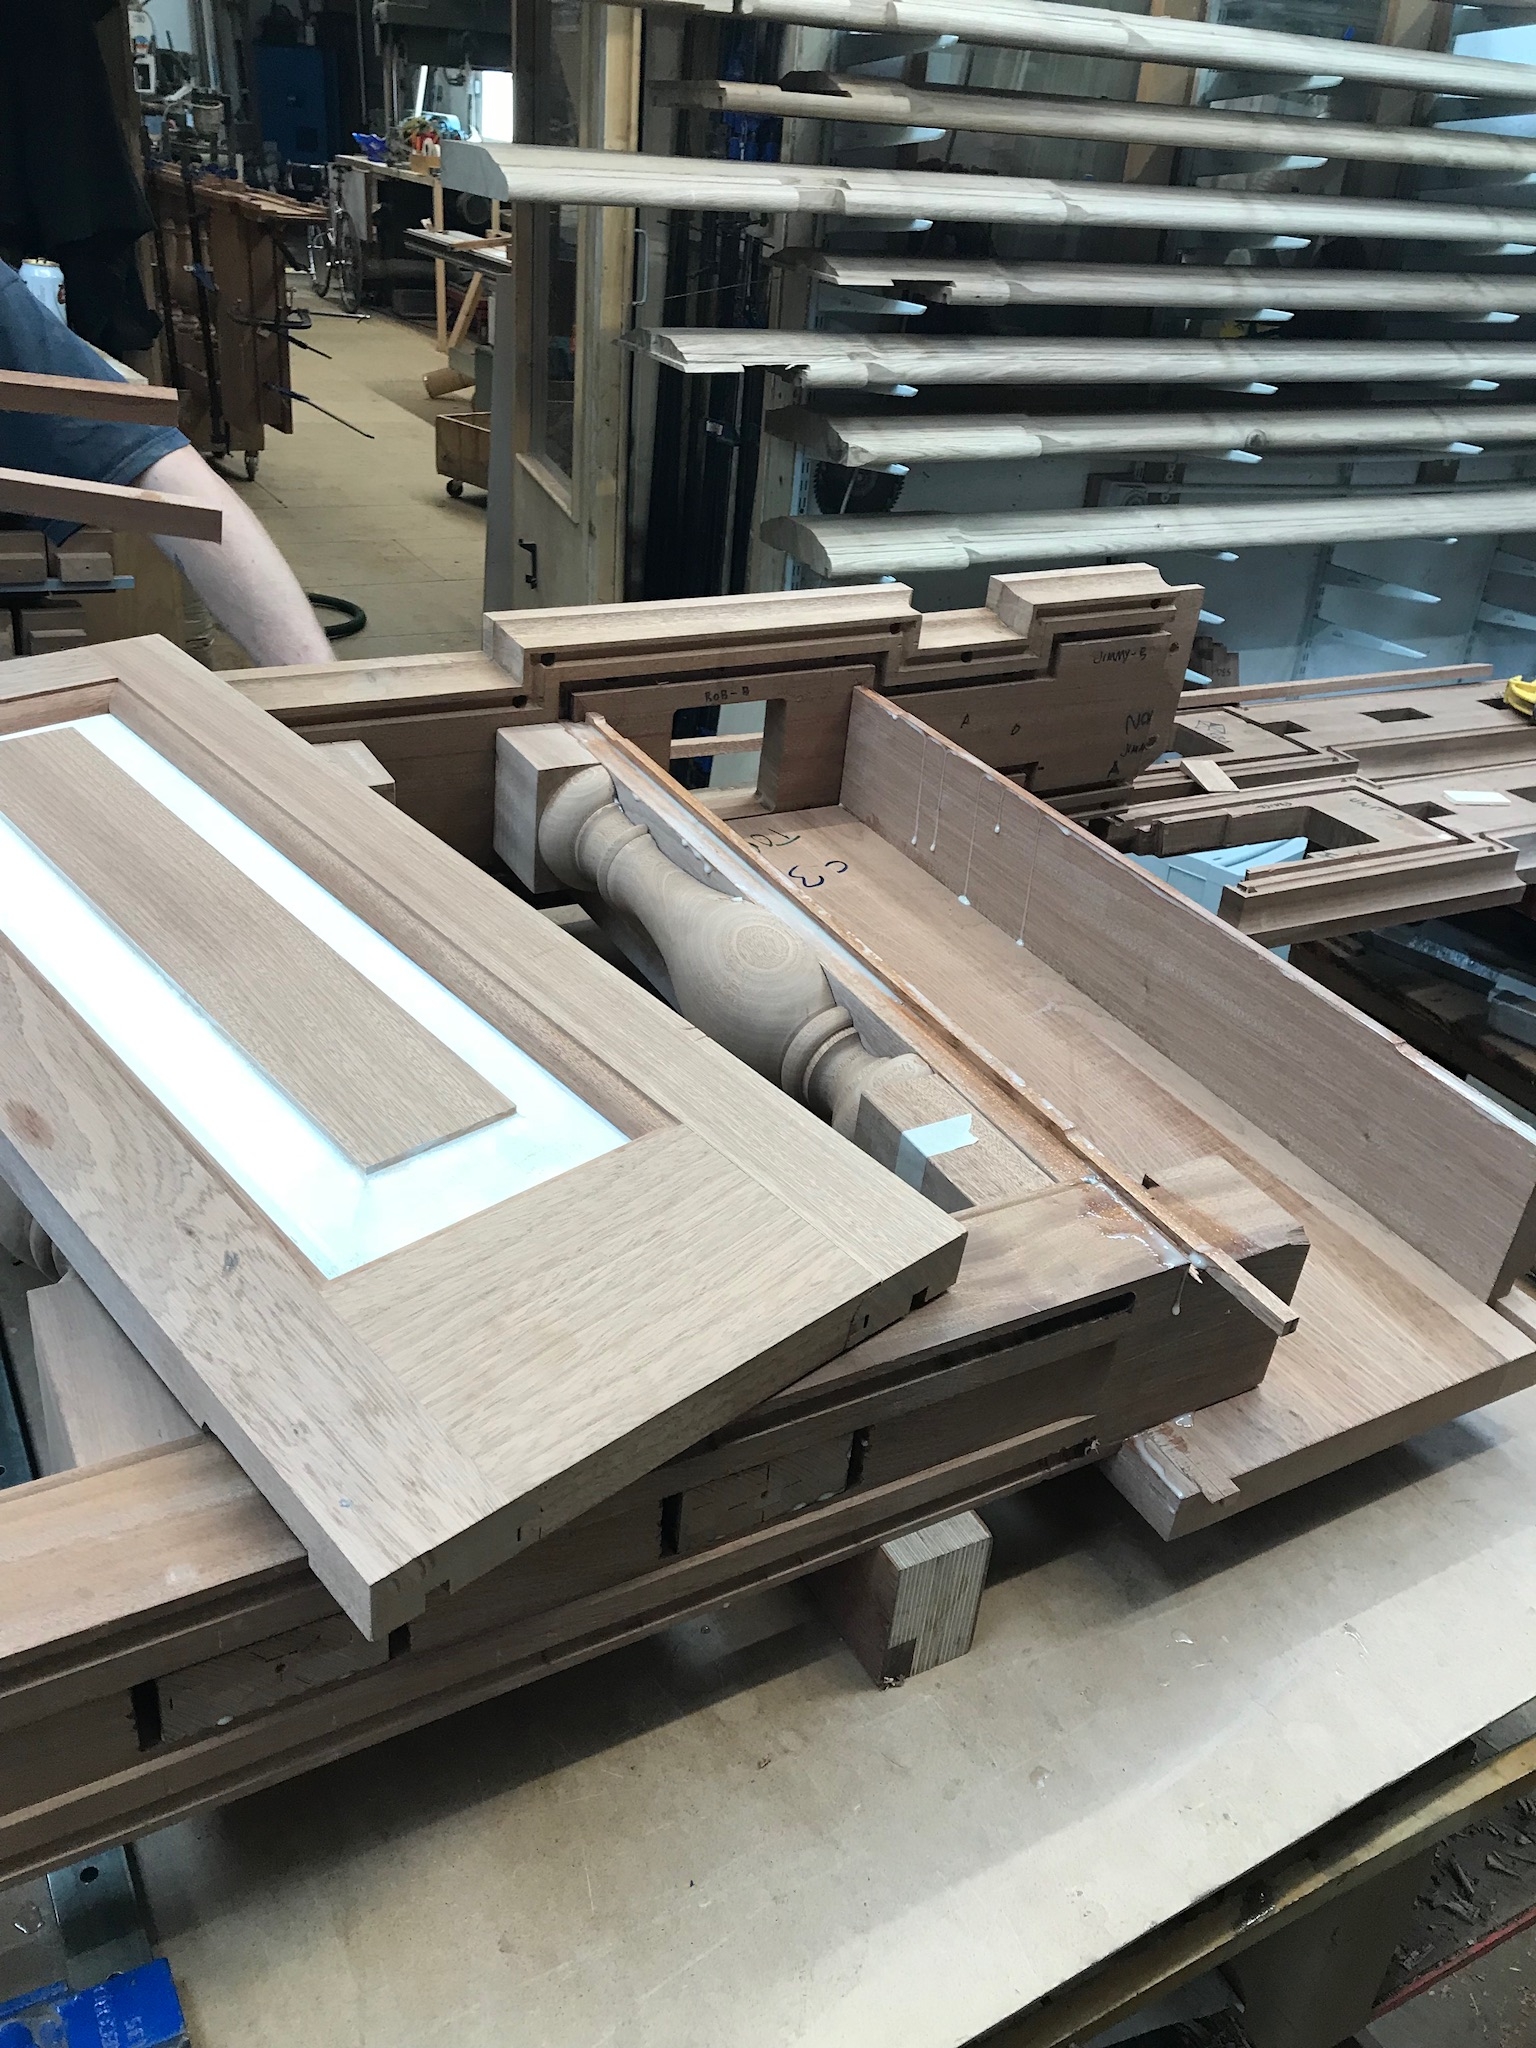
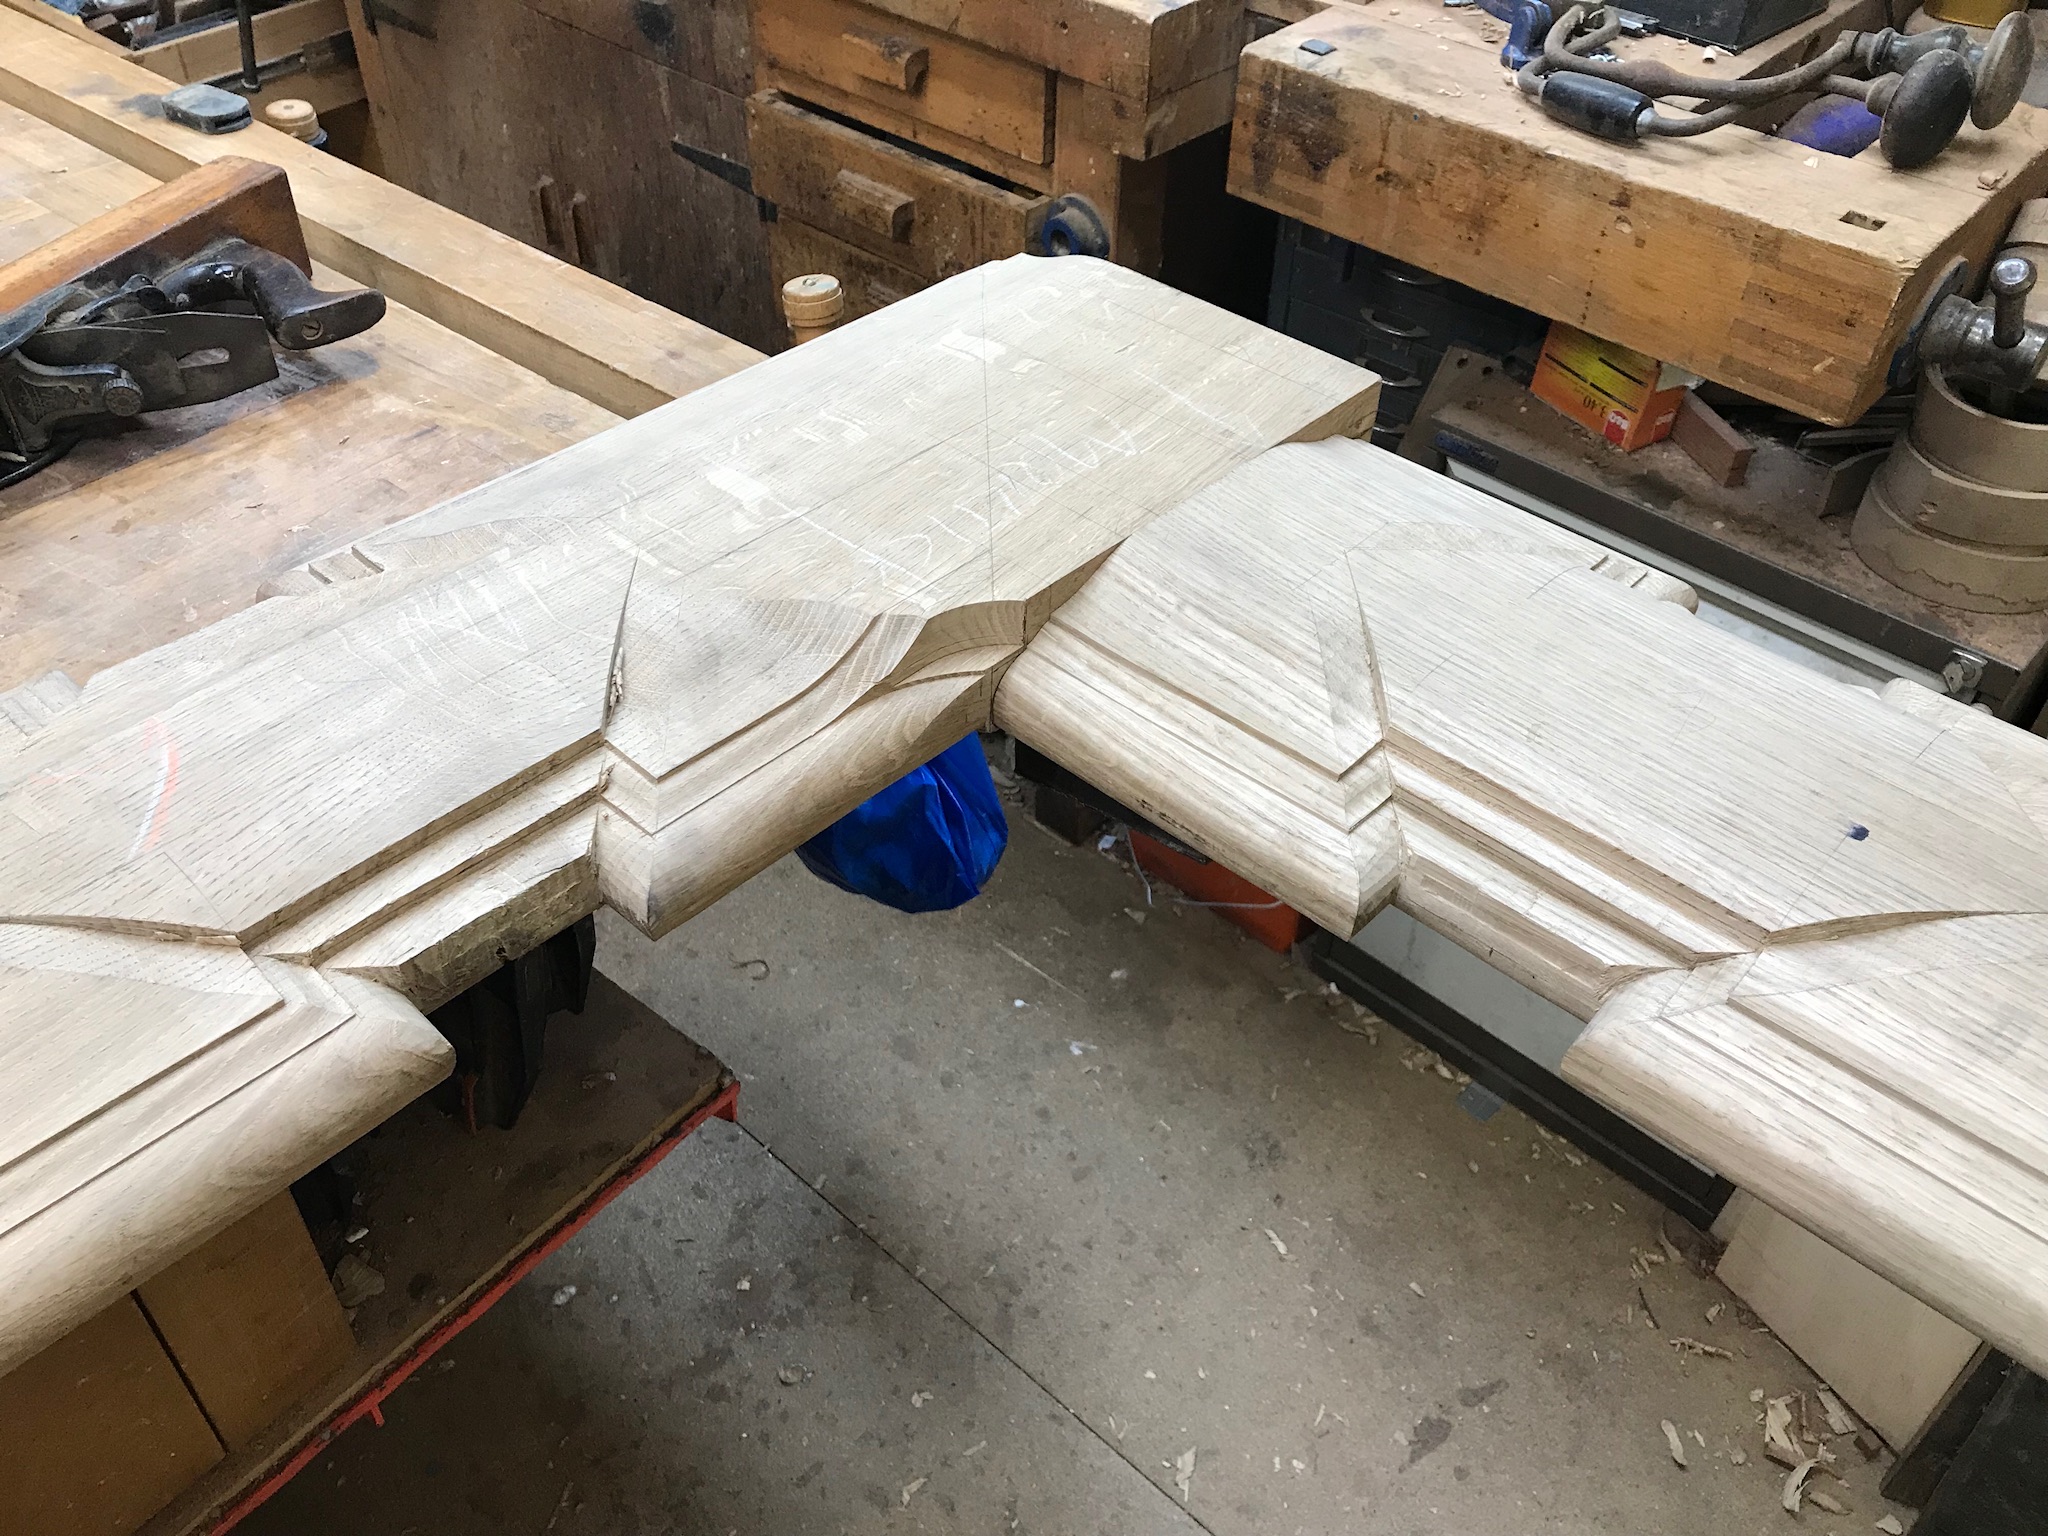
Heads
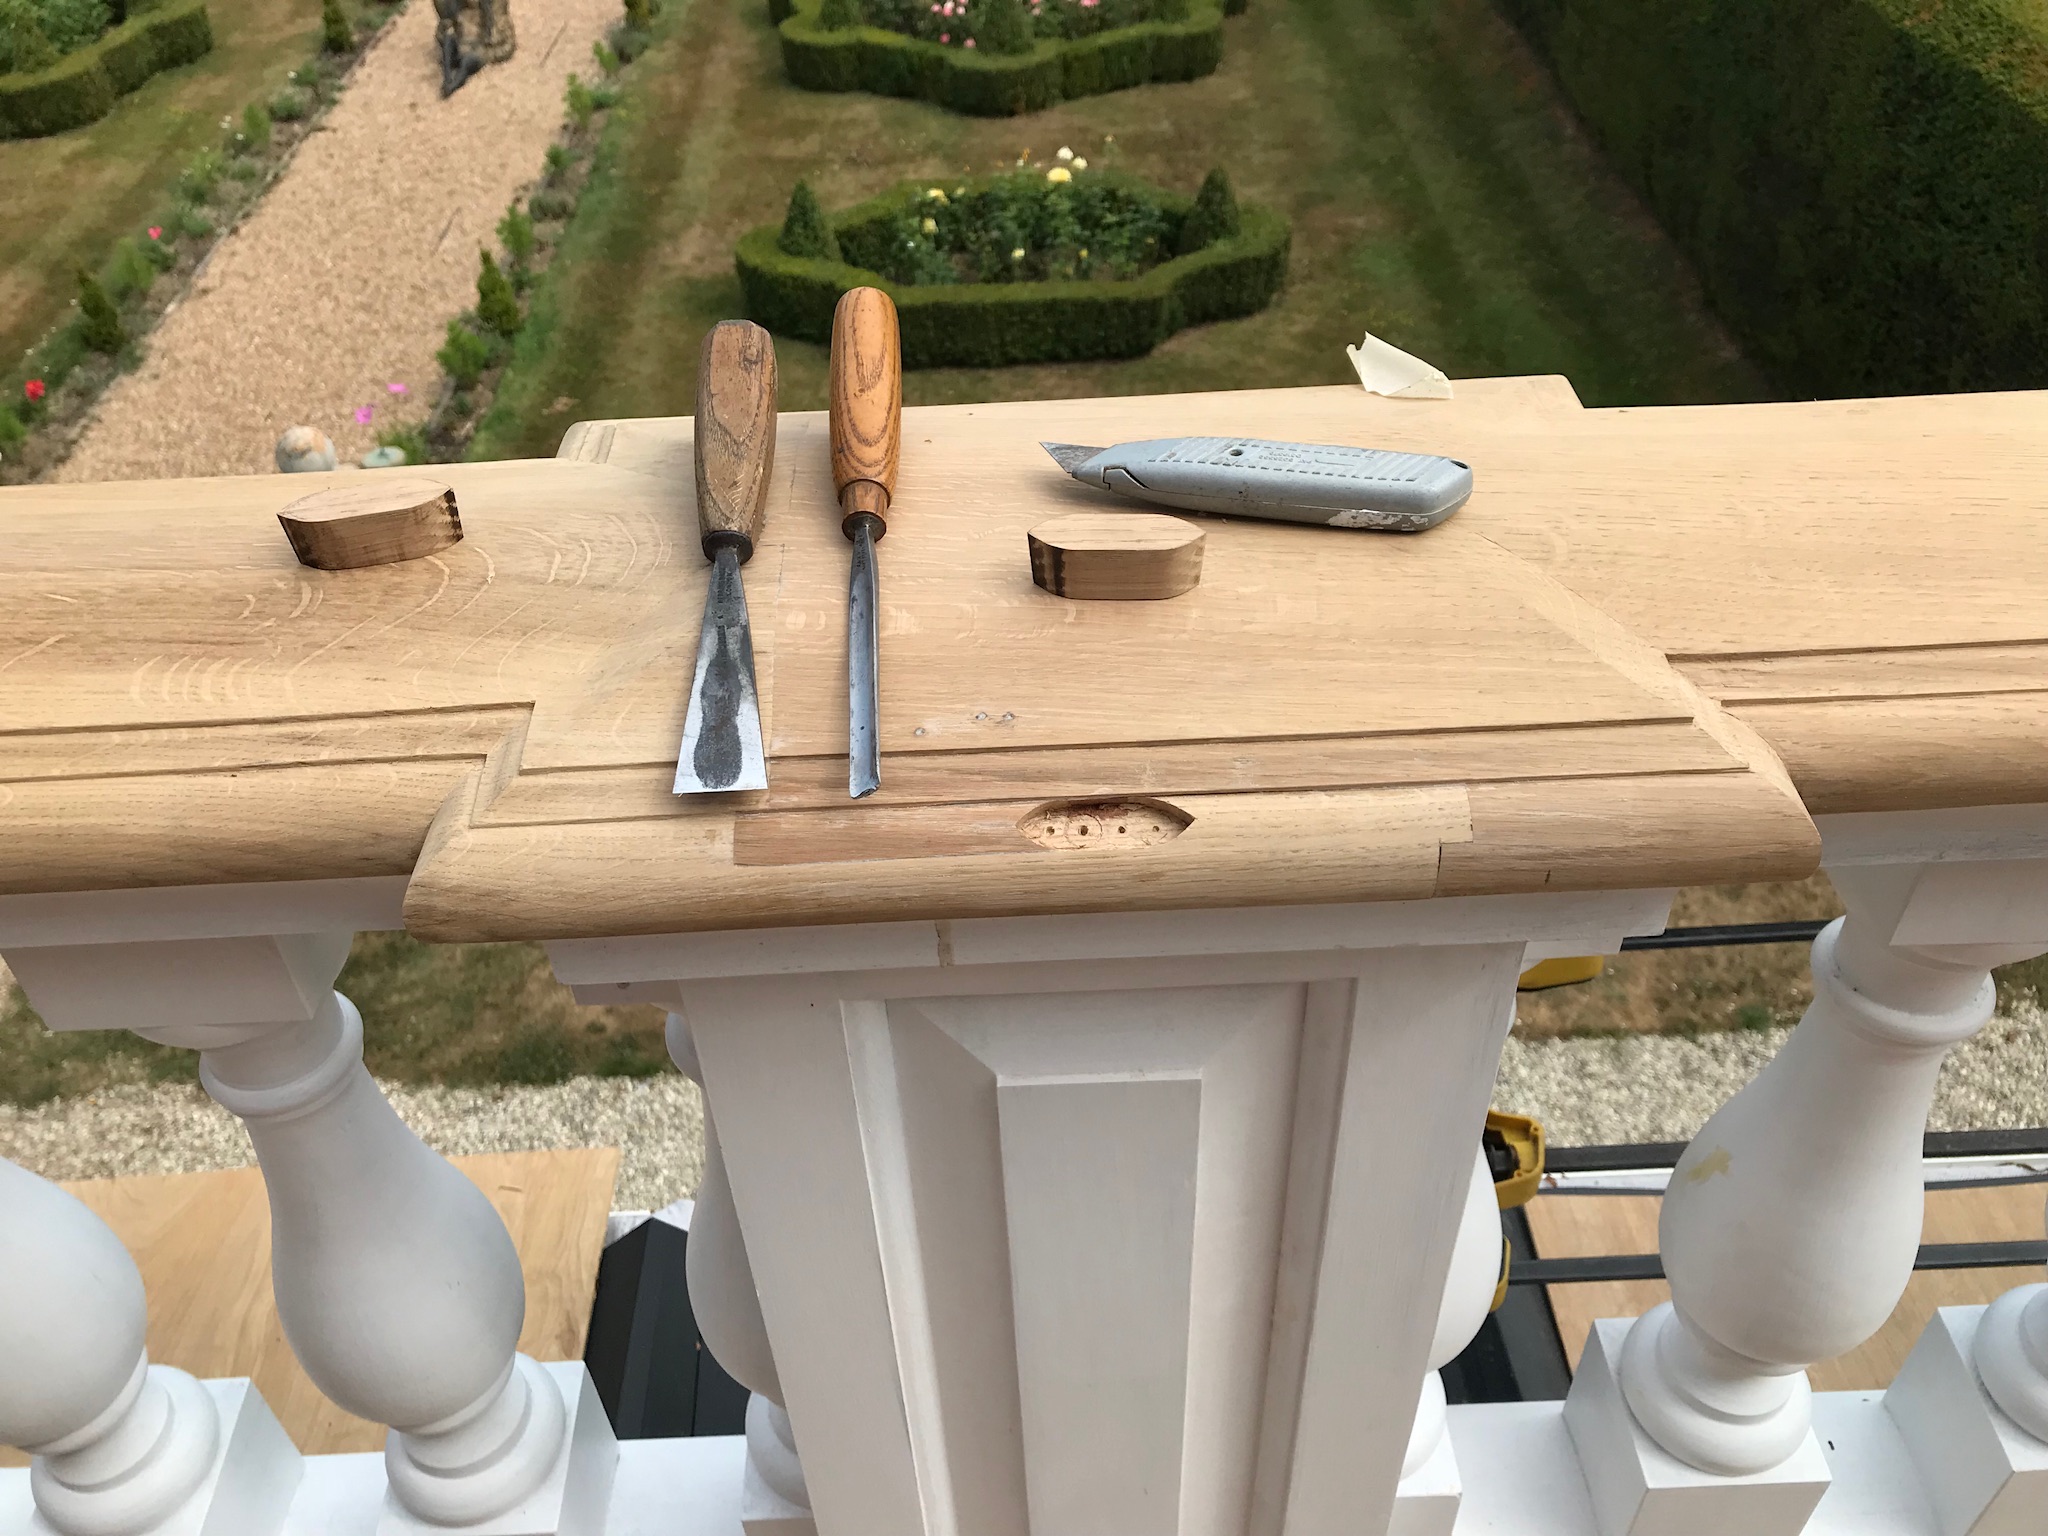
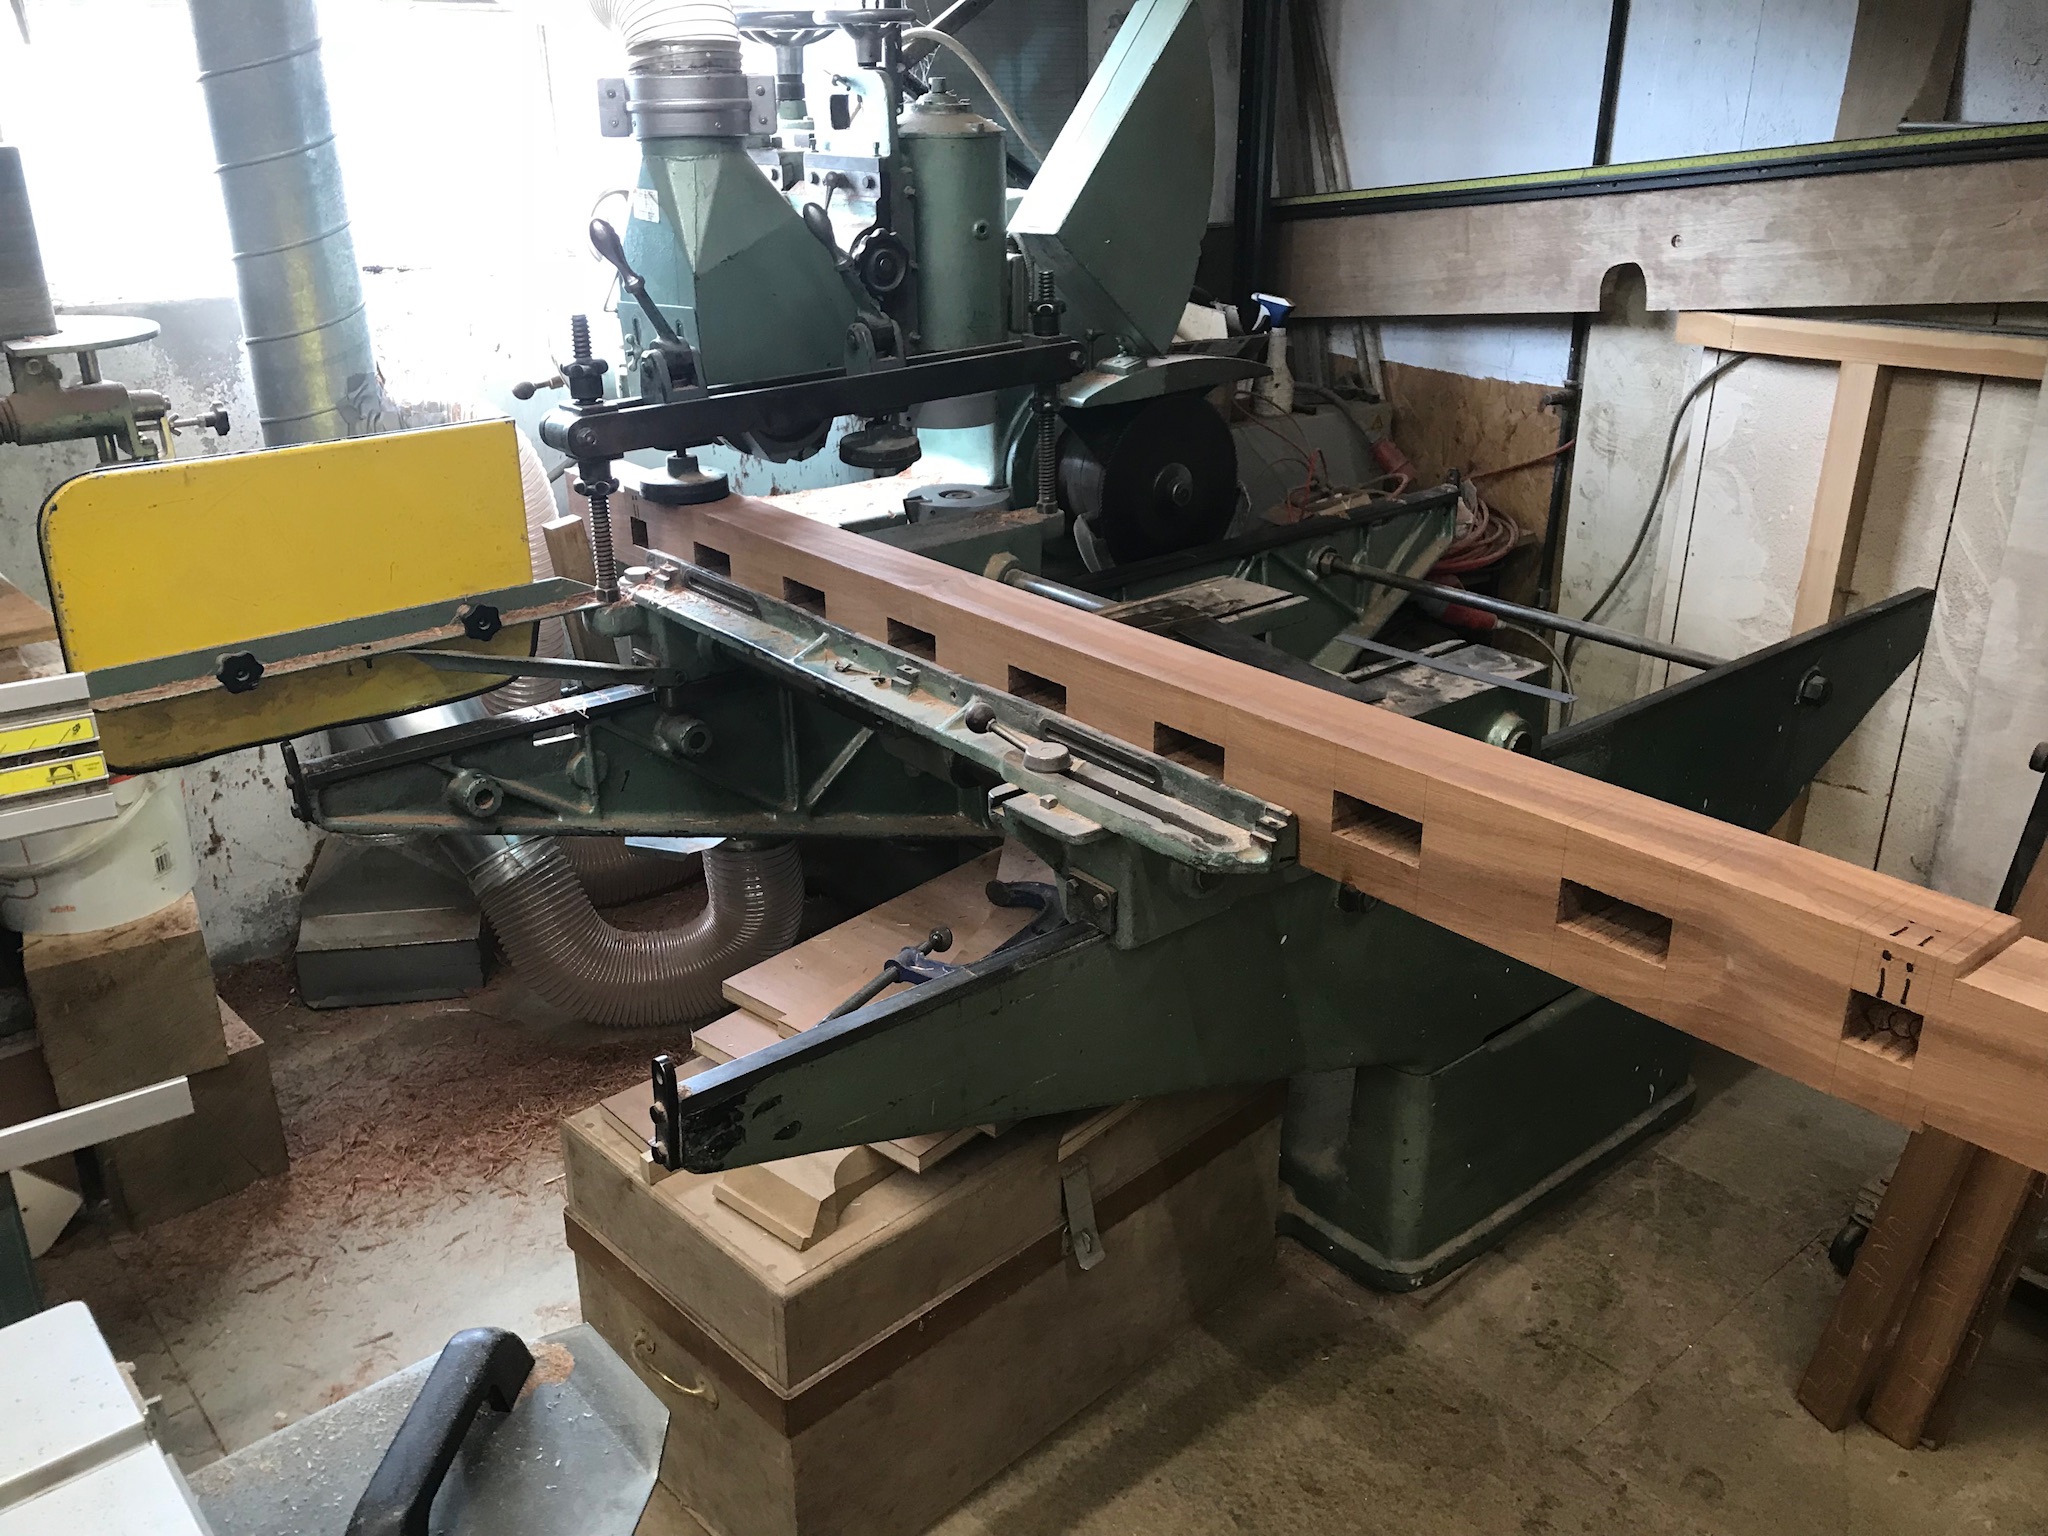
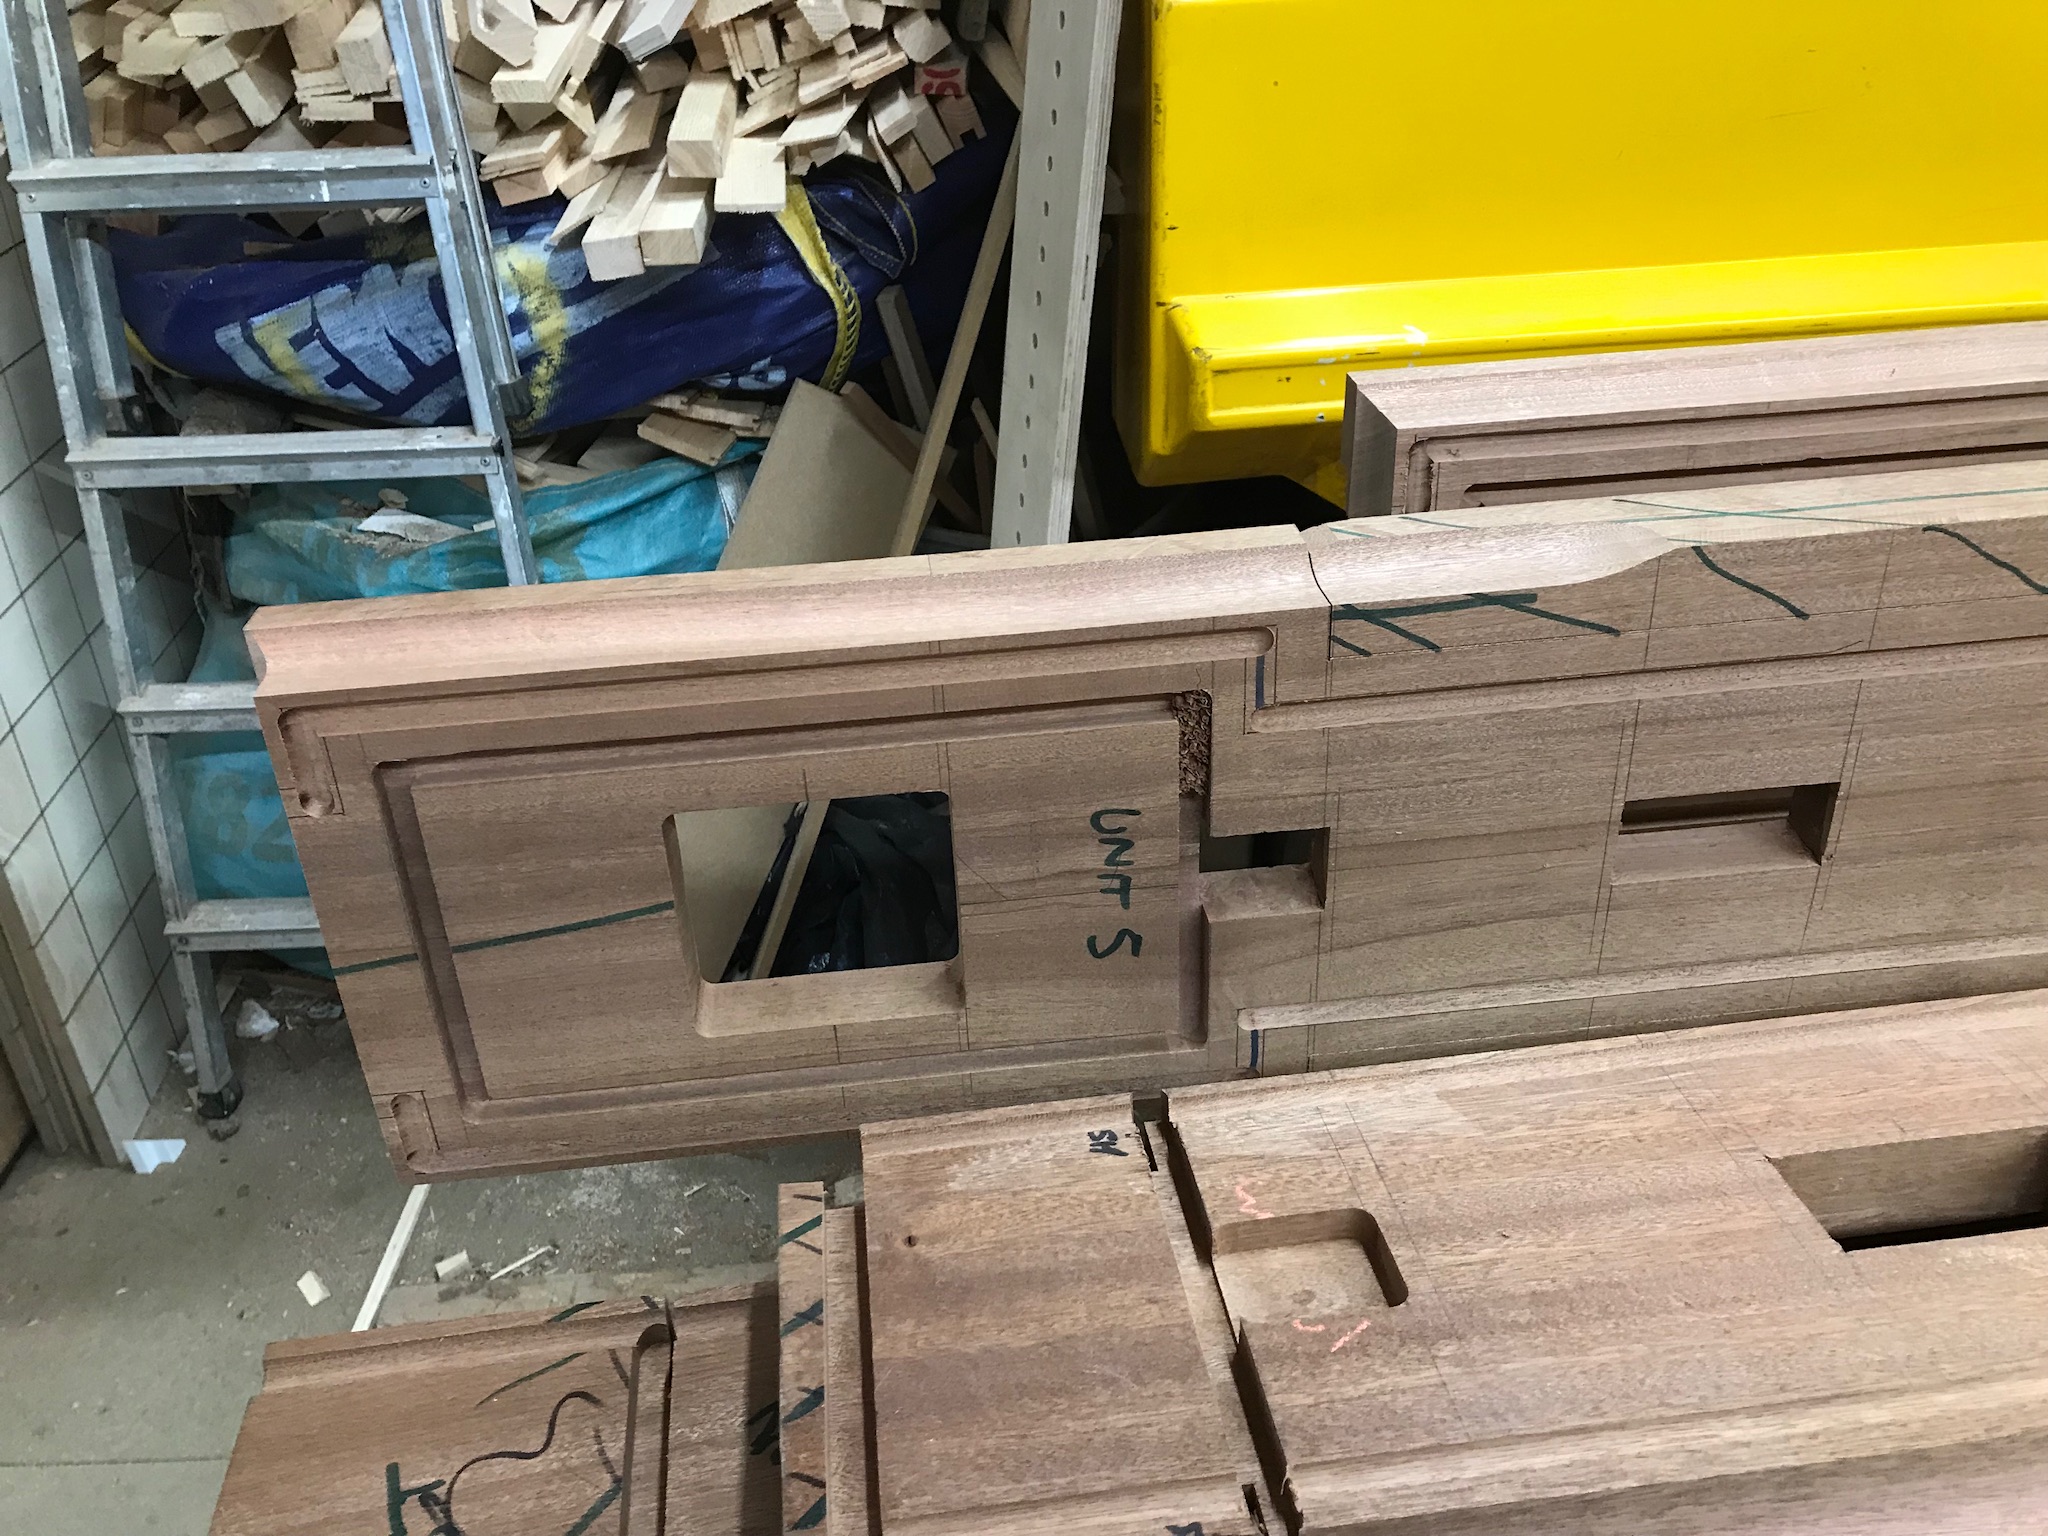
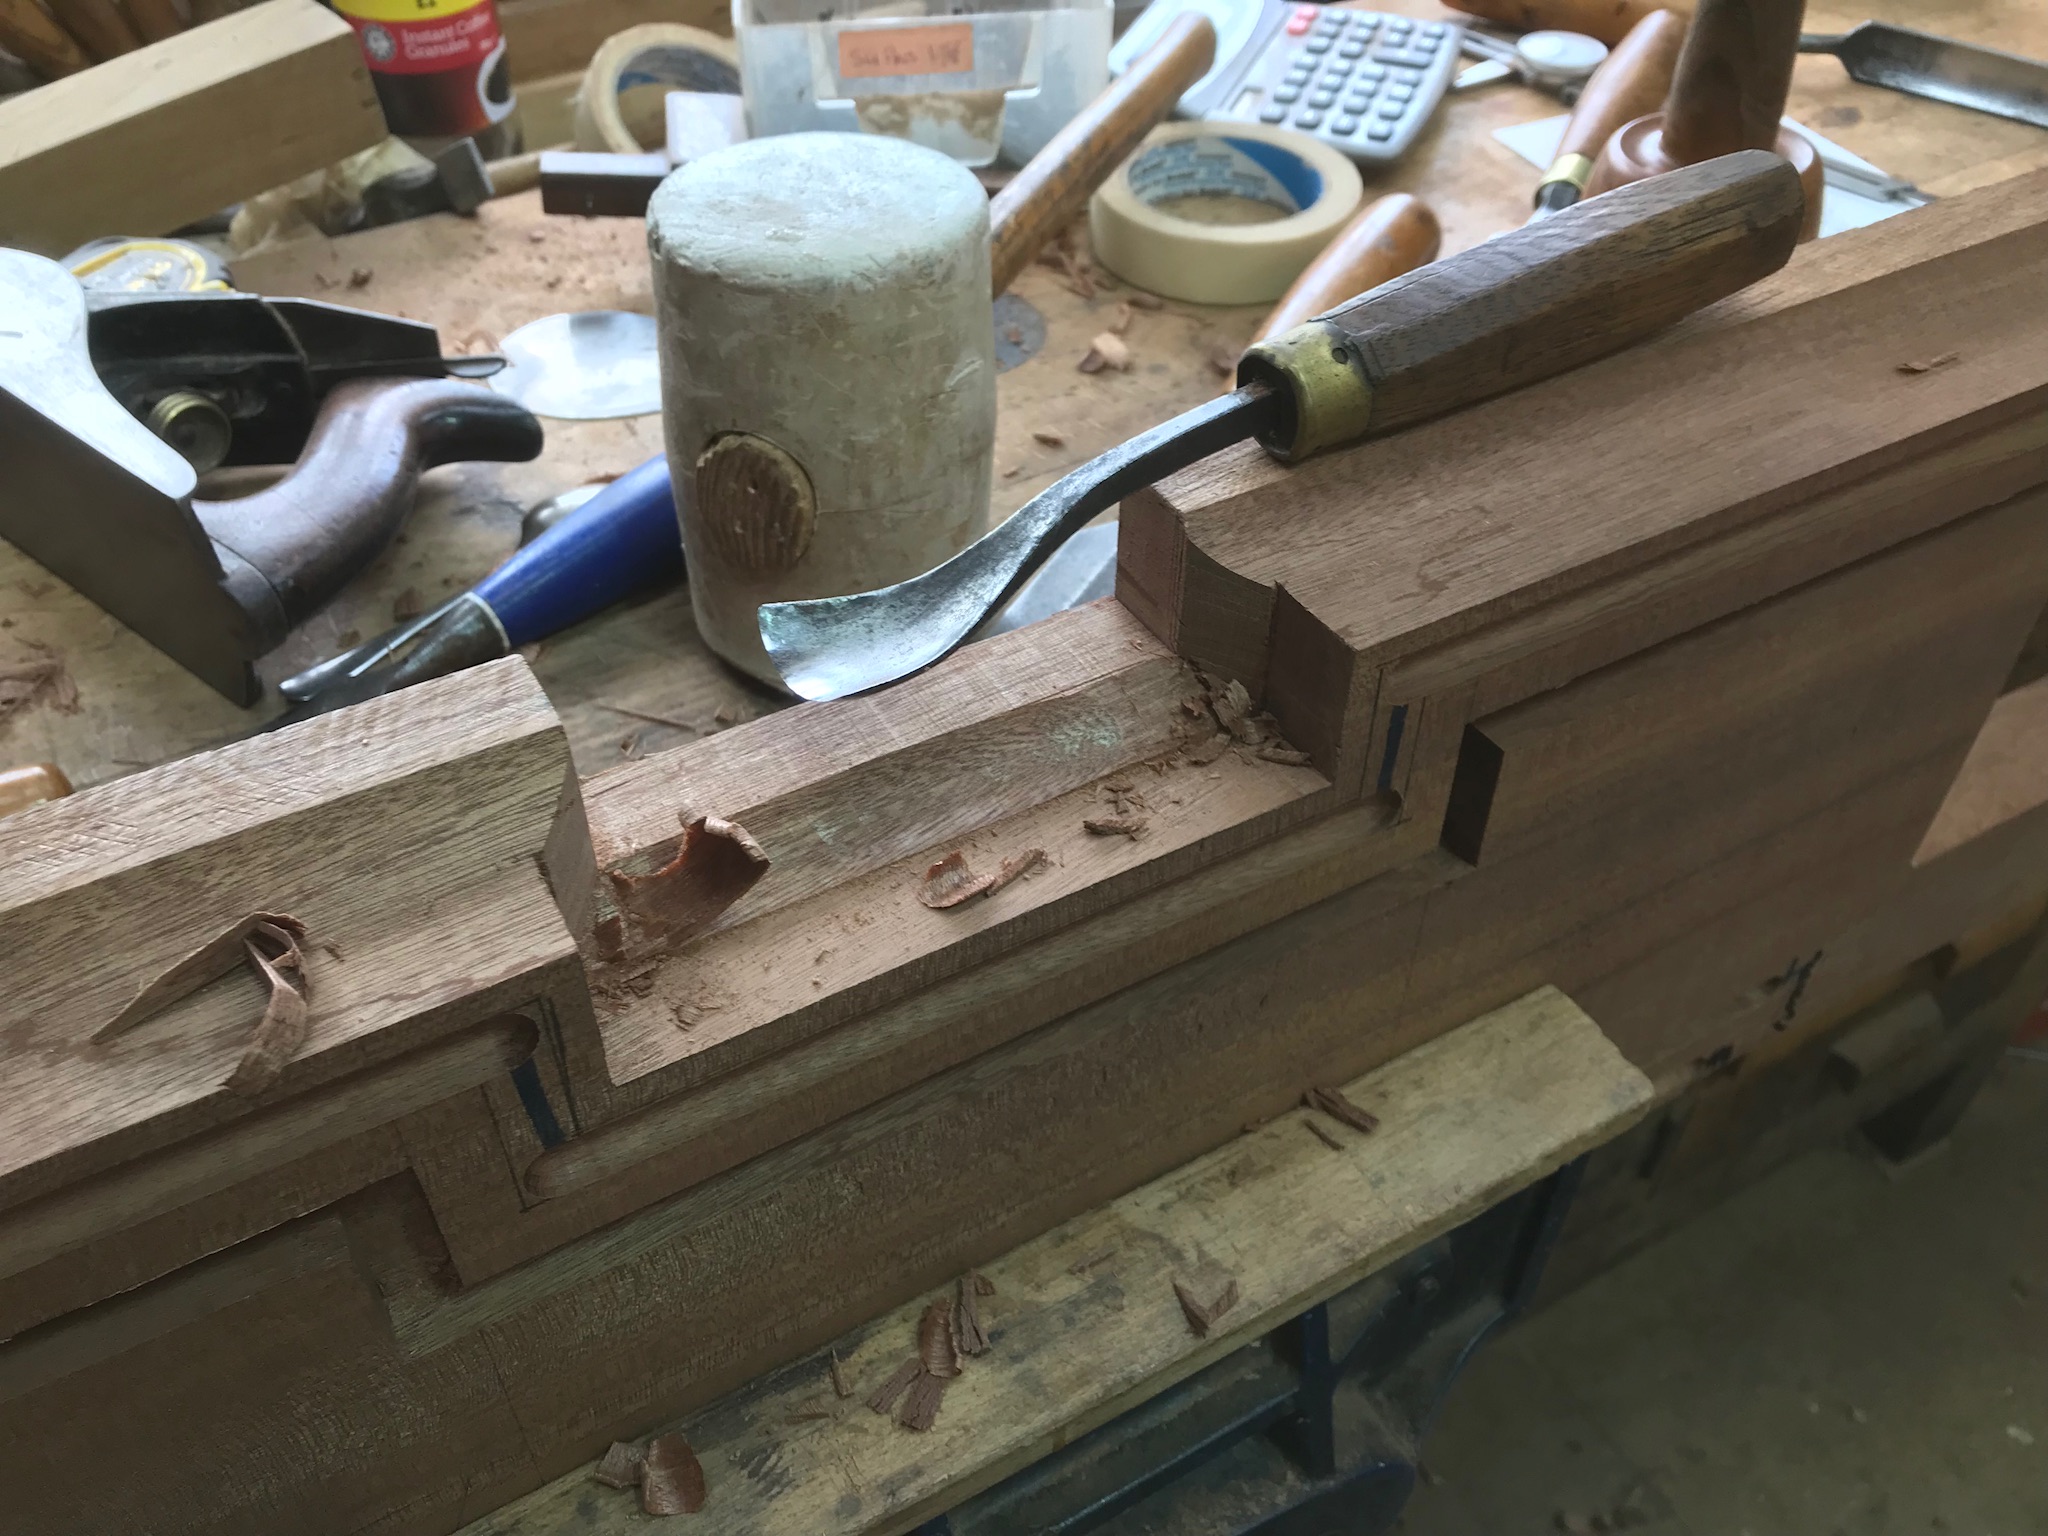
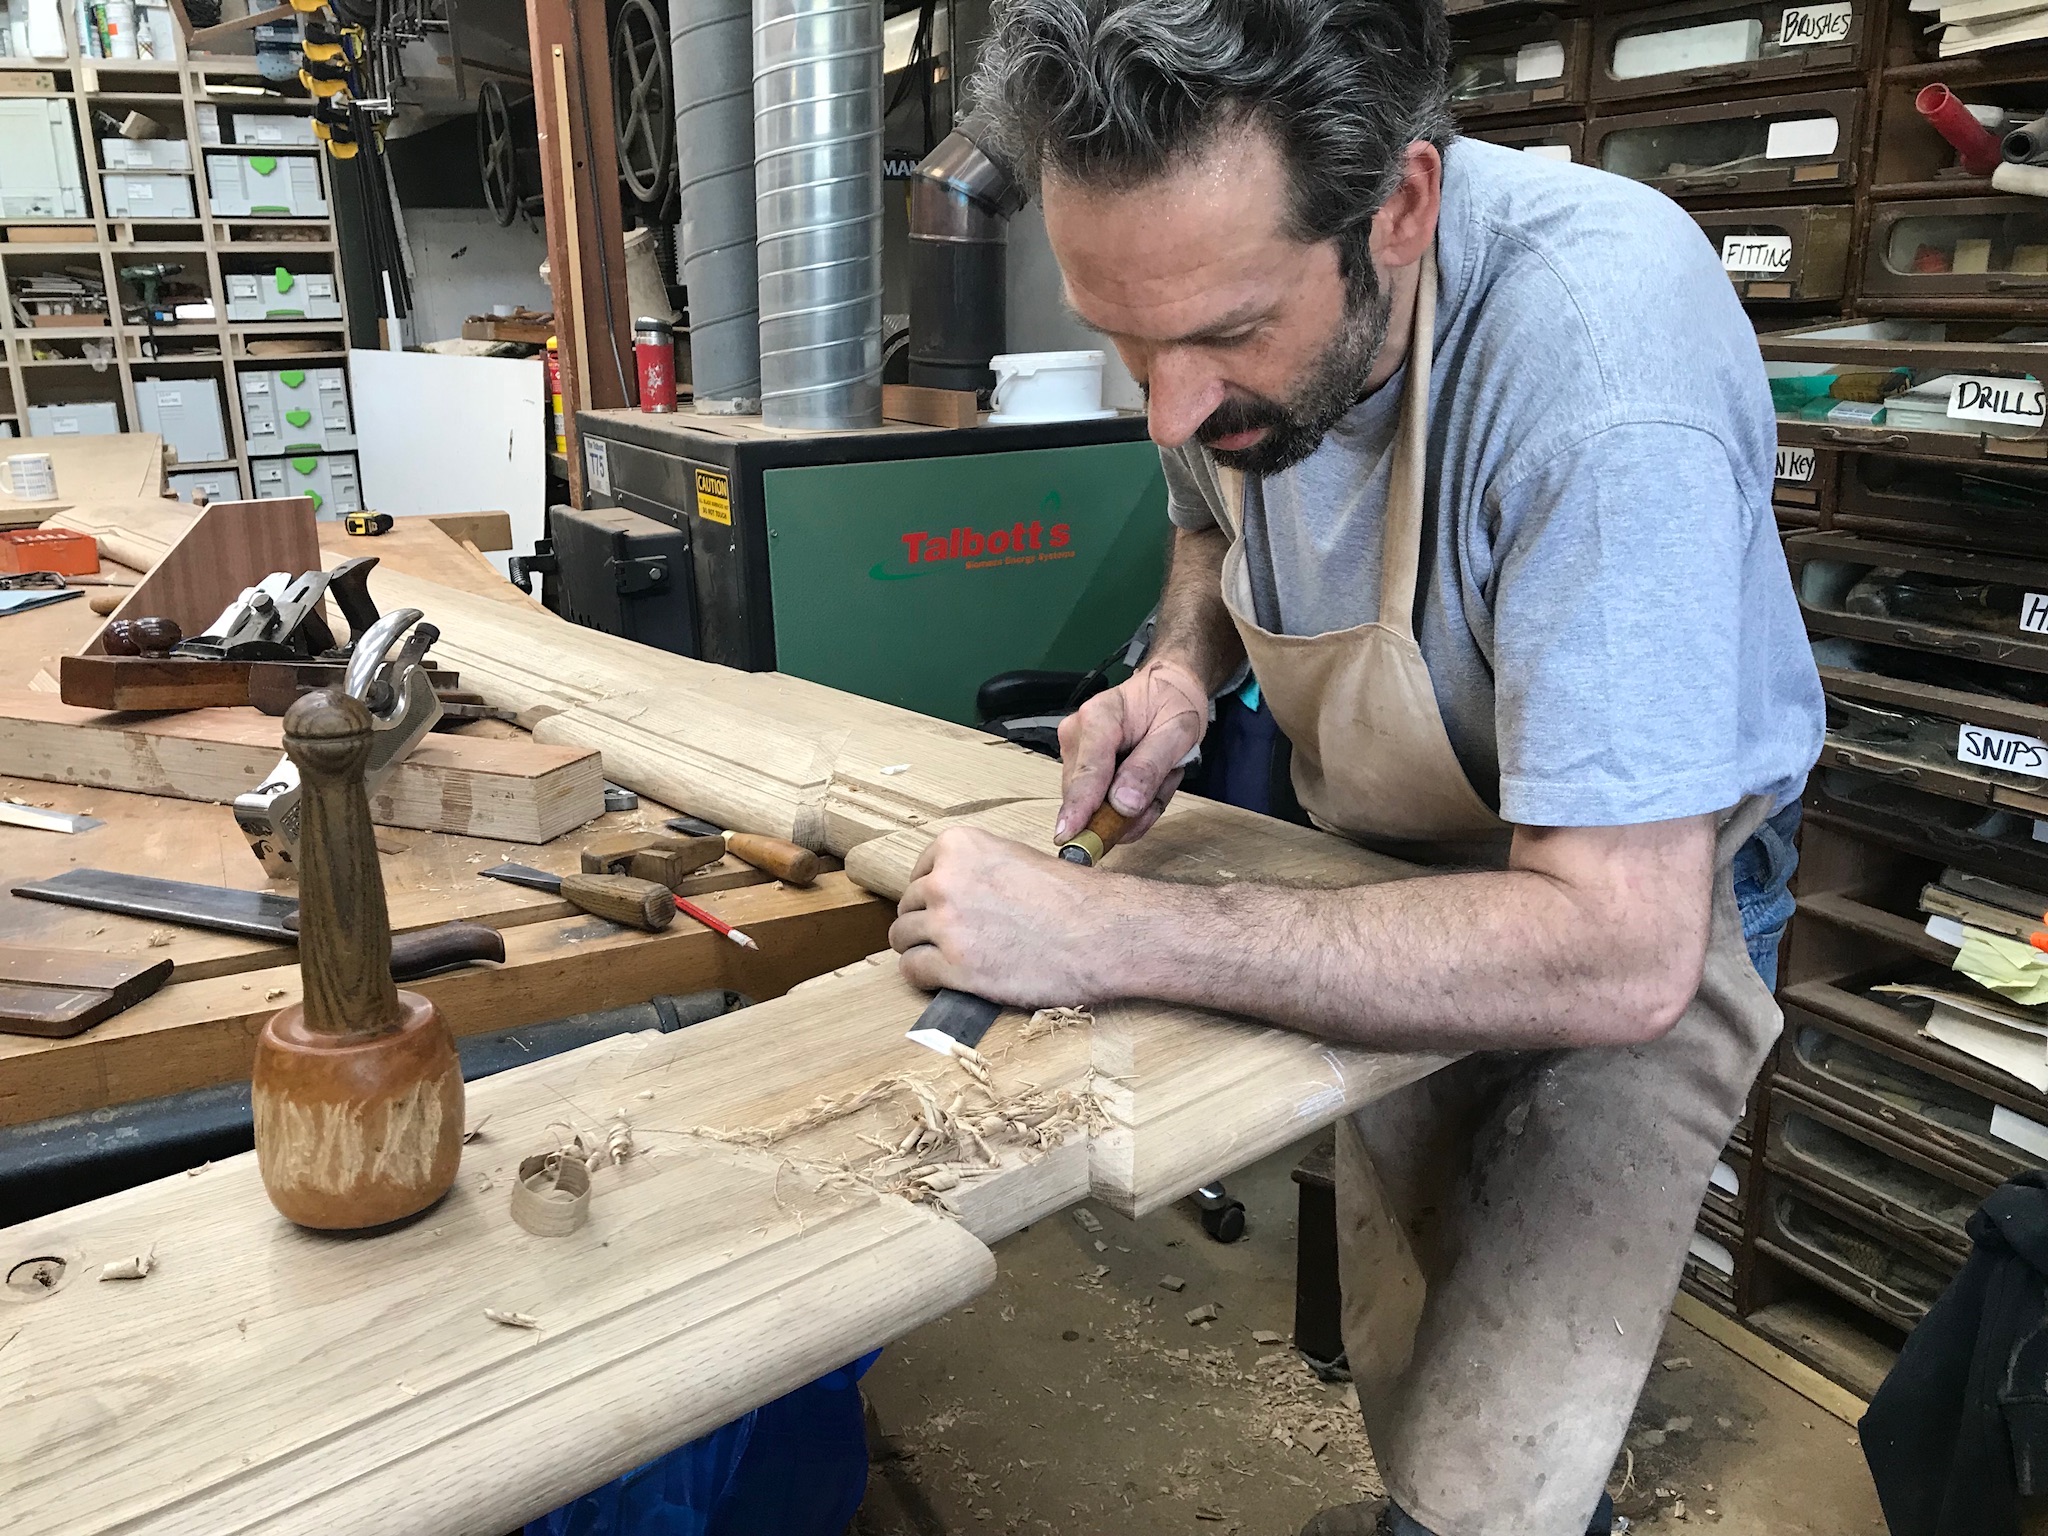
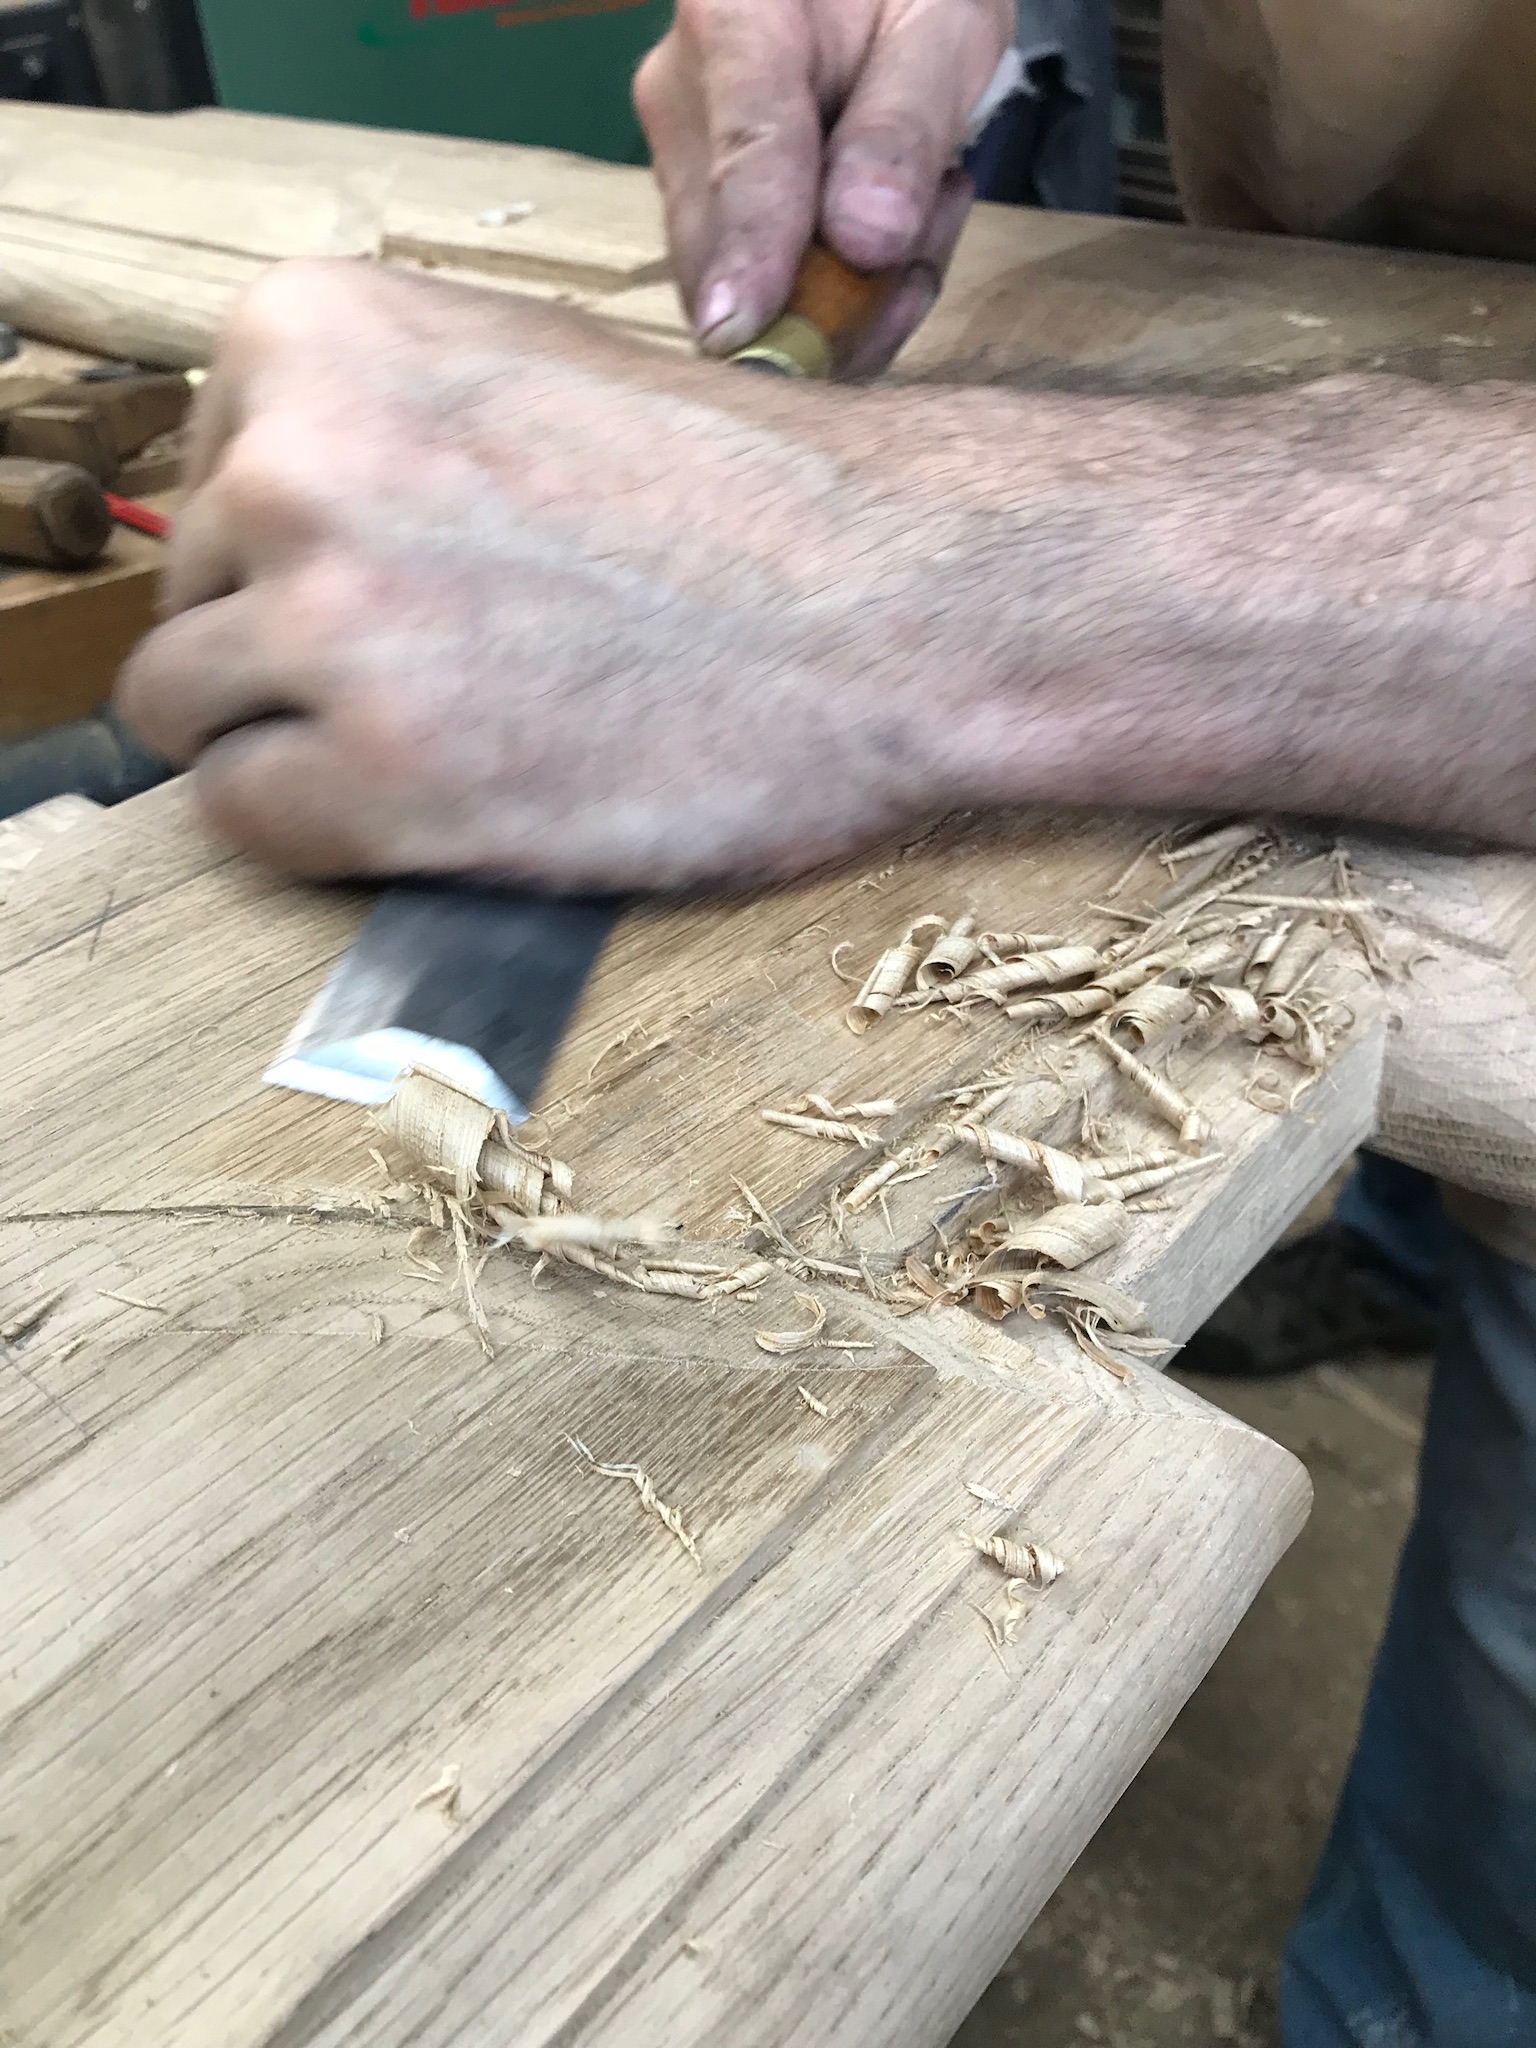
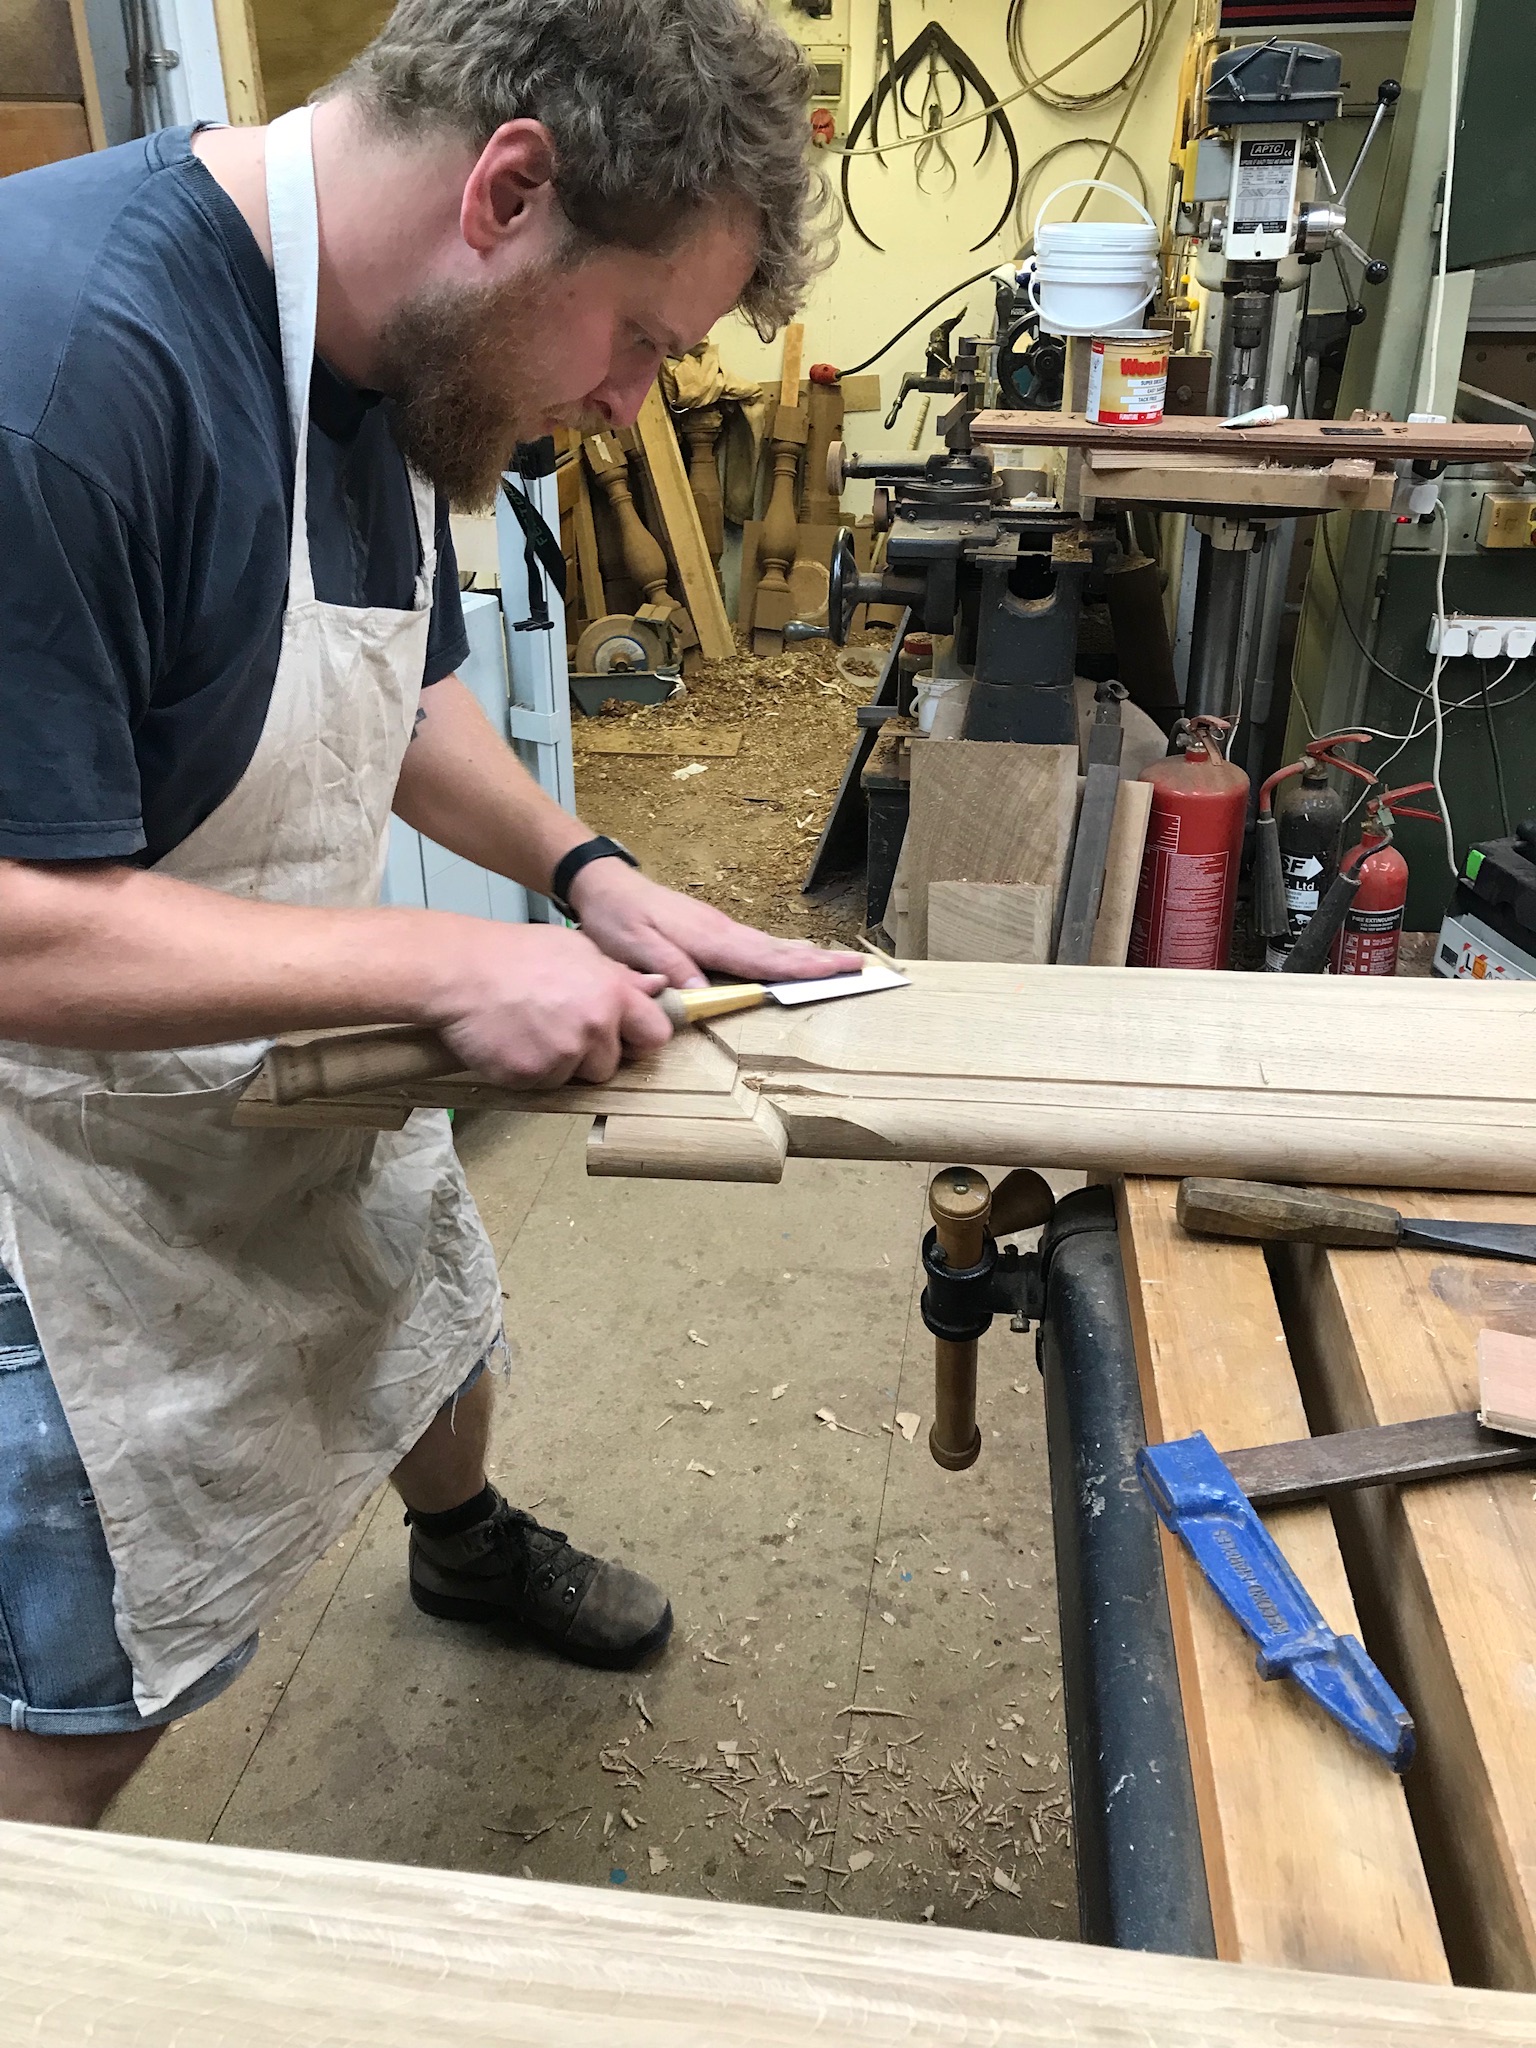
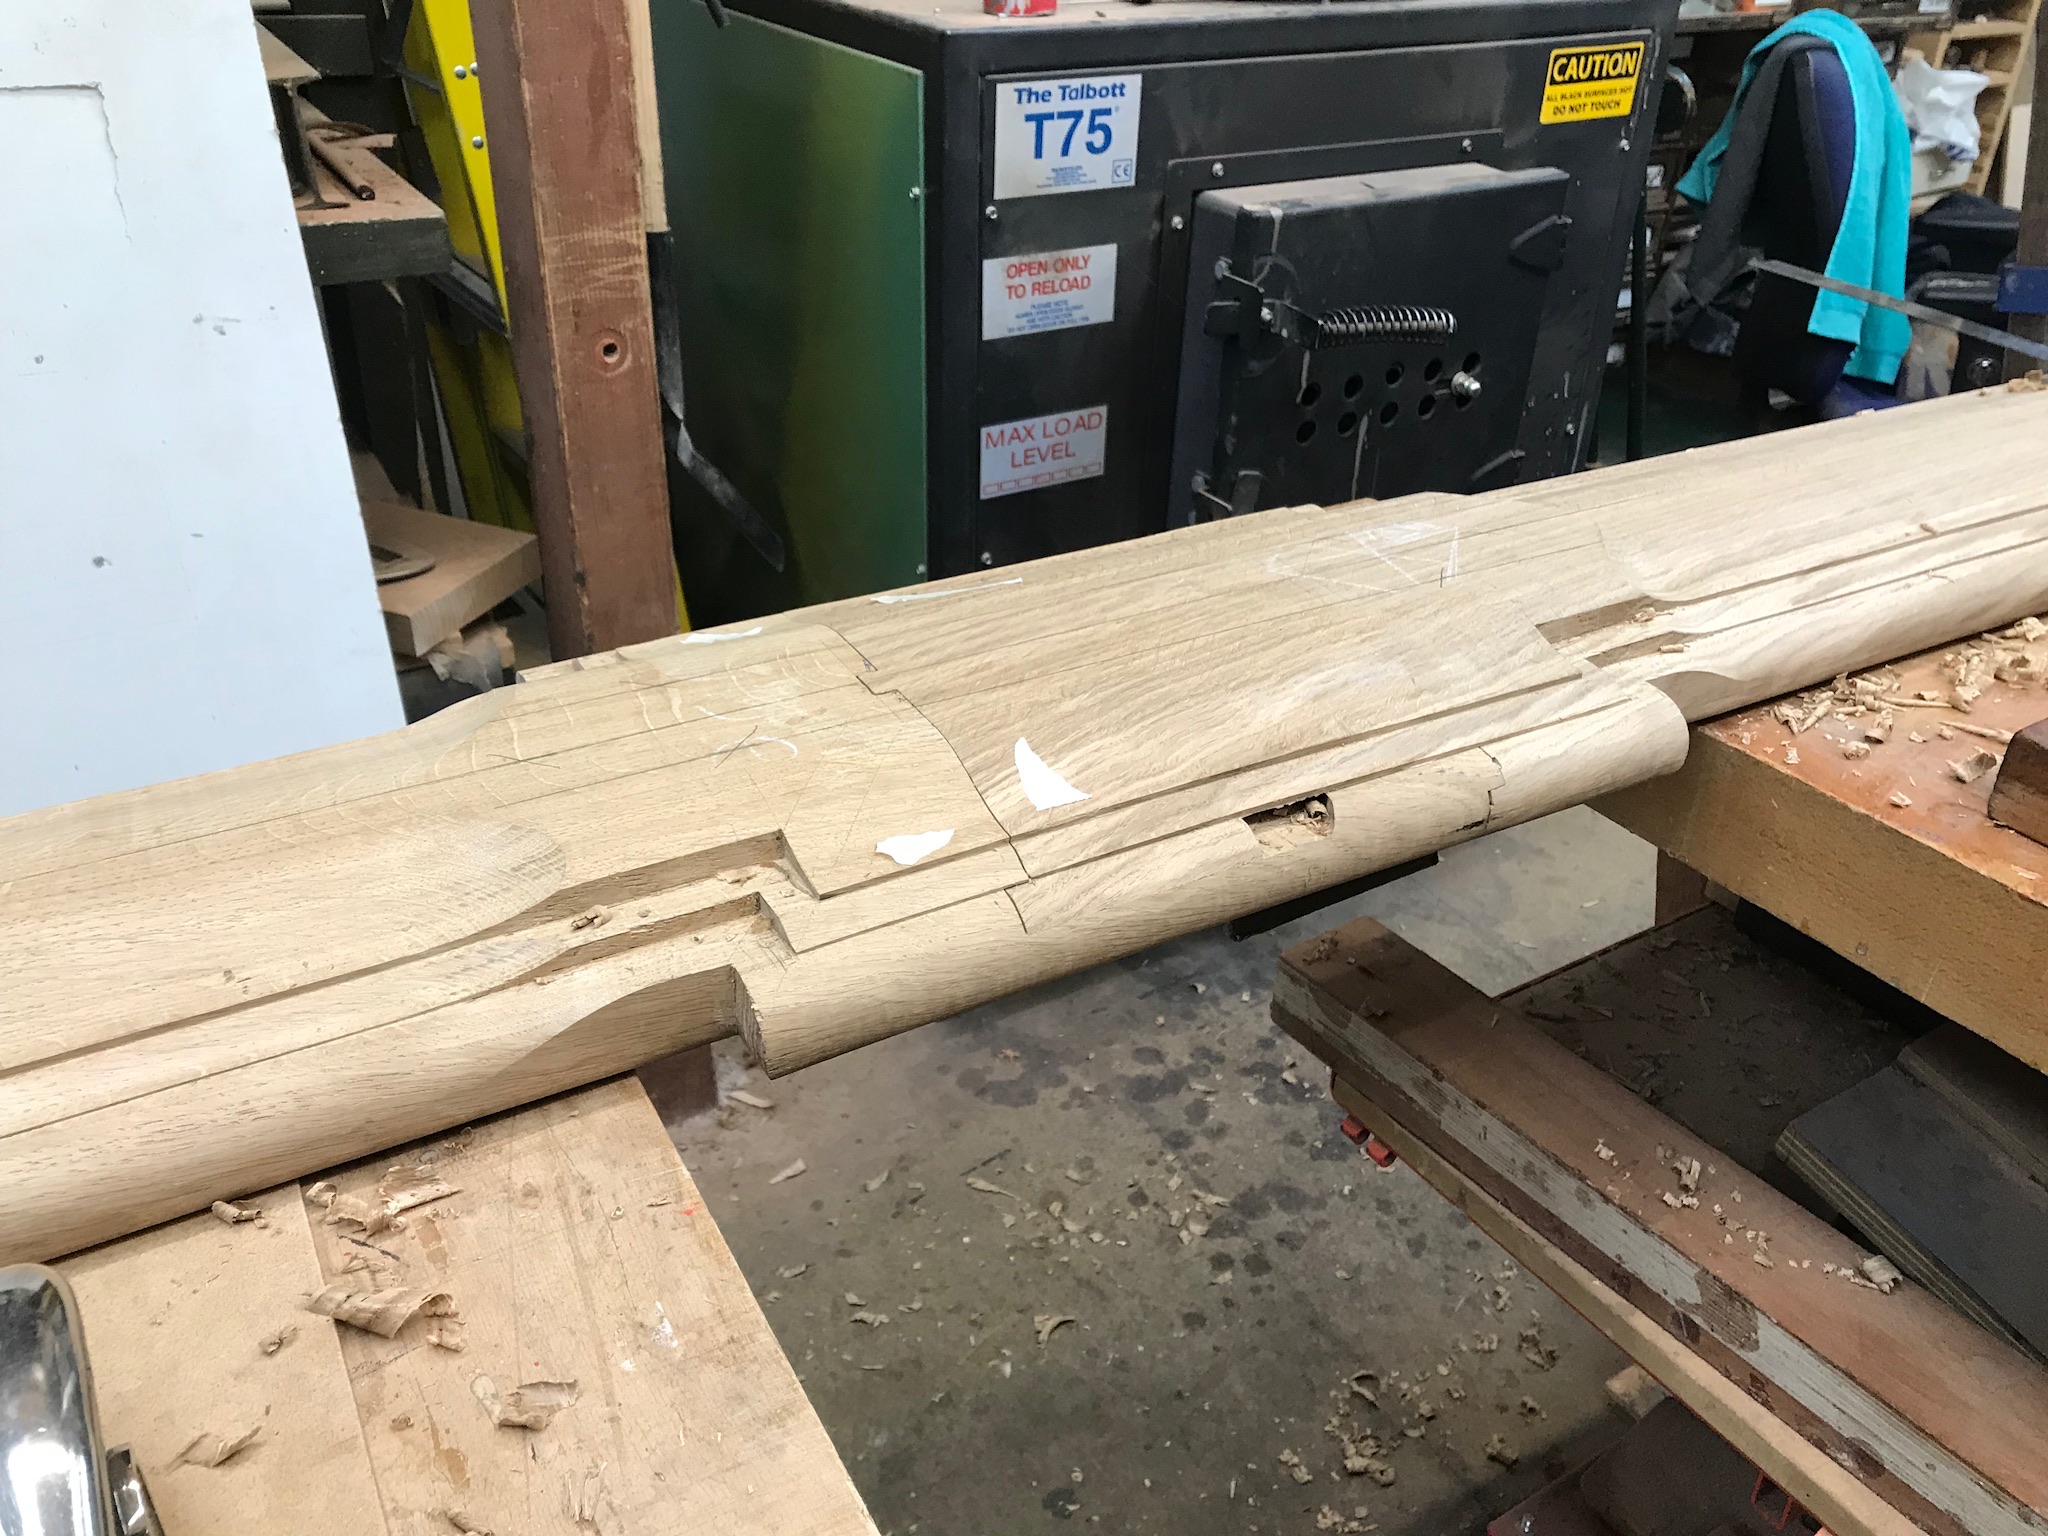
The main ” Handrail ” was a two part construction and this covers the ” Header ” the top joint assembly showing the Mortices and ” Palaster” box placments. The moulded Header also has the anti-capillary groove which stops any water from travelling across the underside of the header and getting to joints of the ” Spindles “.
The Header was carved ” wasted ” and has a mason mitre moulded detail. The top of the header has a continuous groove to fit the structural metal work and tongue which fits into the opposing Oak Handrail capping.


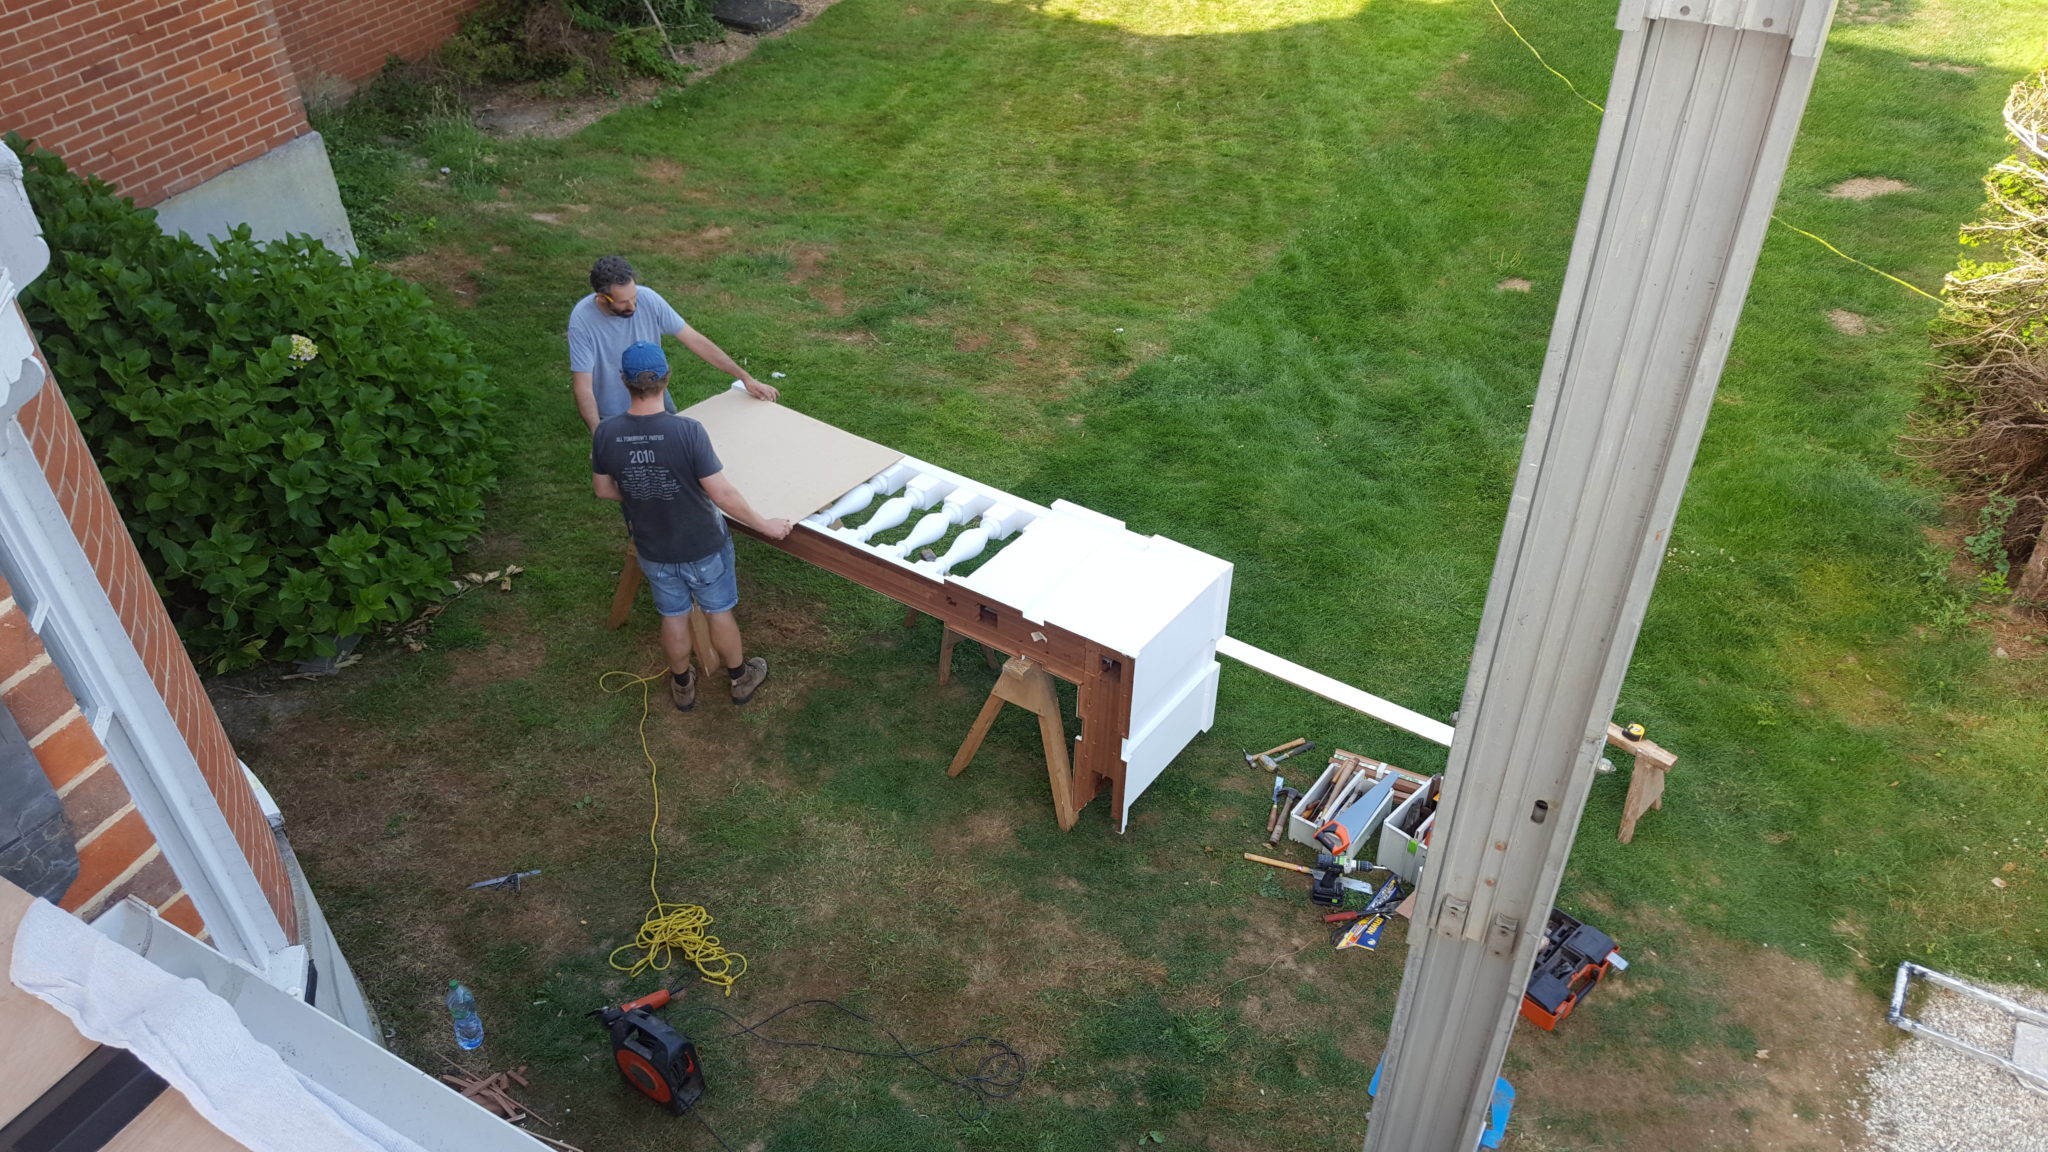
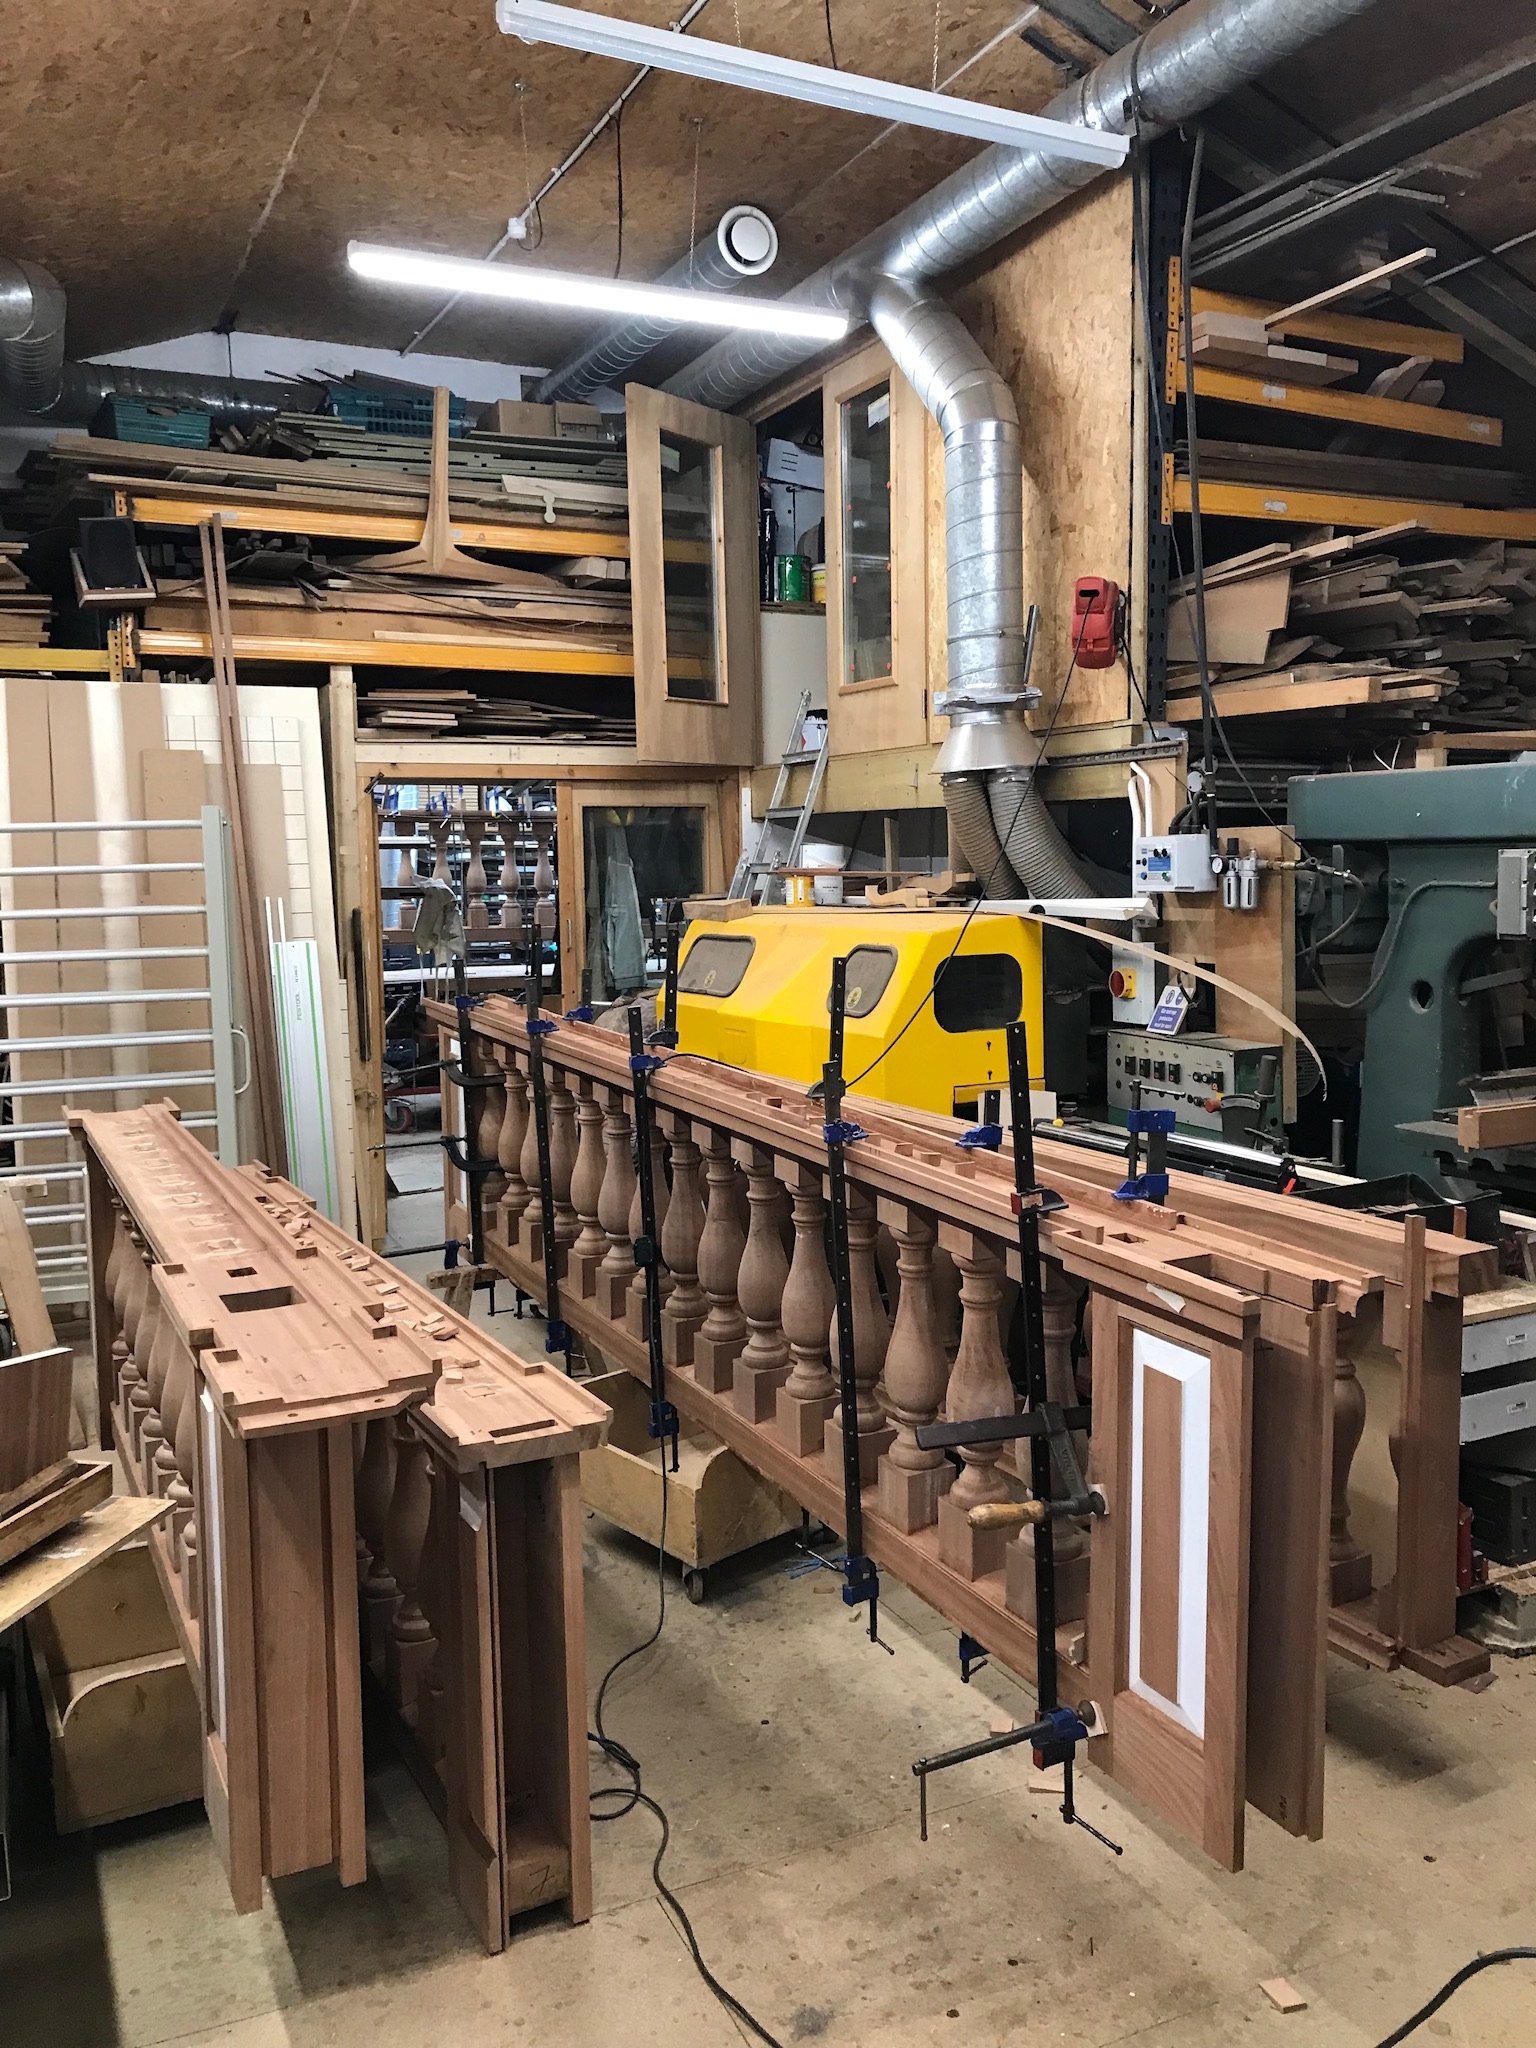
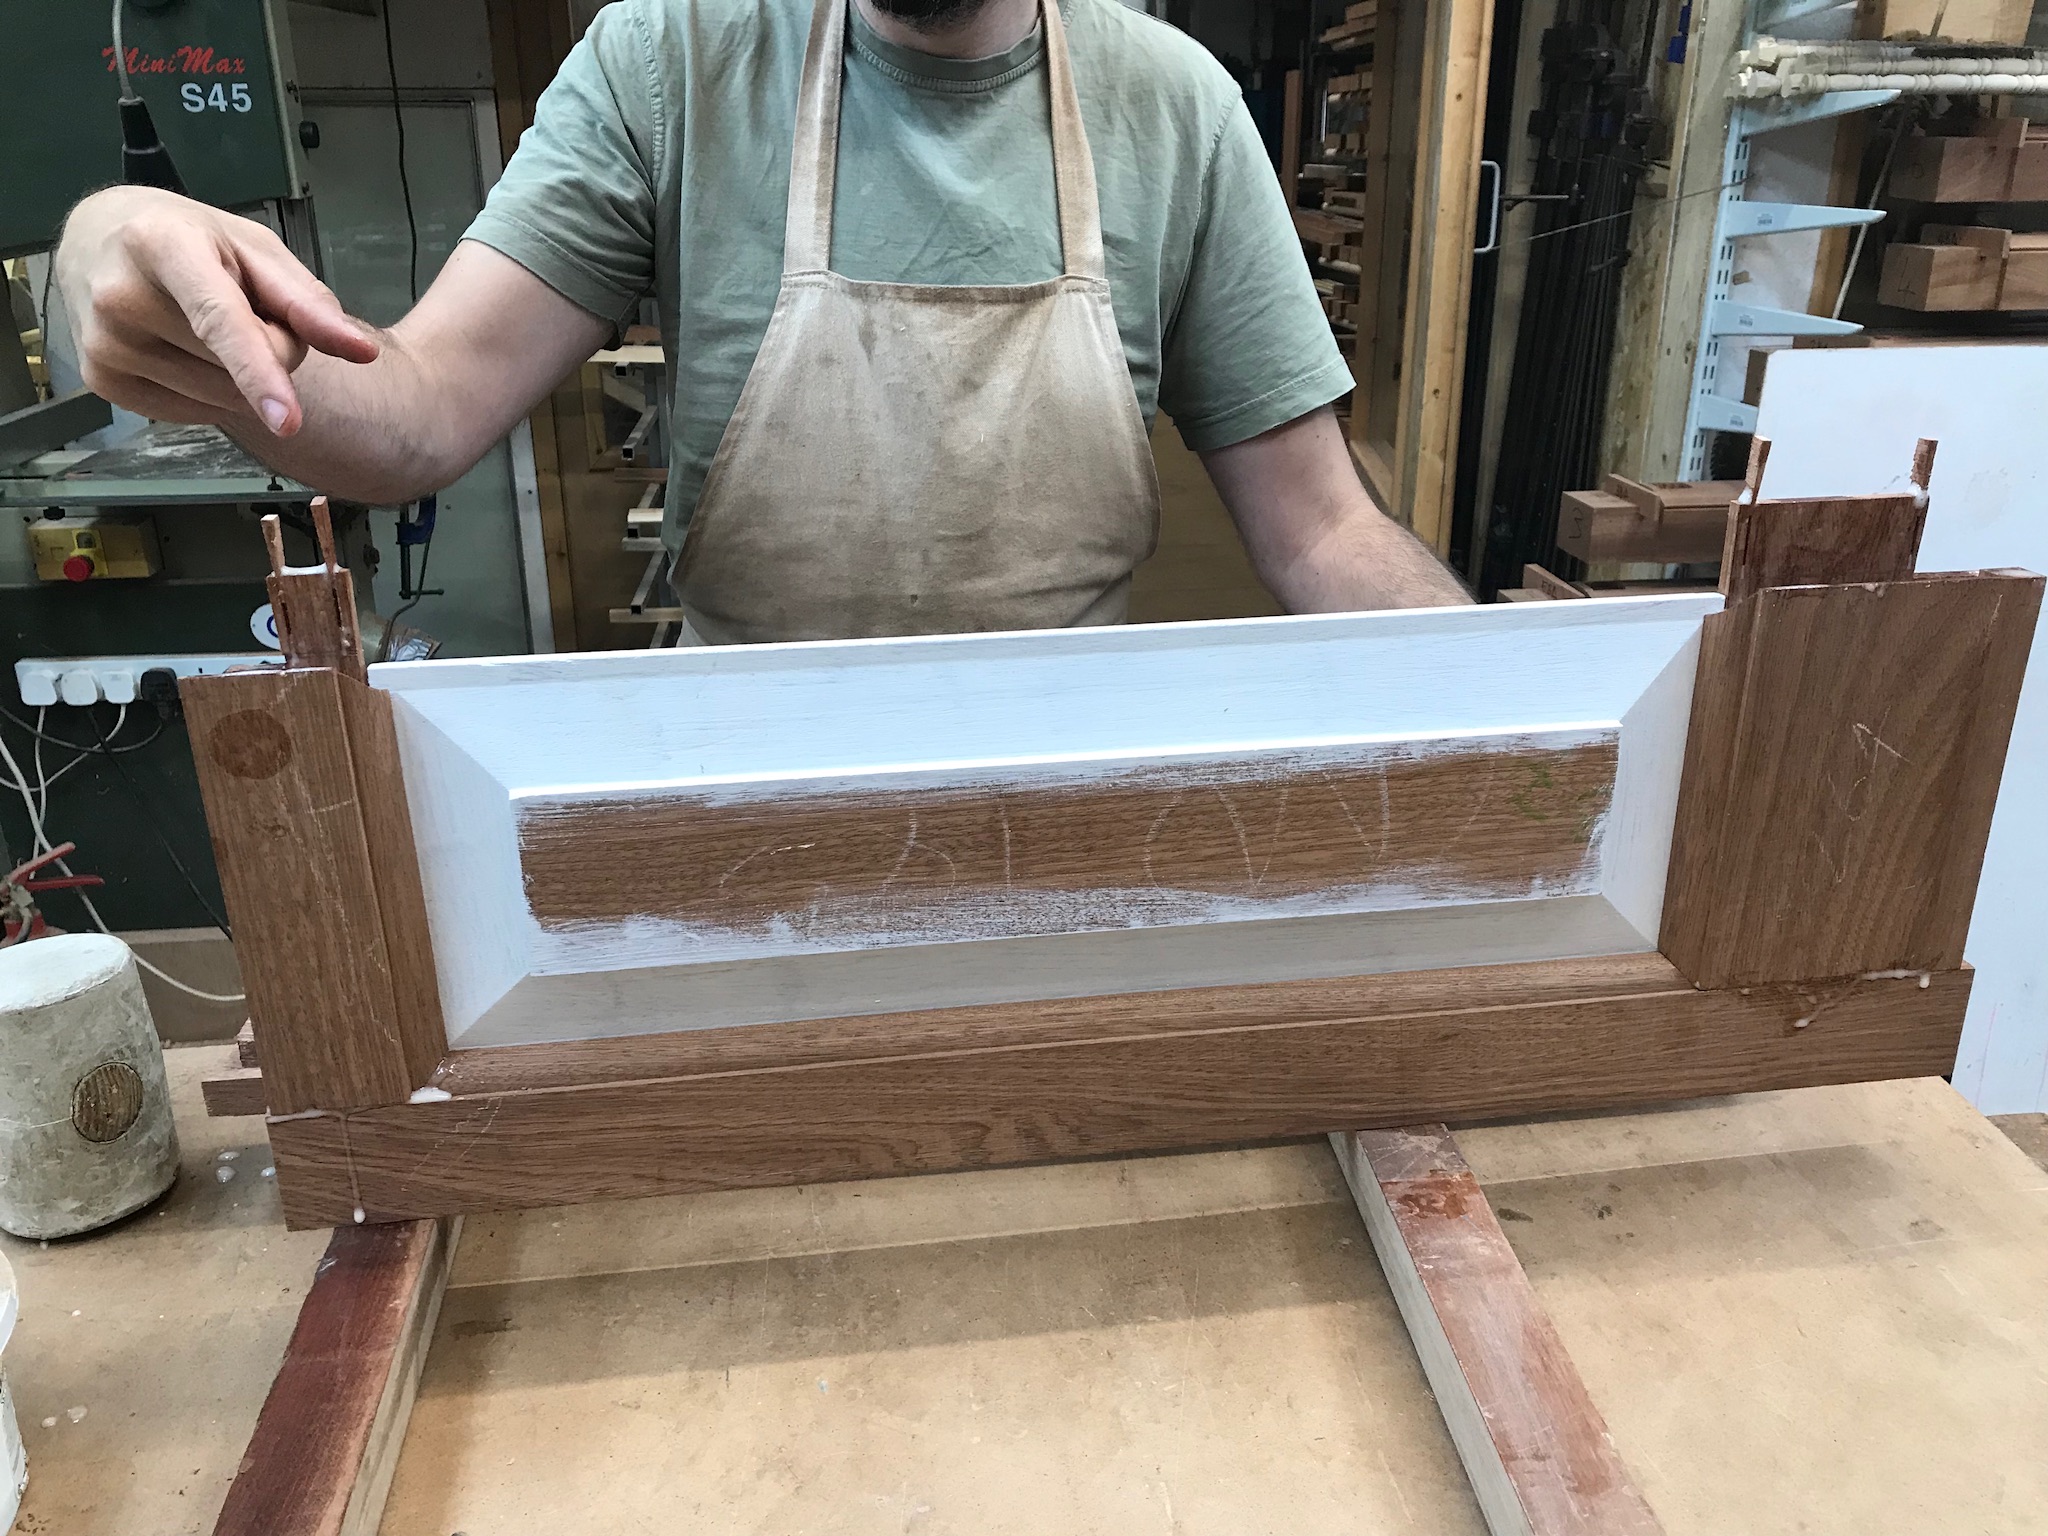
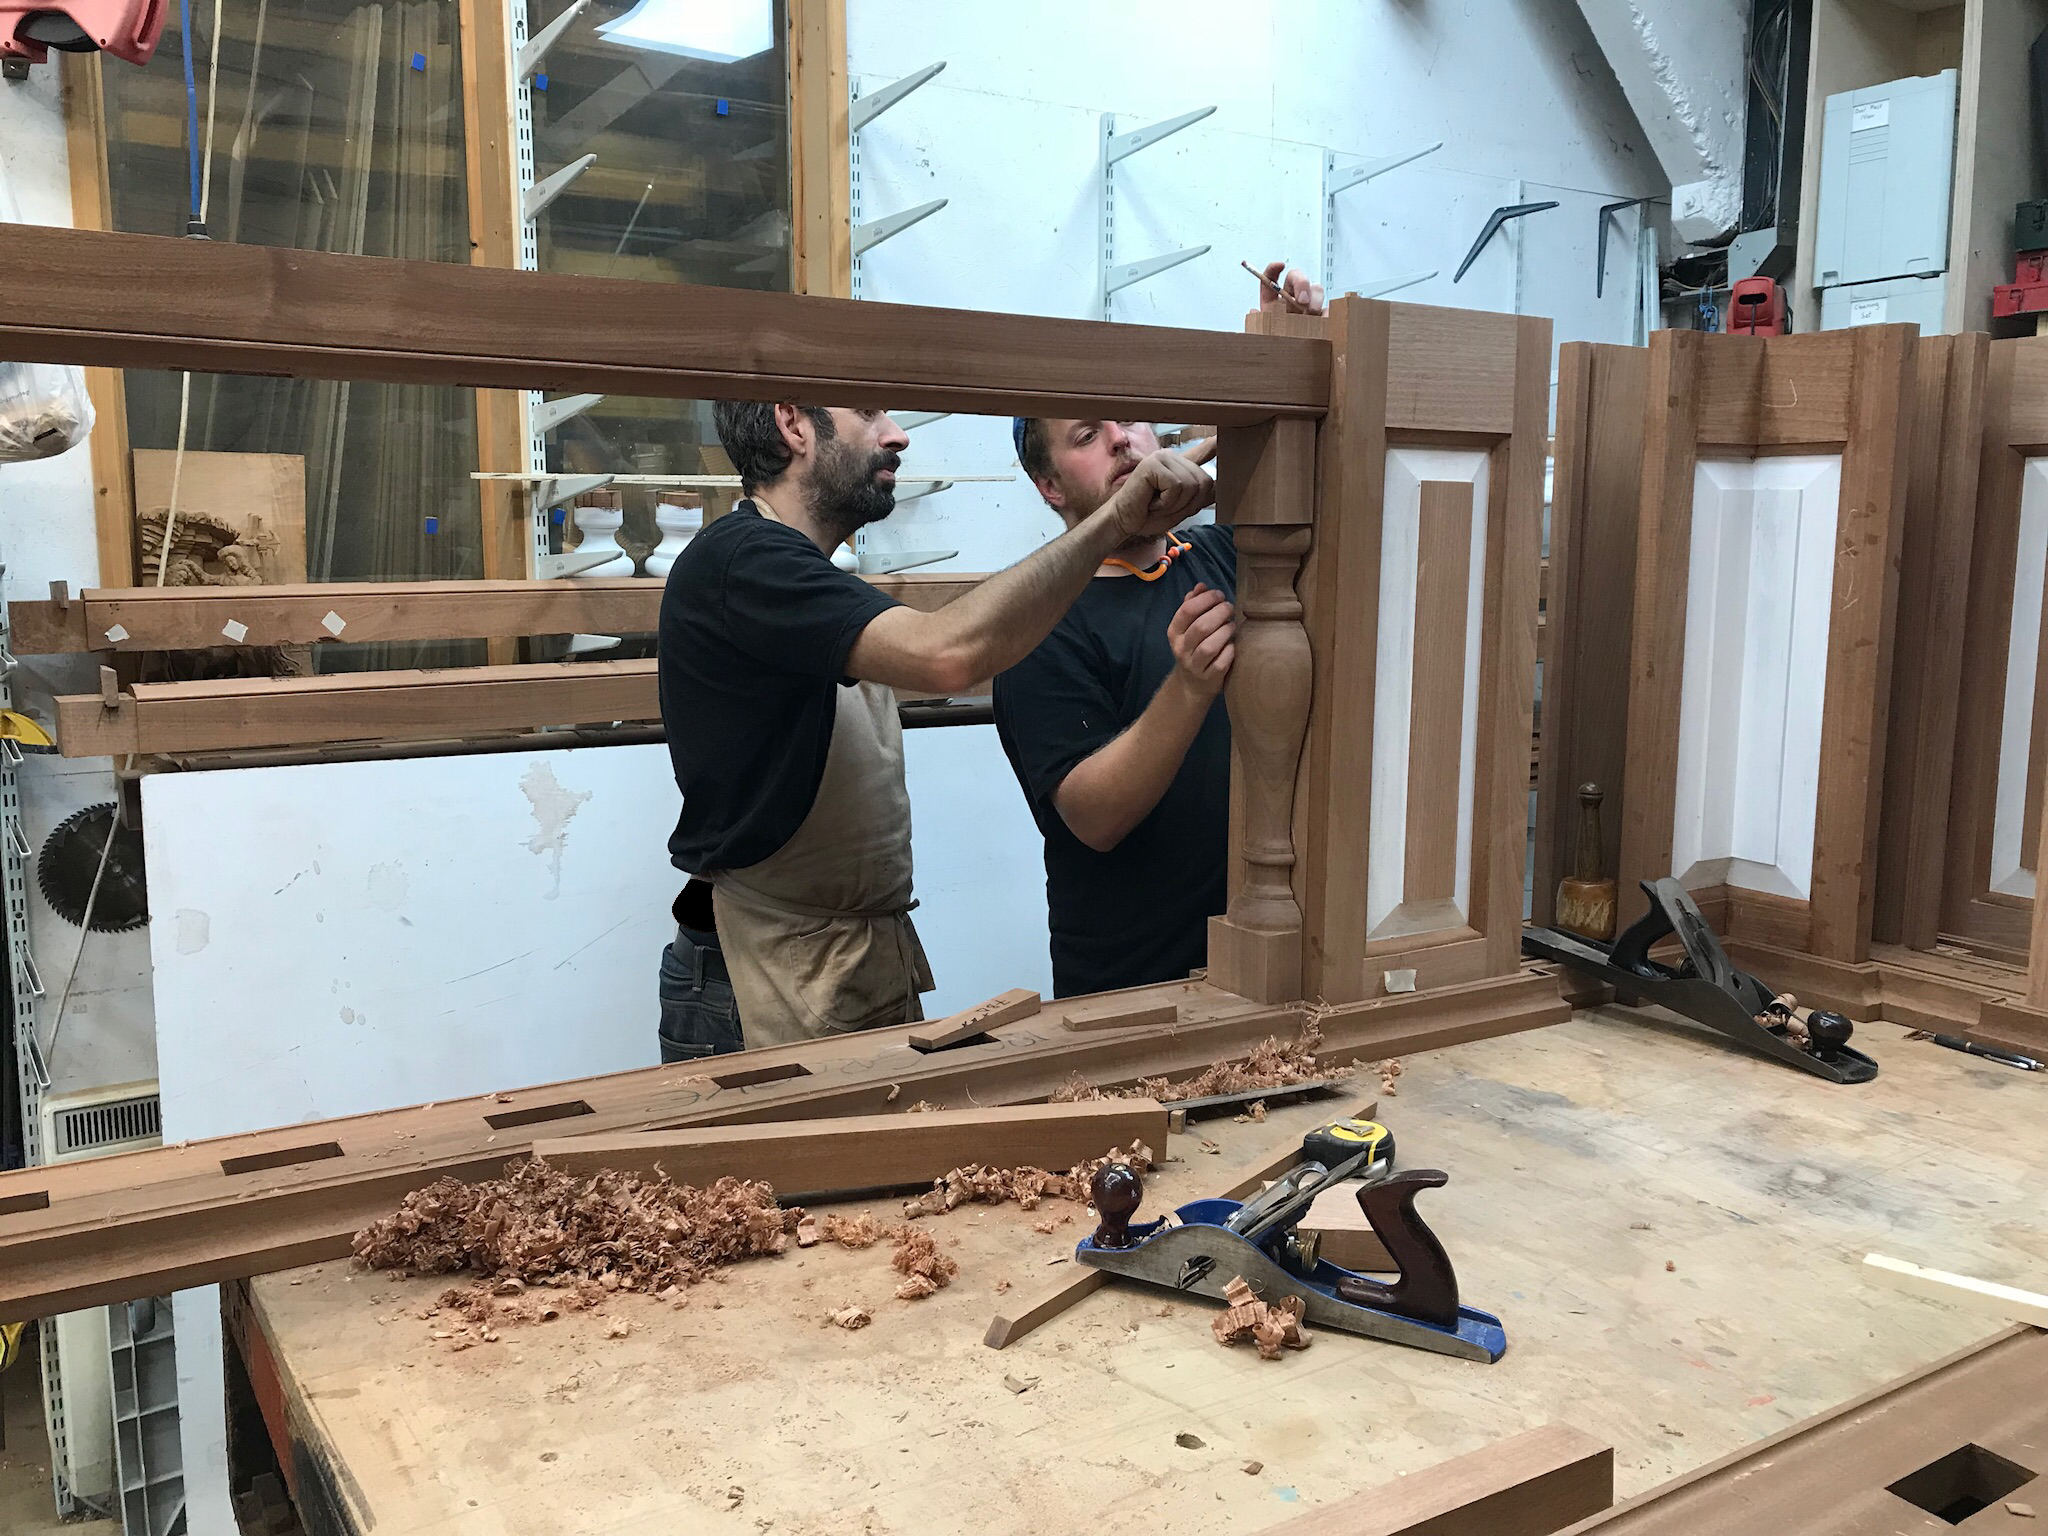
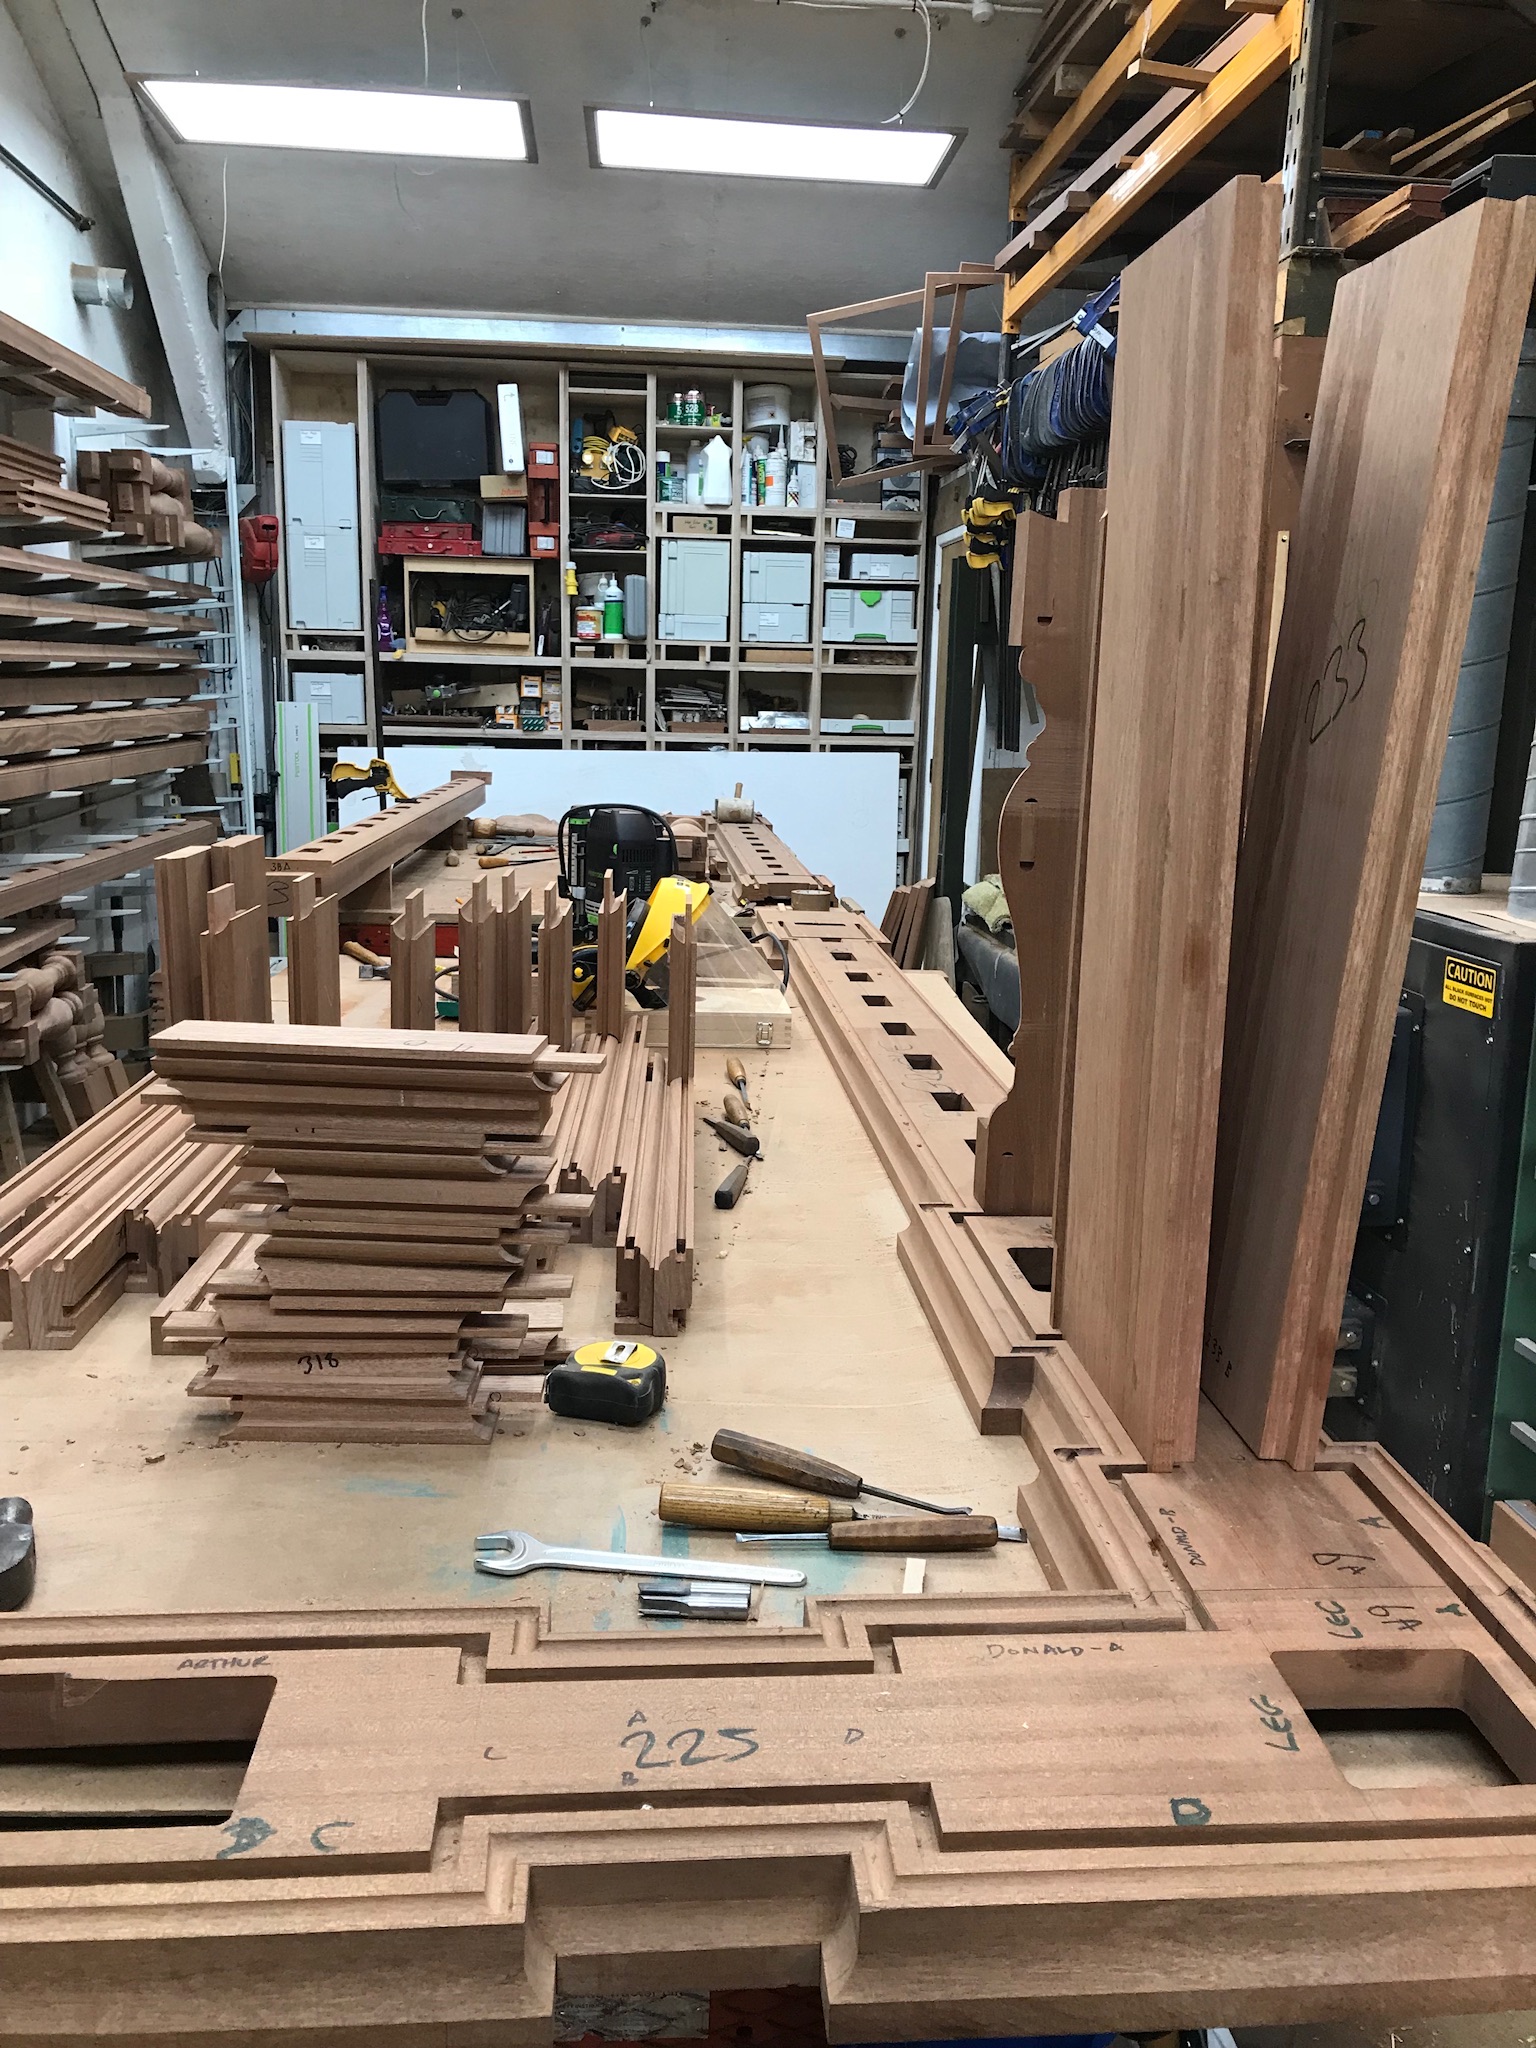
Assembly
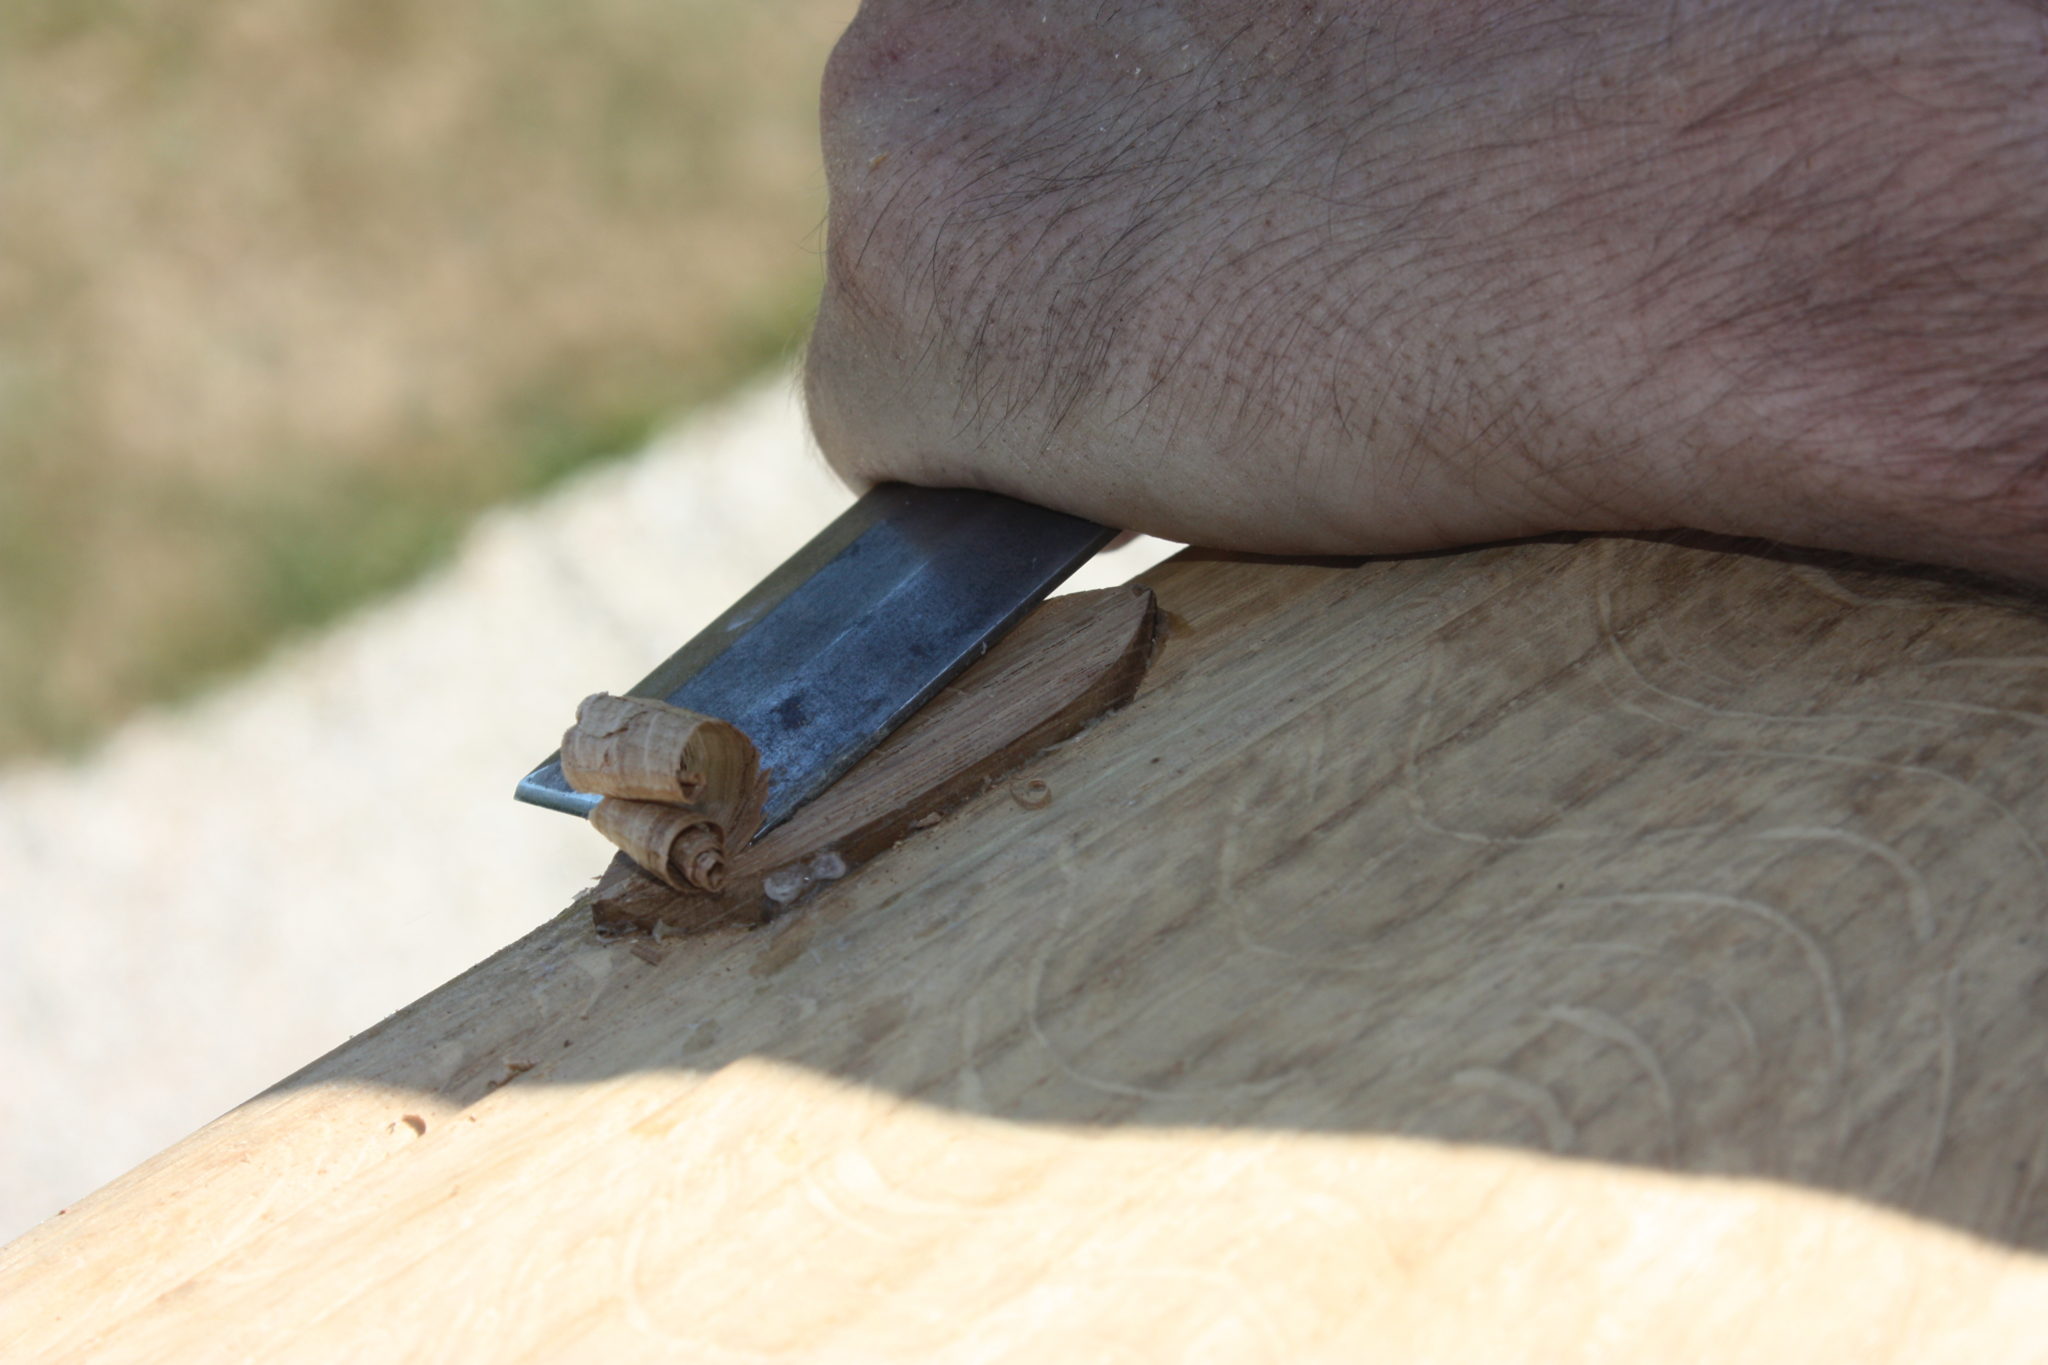
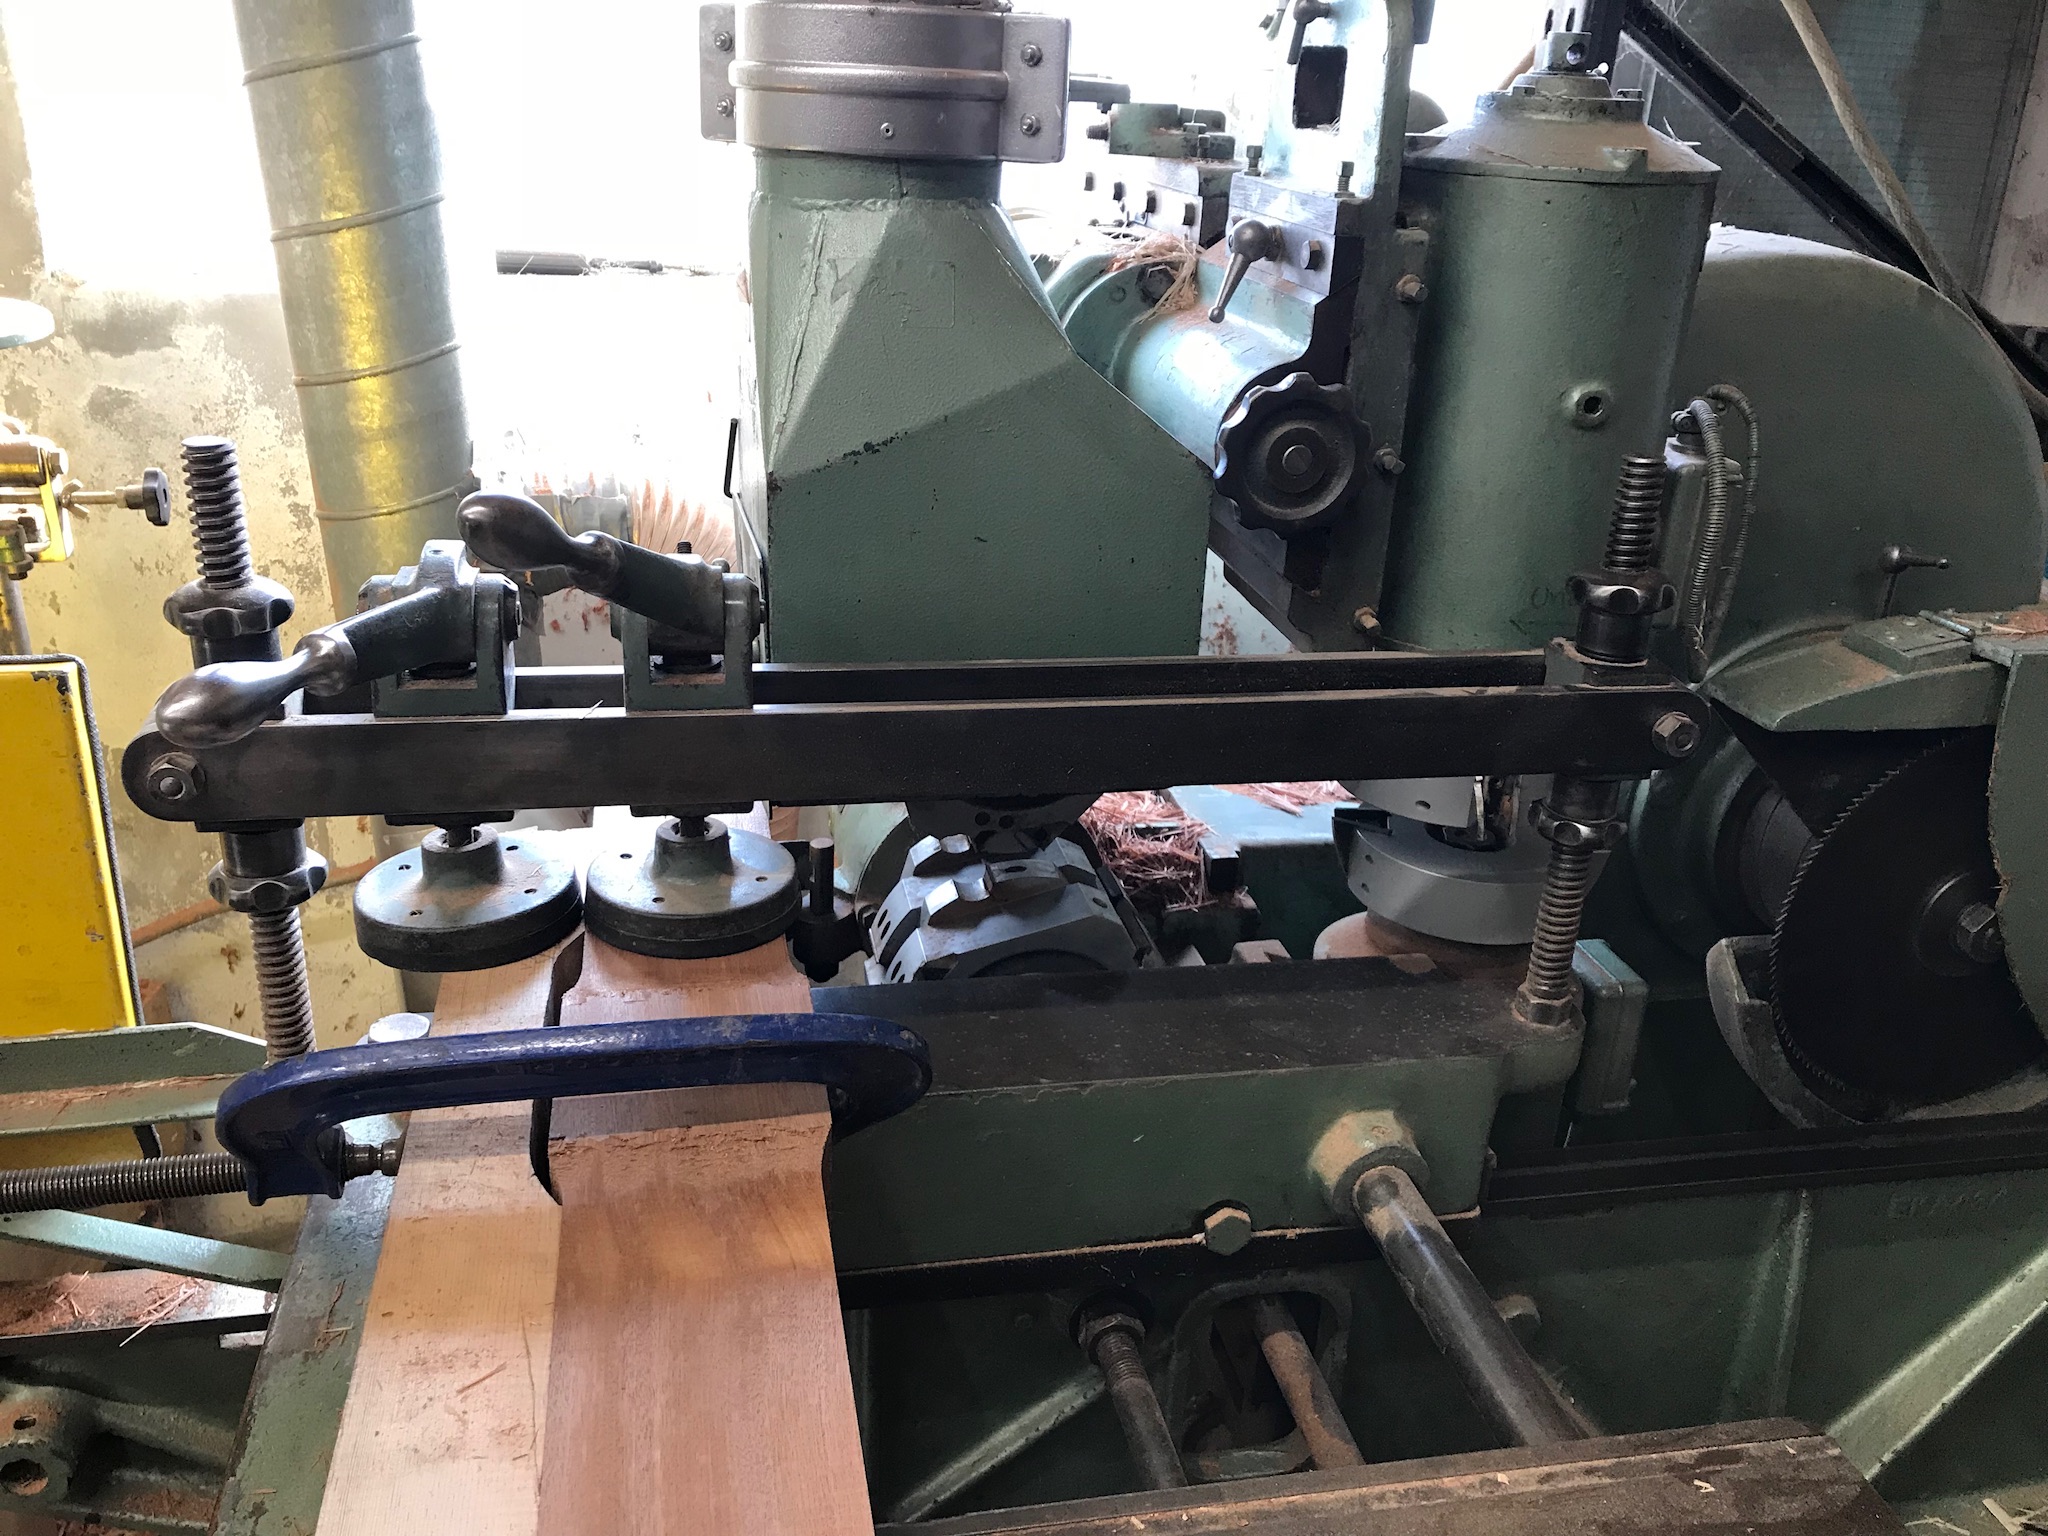
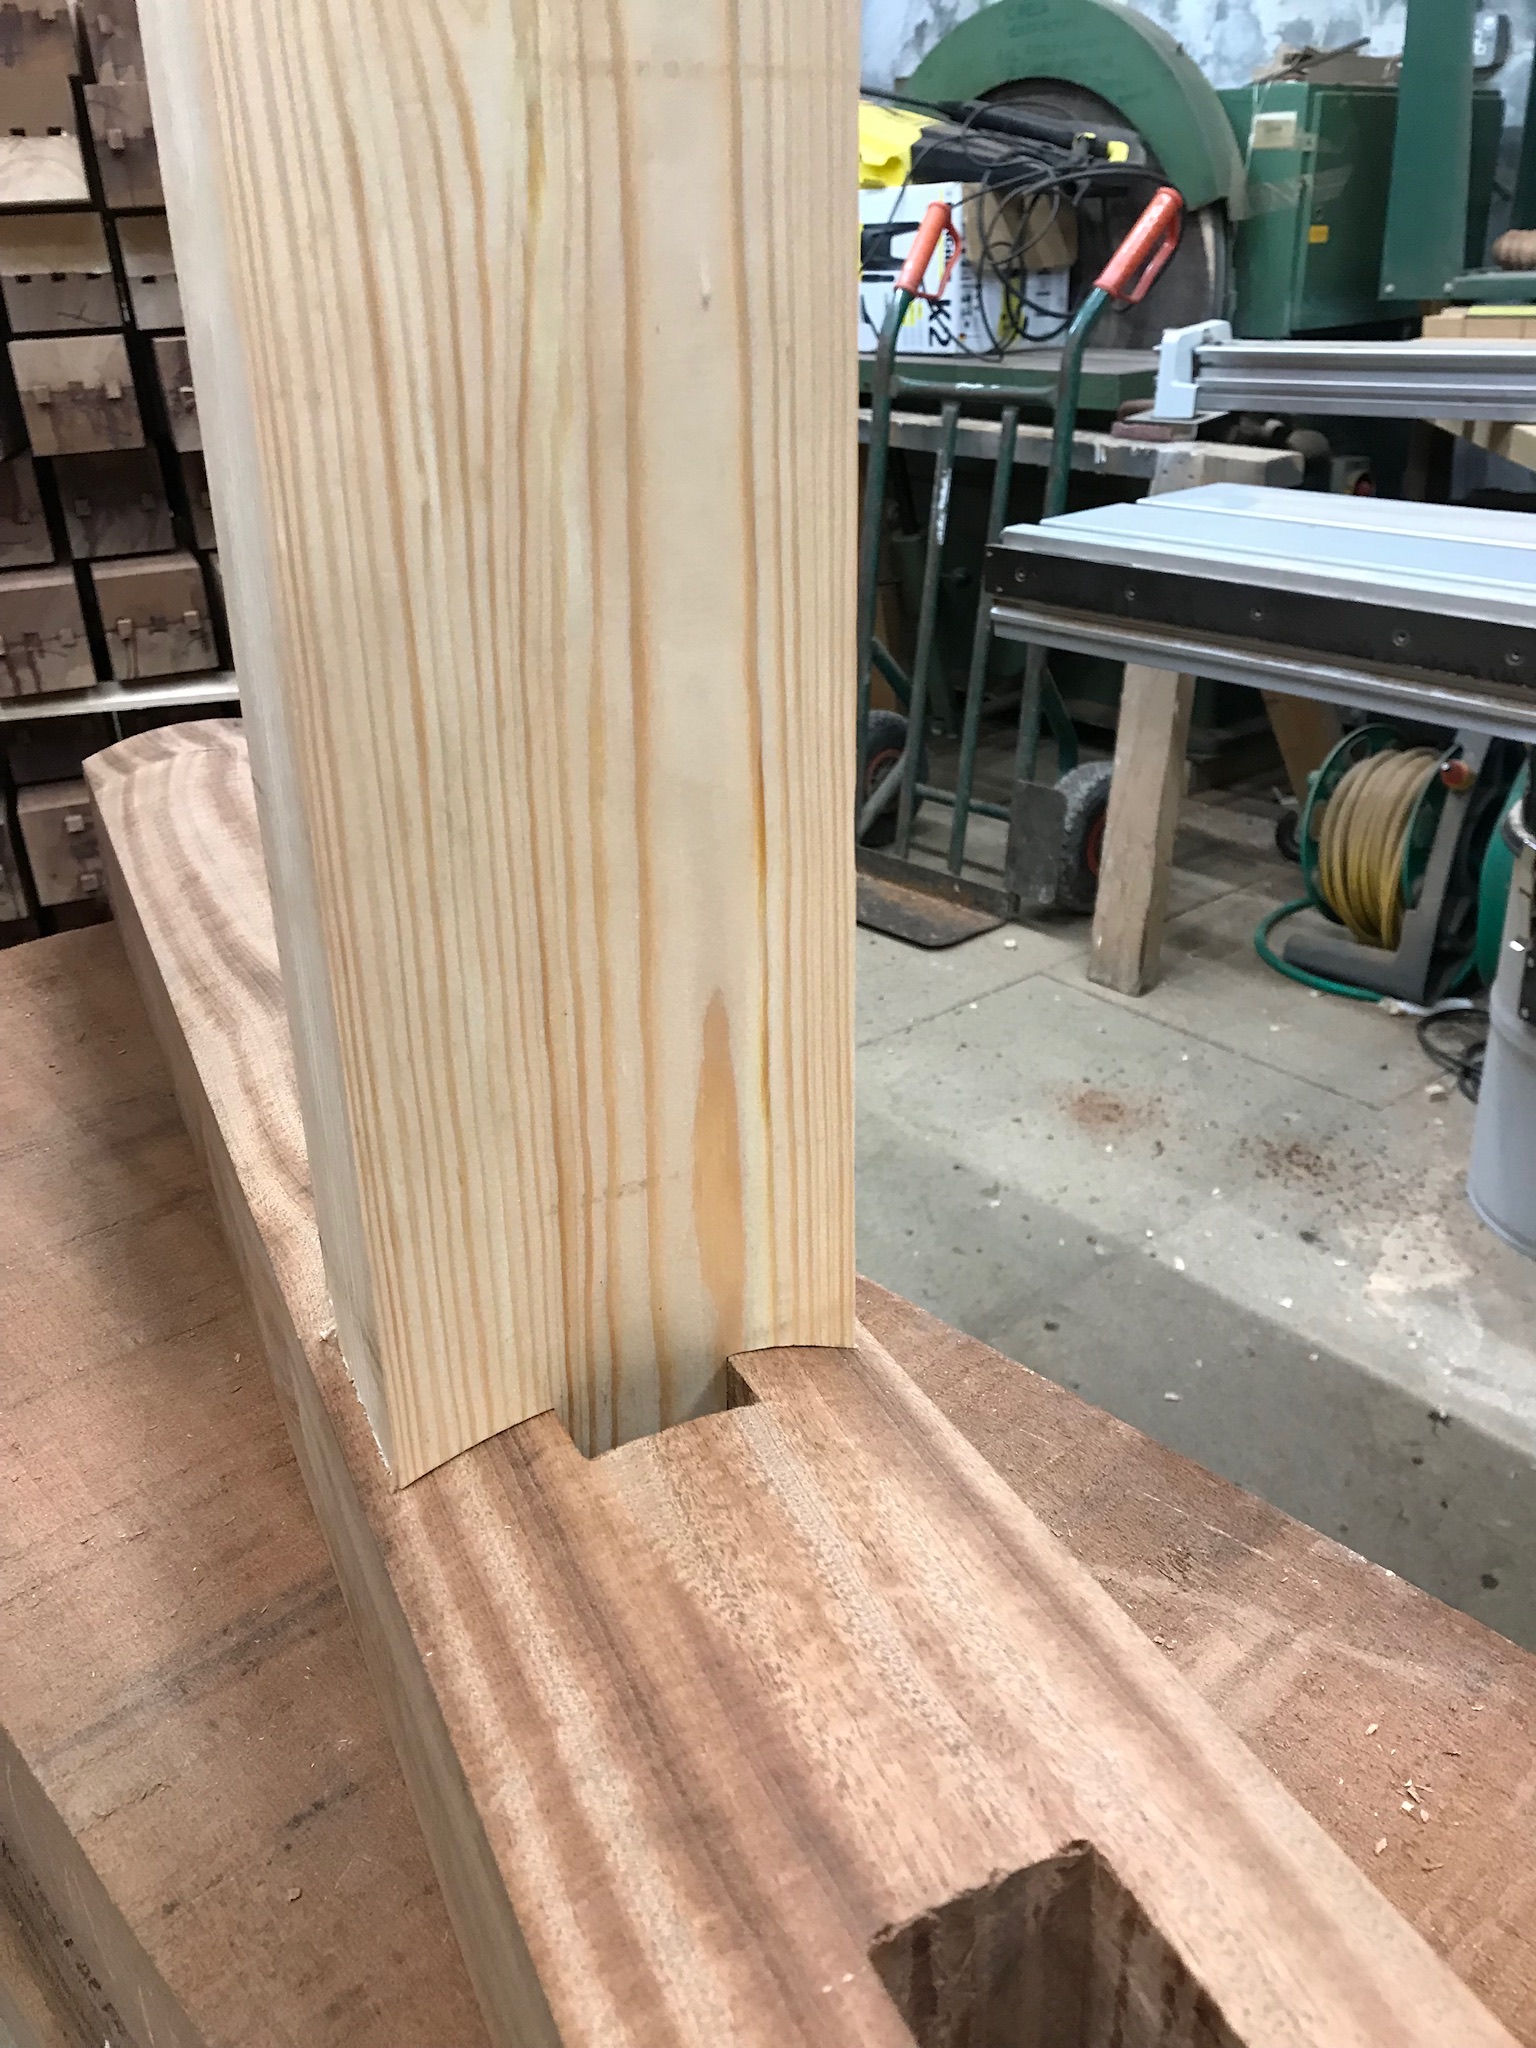
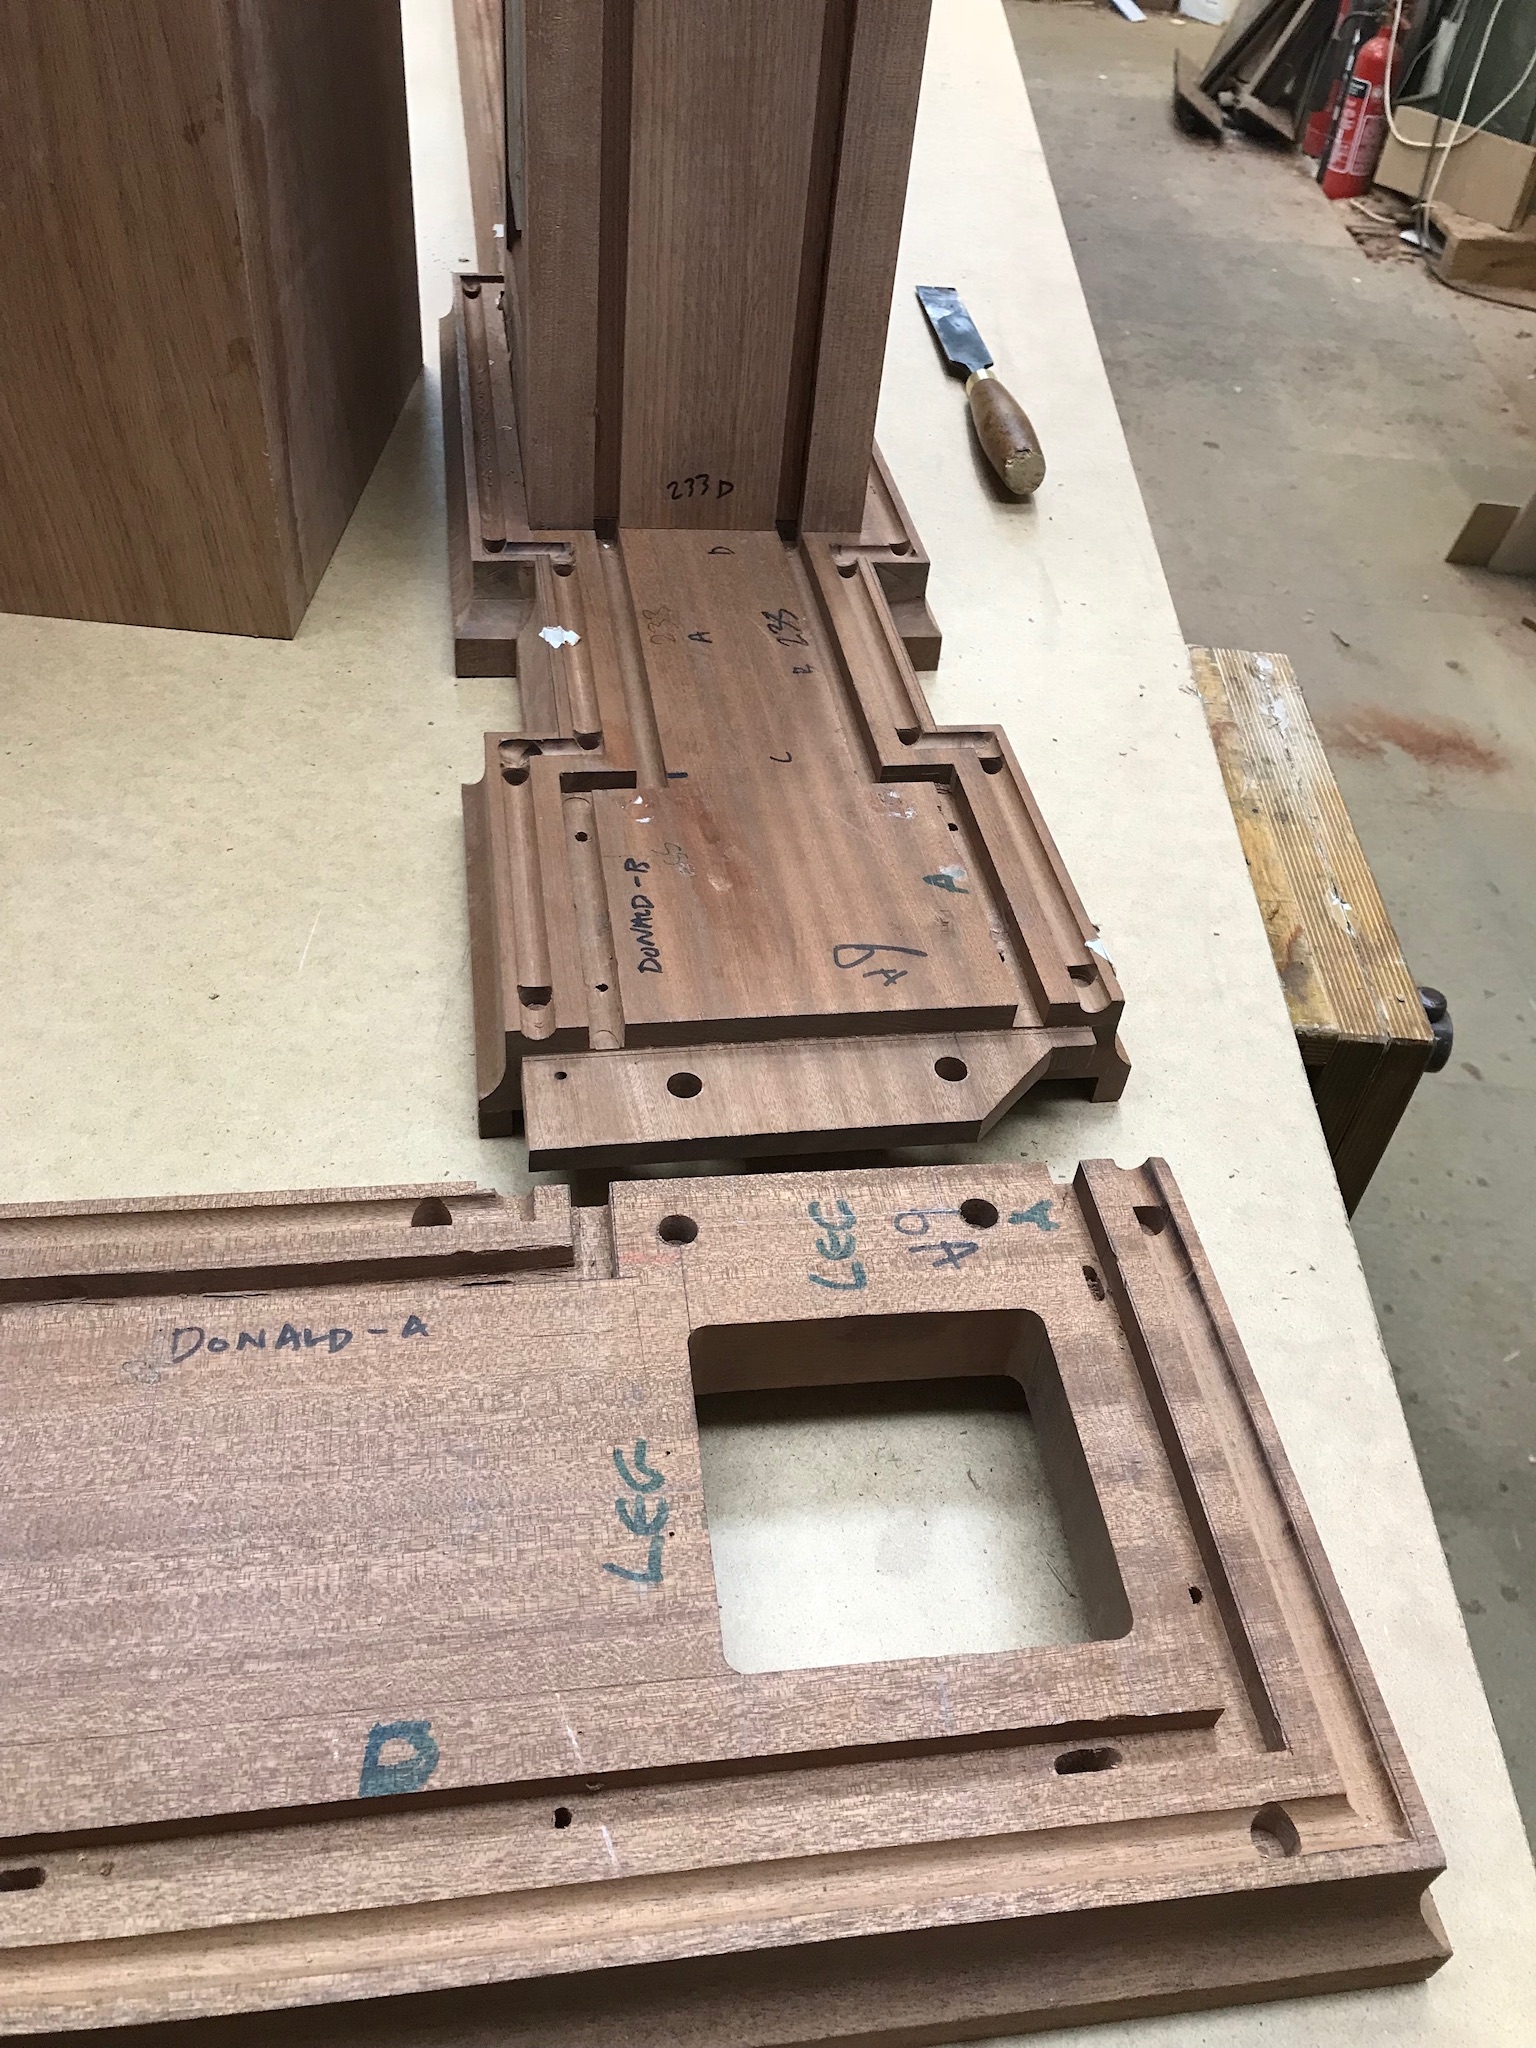
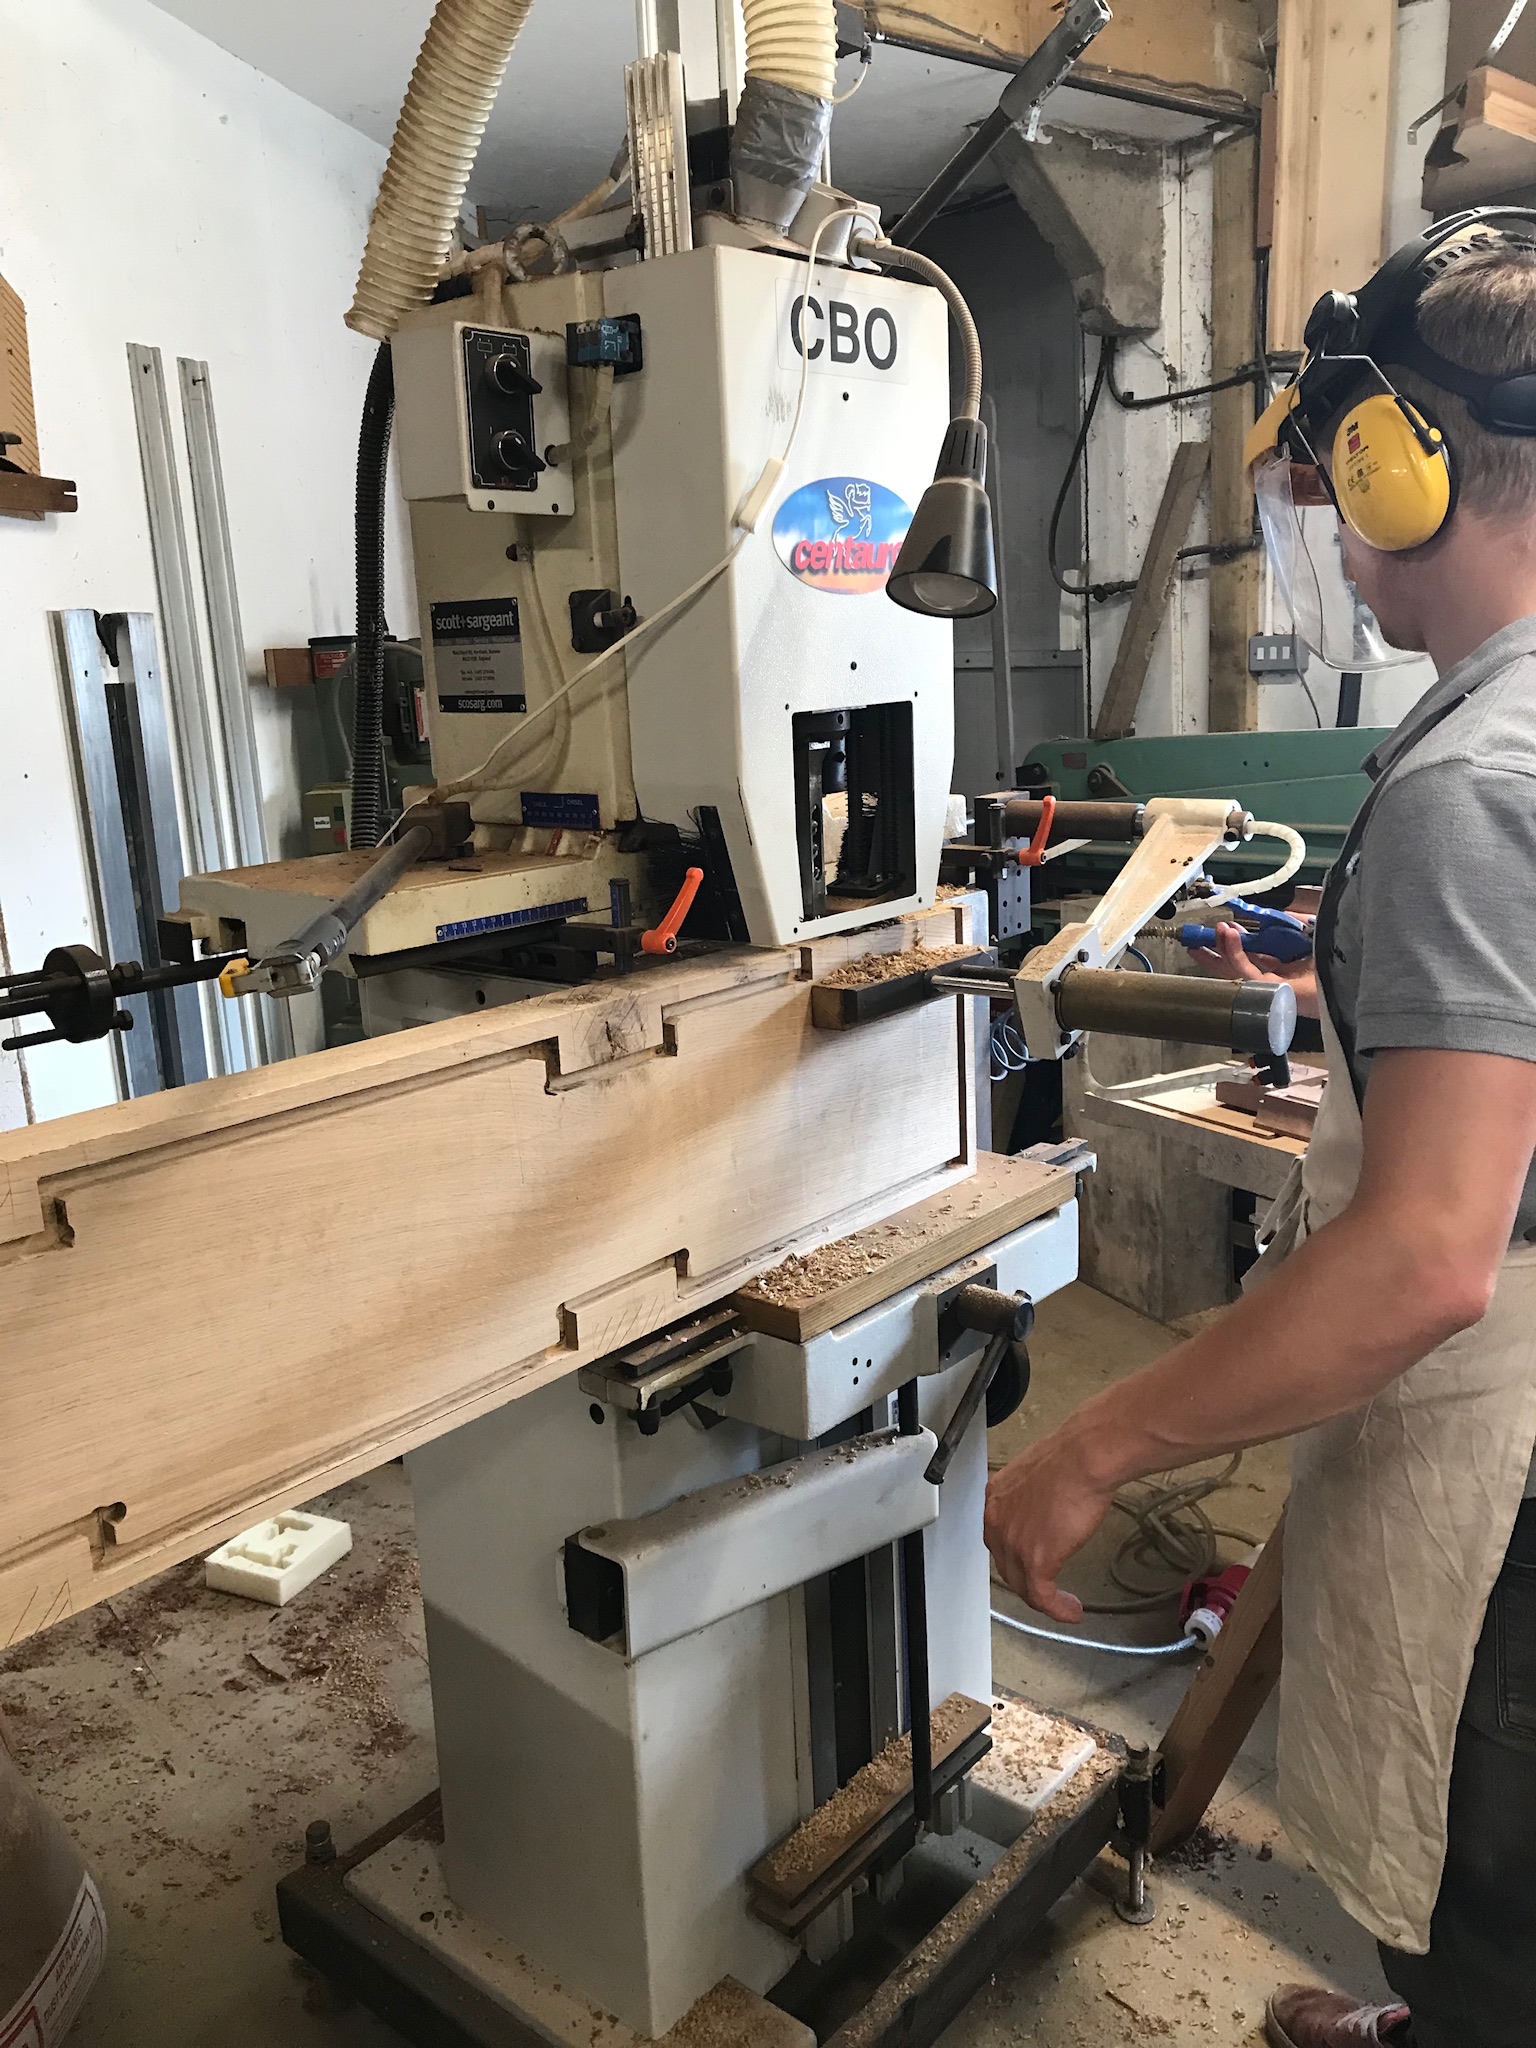
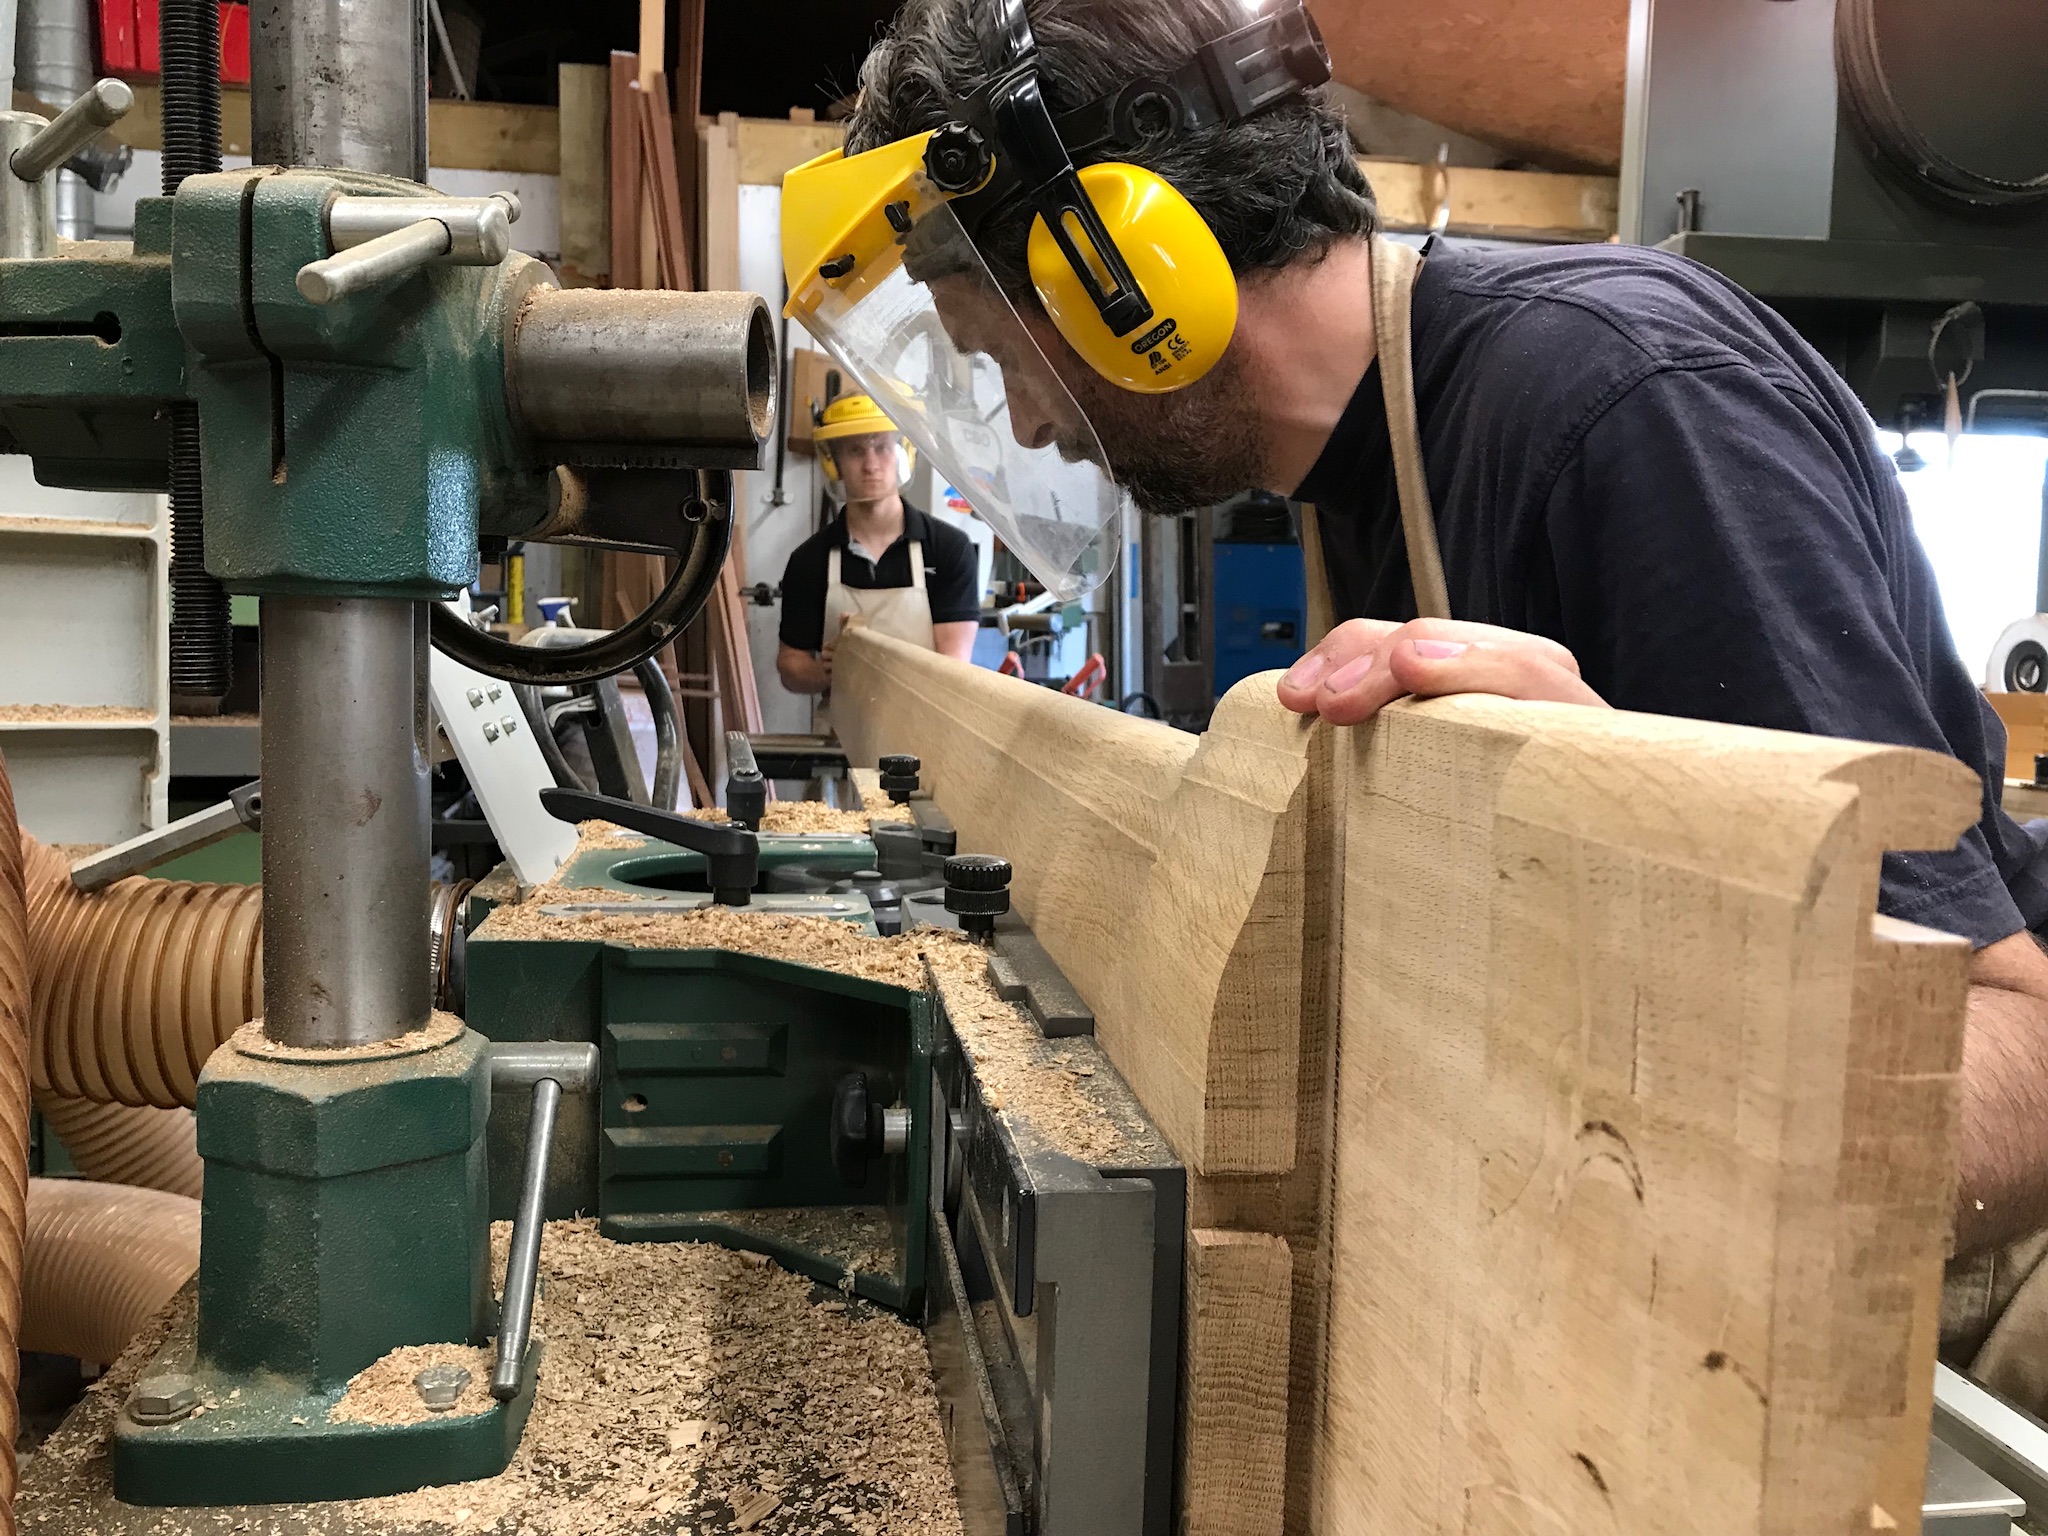
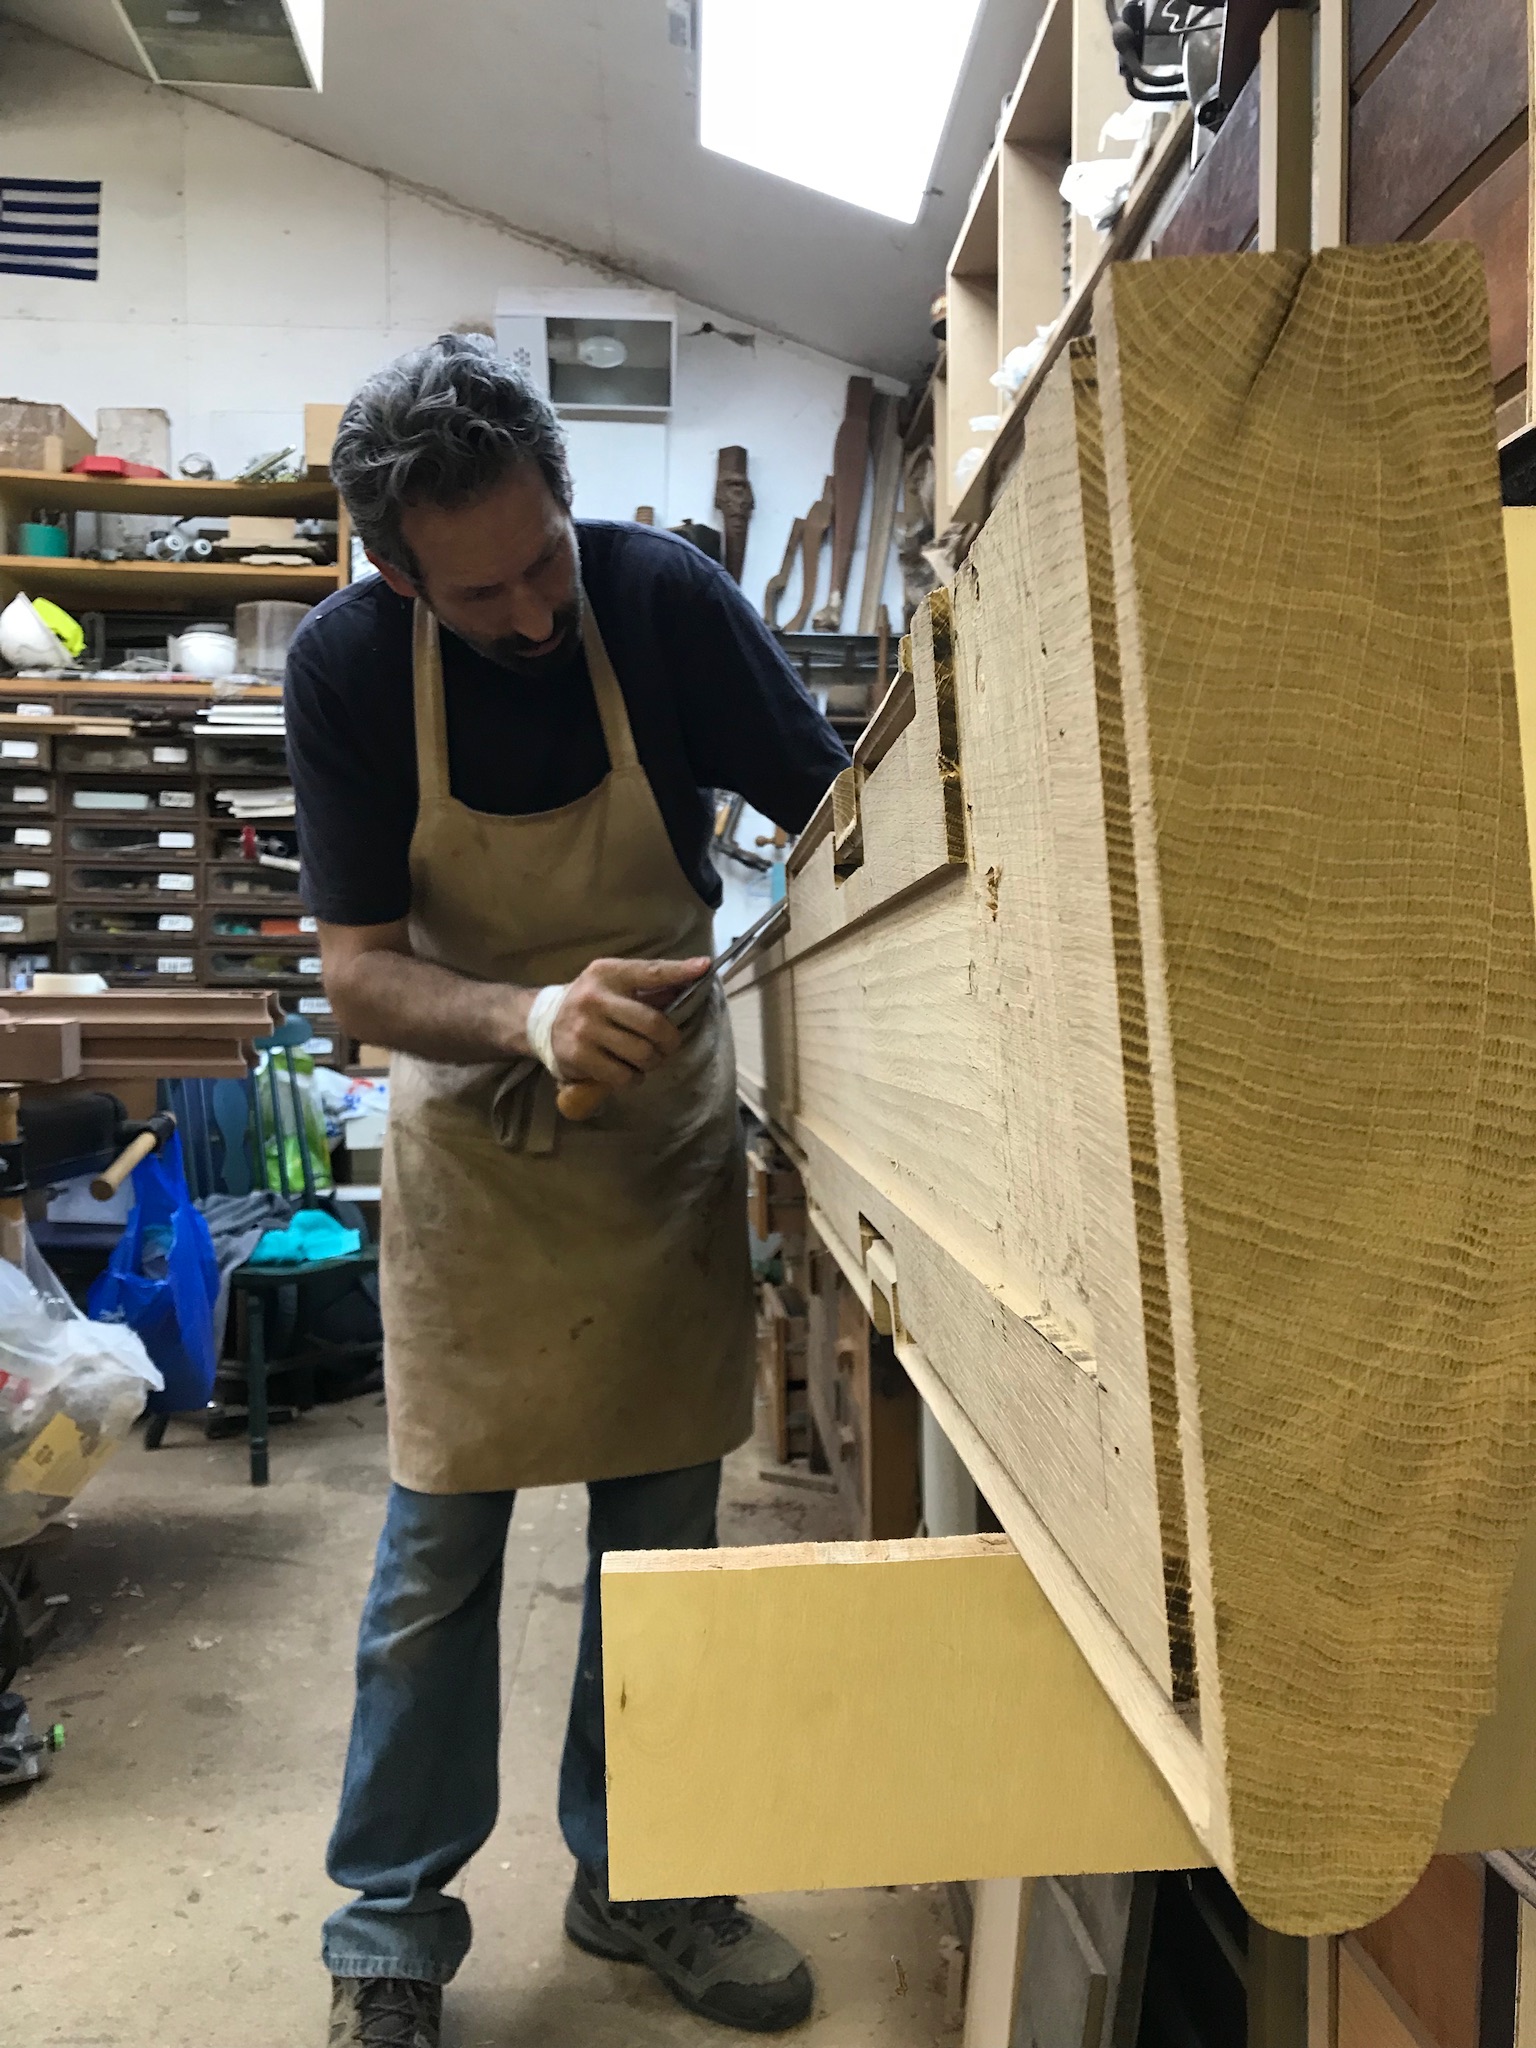
All the indivdual componants are made using a combination of machine production and hand tool skills driven by the Craftsmen in the workshop. The parts are always dry fitted into the corresponding mating detail or section prior mock assembly.
As the project grows, control is required to keep the detail within the overall dimensions and tight tolerances site requires. with the aim of achieving a stress free glue up.

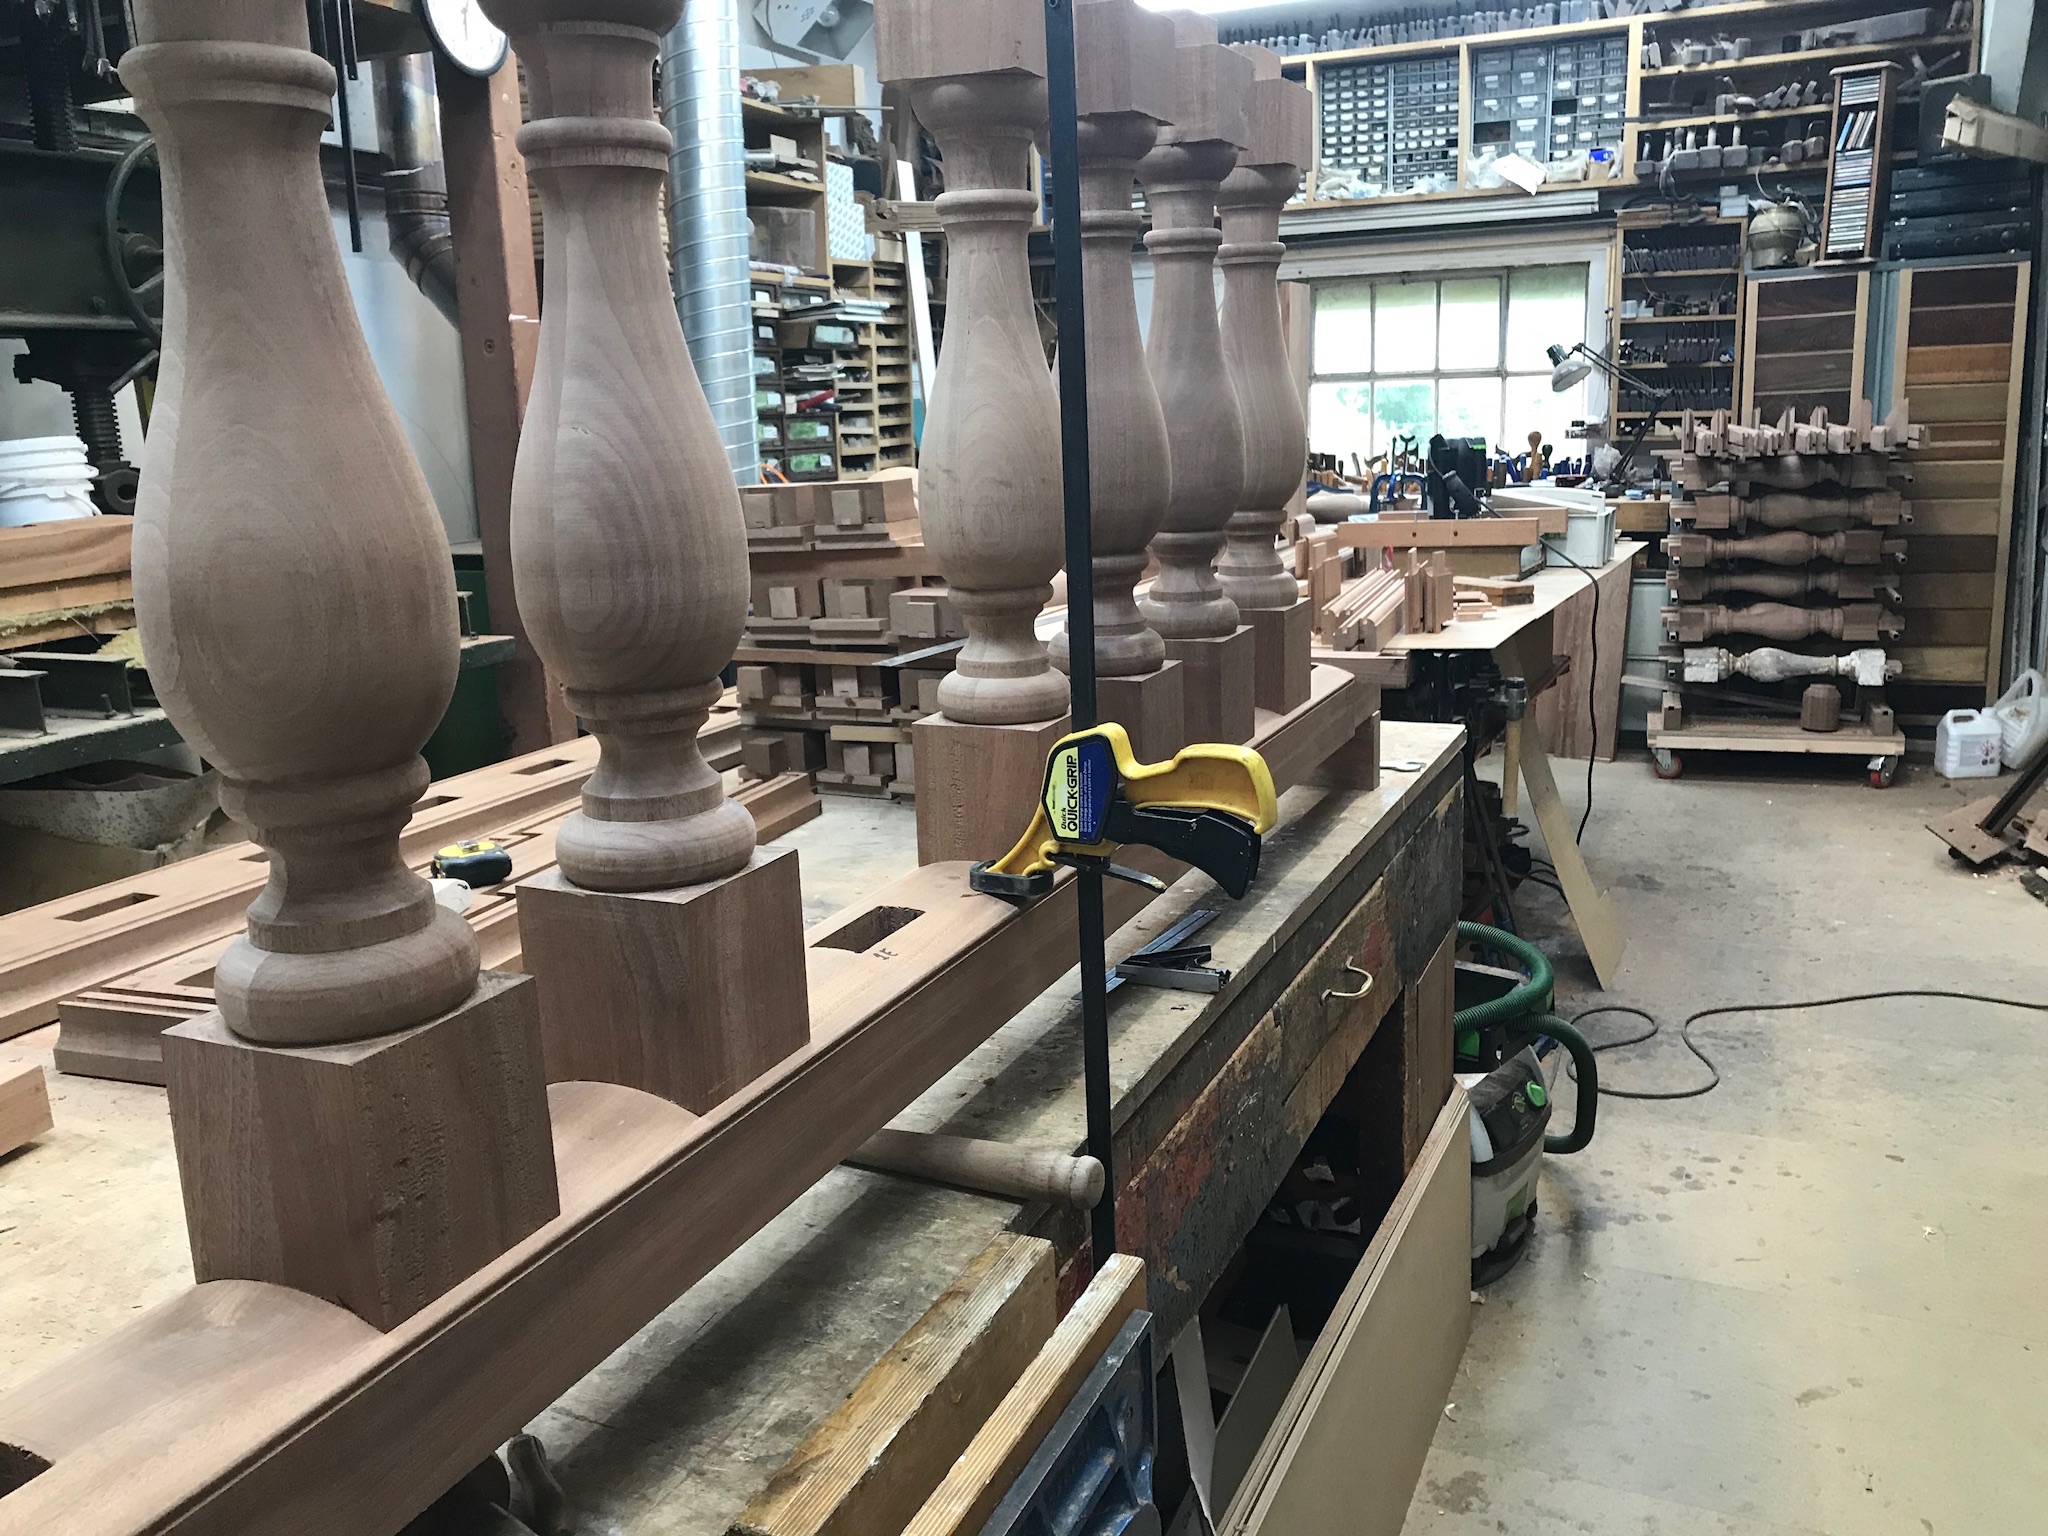


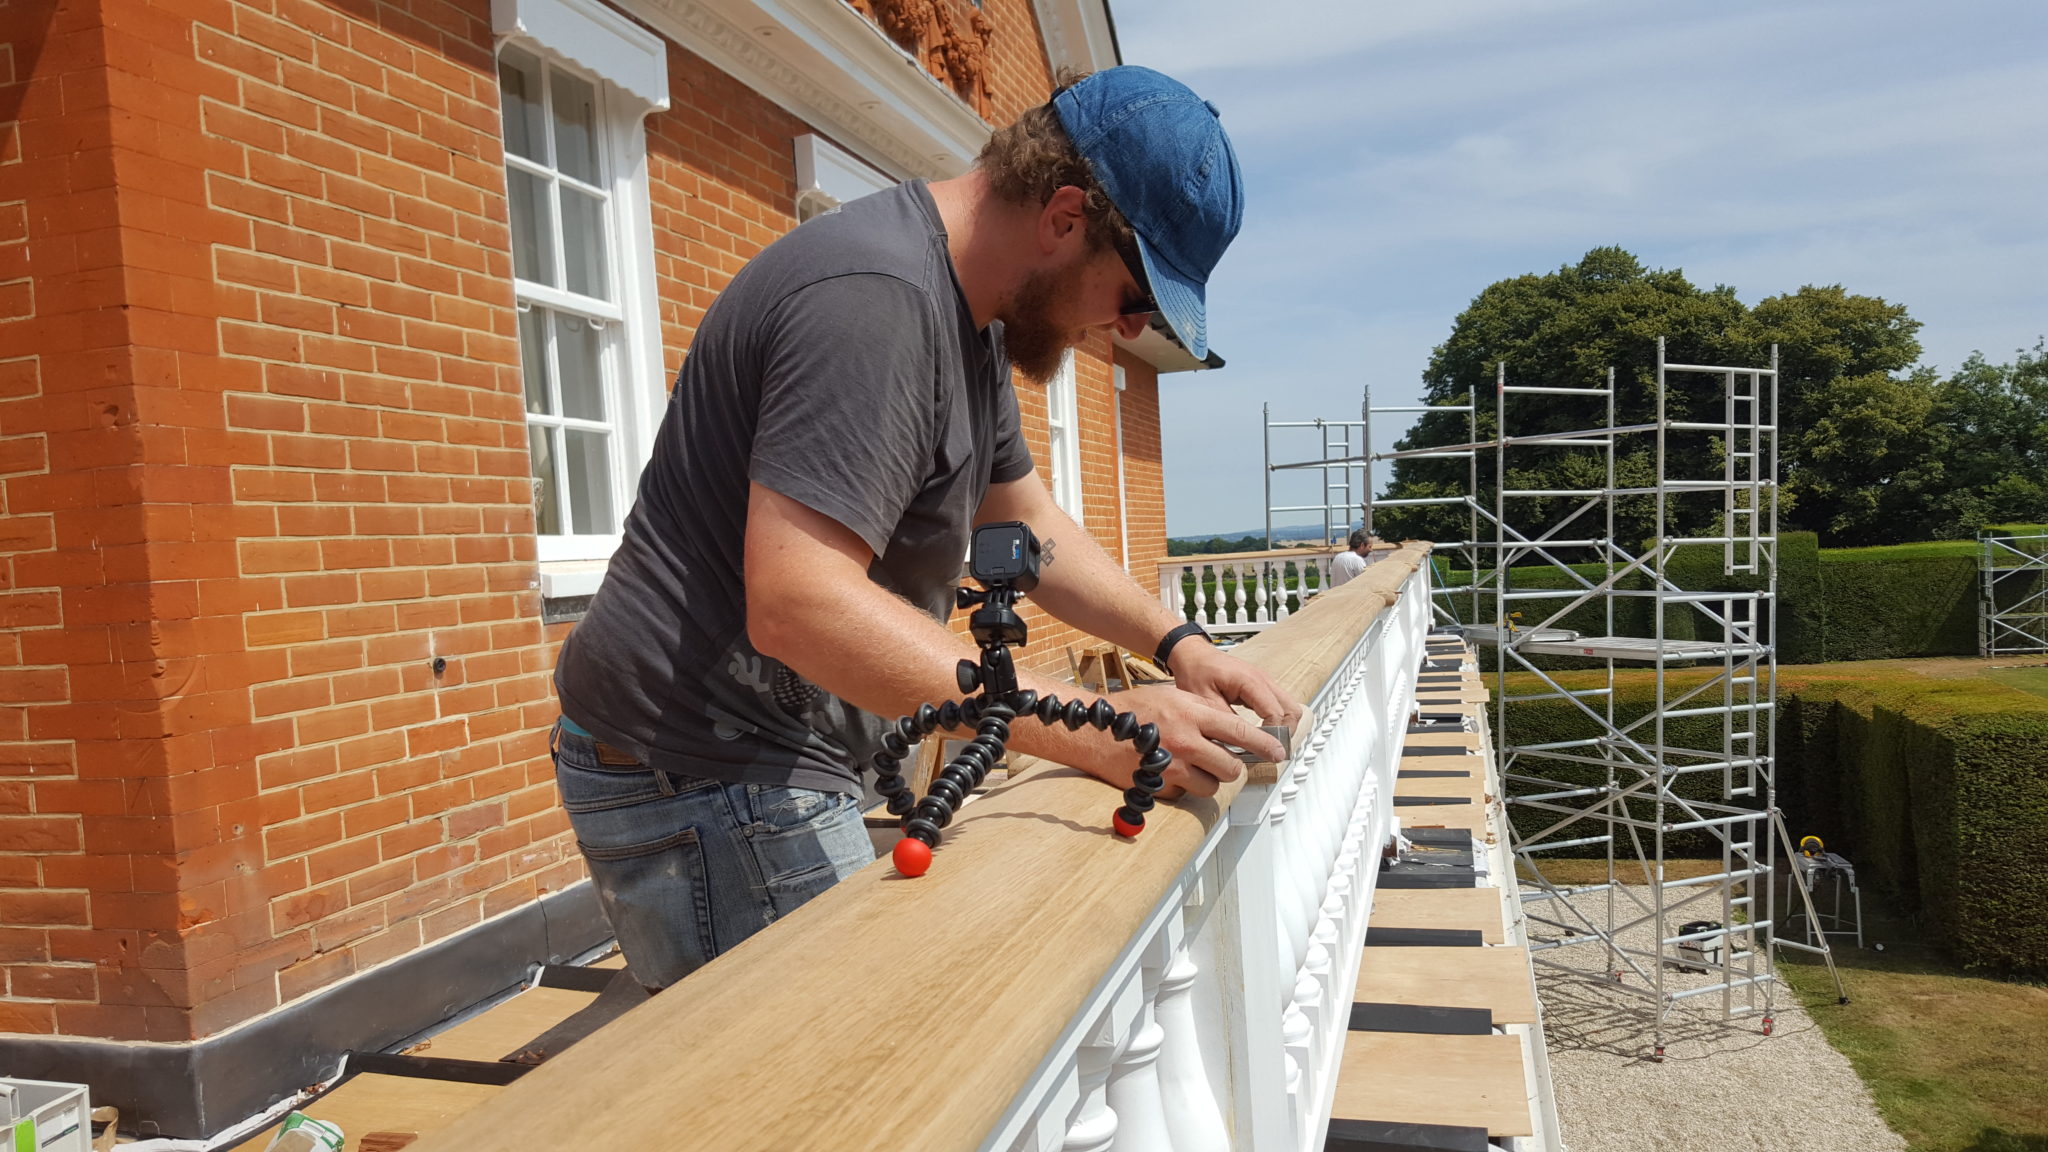
Hand Rail
The handrail was crafted from 1 st quality furniture grade, kiln dried Quarter Sawn, English Oak grown in Sussex.
The handrail timber was selected by us at the start of the project and allowed to rest after being sawn over size. This time gives the large Oak sections a chance to move and relax after releasing any stresses before we try to convert to the component size, by balanced machining we end up with a more stable end result prior to any jointing or carving.
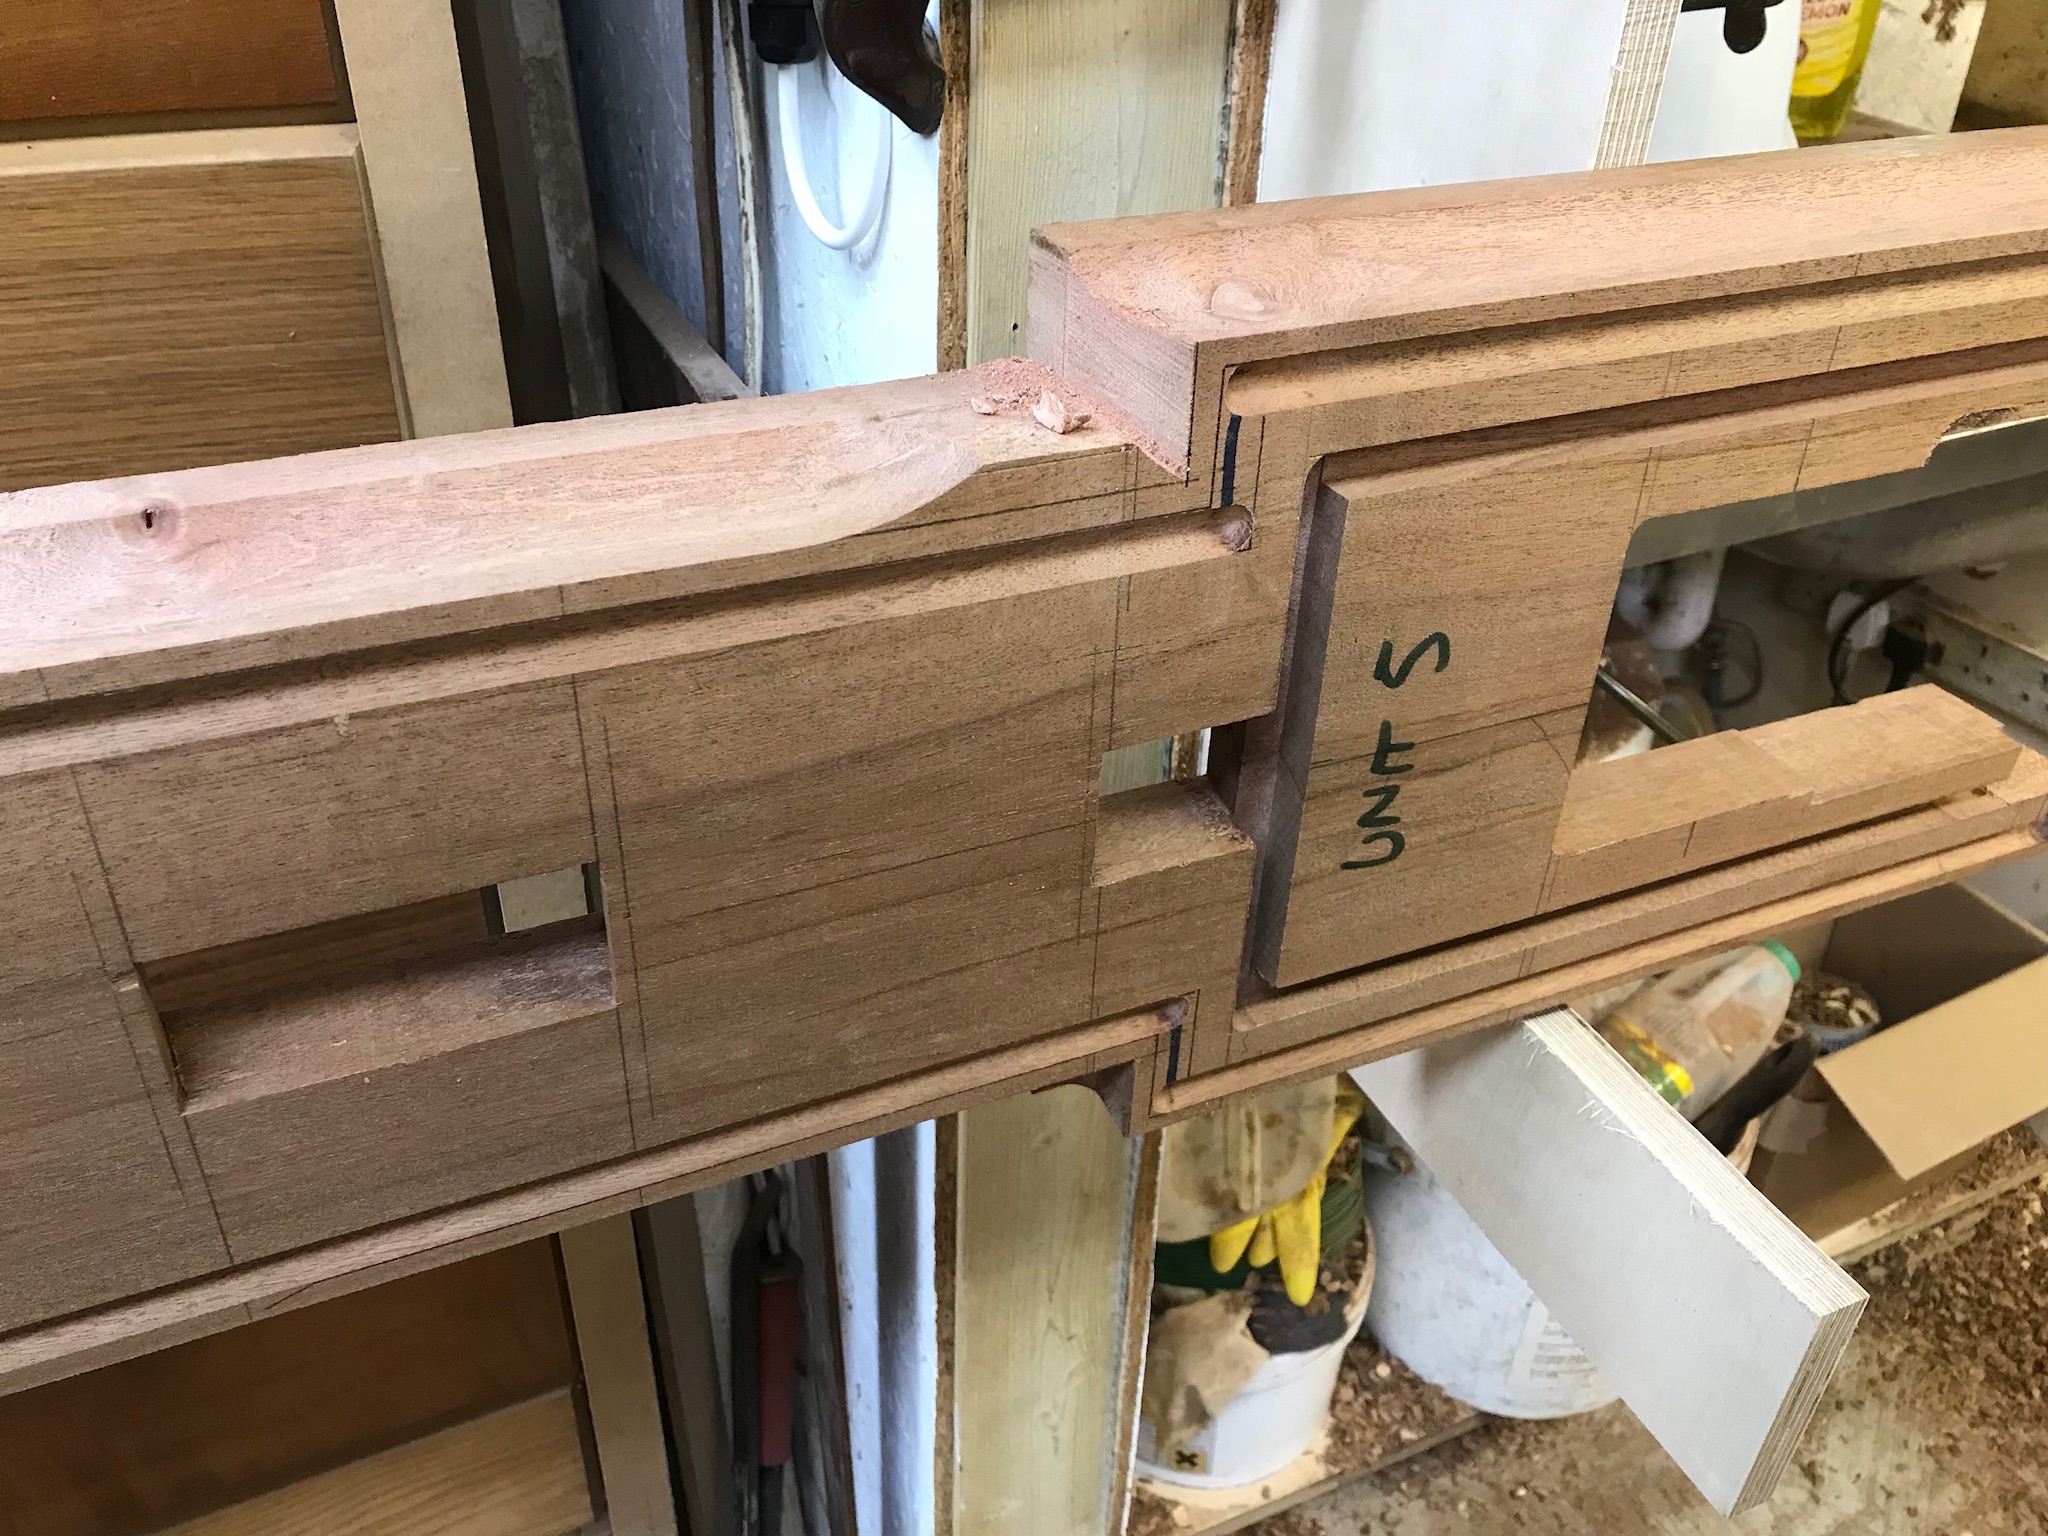
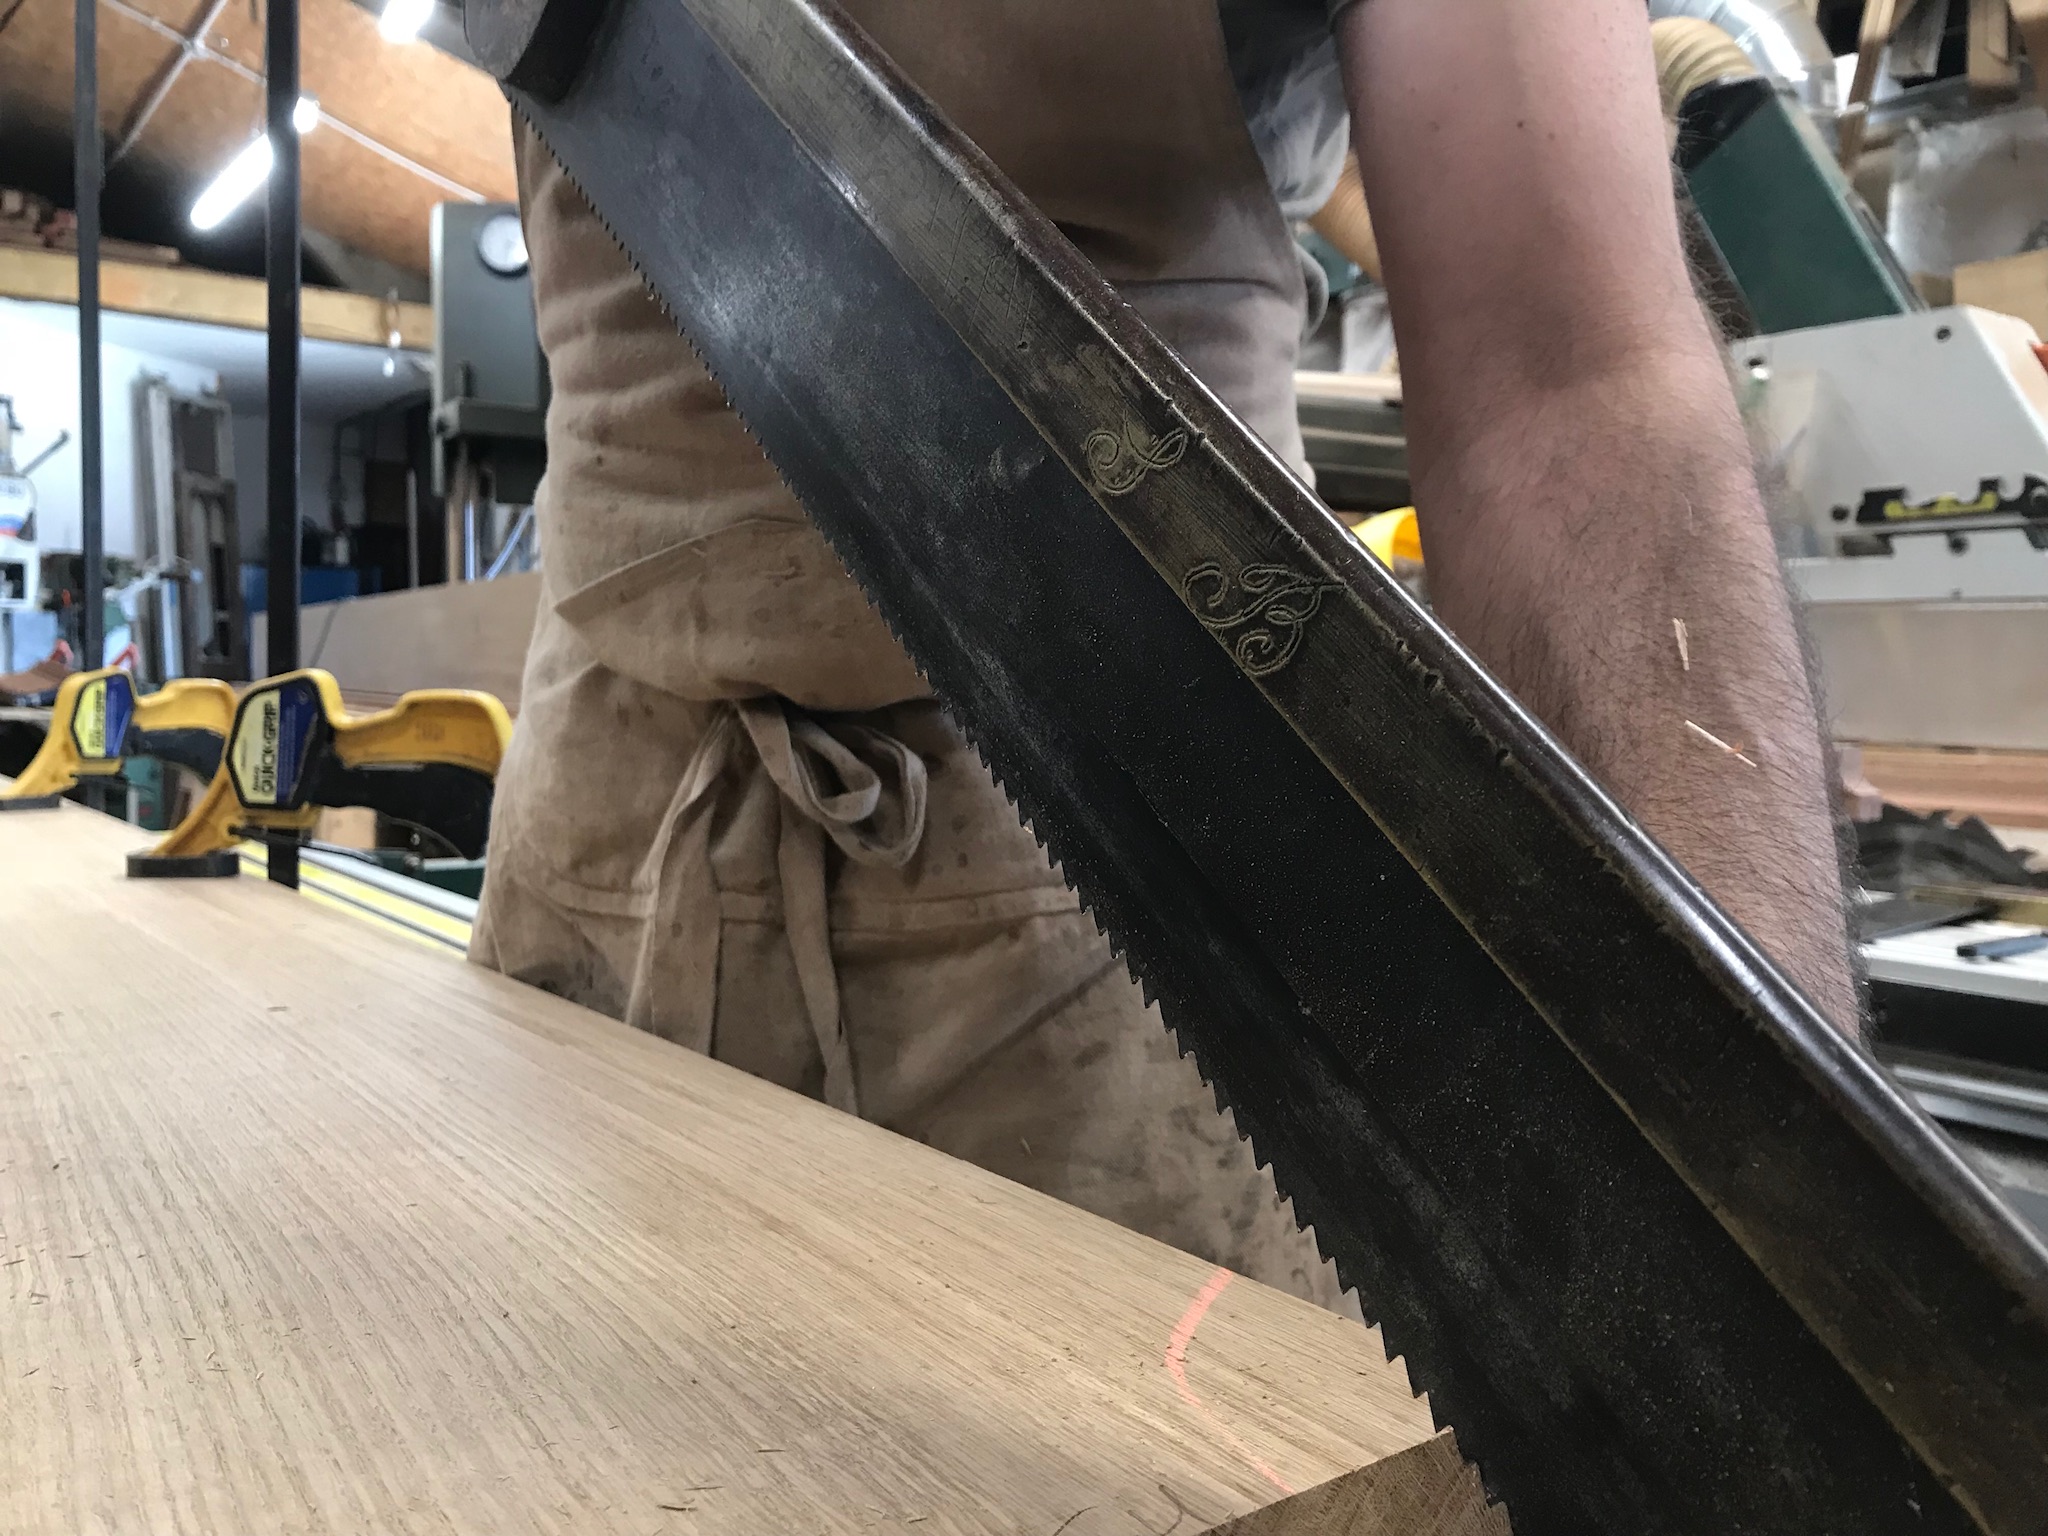
The Handrail was first jointed in the ” Length ” using a twin tenoned scafing joint which uses folding wedges to lock the joint together , purely machanical and structural jointage, These were assembled dry and marked out using centre lines, so we could control and confirm that we had the 65 foot required.
The handrail was then fitted to the ” header ” prior any moulding or carving.The details around the palasters are know as “wasting” or “masons mitres”


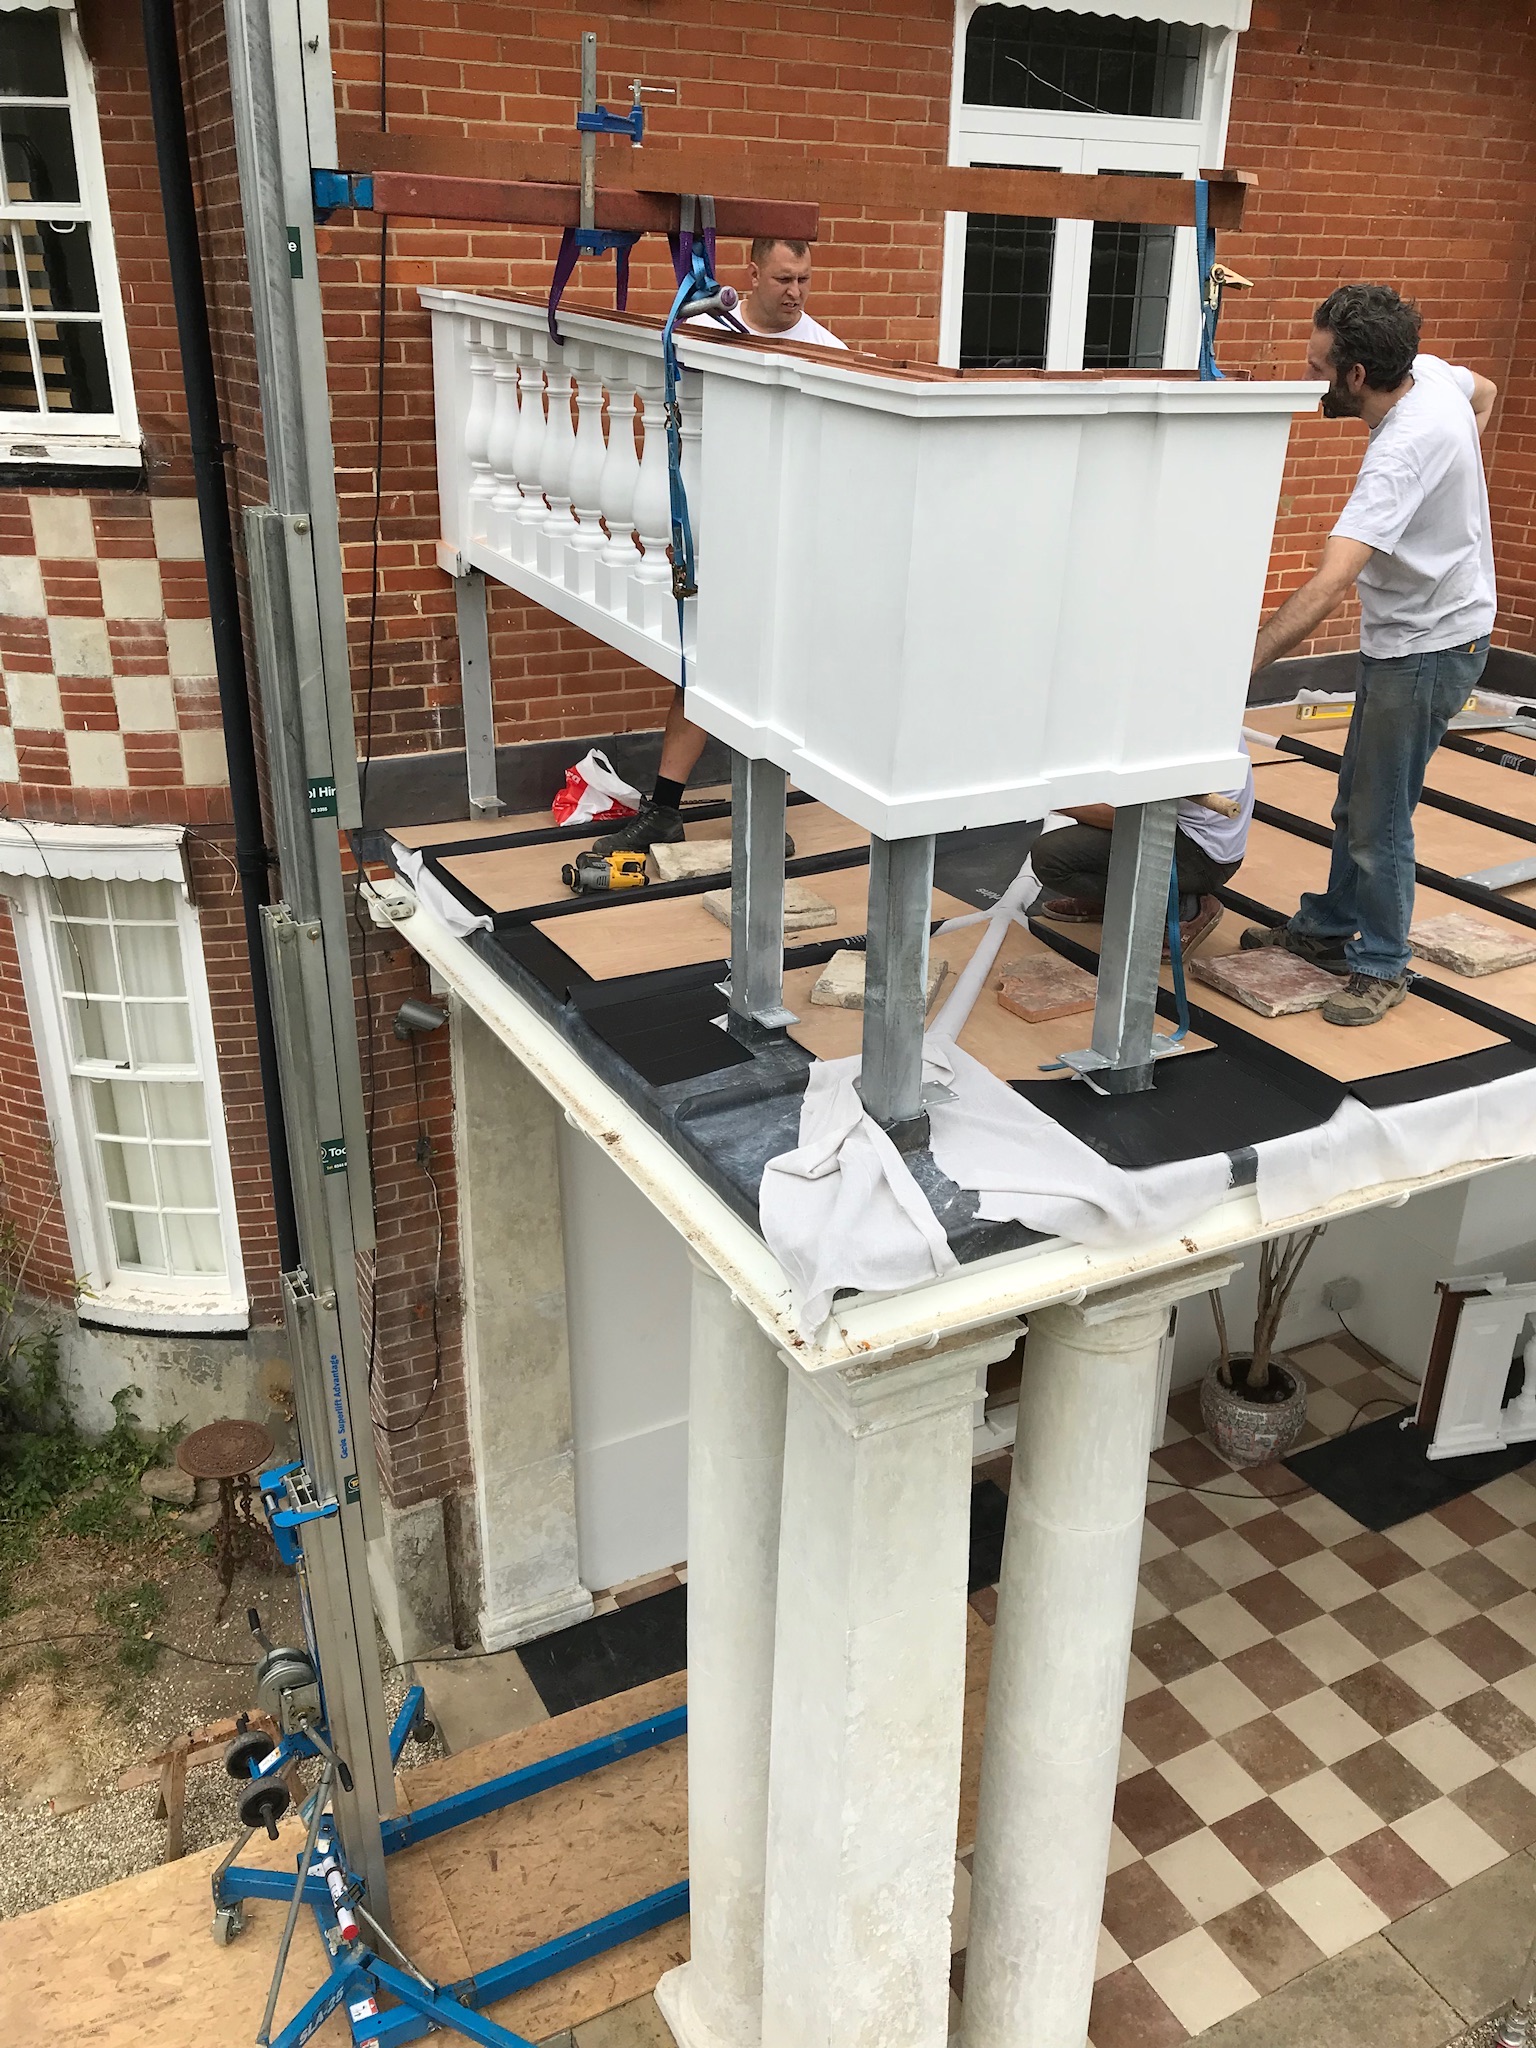
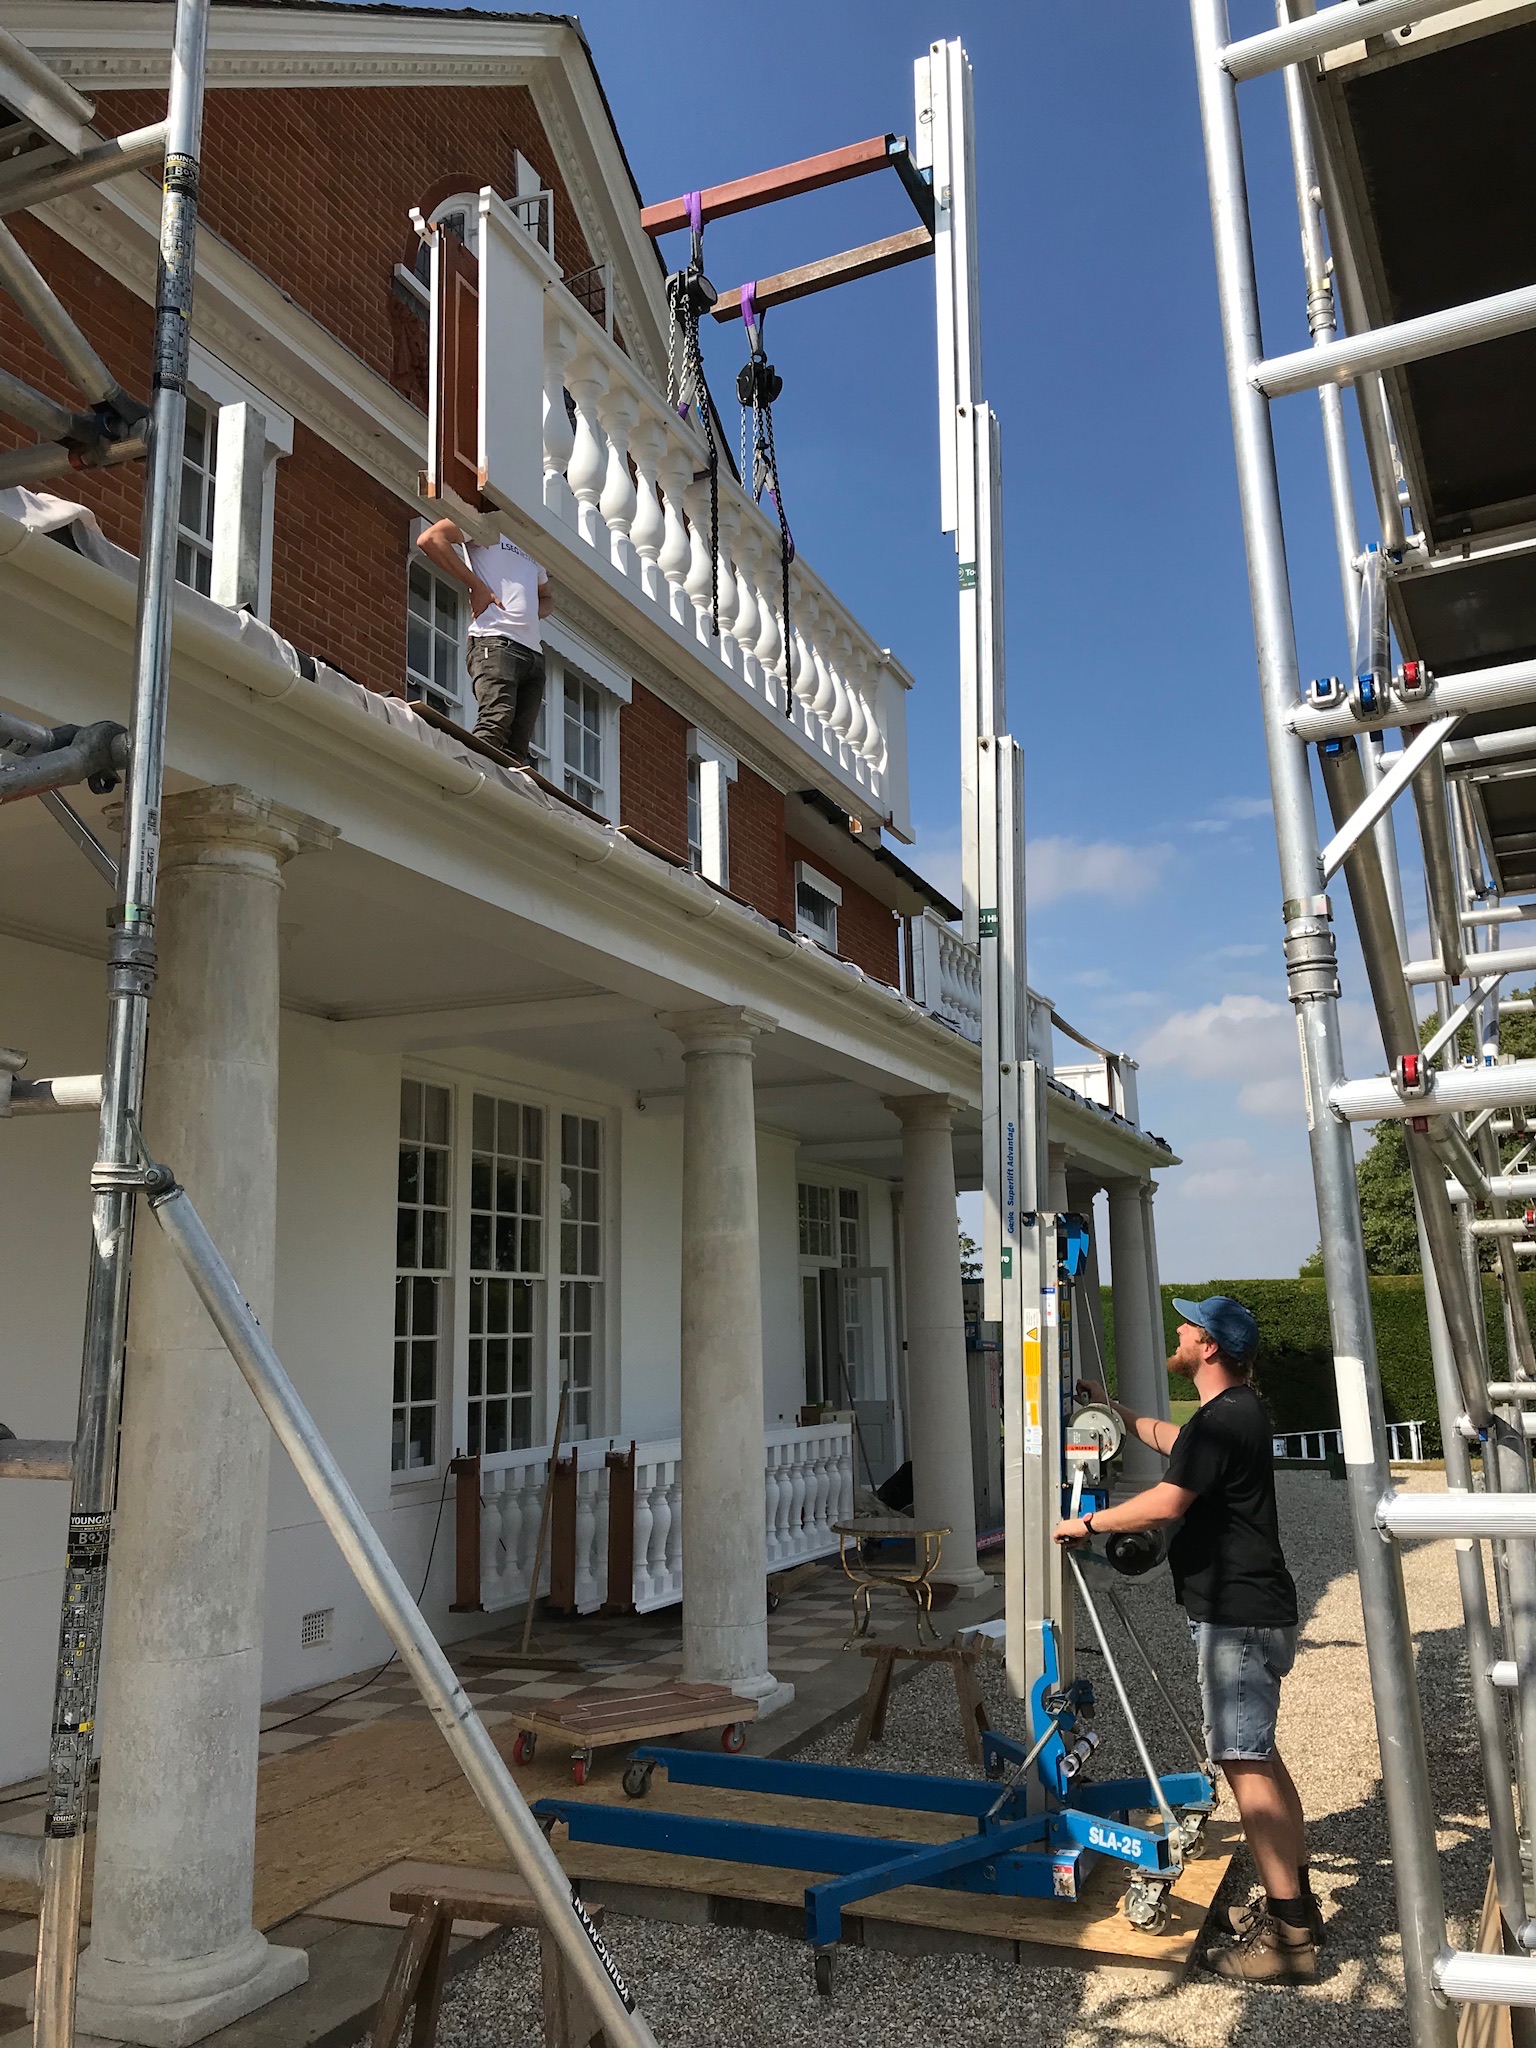
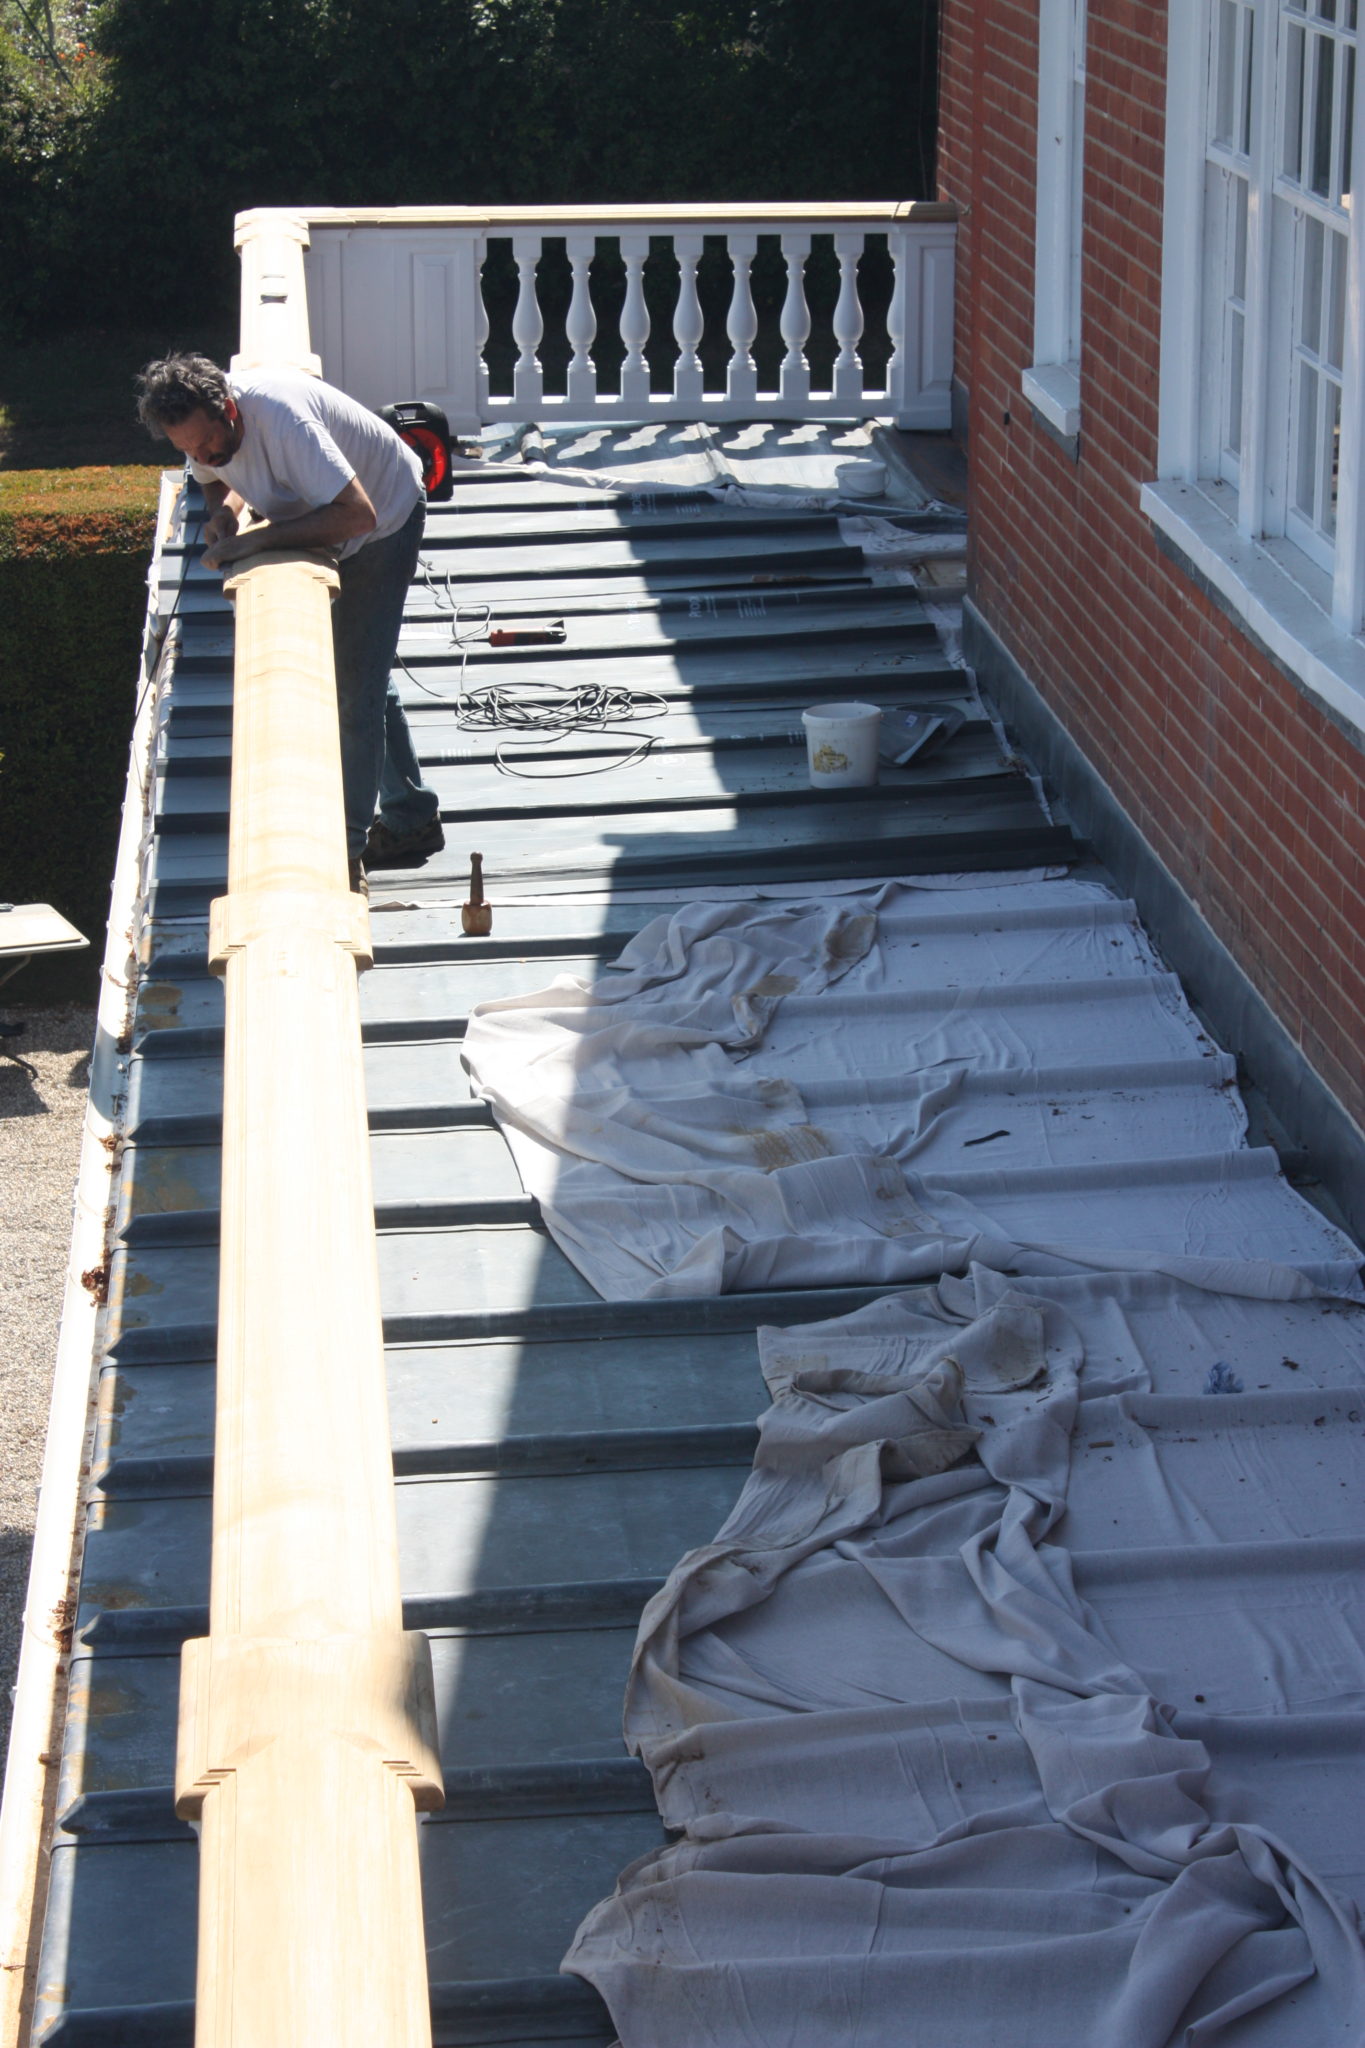
Installation
The Balustrade had received a coat of preserver and two undercoats by hand while in the workshop prior delivery.
After initial unloading of items and our site kit, the first job was to lift and fit the two return ends, these were scribed to fit the red bricks of the main house and around the new leadwork with the use of scribed templates . These return ends were all worked on the grass prior lifting. The total installation weight of the Balustrade was 2 1/2 Tons. Once the complete run of white items were happy and fixed,the metalwork was bolted down and the then covered with the new Oak carved capping. The scafing joints were then blended and sanded prior covering the wedges that lock the joints together, by inserting eye shaped plugs, which were also carved to the shape of the handrail.
——————————
Either from an Email, Phone Call or a Message off the website the initial contact will ignite a conversation as we discuss what you are looking for and the broader details of the project.
This may include planning a site visit or sending pictures of the location.